

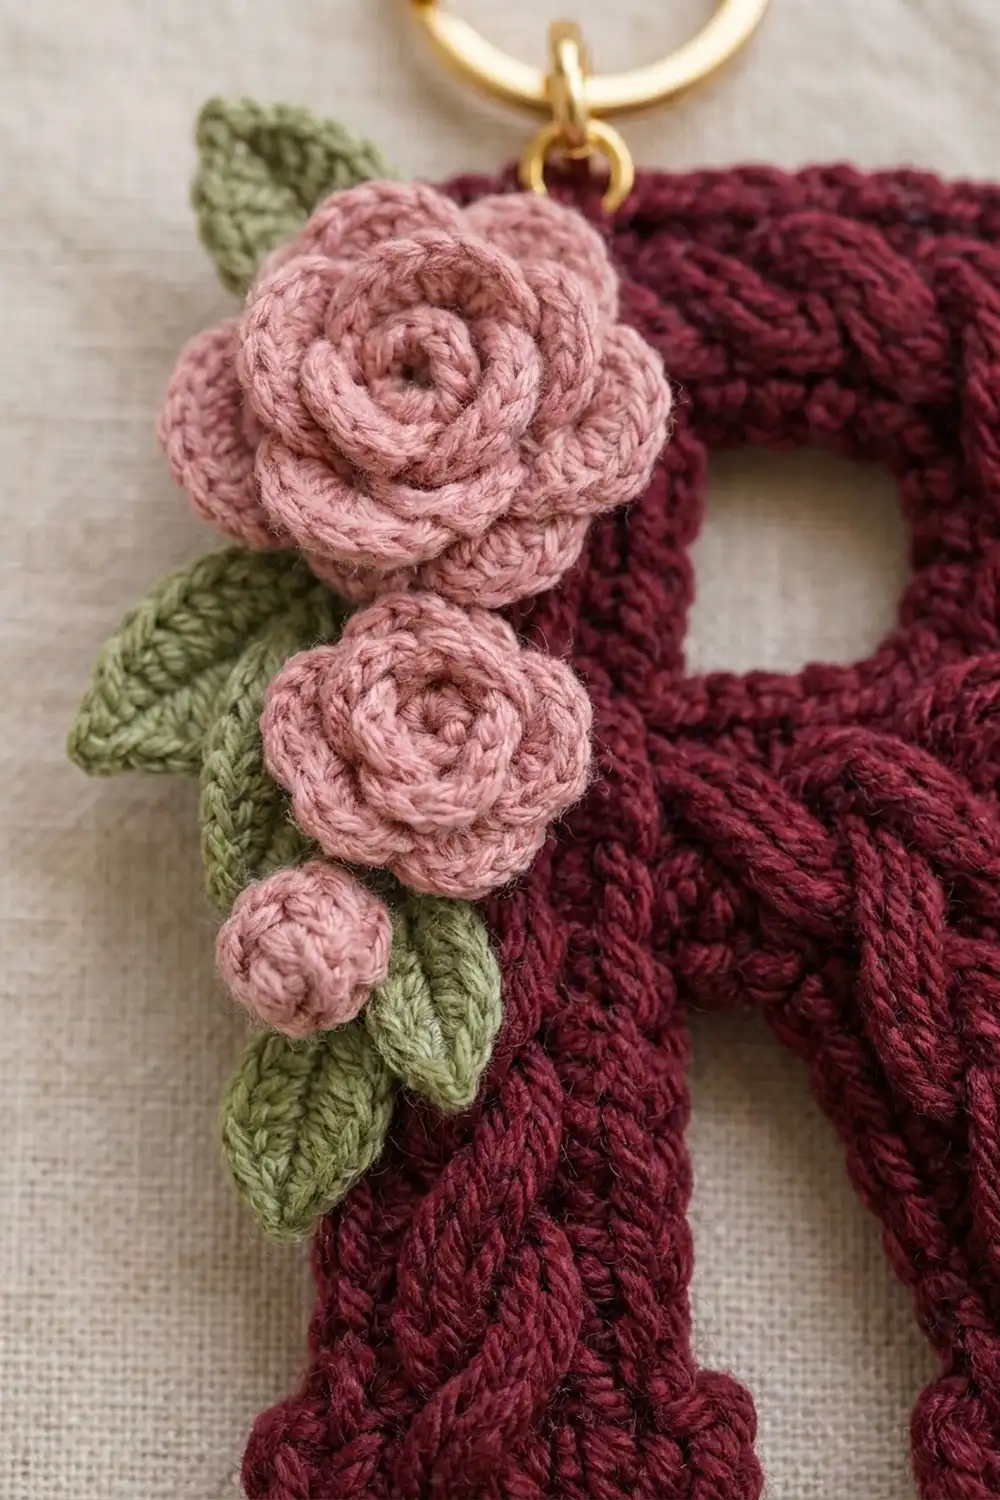
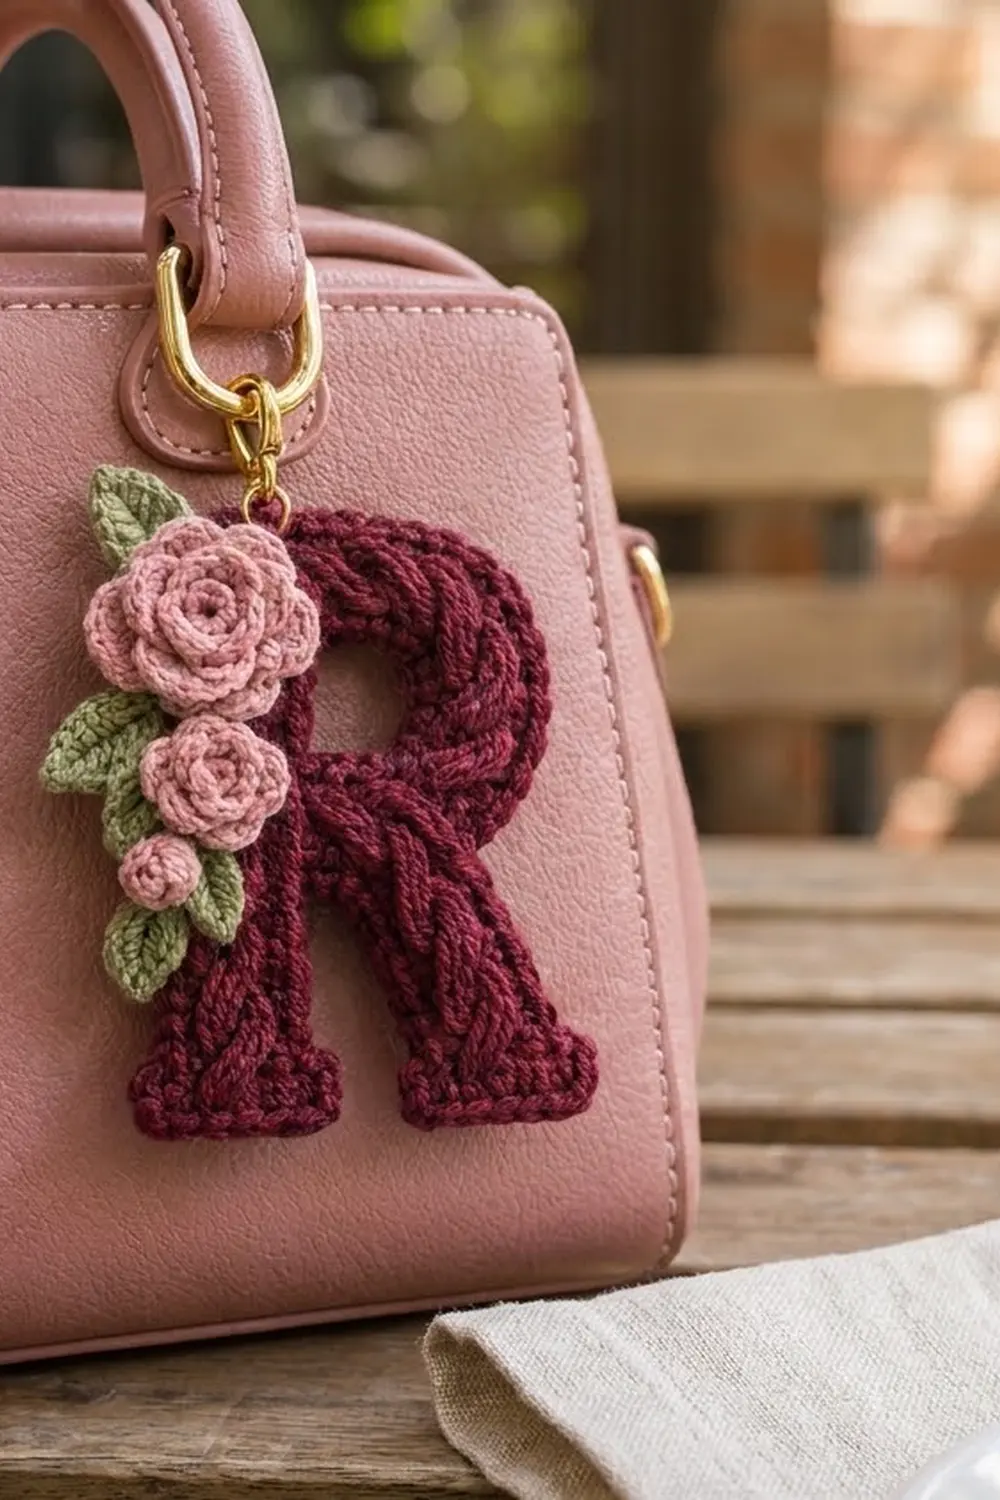
This Rosewood Cable Letter R is a small, textured bag charm. A deep burgundy braided cable follows the strokes of the letter, and a cluster of dusty-pink roses with sage leaves brightens the top-left corner. It is a thoughtful personalized gift and a good project for using up DK leftovers.
The look is vintage and romantic, with rich wine yarn, soft pink petals, green leaves and a gold ring. The pattern uses US crochet terms throughout.
The finished charm measures 5.5 in (14.0 cm) tall and 4.25 in (10.8 cm) wide, not counting the ring.
The letter is worked as one continuous cable strip in rows. You crochet up the stem, turn the top corner and the round bowl with short-row wedges, and slip-stitch the bowl back onto the stem. The leg is then picked up from the bowl’s lower edge. A two-round border tidies the edges. The roses and leaves are made separately and sewn on after blocking.
Finished Size and Construction
- Finished size: 5.5 in × 4.25 in (14.0 cm × 10.8 cm)
- Skill level: Intermediate (post-stitch cables, short rows)
- Terminology: US
- Yarn weight: DK (3)
- Hook: 3.5 mm (E-4)
- Number of pieces: 1 letter, plus 3 roses and 5 leaves as appliqués
- Layout: Single letter “R” with the roses stacked down the upper-left side
- Letter size before border: 5 in × 3.75 in (12.7 cm × 9.5 cm)
- Border depth: about 1/4 in (0.6 cm) on every side
Materials
Use a smooth, firmly plied cotton or cotton-blend DK yarn. Plied yarns show cables clearly, and cotton holds its shape on a charm that gets handled every day.
- Burgundy (main color): 15 g, about 35 m
- Dusty pink (roses): 6 g, about 14 m
- Sage green (leaves): 2 g, about 5 m
These quantities include a small safety margin.
Tools:
– 3.5 mm (E-4) crochet hook
– Tapestry needle and sharp sewing needle
– 4 stitch markers
– Rust-proof pins and a blocking mat
– 30 mm gold spring-gate ring
– 8 mm gold jump ring
– 2 pairs of flat-nose pliers
– Scissors
Abbreviations (US Terms)
- ch: chain
- sl st: slip stitch
- sc: single crochet
- hdc: half double crochet
- dc: double crochet
- sk: skip
- sp: space
- st(s): stitch(es)
- RS / WS: right side / wrong side
- FPdc: front post double crochet
- FPtr: front post treble crochet
Special stitches
- Post rule: On RS cable rows, work every FP stitch around the posts of the previous RS cable row. Skip the sc behind each FP stitch. Each RS cable row is always: sc, 6 FP sts, sc (8 sts).
- Cross X (front cross): Sk 2 posts and FPtr around the next 2 posts. Then, working in front of the sts just made, FPtr around the 2 skipped posts. FPdc around the last 2 posts.
- Cross Y (back cross): FPdc around the first 2 posts. Sk 2 posts and FPtr around the next 2 posts. Then, working behind the sts just made, FPtr around the 2 skipped posts.
- Wedge (6 short rows): Start from the edge named in the pattern.
- ch 1, sc in 6 sts, turn.
- ch 1, sc in 6 sts, turn.
- ch 1, sc in 4 sts, turn.
- ch 1, sc in 4 sts, turn.
- ch 1, sc in 2 sts, turn.
- ch 1, sc in 2 sts, turn.
A Wedge adds 6 rows to one edge and none to the other, which bends the strip about 45 degrees. The stitch count stays at 8.
– V-st: (dc, ch 1, dc) in the same st.
Gauge and Checkpoints
Cable band gauge: 8 sts = 1.25 in (3.2 cm) wide, and 6 rows = 1 in (2.5 cm).
Plain sc gauge: 6 sc = 1 in (2.5 cm).
Test swatch: Work stem Rows 4–15 on a chain of 9: one row of 8 sc, then the cable rows. Block the swatch lightly. It should measure 1.25 in × 2 in (3.2 cm × 5.1 cm).
- If the swatch is too big: go down to a 3.25 mm hook.
- If the swatch is too small: go up to a 3.75 mm hook.
- If only the width is off: loosen or tighten the FP stitches. Cables control the width.
Checkpoints along the way:
- Stem foot: 2 in (5.1 cm) wide.
- Stem after Row 22: about 3 2/3 in (9.3 cm) tall.
- After the corner: the outer top edge sits 5 in (12.7 cm) above the bottom.
- After the bowl: the letter is about 3.5 in (8.9 cm) wide, and the hole is about 3/4 in (1.9 cm) across.
- Before the border: 5 in × 3.75 in (12.7 cm × 9.5 cm).
Stem
Edge A is the left edge of the stem and edge B is the right edge, with the RS facing you. RS rows end at edge A.
Row 1 (WS): Ch 13. Sc in the 2nd ch from the hook and in each ch across, turn. (12 sc)
Rows 2–3: Ch 1, sc in each st across, turn. (12 sc)
Row 4 (RS): Sl st in the first 3 sts. Ch 1, sc in the same st as the last sl st, then sc in the next 7 sts. Leave the last 2 sts unworked, turn. (8 sc)
This row centers the stem on the foot and forms the serif steps.
Row 5 (WS): Ch 1, sc across, turn. (8 sc)
Row 6 (RS): Ch 1, sc in the first st. FPdc around each of the next 6 sts of Row 4. Sc in the last st, turn. (8 sts)
Row 7 and every following WS row: Ch 1, sc across, turn. (8 sc)
Rows 8–22: Work Cross X on rows 8, 12, 16 and 20. Work Cross Y on rows 10, 14, 18 and 22. (8 sts on every row)
Checkpoint: The stem is about 3 2/3 in (9.3 cm) tall. Do not fasten off.
Corner and Bowl
Every Wedge in this section starts from edge A, straight after a RS row.
Corner:
1. Work a Wedge.
2. Work Row 23 (WS) and Row 24 (RS, Cross X).
3. Work a Wedge.
4. Work Row 25 (WS) and Row 26 (RS, Cross Y).
Bowl curve: Work (a Wedge, then 2 full rows) 4 times, for Rows 27–34. Keep alternating the crosses: X on rows 28 and 32, Y on rows 30 and 34.
Bottom arm: Work Rows 35–38, with Cross X on Row 36 and Cross Y on Row 38. (8 sts)
Joining row: Bend the strip so the last row lies against the right edge of the stem, rows 11–18. Working from edge B down to edge A, sl st through each st and its matching stem row-end. (8 sl sts) Fasten off.
Edge tally (used later for the border):
– Edge A of the corner and bowl has 16 + 32 = 48 row-ends.
– The hole is framed by 20 row-ends: stem rows 19–22, the corner’s full rows, the curve’s full rows and the bottom arm.
Leg
Row L1 (RS): With the RS facing, join yarn at the lower edge of the bowl 8 row-ends away from the stem. Sc in each of the 8 row-ends toward the stem: the last 4 row-ends of the curve and the 4 row-ends of the bottom arm. Turn. (8 sc)
Row L2 (WS): Ch 1, sc across, turn. (8 sc)
Row L3 (RS): Ch 1, sc in the first st. FPdc around the next 6 sts of L1. Sc in the last st. (8 sts)
Wedge: Work one Wedge from the stem side. This angles the leg down and to the right.
Rows L4–L10: Work Cross X on L5 and L9 and Cross Y on L7. WS rows are sc. (8 sts)
Checkpoint: The leg’s lower edge should sit about 1/2 in (1.3 cm) above the bottom of the stem foot. If it is lower, rip out L9–L10. If it is higher, add one more pair of rows before the foot.
Foot:
– F1 (RS): Ch 1, 2 sc in the first st, sc in the next 6 sts, 2 sc in the last st. (10 sc)
– F2 (WS): Ch 1, 2 sc in the first st, sc in the next 8 sts, 2 sc in the last st. (12 sc)
– F3 (RS): Ch 1, sc across. (12 sc)
Fasten off. The leg foot is 2 in (5.1 cm) wide, the same as the stem foot. The letter now measures 5 in × 3.75 in (12.7 cm × 9.5 cm).
Border
Border gauge: 6 sc = 1 in (2.5 cm). Work 1 sc into each row-end and 1 sc into each st.
Outer Round 1: With the RS facing, join burgundy in the bottom-left corner of the stem foot. Work counterclockwise:
| Section | Sc |
|---|---|
| Stem foot underside: 3 sc in the corner st, 1 sc in each of the next 10 sts, 3 sc in the corner st | 16 |
| Right side of the stem foot | 3 |
| Right serif step | 2 |
| Stem right edge, rows 4–10 | 7 |
| Leg inner (left) edge, including the Wedge row-ends | 19 |
| Leg foot underside: 3 sc in each corner plus 10 sc between | 16 |
| Leg outer edge, rows L1–F3 | 13 |
| Edge A of the bowl and corner (48 minus the 4 used for the leg) | 44 |
| Stem left edge, rows 22 down to 4 | 19 |
| Left serif step | 2 |
| Left side of the stem foot | 3 |
Join with a sl st to the first sc. (144 sc)
Outer Round 2: Sl st loosely in each sc around. (144 sl sts) Fasten off.
Hole round: Join in any row-end of the hole. Work 1 sc in each row-end around and join. (20 sc) Fasten off.
Why the math works: The cable band has 6 rows per inch and the border has 6 sc per inch. One sc per row-end therefore matches the edge length exactly, so the border lies flat instead of rippling or cupping. The 3-sc corners add the extra length needed for the four sharp corners of the feet only. The 144 sc cover about 24 in (61.0 cm) of outline. The two rounds add about 1/4 in (0.6 cm) on each side, so the letter grows from 5 in × 3.75 in to 5.5 in × 4.25 in (14.0 cm × 10.8 cm).
Roses and Leaves
Large rose (pink):
1. Ch 29.
2. Row 1: V-st in the 5th ch from the hook. Sk 2 ch, V-st in the next ch. Repeat from * to * 7 more times. (9 V-sts)
3. Row 2: Turn. Work the petal dc into the next ch-1 sp, then sl st into the skipped ch between V-sts. Repeat from * to * across. Put 5 dc in each of the first 3 petals and 7 dc in each of the last 6 petals. End with a sl st into the beginning ch-sp. (9 petals, 57 dc)
Medium rose:
1. Ch 20.
2. Work Row 1 as for the large rose, repeating 4 more times. (6 V-sts)
3. Row 2: 5 dc in each of the first 2 petals and 6 dc in each of the last 4 petals. (6 petals, 34 dc)
Small rose:
1. Ch 11.
2. Work Row 1 as for the large rose, repeating once more. (3 V-sts)
3. Row 2: 5 dc in each petal. (3 petals, 15 dc)
Finishing the roses: Leave a 10 in (25.4 cm) tail on each rose. Roll each strip starting from the small-petal end. Stitch through all the layers at the base to secure it.
The roses measure about 1.5 in (3.8 cm), 1 in (2.5 cm) and 3/4 in (1.9 cm) across.
Leaf (green, make 5):
1. Ch 8.
2. Working along the chain: sl st in the 2nd ch from the hook, sc in the next ch, hdc in the next ch, dc in the next 2 ch, hdc in the next ch, 3 sc in the last ch.
3. Working along the other side of the chain: hdc in the next ch, dc in the next 2 ch, hdc in the next ch, sc in the next ch, sl st in the last ch. (15 sts)
4. Ch 2 and sl st in the same ch to make the tip. Fasten off.
Each leaf is about 1 in (2.5 cm) long.
Final Blocking
- Weave in all the ends on the letter.
- Pin the letter RS up to 5.5 in × 4.25 in (14.0 cm × 10.8 cm). Put one pin at each foot corner and one at each side of the bowl.
- Use a blunt pin to open the hole to about 3/4 in (1.9 cm).
- Hold a steam iron 1 in (2.5 cm) above the work. Never press, because pressing flattens the cables.
- Let it dry completely, then remove the pins.
- Sew the large rose over the top-left corner, overlapping the stem’s left edge. Sew the medium rose below it and the small rose below that.
- Tuck the leaves around the roses: one above the large rose, two at its left, one at the left of the medium rose and one at the right of the small rose. Sew each leaf at its base.
- Open the jump ring sideways with the pliers. Pass it through the border at the top of the stem, add the 30 mm ring, and close the jump ring fully.
Final Quality-Control Checklist
- The letter measures 5.5 in × 4.25 in (14.0 cm × 10.8 cm).
- Both feet are 2 in (5.1 cm) wide before the border and sit on the same baseline.
- The braid crosses on every RS row, with no missed or doubled posts.
- The bowl is joined firmly to the stem, with no gap.
- The outer border has 144 sts and the hole border has 20.
- The roses are secure from the back, and no stitches show on the front.
- The jump ring is fully closed.
Troubleshooting
- Letter curls toward the front: Your FP stitches are too tight. Loosen them, or block more firmly.
- Bowl ruffles: Your short rows are too loose. Pull snug at each turn.
- Bowl is too flat or open: You missed a Wedge. Count 4 Wedges in the curve.
- Leg is too long: Remove rows L9–L10.
- Border waves: Check that you worked 1 sc per row-end, not 2.
- Roses flop open: Add a few more anchoring stitches through the base.
Care
Hand wash in cool water and lay flat to dry in shape. Do not wring the charm or put it in the dryer.
Final Notes
The measurement chain:
1. Swatch: 1.25 in × 2 in (3.2 cm × 5.1 cm).
2. Stem after Row 22: 3 2/3 in (9.3 cm).
3. After the corner: 5 in (12.7 cm) tall.
4. After the bowl: 3.5 in (8.9 cm) wide.
5. Before the border: 5 in × 3.75 in (12.7 cm × 9.5 cm).
6. After the 1/4 in (0.6 cm) border: 5.5 in × 4.25 in (14.0 cm × 10.8 cm).
If each checkpoint matches, the finished charm will too.
Happy crocheting!