

This little stocking is a flat ornament made as one piece, with a small heel patch sewn on. The body is deep cranberry red in waffle stitch, which gives a grid of raised ridges around small sunken squares. A cream ribbed cuff, a cream quarter-circle heel, and a cream hanging loop finish it off.
The style is classic cottage Christmas: two colors, plenty of texture, and a tidy outline. The toe points left, the heel sits at the bottom right, and the loop rises from the top right corner of the cuff so the stocking hangs straight.
This pattern uses US crochet terms. The finished ornament measures 4.4 in (11.2 cm) wide from toe to heel and 5.6 in (14.2 cm) tall from sole to cuff top. With the loop it hangs 6.8 in (17.3 cm) tall.
You work the red body flat in rows from the sole up: four full-width foot rows, then six leg rows over the heel-side stitches only. One round of red single crochet outlines the body. The cream cuff is worked into the top of that outline, the loop goes on at the top right corner, and the heel patch is sewn onto the bottom right corner.
Finished Size and Construction
- Finished size: 4.4 in (11.2 cm) wide x 5.6 in (14.2 cm) tall; 6.8 in (17.3 cm) including loop
- Skill level: Intermediate (post stitches, simple shaping)
- Terminology: US
- Yarn weight: DK (#3, light)
- Hook: 3.5 mm (E-4)
- Number of pieces: 1 stocking body (cuff and loop worked on), plus 1 small heel patch sewn on
- Layout: single ornament, no motif joining
- Body size before border: 4.0 in (10.2 cm) wide at the foot x 4.0 in (10.2 cm) tall; leg 2.8 in (7.1 cm) wide
- Border depth: 0.2 in (0.5 cm), one round of sc
- Cuff: 3.2 in (8.1 cm) wide x 1.2 in (3.0 cm) tall
- Heel patch: quarter circle, 1.0 in (2.5 cm) radius
Materials
Choose a smooth DK yarn with crisp stitch definition. Cotton or a cotton blend shows the waffle grid best. Soft acrylic also works and is lighter on a branch. Avoid fuzzy yarns, which blur the ridges.
- Color A, cranberry red: 10 g, about 23 m
- Color B, cream: 5 g, about 12 m
These amounts include a margin of about 30 percent for gauge checks and weaving in ends.
Tools:
- 3.5 mm (E-4) crochet hook
- Tapestry needle
- 2 locking stitch markers
- Scissors
- Rust-proof pins and a foam blocking mat
- Spray bottle or steam iron
Abbreviations (US Terms)
- ch – chain
- sl st – slip stitch
- sc – single crochet
- hdc – half double crochet
- dc – double crochet
- FPdc – front post double crochet: yo, insert hook from front to back to front around the post of the stitch below, complete as a dc
- BPdc – back post double crochet: yo, insert hook from back to front to back around the post of the stitch below, complete as a dc
- st(s) – stitch(es)
- RS / WS – right side / wrong side
- rep – repeat
Special stitch – Waffle Stitch (worked flat, multiple of 3 + 2 sts):
- Pattern Row A: Ch 2, dc in first st, *FPdc around next st, dc in next 2 sts; rep from * to last st, dc in last st.
- Pattern Row B: Ch 2, dc in first st, *FPdc around next 2 sts, dc in next st; rep from * to last st, dc in last st.
In each row you post around the stitches that were plain dc in the row below, and you work plain dc into the stitches that were posted. That alternation builds the raised grid. The turning ch 2 never counts as a stitch in this pattern.
Gauge and Checkpoints
Gauge in waffle stitch: 5 sts = 1 in (2.5 cm) and 5 rows = 2 in (5.1 cm), so each row is 0.4 in (1.0 cm) tall.
Since this is a one-piece ornament, the foot works as your gauge swatch. Work Rows 1–4 and measure before going on.
Checkpoints:
- After Row 4 (foot): 4.0 in (10.2 cm) wide x 1.6 in (4.1 cm) tall
- After Row 10 (leg): leg 2.8 in (7.1 cm) wide; body 4.0 in (10.2 cm) tall
- After the border: 4.4 in (11.2 cm) wide x 4.4 in (11.2 cm) tall; top edge 3.2 in (8.1 cm)
- After the cuff: 5.6 in (14.2 cm) tall
- Heel patch: straight edges 1.0 in (2.5 cm) each
If the foot is too big, switch to a 3.25 mm (D-3) hook. If it is too small, switch to a 3.75 mm (F-5) hook. Post stitches tend to pull in, so keep each FPdc relaxed. Row height matters as much as width: if your rows are short, pull up the first loop of each dc a little taller.
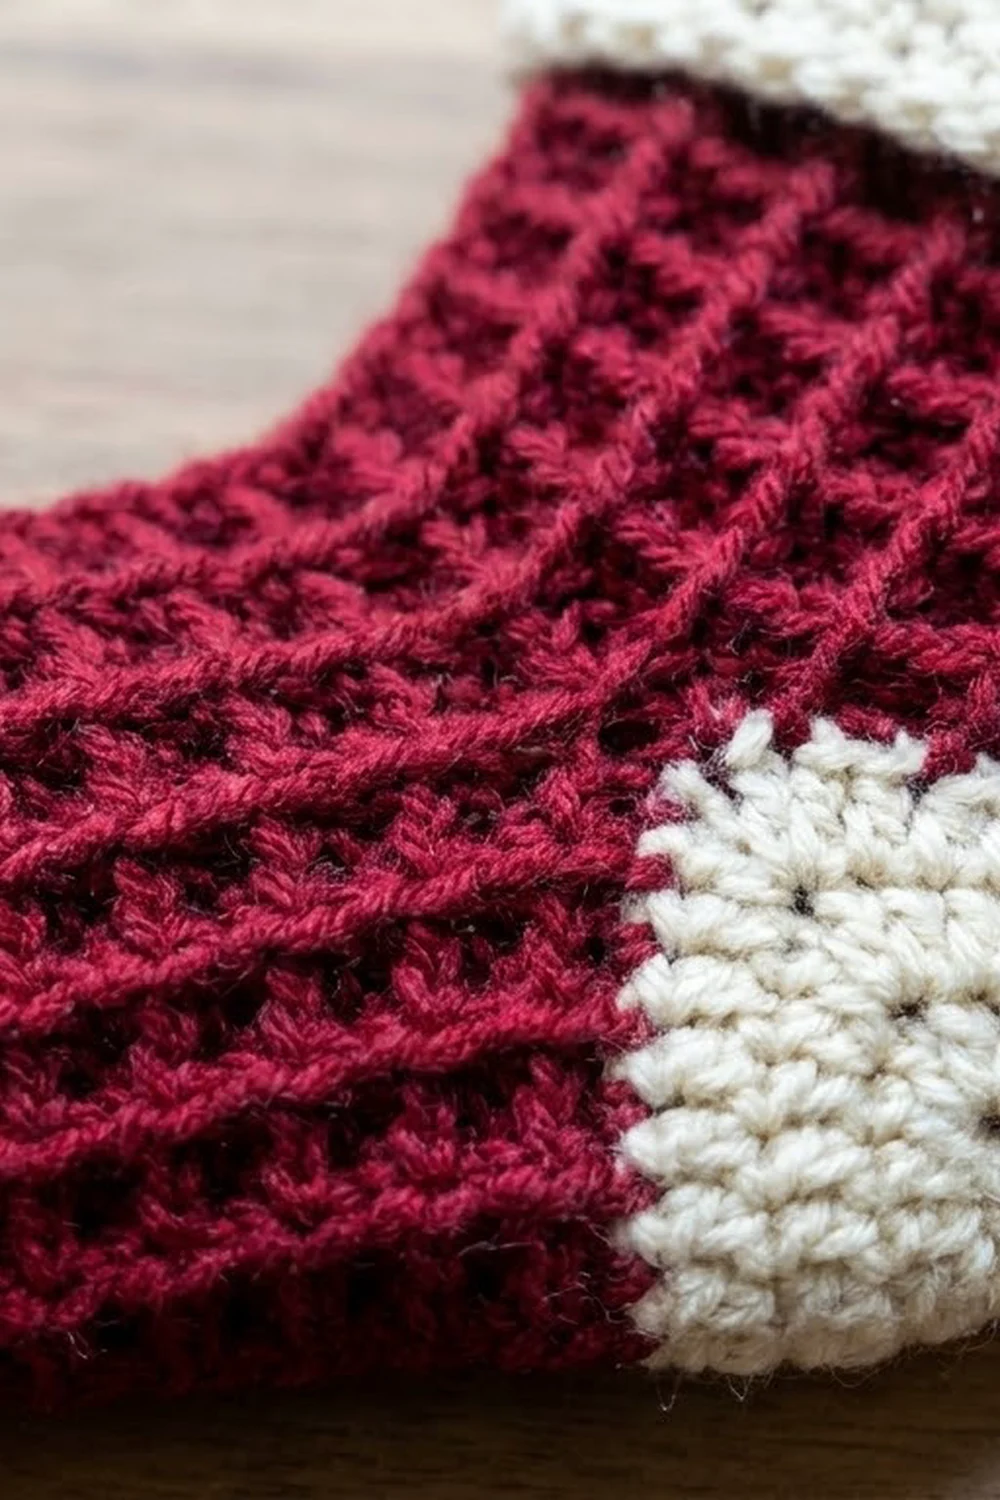
Stocking Body
Work flat in rows with Color A. With the RS facing you, the toe points left and the heel is on the right. Stitches are numbered from the heel side (st 1) to the toe side (st 20).
Foot
Foundation: With Color A, ch 21.
Row 1 (WS): Sc in 2nd ch from hook, hdc in next ch, dc in each of the remaining 18 ch, turn. (20 sts)
The sc and hdc at the toe end start the rounded bottom of the toe.
Row 2 (RS): Work Pattern Row A, working the repeat 6 times in total. (20 sts: 6 FPdc, 14 dc)
Row 3 (WS): Work Pattern Row B, working the repeat 6 times in total. (20 sts: 12 FPdc, 8 dc)
Row 4 (RS): Ch 2, dc in first st, FPdc around next st, dc in next 2 sts; rep from * 4 more times, FPdc around next st, dc in next st, hdc in next st, sc in last st, turn. (20 sts: 6 FPdc, 12 dc, 1 hdc, 1 sc)*
The hdc and sc mirror Row 1 and round off the top of the toe.
Checkpoint: The foot should be 4.0 in (10.2 cm) wide and 1.6 in (4.1 cm) tall.
Leg
Row 5 (WS): Ch 1, sl st loosely in each of the first 6 sts (sts 20–15), ch 2, dc in next st (st 14), FPdc around next 2 sts, dc in next st; rep from * 3 more times, dc in last st, turn. (14 sts plus 6 sl sts)*
The slip stitches form the flat top of the foot in front of the leg.
Row 6 (RS): Work Pattern Row A, working the repeat 4 times in total. (14 sts: 4 FPdc, 10 dc)
Row 7 (WS): Work Pattern Row B, working the repeat 4 times in total. (14 sts: 8 FPdc, 6 dc)
Rows 8 and 10 (RS): Rep Row 6. (14 sts)
Row 9 (WS): Rep Row 7. (14 sts)
Fasten off.
The leg’s 14 sts sit directly over sts 1–14 of the foot. Row 5 posts around the plain dc of Row 4, so the grid runs unbroken from foot into leg.
Checkpoint: The leg should be 2.8 in (7.1 cm) wide, and the body 4.0 in (10.2 cm) from sole to the top of Row 10.
Border
Border gauge: One sc is 0.2 in (0.5 cm) wide and one dc row-end is 0.4 in (1.0 cm) tall. Work 1 sc per stitch along the top and bottom, and 2 sc per dc row-end along the sides.
Corner rule: Each outward-facing corner gets a group of 3 sc worked into one stitch. In the counts below, these corner groups are listed separately and are not included in the side counts.
Round 1 (RS): With the RS facing, join Color A with a sc in the first st of Row 10 (top right corner), then work 1 more sc in the same st. Continue:
- Top edge: sc in each of next 12 sts (12)
- Top left corner: 3 sc in last st (3)
- Leg front edge: 2 sc in each row-end of Rows 10 down to 5 (12)
- Foot top: sc in each of the 6 sl sts (6)
- Toe end: 2 sc in end of Row 4, 3 sc in end of Row 3, 3 sc in end of Row 2, 2 sc in end of Row 1 (10)
- Sole: sc in the free loop of each of the next 19 foundation ch (19)
- Heel corner: 3 sc in last foundation ch (3)
- Heel side: 2 sc in each row-end of Rows 1 up to 10 (20)
- Top right corner: sc in same st as the first sc to complete the group (3 total)
Sl st to the first sc and fasten off. (88 sc: 3 + 12 + 3 + 12 + 6 + 10 + 19 + 3 + 20)
Why the math works:
- Top: The leg has 14 sts. 12 take 1 sc each, and the 2 end sts hold the corner groups.
- Sides: The leg front has 6 rows (6 x 2 = 12 sc) and the heel side has 10 rows (10 x 2 = 20 sc).
- Sole: There are 20 chains. 19 take 1 sc each, and the last one holds the heel corner.
- Toe: Plain coverage of the 4 toe row-ends would be 1 + 2 + 2 + 1 = 6 sc. The 4 extra sc spread around the curve so the toe rounds out without cupping.
- Inside corner: Where the leg meets the top of the foot, the corner pulls in naturally and needs no extra stitches.
Cuff base count: Count the center sc of each top corner group plus every sc between them: 1 + 1 + 12 + 1 + 1 = 16 sts, which is 3.2 in (8.1 cm). The cuff uses exactly these 16 sts.
Checkpoint: 4.4 in (11.2 cm) wide x 4.4 in (11.2 cm) tall.
Cuff
Work flat in rows with Color B.
Row 1 (RS): With the RS facing, join Color B with a sl st in the center sc of the top right corner group. Ch 2, dc in same st, then dc in each of the next 15 sts, ending in the center sc of the top left corner group. Turn. (16 sts)
Row 2 (WS): Ch 2, dc in first st, BPdc around next st, FPdc around next st; rep from * 6 more times, dc in last st, turn. (16 sts: 7 BPdc, 7 FPdc, 2 dc)*
Row 3 (RS): Rep Row 2 without turning. (16 sts) Fasten off.
The wording repeats because the row direction flips. Each FPdc in Row 3 lands on a Row 2 BPdc, so the same 7 stitches stand out as vertical ribs on the RS.
Checkpoint: The cuff is 3.2 in (8.1 cm) wide and 1.2 in (3.0 cm) tall. The stocking is 5.6 in (14.2 cm) tall.
Hanging Loop
With the RS facing, join Color B with a sl st in the first st of Cuff Row 3 (top right corner). Ch 16, then sl st in the same st to form a ring. Ch 1, work 22 sc over the chain ring, and sl st in the same corner st. Fasten off. The loop stands about 1.2 in (3.0 cm) above the cuff.
Heel Patch
Make 1 with Color B.
Row 1: Make a magic ring. Ch 2, work 3 dc in the ring, pull the ring closed, turn. (3 sts)
Row 2: Ch 2, 2 dc in each st across, turn. (6 sts)
Row 3: Ch 1, sc in next st, 2 sc in next st; rep from * 2 more times. (9 sts)* Fasten off, leaving a 12 in (30.5 cm) tail.
The patch is a quarter circle with two straight edges of 1.0 in (2.5 cm).
Attach: Place the patch on the RS with the ring point at the heel corner. Line up one straight edge with the outer edge of the border along the sole and the other along the heel side, with the curved edge facing the toe. Whipstitch the straight edges, then backstitch just inside the curve.
Final Blocking
- Weave in all ends through stitches of the same color.
- Mist the ornament, or soak it briefly and roll it in a towel to remove the water.
- Lay it RS up on the mat.
- Pin the sole and the heel side straight, each to 4.4 in (11.2 cm).
- Pin the cuff square to 3.2 in (8.1 cm) x 1.2 in (3.0 cm).
- Ease the toe into a smooth curve.
- Don’t press it. If you steam it, hold the iron above the work so the ridges keep their depth.
- Leave it pinned until it is completely dry.
Final Quality-Control Checklist
- Body is 4.0 in (10.2 cm) x 4.0 in (10.2 cm) before the border
- Foot rows have 20 sts; leg rows have 14 sts
- The grid runs straight from the foot into the leg
- The border has 88 sc, with three 3-sc corner groups
- The cuff has 16 sts and 7 clear ribs
- The finished size is 4.4 in (11.2 cm) x 5.6 in (14.2 cm)
- The heel patch sits flush with the corner
- The loop is secure at the top right corner
- All ends are hidden
Troubleshooting
The grid looks like plain ribbing. You are posting around the same stitches every row. Post around the plain dc of the row below instead.
The foot is narrower than 4.0 in (10.2 cm). Loosen your post stitches or go up a hook size.
The toe looks square. Check that Rows 1 and 4 end in hdc and sc, and that you worked 3 sc into the ends of Rows 2 and 3 in the border.
The border ruffles along the sides. Your rows are shorter than 0.4 in (1.0 cm). Work 3 sc for every 2 row-ends instead of 2 sc per row-end.
The cuff flares. Work Cuff Row 1 with a smaller hook.
The heel patch cups. Block it on its own before sewing it on.
Care
Hand wash in cool water and lay flat to dry. Store it flat between seasons so the cuff and loop keep their shape.
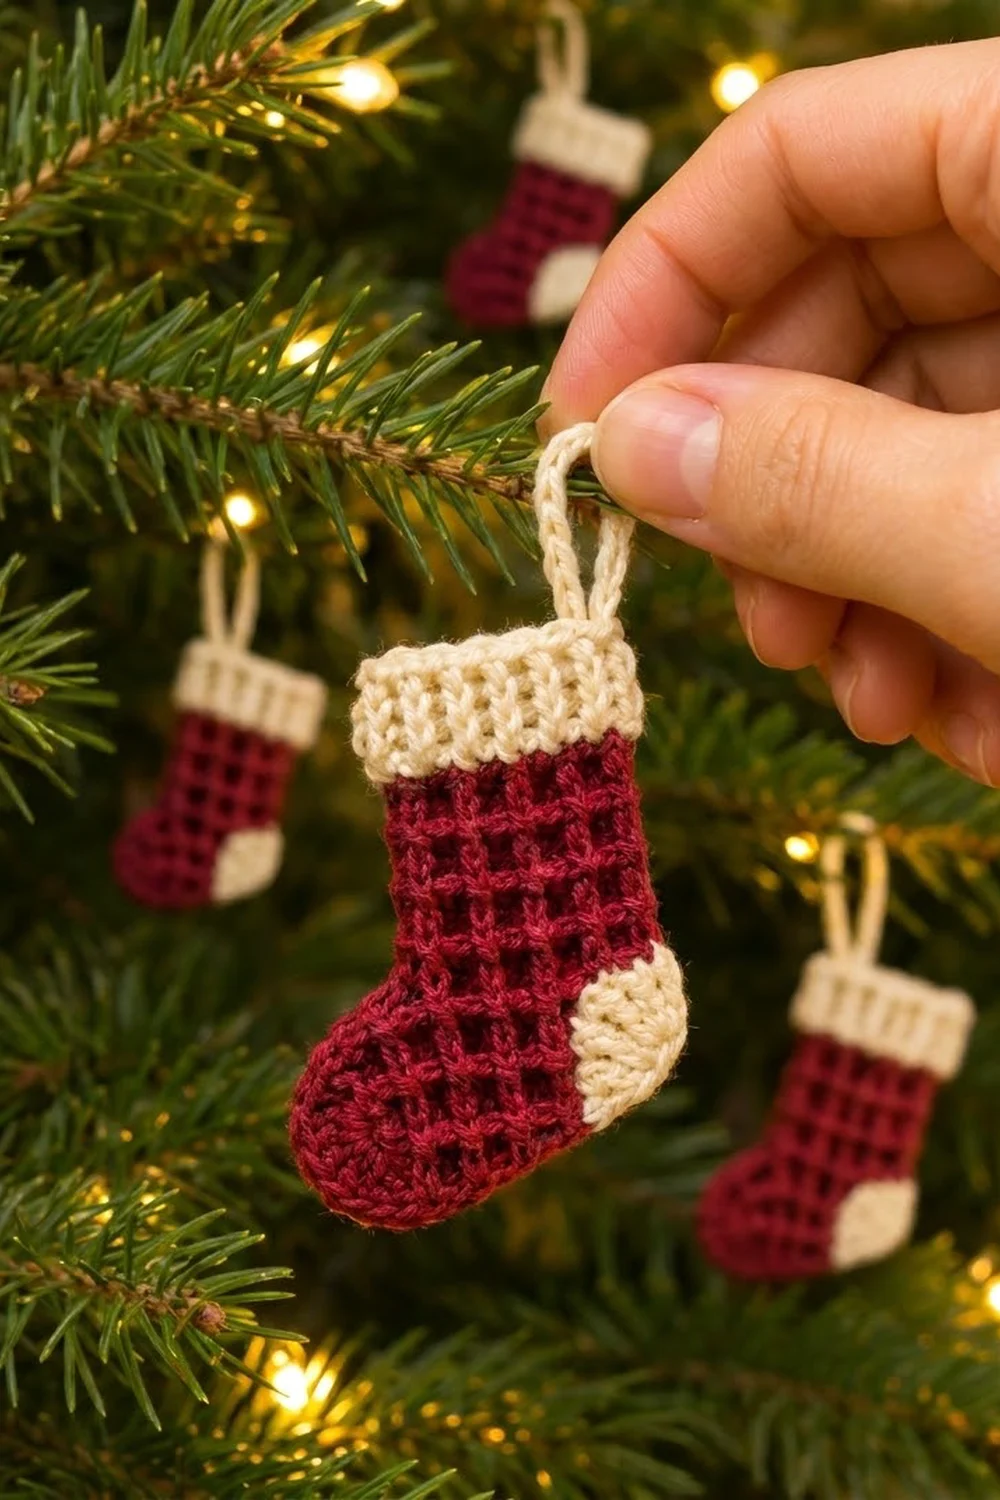
Final Notes
Here is the full measurement chain:
- Foot: 20 sts, 4.0 in (10.2 cm) wide
- Leg: 14 sts, 2.8 in (7.1 cm) wide
- Body: 4.0 in (10.2 cm) tall
- Border: 0.2 in (0.5 cm), bringing the stocking to 4.4 in (11.2 cm) wide and tall
- Cuff: 16 sts, 3.2 in (8.1 cm) wide
- Finished height: 5.6 in (14.2 cm)
If each checkpoint matches, the finished stocking will match too.
Happy crocheting!