

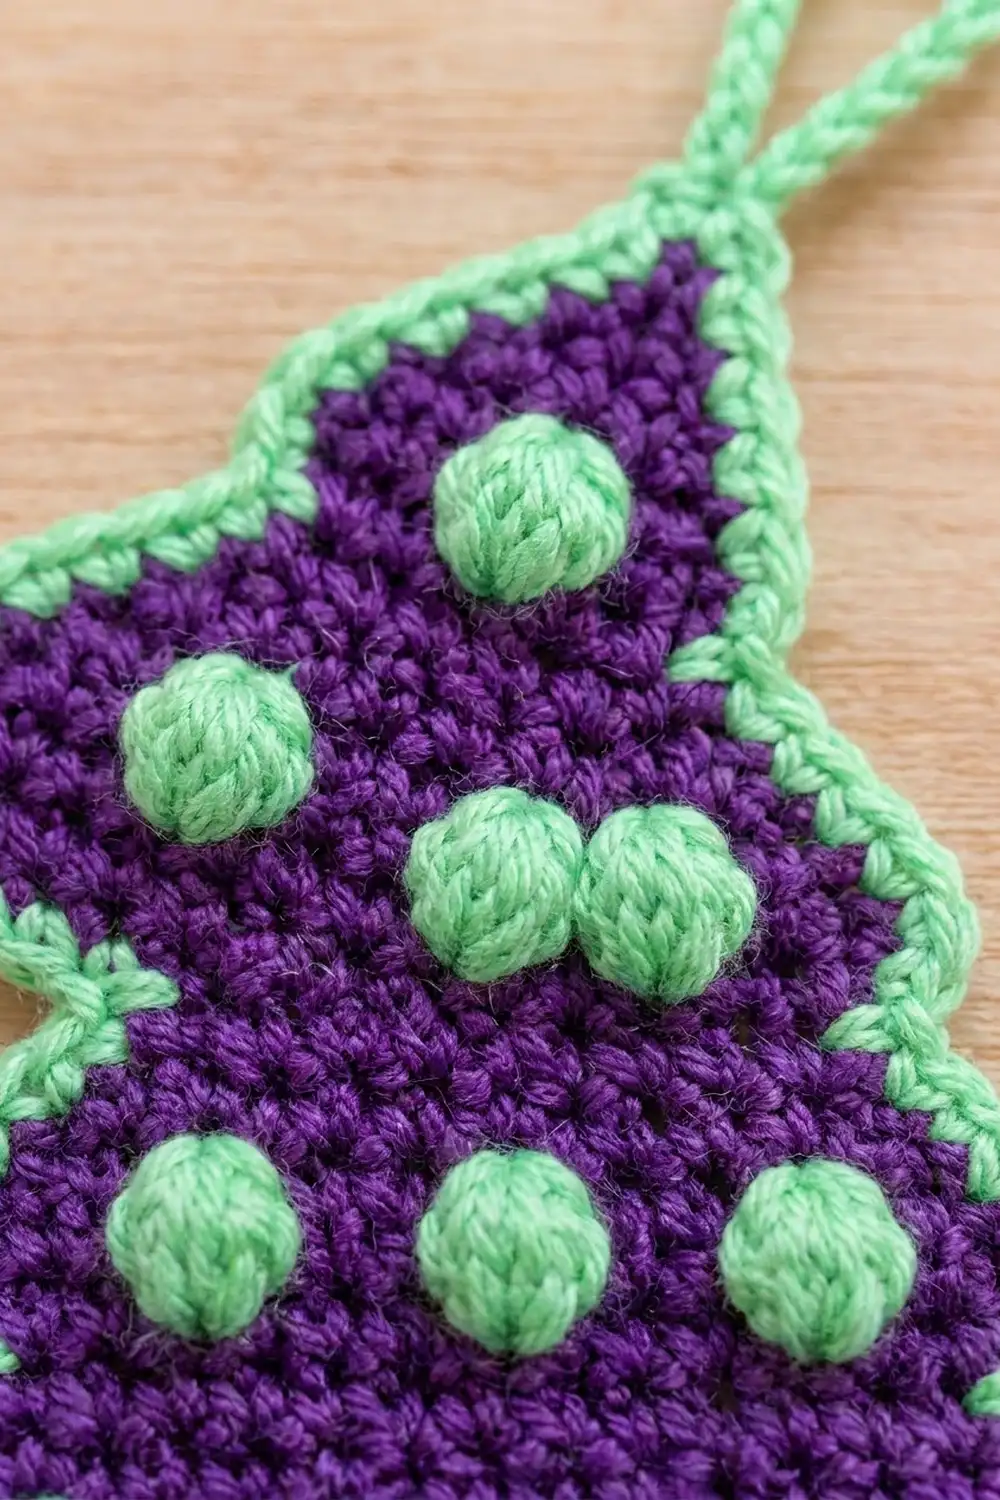
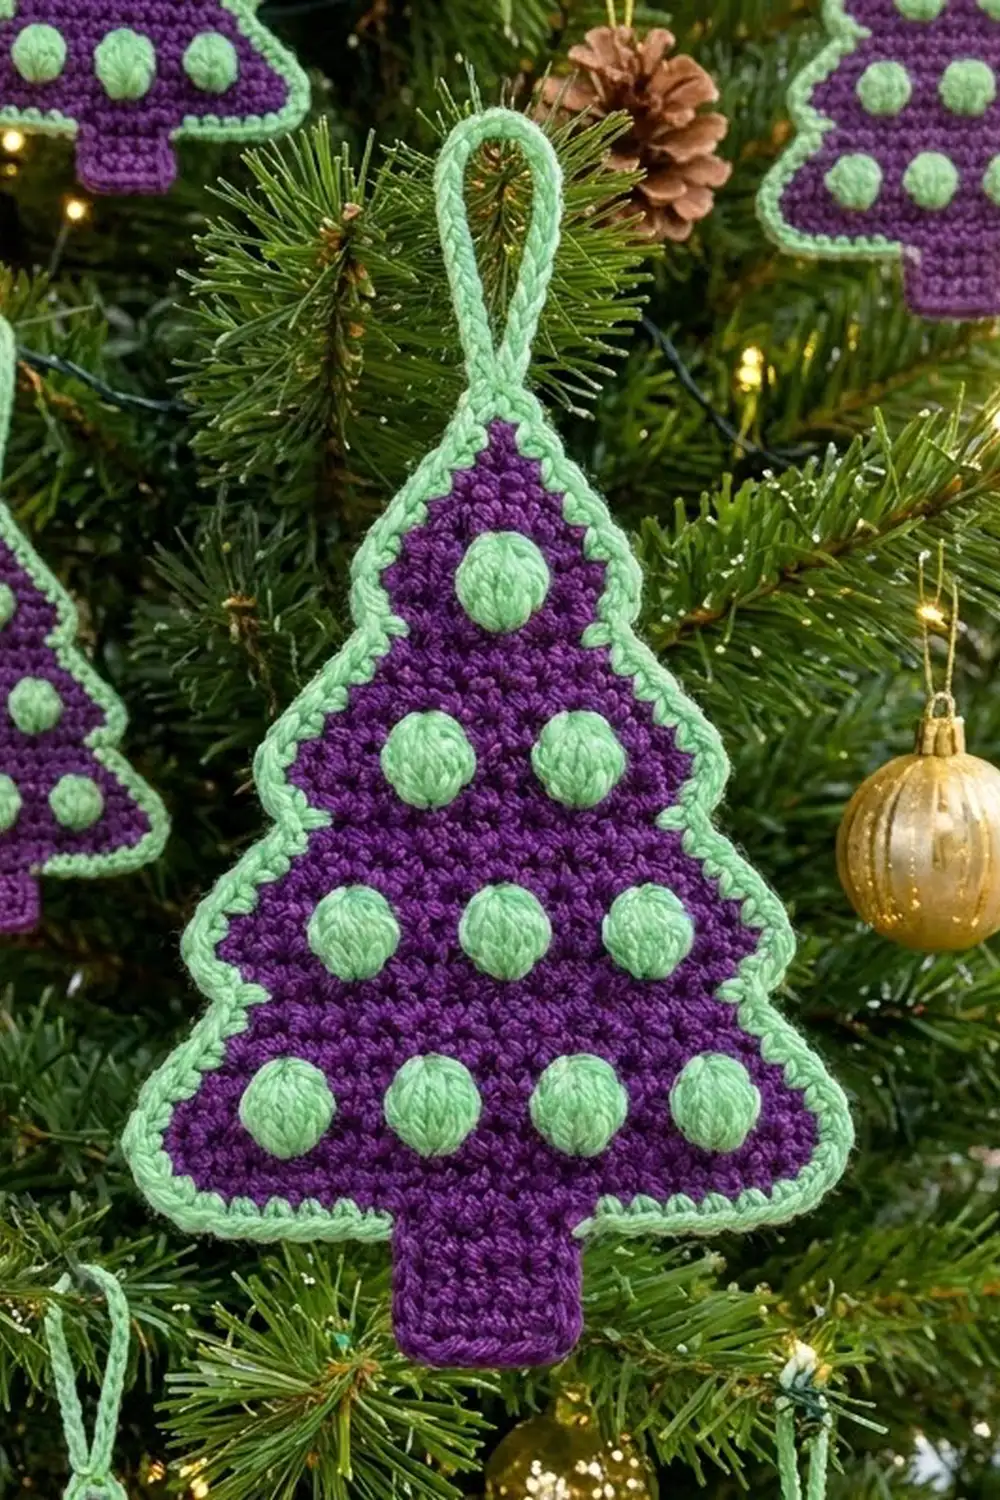
This little tree ornament pairs deep plum purple with a cool mint green. The result feels festive without leaning on the usual red-and-green palette. Ten plump mint bobbles stand out from a dense purple background, and a crisp mint edging traces the stepped tree outline.
The design is one flat, solid piece with four stacked tiers, a short purple trunk and a sturdy corded hanging loop. The bobbles run in rows of 1, 2, 3 and 4, one row per tier, so the tree looks like it’s decorated with baubles.
The finished ornament measures 5.0 in (12.7 cm) wide and 6.2 in (15.7 cm) tall, not counting the loop. With the loop it measures about 8.2 in (20.8 cm). This pattern uses US crochet terms throughout.
You crochet the tree from the tip downward in rows of single crochet. Each tier starts with a slip-stitch “step in” and then widens. The bobbles are worked on wrong-side rows so they pop to the front. You add the trunk at the center of the last row, then work a single border row in mint around the tree, with the hanging loop built in at the tip.
Finished Size and Construction
- Finished size: 5.0 in wide x 6.2 in tall (12.7 cm x 15.7 cm), plus a loop of about 2 in (5.1 cm)
- Skill level: Easy-Intermediate
- Terminology: US crochet terms
- Yarn weight: DK (light worsted, #3), cotton or cotton blend
- Hook: 3.5 mm (E-4)
- Number of pieces: 1
- Layout: single standalone ornament
- Piece size before border: 4.6 in wide x 6.0 in tall (11.7 cm x 15.2 cm), including the trunk
- Border depth: 0.2 in (0.5 cm), one row of single crochet
Materials
Yarn: Choose a smooth DK cotton or cotton blend. Cotton gives crisp stitch definition, round bobbles and a firm ornament that hangs flat. Stay away from fuzzy or very splitty yarns, because the bobbles will lose their shape.
- Color A, Plum Purple: 18 g / 40 m (44 yd) for the tree and trunk
- Color B, Mint Green: 12 g / 28 m (31 yd) for the bobbles, border and loop
These quantities include a margin of roughly 15 percent for your gauge swatch and weaving in ends.
Tools:
- 3.5 mm (E-4) crochet hook
- Tapestry needle
- Scissors
- 2 stitch markers
- Ruler or tape measure
- Blocking mat and rust-proof pins
Abbreviations (US Terms)
- ch – chain
- sl st – slip stitch
- sc – single crochet
- dc – double crochet
- st(s) – stitch(es)
- yo – yarn over
- RS / WS – right side / wrong side
- bob – bobble (see below)
Special stitch: Bobble (bob). Work this with a separate 12 in (30.5 cm) length of Color B. Work the sc before the bobble in Color A up to its final yo. Drop A, yo with B, and pull through to finish that sc. In the next st, using B, (yo, insert hook, yo, pull up a loop, yo, draw through 2 loops) 5 times. You now have 6 loops on the hook. Yo with A and draw through all 6 loops. Tie the two B tails together loosely on the WS. A bobble counts as 1 stitch. Because you work it on a WS row, it puffs out on the RS.
Gauge and Checkpoints
Gauge: 10 sc and 10 rows = 2 in (5.1 cm) in Color A. That’s 5 sts and 5 rows per inch (2.5 cm), so a square gauge. The square gauge matters: the border relies on it to lie flat.
Make a small swatch first: 12 sc wide and 12 rows tall. Measure the center 10 x 10 section. Treat the top tier of the tree as a second check, because it’s quick and shows how your bobbles behave.
Checkpoints (measure the widest row flat, without stretching):
- After Row 6 (Tier 1): 11 sts, 2.2 in (5.6 cm) wide, 1.2 in (3.0 cm) tall
- After Row 12 (Tier 2): 15 sts, 3.0 in (7.6 cm) wide, 2.4 in (6.1 cm) tall
- After Row 18 (Tier 3): 19 sts, 3.8 in (9.7 cm) wide, 3.6 in (9.1 cm) tall
- After Row 24 (Tier 4): 23 sts, 4.6 in (11.7 cm) wide, 4.8 in (12.2 cm) tall
- After the trunk: 6.0 in (15.2 cm) total height before border
If your piece is too big, go down half a hook size, to 3.25 mm. If it’s too small, go up to 3.75 mm. Change the hook rather than the stitch counts, because the bobble spacing and the border counts depend on the exact numbers below.
Tree Body
The tree is worked top-down in turning rows. The ch 1 at the start of a row never counts as a stitch. Odd-numbered rows are RS rows and even-numbered rows are WS rows.
Tier 1
Row 1 (RS): With A, ch 2. Work 3 sc in the 2nd ch from the hook. (3 sts)
Row 2 (WS): Ch 1, turn. 2 sc in the first st, sc in the next st, 2 sc in the last st. (5 sts)
Row 3: Ch 1, turn. 2 sc in the first st, sc in the next 3 sts, 2 sc in the last st. (7 sts)
Row 4 (WS, bobble row): Ch 1, turn. Sc in the next 3 sts, bob in the next st, sc in the last 3 sts. (7 sts: 6 sc, 1 bobble)
Row 5: Ch 1, turn. 2 sc in the first st, sc in the next 5 sts, 2 sc in the last st. (9 sts)
Row 6: Ch 1, turn. 2 sc in the first st, sc in the next 7 sts, 2 sc in the last st. (11 sts)
The single bobble sits in the exact center, at stitch 4 of 7.
Tier 2
Row 7 (RS, step row): Turn, but don’t chain. Sl st in the first 2 sts, ch 1, sc in the next 7 sts. Leave the last 2 sts unworked. (7 sts)
The 2 slip stitches and the 2 unworked stitches form the overhang of Tier 1. That overhang is what creates the notched tree outline.
Row 8: Ch 1, turn. 2 sc in the first st, sc in the next 5 sts, 2 sc in the last st. (9 sts)
Row 9: Ch 1, turn. 2 sc in the first st, sc in the next 7 sts, 2 sc in the last st. (11 sts)
Row 10 (WS, bobble row): Ch 1, turn. Sc in the next 3 sts, bob, sc in the next 3 sts, bob, sc in the last 3 sts. (11 sts: 9 sc, 2 bobbles)
Row 11: Ch 1, turn. 2 sc in the first st, sc in the next 9 sts, 2 sc in the last st. (13 sts)
Row 12: Ch 1, turn. 2 sc in the first st, sc in the next 11 sts, 2 sc in the last st. (15 sts)
Tier 3
Row 13 (step row): Turn. Sl st in the first 2 sts, ch 1, sc in the next 11 sts. Leave the last 2 sts unworked. (11 sts)
Row 14: Ch 1, turn. 2 sc in the first st, sc in the next 9 sts, 2 sc in the last st. (13 sts)
Row 15: Ch 1, turn. 2 sc in the first st, sc in the next 11 sts, 2 sc in the last st. (15 sts)
Row 16 (WS, bobble row): Ch 1, turn. Sc in the next 3 sts, *bob, sc in the next 3 sts; repeat from * 2 more times. (15 sts: 12 sc, 3 bobbles)
Row 17: Ch 1, turn. 2 sc in the first st, sc in the next 13 sts, 2 sc in the last st. (17 sts)
Row 18: Ch 1, turn. 2 sc in the first st, sc in the next 15 sts, 2 sc in the last st. (19 sts)
Tier 4
Row 19 (step row): Turn. Sl st in the first 2 sts, ch 1, sc in the next 15 sts. Leave the last 2 sts unworked. (15 sts)
Row 20: Ch 1, turn. 2 sc in the first st, sc in the next 13 sts, 2 sc in the last st. (17 sts)
Row 21: Ch 1, turn. 2 sc in the first st, sc in the next 15 sts, 2 sc in the last st. (19 sts)
Row 22 (WS, bobble row): Ch 1, turn. Sc in the next 3 sts, *bob, sc in the next 3 sts; repeat from * 3 more times. (19 sts: 15 sc, 4 bobbles)
Row 23: Ch 1, turn. 2 sc in the first st, sc in the next 17 sts, 2 sc in the last st. (21 sts)
Row 24: Ch 1, turn. 2 sc in the first st, sc in the next 19 sts, 2 sc in the last st. (23 sts)
Fasten off A.
Each tier steps in by 2 sts per side and then grows by 4 sts per side over its 6 rows. The tier bottoms come out at 11, 15, 19 and 23 sts. Every bobble row has 3 sc before the first bobble, 3 sc between bobbles and 3 sc after the last bobble, so each row of bobbles is centered.
Trunk
Row 25 (RS): With the RS facing, skip the first 8 sts of Row 24. Join A in the 9th st, ch 1, and sc in the same st and the next 6 sts. (7 sts)
Leave 8 sts unworked on each side: 8 + 7 + 8 = 23.
Rows 26–30: Ch 1, turn. Sc in each st across. (7 sts)
Fasten off. The trunk measures 1.4 in (3.6 cm) wide and 1.2 in (3.0 cm) tall. Weave in the A tails and the bobble tails on the WS now, before you add the border.
Border and Hanging Loop
Border gauge: The border uses 1 sc per stitch along stitch edges and about 5 sc per inch along row-end edges, which matches the body gauge.
Hold the tree with the RS facing and the trunk pointing up. Join B in the first free Row 24 stitch to the left of the trunk. You’ll work leftward, away from the trunk. (Left-handed crocheters mirror these directions.)
Border Row (Side 1, trunk to tip):
- Tier 4 bottom edge: Ch 1. Sc in the same st and in the next 6 sts, then 3 sc in the 8th (corner) st. (10 sc)
- Tier 4 side: Work 1 sc in each of the 6 row ends, but work 2 sc in the 3rd row end. (7 sc)
- Tier 3 overhang: Sc in the first of the 2 overhang sts, then 3 sc in the outer st. Work through the slip stitch or the bare stitch, whichever is there. (4 sc)
- Tier 3 side: 6 row ends, with 2 sc in the 3rd. (7 sc)
- Tier 2 overhang: Sc 1, then 3 sc in the outer st. (4 sc)
- Tier 2 side: 6 row ends, with 2 sc in the 3rd. (7 sc)
- Tier 1 overhang: Sc 1, then 3 sc in the outer st. (4 sc)
- Tier 1 side: 6 row ends, with 2 sc in the 3rd. (7 sc)
Side 1 total: 10 + 7 + 4 + 7 + 4 + 7 + 4 + 7 = 50 sc.
Tip and loop: In the foundation ch at the tip, work 1 sc, ch 20, and sl st into the top of that sc to close the loop. Work 30 sc over the ch-20 loop, wrapping the chain completely. Then work 1 more sc in the same tip ch. (2 sc at the tip, plus 30 sc on the loop)
Side 2 (tip to trunk), mirrored:
- Tier 1 side: 7 sc
- Tier 1 overhang: 3 sc in the outer st, sc 1 (4 sc)
- Tier 2 side: 7 sc
- Tier 2 overhang: 4 sc
- Tier 3 side: 7 sc
- Tier 3 overhang: 4 sc
- Tier 4 side: 7 sc
- Tier 4 bottom edge: 3 sc in the corner st, then sc in the next 7 sts, ending beside the trunk (10 sc)
Side 2 total: 50 sc.
Fasten off, and weave the tail into the trunk seam on the WS. The trunk stays purple, with no border.
Totals: 50 + 2 + 50 = 102 sc around the tree, plus 30 sc on the loop, for 132 sc in all.
Why the math works:
- Bottom edge: Row 24 has 8 free stitches on each side of the trunk. Working 1 sc in each, with 3 sc in the corner stitch, gives 7 + 3 = 10.
- Overhangs: Each overhang is 2 stitches wide. One sc plus a 3-sc corner gives 4, and the extra 2 stitches turn the convex corner.
- Tier sides: Each tier side is a diagonal 6 rows tall (1.2 in / 3.0 cm) and 4 stitches across (0.8 in / 2.0 cm). That makes the edge about 1.44 in (3.7 cm) long. At 5 sc per inch, 7 sc fits it, so 6 row ends plus 1 extra sc keeps the edge flat. Using only 6 sc would make the edge cup.
- Inner notches: No extra stitches go into the inner notches. That lets the border pull in slightly and keep the stepped outline sharp.
- Size: The border adds 0.2 in (0.5 cm) on each side, so the 4.6 in (11.7 cm) body becomes 5.0 in (12.7 cm) wide. At the tip, the border adds 0.2 in (0.5 cm) to the 6.0 in (15.2 cm) height, giving 6.2 in (15.7 cm).
Final Blocking
- Wet the ornament fully in cool water, then gently squeeze it out in a towel. Don’t wring it.
- Lay it RS up on the blocking mat.
- Pin the trunk straight, at 1.4 in (3.6 cm) wide.
- Pin the bottom tier to 5.0 in (12.7 cm) across, including the border.
- Pin each outer tier corner to a sharp point, and pin each inner notch slightly inward.
- Check that the height from the tip to the bottom of the trunk is 6.2 in (15.7 cm).
- Lay the loop straight up from the tip, and pin it flat in a teardrop shape.
- Don’t press the bobbles. Gently round each one with your fingertips.
- Let it dry completely, then unpin.
Final Quality-Control Checklist
- [ ] Width is 5.0 in (12.7 cm), height is 6.2 in (15.7 cm) and the loop rises about 2 in (5.1 cm)
- [ ] Four tiers, each with a clear notch on both sides
- [ ] 10 bobbles in rows of 1, 2, 3 and 4, all centered and all puffing to the RS
- [ ] Border count is 50 sc per side plus 2 at the tip, and the loop has 30 sc
- [ ] Trunk is 7 sts wide, centered, with no border
- [ ] All tails are woven in on the WS, and no green shows through the purple
- [ ] Ornament hangs straight from its loop
Troubleshooting
Bobbles pop to the back: You worked them on a RS row. Bobbles belong only on Rows 4, 10, 16 and 22.
Bobbles look flat: Make sure all 5 partial dc go into the same stitch. Also keep the final pull-through snug.
Purple shows a green fleck before a bobble: Switch to green only at the final yo of the previous sc, and keep the B tails on the WS.
Edges ruffle: You may have added extra sc on the sides. Recount for 7 per tier side.
Edges cup or pull: Make sure you put 2 sc in the 3rd row end of each tier side, or go up a hook size for the border only.
Notches are soft: Check that each step row starts with 2 sl sts and leaves 2 sts unworked.
Trunk is off-center: Recount the skipped stitches. You need exactly 8 on each side.
Loop twists: Spread the 30 sc evenly around the ch-20 loop, then block it flat.
Care
Hand wash in cool water with mild soap, reshape the ornament and dry it flat. Store it flat or hang it by the loop, away from heat and direct sunlight.
Final Notes
The measurement chain is simple. A gauge of 5 sts and 5 rows per inch gives tiers that end at 11, 15, 19 and 23 sts. The tree body is 4.6 in (11.7 cm) wide and 4.8 in (12.2 cm) tall. The trunk adds 1.2 in (3.0 cm), for a 6.0 in (15.2 cm) piece. The 50-plus-50-plus-2 border brings the ornament to 5.0 in x 6.2 in (12.7 cm x 15.7 cm). If you hit each checkpoint, the border counts will fit, and you’ll get a crisp, flat tree.
Happy crocheting!