

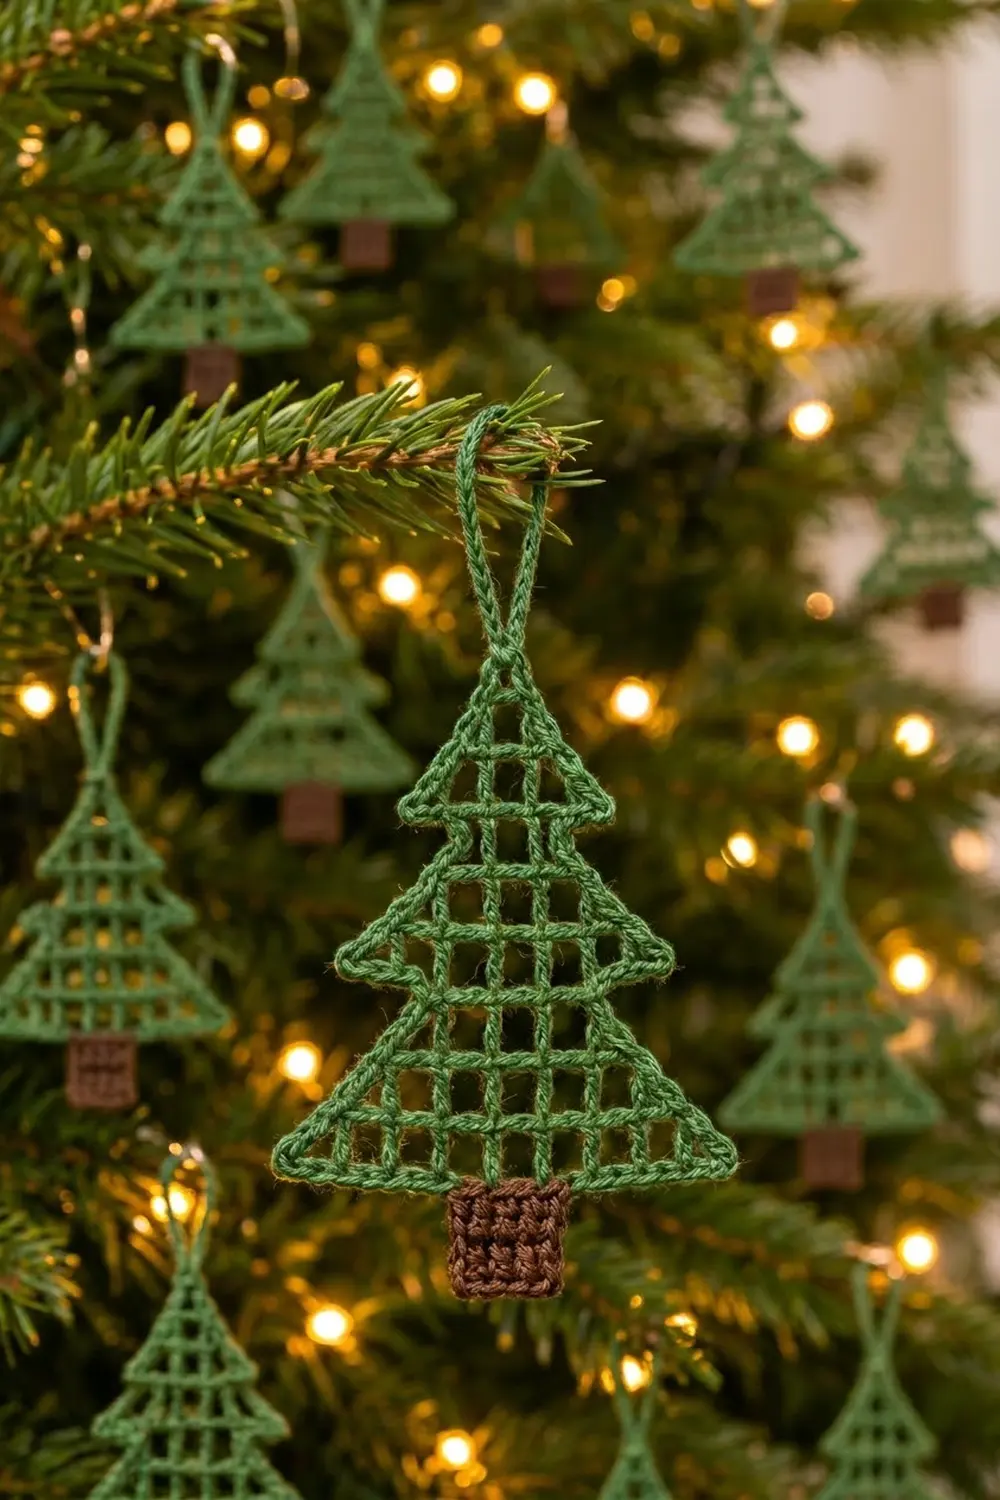
The Evergreen Lattice Tree is a small, flat Christmas ornament worked in open filet mesh. Three stepped tiers of square cells make a crisp tree outline, and a solid brown trunk and a simple chain loop finish it for hanging.
The palette is just forest green and chocolate brown. The open grid lets tree lights show through, so the ornament looks light and graphic without any beads or embellishments. It also works as a gift tag or package topper.
This pattern uses US crochet terms. The finished ornament measures about 3.85 in (9.8 cm) wide and 4.85 in (12.3 cm) tall without the loop, or about 6.1 in (15.5 cm) tall with the loop.
You work the green tree from the bottom up in filet mesh rows, decreasing at the edges to shape each tier and increasing to start the next one. A single round of edging outlines the tree and makes the hanging loop. Then you work the brown trunk downward from the center of the bottom edging, so there is nothing to sew.
Finished Size and Construction
- Finished size: 3.85 in (9.8 cm) wide x 4.85 in (12.3 cm) tall; 6.1 in (15.5 cm) tall including the loop
- Skill level: Intermediate (filet increases and decreases)
- Terminology: US crochet terms
- Yarn weight: Fingering / super fine (#1) cotton
- Hook: 2.75 mm (C-2)
- Number of pieces: 1 (single ornament, trunk worked on, no seams)
- Layout: 9 rows of filet mesh in three tiers (9-7-5, 7-5-3, 5-3-1 meshes)
- Tree size before edging: 3.6 in x 3.6 in (9.1 cm x 9.1 cm)
- Edging depth: about 1/8 in (0.3 cm) on each side
- Trunk: 1.25 in wide x 1 in tall (3.2 cm x 2.5 cm)
Materials
Choose a smooth mercerized cotton or cotton blend in fingering weight. Firm, twisted yarn gives crisp, square mesh cells and holds its shape on a branch. Avoid fuzzy or very stretchy yarns, because they blur the grid.
- Forest green: 8 g (about 32 m)
- Chocolate brown: 2 g (about 8 m)
These amounts include a small margin for your gauge swatch and weaving in ends.
Tools:
– 2.75 mm (C-2) crochet hook
– Tapestry needle
– Scissors
– Rust-proof pins and a foam blocking mat
– Spray bottle; optional fabric stiffener or spray starch
Abbreviations (US Terms)
- ch – chain
- sl st – slip stitch
- sc – single crochet
- dc – double crochet
- trtr – triple treble: yarn over 4 times, insert hook, pull up a loop, [yarn over, pull through 2 loops] 5 times
- sk – skip
- sp – space
- RS – right side
Special techniques:
- Mesh: one open square cell made of a dc post plus ch 2. A row of n meshes has n + 1 posts and 3n + 1 stitches.
- Beginning increase (beg-inc): Ch 7, then dc in the dc at the base of the ch-7. The 7 chains form the bottom (2 ch), the outer post (3 ch) and the top (2 ch) of one new mesh.
- End increase (end-inc): Ch 2, then trtr in the same stitch as the last dc. The long trtr bends to form the bottom and outer side of one new mesh.
- Edge decrease: At the start of a row, sl st in each of the next 2 ch and in the next dc, then begin the row there. At the end of the row, stop before the last mesh and leave it unworked.
Gauge and Checkpoints
Mesh gauge: 5 meshes x 5 rows = 2 in x 2 in (5.1 cm x 5.1 cm). Each mesh is 0.4 in (1.0 cm) square.
Trunk gauge: 8 sc x 7 rows = 1.25 in x 1 in (3.2 cm x 2.5 cm).
Work Rows 1–3 as a test, then measure flat before you continue.
- After Row 1: width 3.6 in (9.1 cm)
- After Row 3: height 1.2 in (3.0 cm)
- After Row 6: height 2.4 in (6.1 cm)
- After Row 9: height 3.6 in (9.1 cm), tip centered over Row 1
- After edging: 3.85 in x 3.85 in (9.8 cm x 9.8 cm)
If 5 meshes measure more than 2 1/8 in (5.4 cm), go down one hook size. If they measure less than 1 7/8 in (4.8 cm), go up one hook size. If the cells come out taller than they are wide, keep your dc a little shorter by not pulling up the first loop as high.
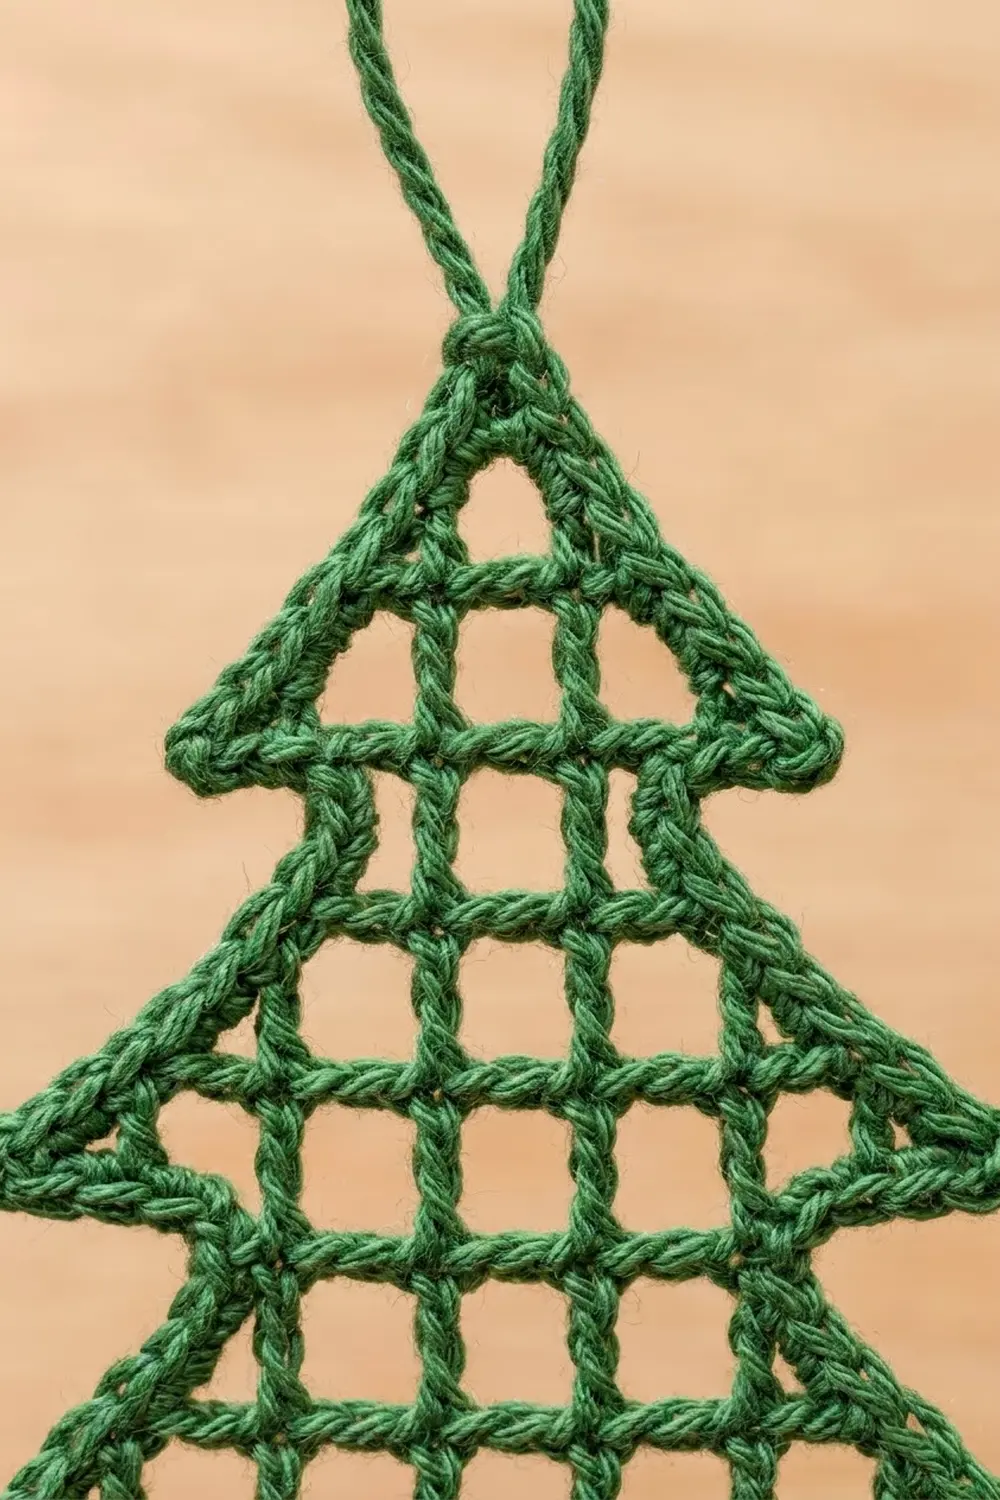
Tree (Green)
With green, ch 32.
Row 1 (RS): Dc in 8th ch from hook. The 7 skipped ch count as the first dc, ch 2 and 2 base ch. [Ch 2, sk 2 ch, dc in next ch] 8 times. Turn.
9 meshes, 10 posts, 28 sts.
Tier 1
Row 2: Sl st in each of next 2 ch and in next dc. Ch 5 (counts as dc + ch 2 here and throughout). Dc in next dc, [ch 2, dc in next dc] 6 times. Leave the last mesh unworked. Turn.
7 meshes, 8 posts, 22 sts.
Row 3: Sl st in each of next 2 ch and in next dc. Ch 5, dc in next dc, [ch 2, dc in next dc] 4 times. Leave the last mesh unworked. Turn.
5 meshes, 6 posts, 16 sts.
Tier 2
Row 4: Beg-inc. [Ch 2, dc in next dc] 5 times, working the last dc in the 3rd ch of the turning ch-5. End-inc. Turn.
7 meshes, 8 posts, 22 sts.
Row 5: Sl st in each of next 2 ch and in next dc. Ch 5, dc in next dc, [ch 2, dc in next dc] 4 times. Leave the last mesh unworked. Turn.
5 meshes, 6 posts, 16 sts.
Row 6: Sl st in each of next 2 ch and in next dc. Ch 5, dc in next dc, [ch 2, dc in next dc] 2 times. Leave the last mesh unworked. Turn.
3 meshes, 4 posts, 10 sts.
Tier 3
Row 7: Beg-inc. [Ch 2, dc in next dc] 3 times, working the last dc in the 3rd ch of the turning ch-5. End-inc. Turn.
5 meshes, 6 posts, 16 sts.
Row 8: Sl st in each of next 2 ch and in next dc. Ch 5, dc in next dc, [ch 2, dc in next dc] 2 times. Leave the last mesh unworked. Turn.
3 meshes, 4 posts, 10 sts.
Row 9: Sl st in each of next 2 ch and in next dc. Ch 5, dc in next dc.
1 mesh, 2 posts, 4 sts.
Fasten off, leaving a 4 in (10.2 cm) tail.
Count check: Each decrease row has 2 fewer meshes than the row before (6 fewer stitches). Each increase row has 2 more meshes (6 more stitches). Rows 4 and 7 overhang the row below by one mesh on each side, which creates the tier ledges.
Edging and Hanging Loop
Edging gauge
Work 2 sc along each 0.4 in (1.0 cm) post side or ledge, and 1 sc at each corner point. Each diagonal ch-4 spans one stair-step, about 0.57 in (1.4 cm) corner to corner.
Edging round
Work with the RS facing. Join green with a sl st in the top of the right-hand edge stitch of Row 9, ch 1, and work as follows.
Peak: Sc in the same stitch, sc in the ch-2 sp, ch 25 for the hanging loop, sc in the same ch-2 sp, sc in the top of the left-hand edge stitch.
4 sc and 1 loop.
Left side (working down):
1. Ch 4, sc in the top of the Row 8 edge stitch. Ch 4, sc in the top of the Row 7 edge stitch.
2. Work 2 sc down the side of the Row 7 edge stitch, 1 sc in its outer bottom corner, and 2 sc along the underside of the overhanging mesh.
3. Sc in the top of the Row 6 edge stitch. Ch 4, sc in the top of the Row 5 edge stitch. Ch 4, sc in the top of the Row 4 edge stitch.
4. Work 2 sc down the Row 4 edge stitch, 1 sc in the corner, and 2 sc along the underside.
5. Sc in the top of the Row 3 edge stitch. Ch 4, sc in the top of the Row 2 edge stitch. Ch 4, sc in the top of the Row 1 edge stitch.
6. Work 2 sc down the Row 1 edge stitch.
20 sc and 6 ch-4 sps.
Bottom: Working in the free loops of the foundation chain, work 3 sc in the first ch, 1 sc in each of the next 26 ch, and 3 sc in the last ch.
32 sc.
Right side (working up): Mirror the left side.
1. Work 2 sc up the Row 1 edge stitch and sc in its top. Ch 4, sc in the top of Row 2. Ch 4, sc in the top of Row 3.
2. Work 2 sc along the underside of the Row 4 overhang, 1 sc in the corner, 2 sc up the edge stitch, and sc in its top.
3. Ch 4, sc in the top of Row 5. Ch 4, sc in the top of Row 6.
4. Work 2 sc along the underside of the Row 7 overhang, 1 sc in the corner, 2 sc up the edge stitch, and sc in its top.
5. Ch 4, sc in the top of Row 8. Ch 4, then sl st to the first sc.
20 sc and 6 ch-4 sps.
Round total: 76 sc (4 + 20 + 32 + 20), 12 ch-4 sps and 1 ch-25 loop. Fasten off.
Why the math works
Every row is one mesh tall, so each vertical post side gets 2 sc, matching the 2 ch across the top of a mesh. That keeps the edging flat on straight edges.
On the tier slopes, each row steps in by exactly one mesh. The stair corners therefore line up on a 45-degree line, and a single ch-4 between corner points makes a straight diagonal. The small triangle left under each chain is part of the design.
The bottom count of 32 is the 28 foundation chains plus 2 extra sc at each corner. That allows the corners to turn without cupping.
Trunk (Brown)
Find the trunk position on the bottom edge. Starting at the bottom-left corner, skip the 3 corner sc and the next 9 sc. With the RS facing, join brown in the next sc. There are 12 sc on each side of the trunk position, so it is centered.
Row 1: Ch 1, sc in the same sc and in each of the next 7 sc. Turn. (8 sc)
Rows 2–7: Ch 1, sc in each sc across. Turn. (8 sc)
Fasten off. The trunk should measure 1.25 in wide x 1 in tall (3.2 cm x 2.5 cm). Weave in all ends along the edging so they do not cross the open cells.
Final Blocking
- Draw a 3.85 in (9.8 cm) square on paper and mark its center line. Place it under plastic wrap on your blocking mat.
- Spray the ornament until it is evenly damp, not dripping.
- Lay it RS up, with the peak on the center line and the bottom edge on the bottom of the square.
- Pin the two bottom corners, then the peak. Pin each tier tip and each ledge corner so the left and right sides mirror each other.
- Gently square up the mesh cells with a blunt needle so every opening is about 0.4 in (1.0 cm).
- Pin the trunk straight and square, 1 in (2.5 cm) below the bottom edge.
- If you want a firmer ornament, brush on a thin coat of fabric stiffener or spray starch.
- Let it dry completely before you unpin it.
Final Quality-Control Checklist
- 9 rows with mesh counts of 9, 7, 5, 7, 5, 3, 5, 3, 1
- All mesh cells open and roughly square
- Edging round has 76 sc and 12 ch-4 sps
- Diagonal slopes are straight, with no stair-step bumps
- Tier tips stick out evenly on both sides
- Trunk is 8 sc wide, 7 rows tall and centered (12 sc on each side)
- Hanging loop is centered on the peak
- Overall size is 3.85 in x 4.85 in (9.8 cm x 12.3 cm) without the loop
- All ends woven in invisibly
Troubleshooting
Cells are tall rectangles: Your dc are too loose vertically. Shorten the first pulled-up loop, or go down a hook size.
The tree leans to one side: You probably worked an extra or missing repeat in a decrease row. Count posts after each row (n + 1 for n meshes).
The end-inc cell is distorted: Make sure the trtr goes into the same stitch as the last dc. Keep its loops even and do not yank the first one.
Diagonal edging puckers: Change the ch-4 to ch-5.
Diagonal edging ripples: Change the ch-4 to ch-3.
The bottom edge flares: Check that you worked exactly 26 sc between the corner groups.
The trunk is off-center: Pull out the trunk and recount 12 sc in from each corner.
The loop twists: Before blocking, twist it against its natural direction once, then pin it flat to dry.
Care
Hand wash in cool water with mild soap, press out the water in a towel, and reshape flat to dry. Re-stiffen after washing if you used starch.
Final Notes
The measurement chain is simple:
– Each mesh is 0.4 in (1.0 cm).
– 9 meshes and 9 rows make a 3.6 in (9.1 cm) square tree.
– The 1/8 in (0.3 cm) edging brings it to 3.85 in (9.8 cm).
– The 1 in (2.5 cm) trunk brings the height to 4.85 in (12.3 cm).
– The loop adds about 1.25 in (3.2 cm), for 6.1 in (15.5 cm) in total.
If your Row 1 measures correctly, everything after it falls into place.
Happy crocheting!