
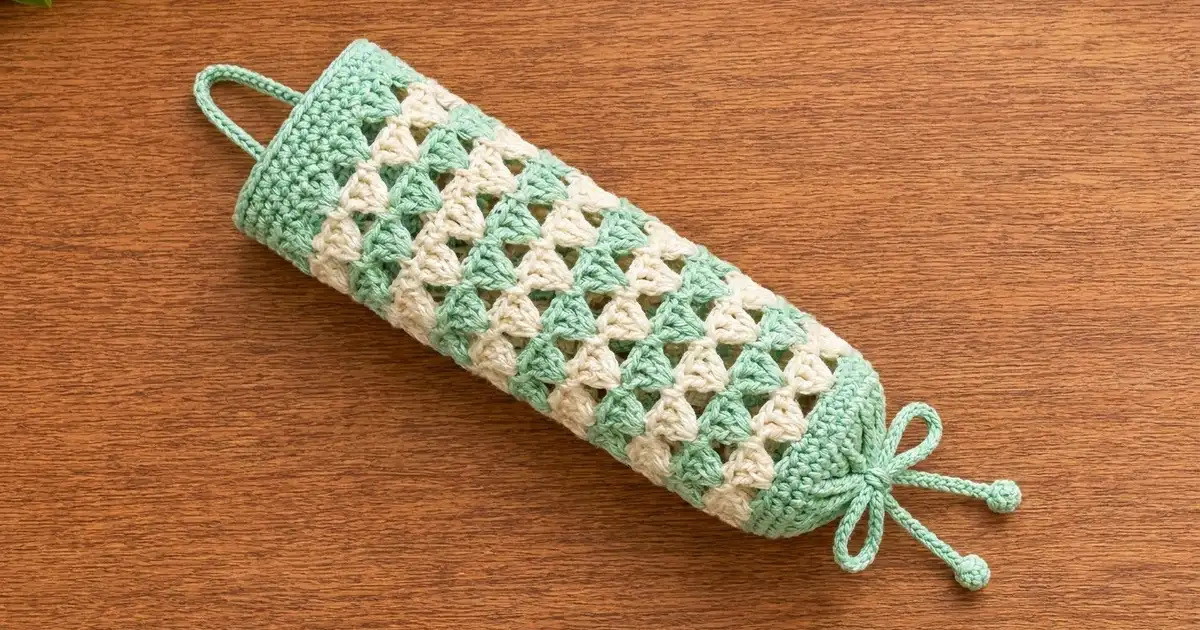
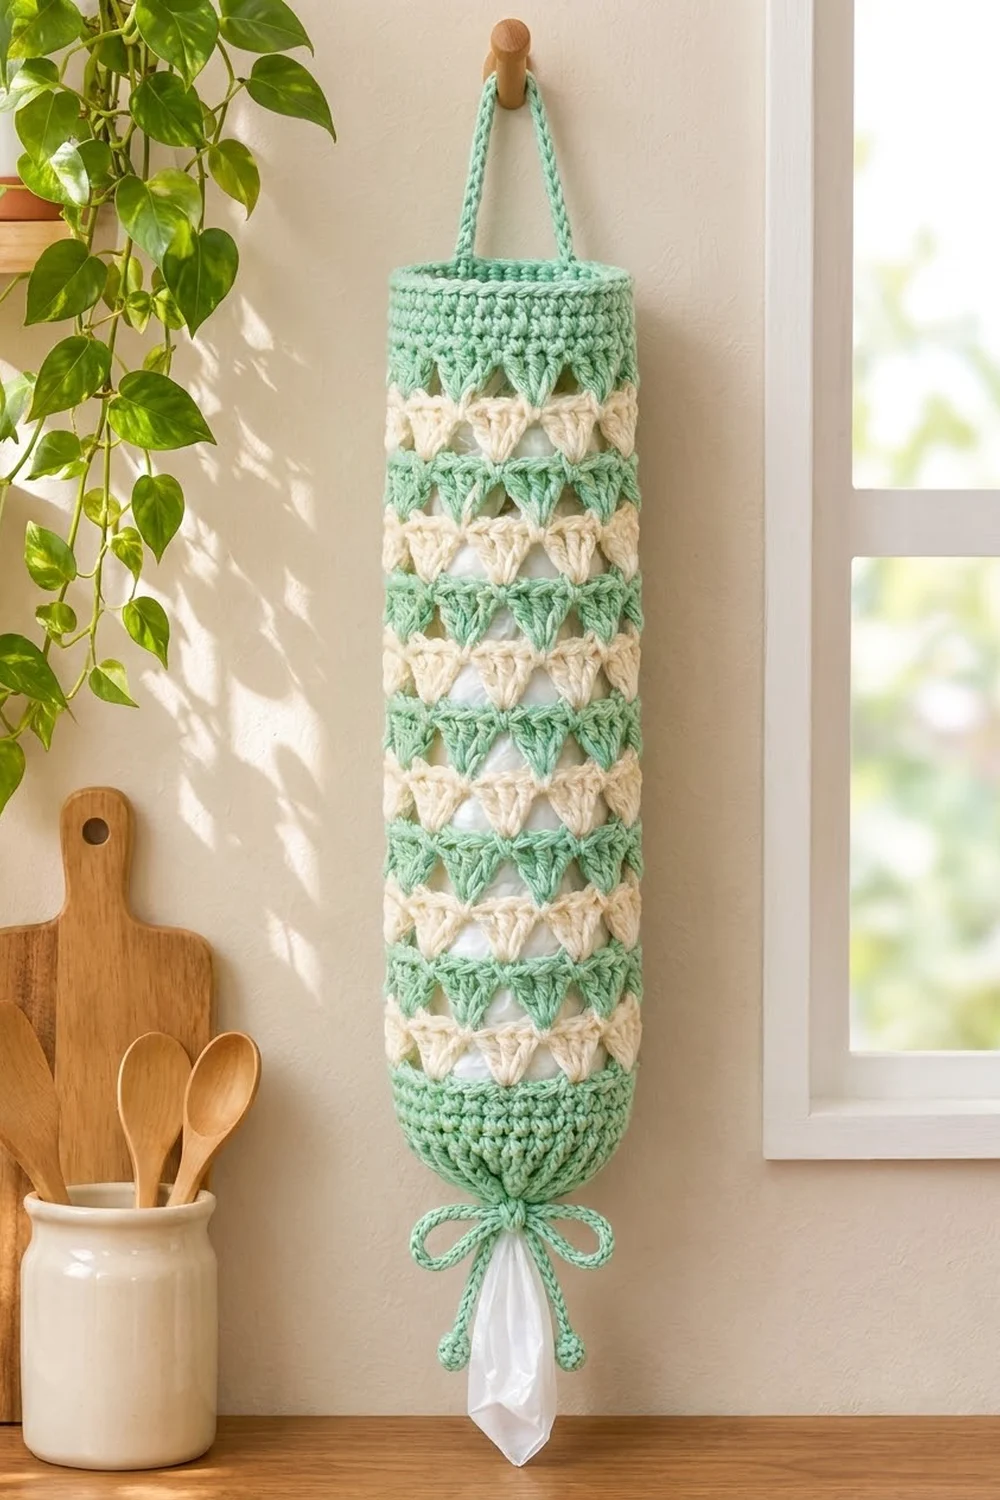
The Mint Meringue Bag Holder is a tall, open-work tube that keeps plastic grocery bags tidy and ready to grab. Rows of small, solid triangles in soft mint green and creamy white stack around the body, and the gaps between them give it a light, airy lattice look.
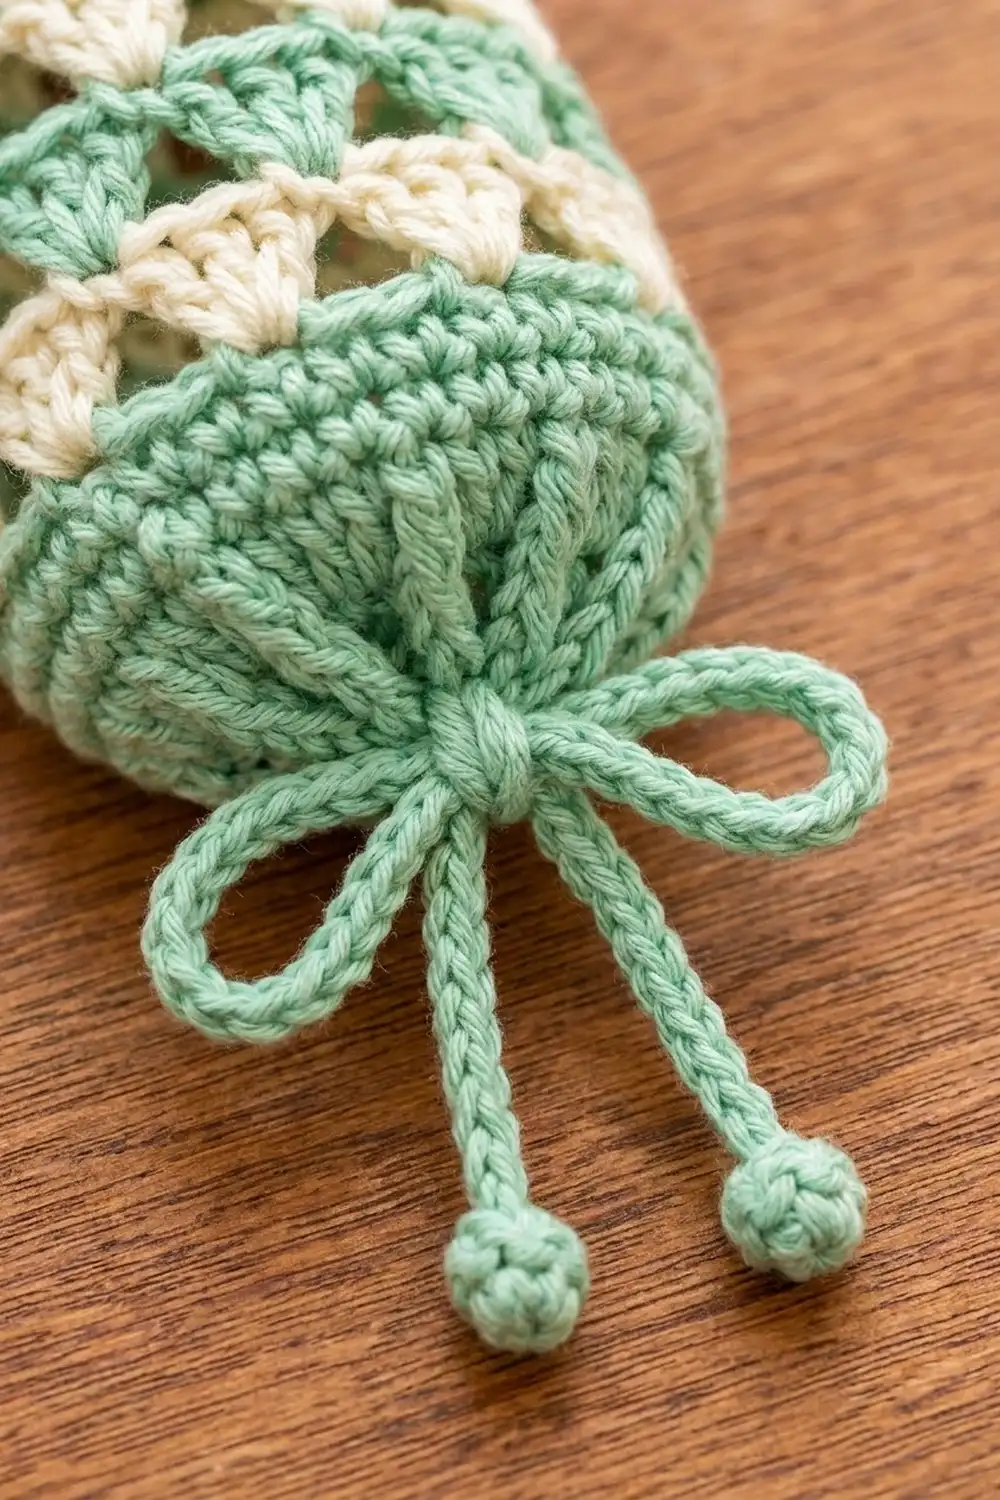
The style is fresh and farmhouse-simple. A plain mint single crochet band frames the top and bottom. A mint cord loop hangs it from a hook or peg, and a mint drawstring with little ball ends gathers the bottom into a small opening, finished with a bow. You stuff bags in the top and pull them out the bottom one at a time.
This pattern uses US crochet terms. The finished body measures 6 in (15.2 cm) wide when laid flat, 12 in (30.5 cm) around, and 18.1 in (46.0 cm) tall, not counting the hanging loop.
Construction is simple. You chain a ring and work the body in joined rounds from the bottom up: a single crochet band with one eyelet round, 19 shell rounds that switch color every round, and a single crochet top band. Then you make two cords and two small balls, and put everything together.
Finished Size and Construction
- Finished size: 6 in (15.2 cm) wide flat × 18.1 in (46.0 cm) tall; 12 in (30.5 cm) around
- Skill level: Easy / advanced beginner
- Terminology: US crochet terms
- Yarn weight: Worsted (#4), cotton or cotton blend
- Hook: 5.0 mm (H-8)
- Number of pieces: 1 body tube, plus 1 hanging loop cord, 1 drawstring cord, and 2 small balls
- Layout: Single seamless tube worked in the round; the cords are sewn or threaded on
- Body before top band: 6 in (15.2 cm) wide × 16.8 in (42.7 cm) tall
- Top band (border) depth: 1.3 in (3.3 cm)
- Bottom band depth: 1.6 in (4.1 cm)
Materials
Choose a smooth worsted-weight cotton with about 85 m per 50 g. Cotton holds its shape and doesn’t stretch out under the weight of the bags.
- Color A – Mint green: 60 g / 102 m (bottom band, 9 shell rounds, top band, both cords, balls)
- Color B – Cream: 40 g / 68 m (10 shell rounds)
- 5.0 mm (H-8) crochet hook
- Tapestry needle
- 4 locking stitch markers
- Scissors
- A pinch of fiberfill or yarn scraps for the balls
- Measuring tape, rust-proof pins, and a spray bottle for blocking
These amounts already include a safety margin of about 15%, so a typical tension difference won’t leave you short.
Abbreviations (US Terms)
- ch – chain
- sl st – slip stitch
- sc – single crochet
- dc – double crochet
- sc2tog – single crochet 2 together
- sk – skip
- sp(s) – space(s)
- rep – repeat
- st(s) – stitch(es)
- beg – beginning
Special stitch – Shell: (2 dc, ch 1, 2 dc) all in the same stitch or space. One shell has 4 dc and 1 center ch-1 sp. When you start a round with ch 3, that ch 3 counts as the first dc of the first shell.
Gauge and Checkpoints
Single crochet gauge: 16 sc and 18 rounds = 4 in (10.2 cm) in joined rounds.
Shell gauge: 1 shell repeat (shell + ch 1) = 1 in (2.5 cm) wide; 5 shell rounds = 4 in (10.2 cm) tall, so each round is about 0.8 in (2.0 cm).
The bottom band works as your gauge swatch. Make Rounds 1–6, then lay the tube flat and measure before going on.
- Checkpoint 1 (after Round 6): 6 in (15.2 cm) wide flat, 12 in (30.5 cm) around, about 1.6 in (4.1 cm) tall.
- Checkpoint 2 (after Round 11): the 5 shell rounds measure 4 in (10.2 cm) tall and the tube is still 6 in (15.2 cm) wide flat.
- Checkpoint 3 (after Round 25): body is 16.8 in (42.7 cm) tall.
- Checkpoint 4 (after Round 31): body is 18.1 in (46.0 cm) tall.
If your tube is too wide, go down a hook size (4.5 mm). If it’s too narrow, go up a size (5.5 mm). Don’t add or remove stitches. The shell pattern repeats over 4 stitches, so the count must stay at 48. A width difference of 0.25 in (0.6 cm) or less is fine, because blocking will even it out.
Body
Bottom Band (Color A)
Foundation: With Color A, ch 48. Join with a sl st to the first ch to make a ring, taking care not to twist the chain.
Round 1: Ch 1, sc in each ch around, join with sl st to first sc. (48 sc)
Round 2 (eyelet round): Ch 4 (counts as dc + ch 1), sk next sc, dc in next sc, ch 1, sk next sc; rep from * 22 more times, join with sl st to 3rd ch of beg ch-4. (24 dc + 24 ch-1 sps = 48 sts)*
The drawstring will go through these 24 ch-1 spaces.
Round 3: Ch 1, sc in each dc and in each ch-1 sp around, join. (48 sc: 24 in dc + 24 in ch-1 sps)
Rounds 4–6: Ch 1, sc in each sc around, join. (48 sc) At the end of Round 6, fasten off.
Place a marker in sc 1 and another in sc 25. These show the two side folds and divide the tube into a front and a back of 24 sts each. Check Checkpoint 1 now.
Shell Section (Alternating Colors)
Fasten off at the end of every shell round, and join the next color new each time. To cut down on weaving later, crochet over the tails for the first few stitches of each round, on the inside of the tube.
Round 7 (Color B): Join B with a sl st in any sc. Ch 3, (dc, ch 1, 2 dc) in same sc (first shell made), ch 1, sk next 3 sc, shell in next sc, ch 1, sk next 3 sc; rep from * 10 more times, join with sl st to top of beg ch-3. Fasten off. (12 shells + 12 ch-1 sps between shells = 48 dc, 24 ch-1 sps)*
Each repeat takes up exactly 4 sc: 1 for the shell plus 3 skipped. That’s why 12 repeats fit evenly onto 48 sc.
Round 8 (Color A): Join A with a sl st in any ch-1 sp between two shells (not a shell center). Ch 3, (dc, ch 1, 2 dc) in same sp, ch 1, shell in next between-shell ch-1 sp, ch 1; rep from * 10 more times, join to top of beg ch-3. Fasten off. (12 shells, 48 dc, 24 ch-1 sps)*
The ch 1 between the new shells passes over the center of each shell below. That’s what offsets the triangles and makes the small triangular holes.
Rounds 9–25: Rep Round 8, alternating colors: odd rounds in Color B, even rounds in Color A. Each round has 12 shells, 48 dc, 24 ch-1 sps. Round 25 is Color B.
The shell section is 19 rounds (Rounds 7–25): 10 cream rounds and 9 mint rounds, about 15.2 in (38.6 cm) tall. Check Checkpoint 3: 1.6 in (4.1 cm) + 15.2 in (38.6 cm) = 16.8 in (42.7 cm).
Top Band (Border)
The top band works like the border for this piece. It turns the lacy shell edge back into a firm 48-stitch rim that holds its shape and supports the hanging loop.
Border gauge: 16 sc = 4 in (10.2 cm), so 48 sc = 12 in (30.5 cm) around and 24 sc = 6 in (15.2 cm) per flat side. A tube has no corners, so each “side” is just half the round between the two fold markers. No corner stitches are added.
Round 26 (conversion round, Color A): Join A with a sl st in the first dc of any shell. Ch 1, sc in the same dc, sc in each of the next 3 dc of that shell, then sc in each of the 4 dc of the next shell; rep from * around, skipping every ch-1 sp, join. (48 sc = 48 dc worked 1 each + 0 extra; 24 per side)*
Rounds 27–31: Ch 1, sc in each sc around, join. (48 sc; 24 per side)
At the end of Round 31, fasten off, leaving a 6 in (15.2 cm) tail.
Why the math works: Every shell round has exactly 48 dc (12 shells × 4 dc). Putting 1 sc in each dc and none in the chain spaces gives back the 48 stitches from the bottom band. So the top and bottom bands match at 12 in (30.5 cm) around, and the tube hangs straight instead of flaring. Six sc rounds at 18 rounds per 4 in (10.2 cm) gives a depth of 1.3 in (3.3 cm).
Lay the tube flat with the round joins at one side fold. Move your markers to the two fold sts of Round 31 (sc 1 and sc 25). The hanging loop gets sewn at these points.
Cords and Assembly
Hanging Loop (Color A)
Ch 61. Sl st in the back bump of the 2nd ch from hook and in the back bump of each ch across. (60 sl st) The cord should be about 12 in (30.5 cm) long. Fasten off, leaving 8 in (20.3 cm) tails at both ends.
Drawstring (Color A)
Ch 151. Sl st in the back bump of the 2nd ch from hook and in the back bump of each ch across. (150 sl st) The cord should be about 30 in (76.2 cm) long. Fasten off, leaving short tails.
Balls (make 2, Color A)
Round 1: Make a magic ring, 6 sc in ring, pull it closed, join. (6 sc)
Round 2: Ch 1, sc in each sc around, join. (6 sc)
Stuff with a pinch of fiberfill or scraps.
Round 3: Ch 1, sc2tog 3 times, join. (3 sts) Fasten off with an 8 in (20.3 cm) tail.
Assembly
- Loop: Put 1 in (2.5 cm) of each loop end inside the tube at the marked fold sts, lined up with Rounds 27–31. Sew each end down firmly through the sc. This leaves 10 in (25.4 cm) of cord free, making an arch about 4 in (10.2 cm) above the rim.
- Drawstring: Starting at the center front of Round 2, weave the drawstring in and out through all 24 ch-1 eyelet spaces. Bring it out in the space next to where you started, so both ends come out at the front.
- Balls: Sew one ball firmly to each end of the drawstring with its tail. Hide the tail inside the ball.
- Gather: Pull both ends until the bottom gathers into an opening about 1.5 in (3.8 cm) across, then tie a bow. Round 1 makes a small ruffle below the drawstring.
Final Blocking
- Weave in all remaining ends on the inside. Weave each tail through stitches of its own color.
- Untie the bow and loosen the drawstring so the tube lies open.
- Mist the tube until it’s damp, or wet it and roll it in a towel to press out extra water.
- Lay it flat with the round joins at one side fold. Pin it to 6 in (15.2 cm) wide and 18.1 in (46.0 cm) tall.
- Gently open each shell so the triangles point down evenly and the holes look matching.
- Let it dry completely. Then turn it so the fold lines move, and let it dry flat again so no hard creases form.
- Cinch the drawstring again and retie the bow.
Final Quality-Control Checklist
- Every round of the bands has 48 sc, and Round 2 has 24 eyelets.
- Every shell round has 12 shells, and the triangles are offset from the round below.
- Colors alternate cleanly: 10 cream rounds and 9 mint rounds, with cream next to both bands.
- The tube is 6 in (15.2 cm) wide flat all the way up, with no flare at the top.
- Total body height is 18.1 in (46.0 cm).
- The loop ends are sewn on at opposite folds, and the tube hangs straight.
- The balls are secure, and the bow holds when you pull a bag out.
- No tails show on the outside.
Troubleshooting
- Tube twists in a spiral: The foundation ring was twisted. Rip back to the foundation, because this can’t be fixed later.
- Wrong shell count: You probably worked a shell into a shell-center space. Shells always go into the between-shell spaces only.
- Top flares out: You worked sc into the ch-1 sps in Round 26. Rework it with 1 sc in each dc only.
- Tube is too short: Your shell rounds are less than 0.8 in (2.0 cm) tall. Use a larger hook, or add 2 more shell rounds (one of each color) to keep the color order.
- Bags slip out by themselves: Pull the drawstring tighter so the opening is smaller than 1.5 in (3.8 cm).
- Loop pulls the rim out of shape: Sew the ends lower, through all of Rounds 27–31, not just the top round.
Care
Hand wash in cool water with mild soap, press out the water in a towel, and reshape to 6 in (15.2 cm) × 18.1 in (46.0 cm) to dry flat. Don’t tumble dry. Heat can shrink cotton and make the tube shorter.
Final Notes
Here’s how the measurements build on each other. The 48-stitch ring sets a 12 in (30.5 cm) circumference, or 6 in (15.2 cm) flat. Each 4-stitch repeat holds one shell that is 1 in (2.5 cm) wide. The 1.6 in (4.1 cm) bottom band, 15.2 in (38.6 cm) shell section, and 1.3 in (3.3 cm) top band add up to 18.1 in (46.0 cm). Check each stage as you go, and the finished holder will hang straight and neat.
Happy crocheting!