

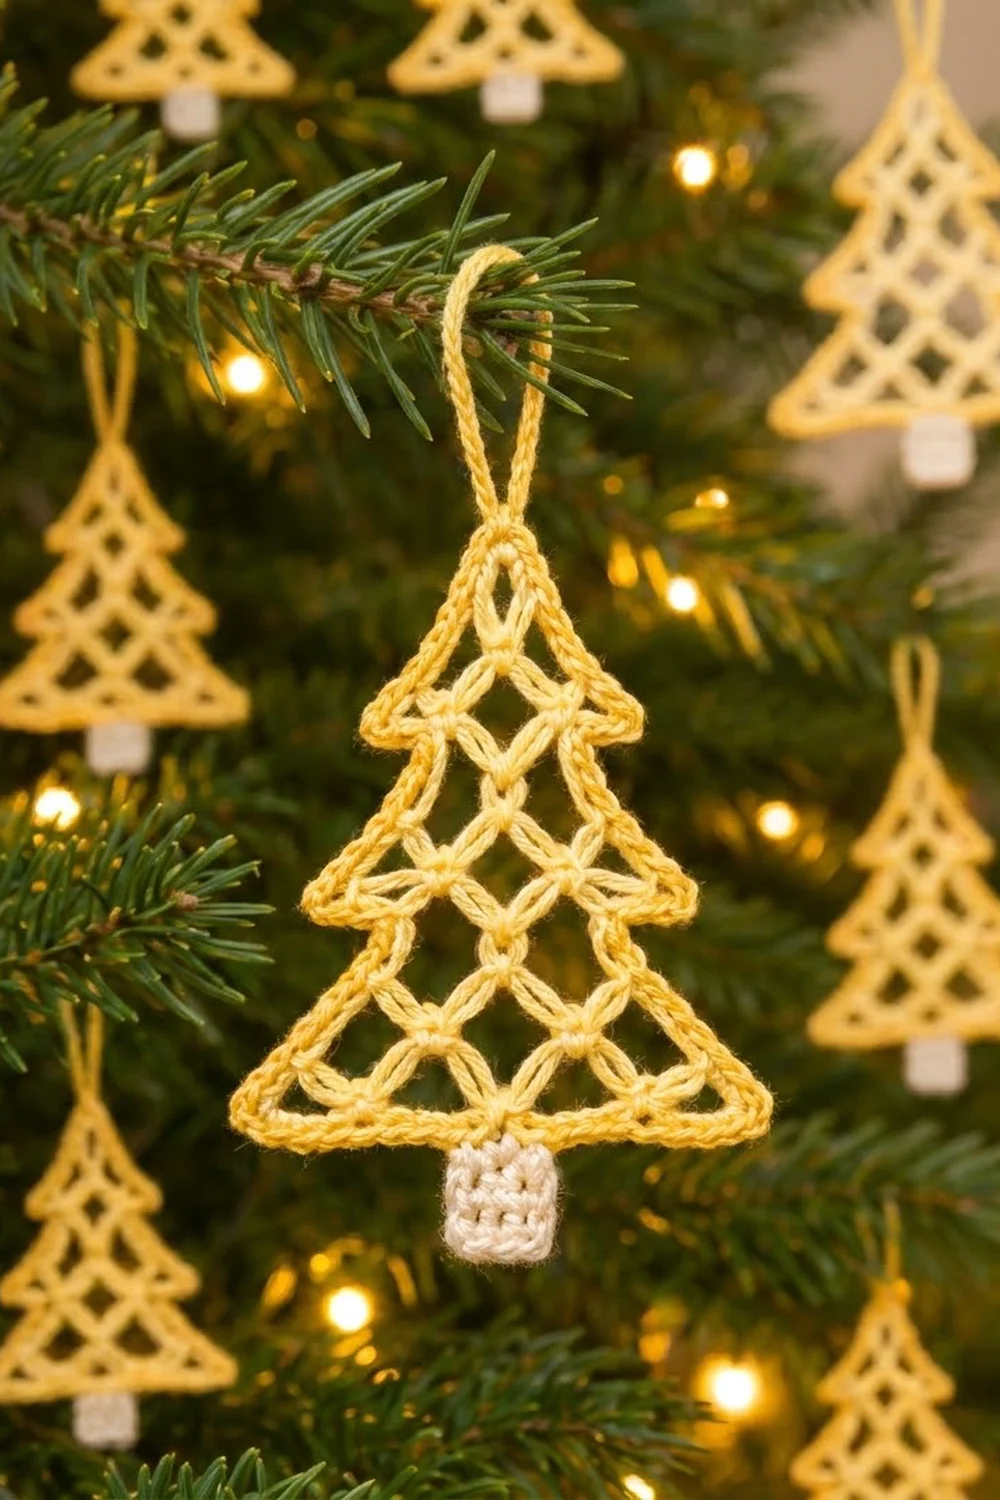
The Golden Lattice Christmas Tree is a light, lacy ornament. Its open diamond mesh lets the tree lights shine through. A firm corded edge frames the triangle, and small pointed ledges on each side give it the classic three-tier shape.
This version uses butter yellow for the tree and cream for a small solid trunk. Together the colors look soft and slightly vintage, like straw or gold thread. Make a set in one color for a coordinated tree, or switch to white, red or metallic yarn for a different look.
The pattern uses US crochet terms. The finished ornament measures 4.7 in (11.9 cm) wide by 5.1 in (13.0 cm) tall without the loop. With the hanging loop, it is 6.6 in (16.8 cm) tall.
The tree is worked as one piece. You crochet the mesh from the bottom edge up to the tip, and each row ends one loop shorter. Then you work two border rounds around the whole shape: the second round adds the tier ledges and the hanging loop. The trunk is crocheted directly off the bottom edge, so there is no sewing.
Finished Size and Construction
- Finished size: 4.7 in (11.9 cm) wide × 5.1 in (13.0 cm) tall, plus a 1.5 in (3.8 cm) hanging loop
- Skill level: Easy / advanced beginner
- Terminology: US crochet terms
- Yarn weight: DK (#3) cotton
- Hook: 3.5 mm (E-4)
- Number of pieces: 1 (single motif)
- Layout: single standalone ornament, no joining
- Tree body before border: 4.2 in (10.7 cm) wide × 3.8 in (9.7 cm) tall
- Border depth: 0.25 in (0.6 cm) per side
- Trunk: 1 in (2.5 cm) wide × 0.8 in (2.0 cm) tall
Materials
Yarn: Use a smooth mercerized cotton or cotton blend in DK weight, about 105 m per 50 g. Cotton holds the mesh crisply and takes blocking well. Fuzzy yarns hide the diamond pattern, so avoid them.
- Color A – Butter Yellow (tree, border, loop): 8 g / 17 m
- Color B – Cream (trunk): 2 g / 4 m
These quantities include a margin for your gauge swatch and the yarn tails.
Tools:
– 3.5 mm (E-4) crochet hook
– Tapestry needle
– Scissors
– Blocking mat or folded towel
– Rust-proof pins
– Spray bottle with water
– Optional: fabric stiffener or starch for a firmer ornament
Abbreviations (US Terms)
- ch – chain
- sl st – slip stitch
- sc – single crochet
- hdc – half double crochet
- dc – double crochet
- sk – skip
- sp – space
- st(s) – stitch(es)
Special stitch – Spur: Ch 4, sc in 2nd ch from hook, hdc in next ch, dc in next ch. This makes a small tapered wedge that sticks out from the edge. It is 0.5 in (1.3 cm) long, with a flat chain side and a sloped stitched side. For counting, each spur equals 3 sts (sc, hdc, dc). Its chains are not counted.
Gauge and Checkpoints
Solid gauge: 10 sc and 10 rows = 2 in (5.1 cm) square.
Mesh gauge: each mesh row adds about 0.6 in (1.5 cm) of height after blocking.
Make one full tree before you plan a set, and measure it at each stage:
- After Row 1: the foundation row of 21 sc measures 4.2 in (10.7 cm).
- After Row 4: the piece is 2 in (5.1 cm) tall when gently stretched.
- After Row 7: the unbordered triangle is 4.2 in (10.7 cm) wide × 3.8 in (9.7 cm) tall.
- After the border: the body is 4.7 in (11.9 cm) wide × 4.3 in (10.9 cm) tall.
- After the trunk: the total height is 5.1 in (13.0 cm) without the loop.
If your Row 1 is wider than 4.2 in (10.7 cm), go down a hook size to 3.25 mm (D-3). If it is narrower, go up to 3.75 mm (F-5).
If the width is right but the mesh is shorter than expected, your chains are tight. Loosen your chain tension rather than changing the hook. The mesh height comes mostly from the chain loops.
Tree Body (Color A)
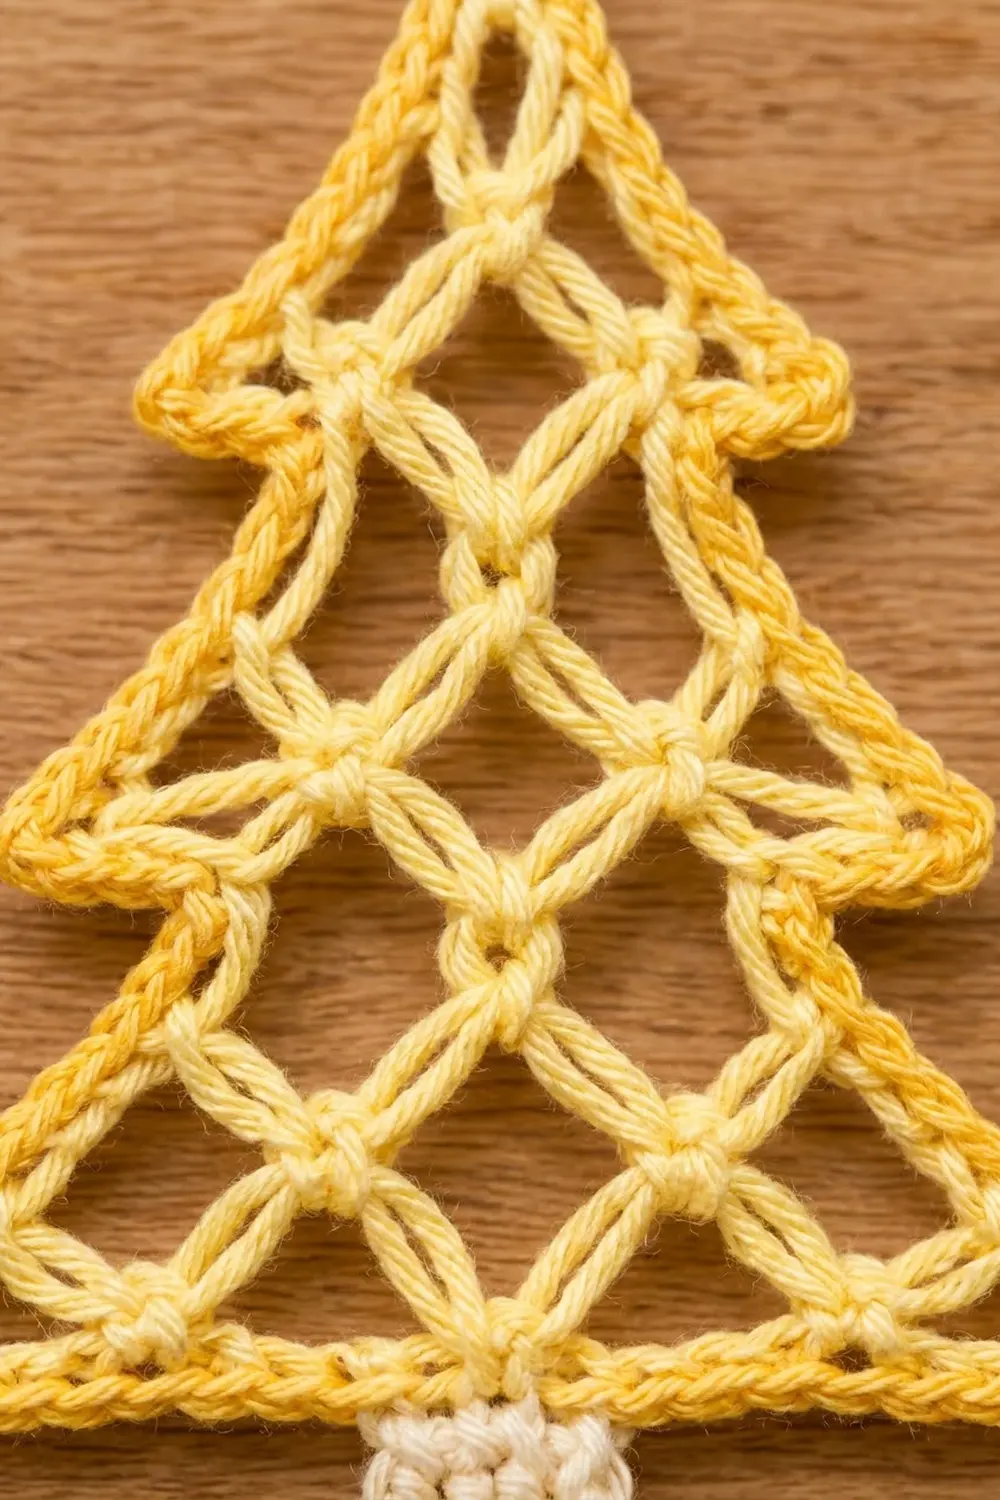
The body is worked in turning rows from the bottom edge up to the tip. From Row 3 on, you slip stitch to the center of the first loop at the start of each row, then work an sc into the center of each loop. Each row therefore has one loop fewer than the row before. Each sc into a loop center forms one of the small knots where the diamonds meet.
Row 1 (foundation): With Color A, ch 22. Sc in 2nd ch from hook and in each ch across. (21 sc)
Row 2 (first mesh row): Ch 1, turn. Sc in first sc, ch 5, sk 3 sc, sc in next sc; repeat from * 4 more times. (6 sc, 5 ch-5 loops)
Check: 1 sc + 5 repeats × 4 sts = 21 sts used, so the row ends exactly in the last sc.
Row 3: Turn. Sl st in first sc and in next 2 ch, ch 1, sc in same ch-5 loop. Ch 5, sc in next ch-5 loop; repeat from * across. (5 sc, 4 ch-5 loops)
Row 4: Turn. Sl st in first sc and in next 2 ch, ch 1, sc in same loop. Ch 5, sc in next loop; repeat from * across. (4 sc, 3 ch-5 loops)
Row 5: Repeat Row 4. (3 sc, 2 ch-5 loops)
Row 6: Repeat Row 4. (2 sc, 1 ch-5 loop)
Row 7 (tip): Turn. Sl st in first sc and in next 2 ch, ch 1, sc in the ch-5 loop. (1 sc: the apex)
Do not fasten off.
About the side edges: Each side of the triangle is now made of 5 half-loops. These are the outer halves of the first loop in Rows 2, 3, 4, 5 and 6. The border is worked into these half-loops, and that keeps the stitch count the same every time.
Checkpoint: Lay the piece flat and stretch it lightly. It should form a clean triangle 4.2 in (10.7 cm) wide × 3.8 in (9.7 cm) tall, with 5 rows of diamond openings.
Border
Border gauge: 5 sc per 1 in (2.5 cm) along the edges, which matches the solid gauge.
Round 1 (single crochet outline)
Do not turn. Continue with Color A from the apex.
- Apex: Ch 2. This chain forms the apex ch-2 sp.
- First side, working down: Work 4 sc into each of the 5 half-loops (20 sc). Then work 1 sc into the end of Row 1. (21 sc)
- Bottom edge: Work along the underside of the foundation chain. Work 3 sc in the first ch (corner), sc in each of the next 19 ch, then 3 sc in the last ch (corner). (25 sc, including both 3-sc corner groups)
- Second side, working up: Work 1 sc into the end of Row 1, then 4 sc into each of the 5 half-loops. (21 sc)
- Sl st into the apex sc of Row 7.
Round 1 total: 67 sc (21 + 25 + 21), plus the apex ch-2 sp.
The corner stitches are counted once, inside the bottom edge’s 25. They are not added again to the sides.
Round 2 (corded edge, spurs and hanging loop)
Work every sl st loosely so that the edge lies flat. Continue in the same direction as Round 1.
- Hanging loop: Sl st into the apex ch-2 sp, ch 18, sl st into the same ch-2 sp. The 18 chains are about 3 in (7.6 cm) long and fold into a 1.5 in (3.8 cm) loop.
- First side, working down: Sl st in each of the next 4 sc, then work 1 Spur. Sl st in each of the next 8 sc, then work 1 Spur. Sl st in each of the remaining 9 sc. (21 sl st, 2 Spurs)
- Bottom edge: Sl st in each of the 25 sc. (25 sl st)
- Second side, working up: Sl st in each of the next 9 sc, then work 1 Spur. Sl st in each of the next 8 sc, then work 1 Spur. Sl st in each of the last 4 sc. (21 sl st, 2 Spurs)
- Sl st into the apex ch-2 sp. Fasten off.
Round 2 total: 67 sl st, 4 Spurs (12 counted sts) and the 18-ch hanging loop.
Why the Math Works
Each side of the unbordered triangle is about 4.2 in (10.7 cm) long. It has 5 half-loops of about 0.8 in (2.0 cm) each. At 5 sc per inch, 4 sc per half-loop matches that length, so the edge lies flat without pulling in or rippling.
The bottom edge uses 1 sc per foundation chain, plus 2 extra sc at each corner to turn the corner. The result is 21 + 4 = 25 sc.
The spurs are mirrored. On the first side they sit after sc 4 and sc 12, counting from the top. On the second side they sit after sc 9 and sc 17, counting from the bottom. Since 21 − 4 = 17 and 21 − 12 = 9, both sides have their spurs at the same height. Those two heights mark the bottom of the top tier (Rows 6 and 7) and the bottom of the middle tier (Rows 4 and 5).
Trunk (Color B)
Work with the bottom edge facing up and the right side toward you. Count the 25 bottom-edge sts from corner to corner. The trunk goes on the center 5: sts 11 through 15.
Row 1: With Color B, join with a sc in the 11th bottom-edge st. Work it through the Round 2 sl st and the Round 1 sc beneath it. Sc in each of the next 4 sts. (5 sc)
Rows 2–4: Ch 1, turn, sc in each sc across. (5 sc each row)
Fasten off. The trunk measures 1 in (2.5 cm) wide × 0.8 in (2.0 cm) tall. It sits centered, with 10 bottom-edge sts on each side of it.
Weave in all ends inside the solid sc areas: the border, Row 1 and the trunk. Do not weave ends into the mesh, where they would show.
Final Blocking
- Mist the ornament until it is evenly damp, or dip it in diluted fabric stiffener and squeeze out the excess.
- Lay it right side up on the blocking mat.
- Pin the two bottom corners 4.7 in (11.9 cm) apart, keeping the bottom edge straight.
- Pin the apex 4.3 in (10.9 cm) above the center of the bottom edge.
- Open each diamond by pinning through the sc knots. Work row by row from the bottom up, so that each chain loop forms an even point.
- Pin each spur straight out, with the flat chain side facing down. Each spur should stick out about 0.5 in (1.3 cm).
- Pin the trunk square, 1 in (2.5 cm) wide and straight down from the center.
- Pin the hanging loop into a neat, narrow oval.
- Let it dry completely, at least 12 hours. Unpin it only when it is fully dry.
Final Quality-Control Checklist
- [ ] Row stitch counts were 21, 6/5, 5/4, 4/3, 3/2, 2/1 and 1 (sc/loops)
- [ ] Border Round 1 has 21 + 25 + 21 = 67 sc
- [ ] The 4 spurs are mirrored at the same heights on both sides
- [ ] The body measures 4.7 in (11.9 cm) × 4.3 in (10.9 cm)
- [ ] The trunk is centered on bottom-edge sts 11–15
- [ ] The total height is 5.1 in (13.0 cm) without the loop
- [ ] The hanging loop is firmly anchored in the apex ch-2 sp
- [ ] All ends are hidden in solid stitches
- [ ] The diamonds are open and even, with no twisted chains
Troubleshooting
The triangle leans to one side. You probably skipped the sl st into the first loop on some rows. Every row from 3 to 7 must start with the sl st move.
The bottom edge flares. Work Row 1 with a smaller hook, or put the 19 middle bottom-edge sc under slight tension.
The side edges ripple. Your border sc are loose. Work 3 sc into the top half-loop instead of 4, but only if all 4 sides of your swatch confirm a loose gauge.
The side edges pull inward. Keep 4 sc per half-loop and loosen your tension. Do not add extra sc.
The spurs curl or point up. Pin them flat while damp, and use stiffener if they still curl.
The diamonds look uneven. Make all ch-5 loops with the same tension, and block the knots into straight rows.
The trunk is off-center. Recount the 25 bottom-edge sts from corner to corner. Corner sts are counted as part of the bottom edge.
Care
Hand wash in cool water with mild soap, press out the water in a towel, and re-block flat. Store the ornament flat between tissue paper so the spurs and loop keep their shape.
Final Notes
The measurement chain is simple:
– Row 1 sets the 4.2 in (10.7 cm) width.
– Six mesh rows build the 3.8 in (9.7 cm) triangle.
– The two border rounds add 0.25 in (0.6 cm) on each side, for a 4.7 in × 4.3 in (11.9 cm × 10.9 cm) body.
– The trunk adds 0.8 in (2.0 cm), for a finished height of 5.1 in (13.0 cm).
If Row 1 matches the target width, the rest of the ornament should follow. Make one tree, check it against these numbers, then make the rest of your set.
Happy crocheting!