

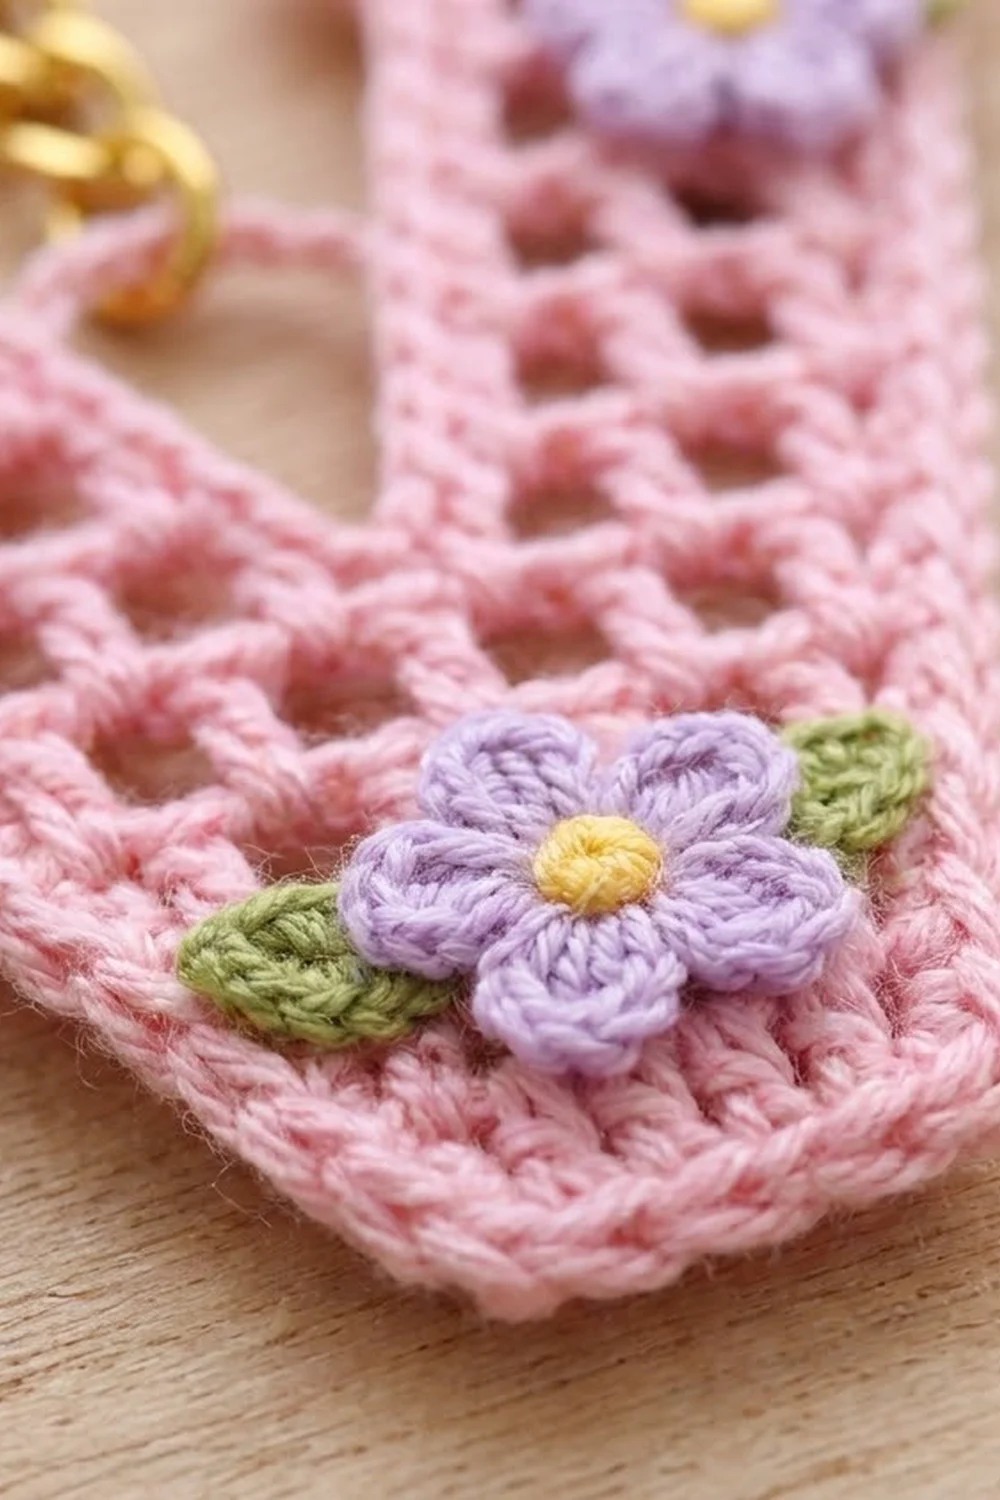
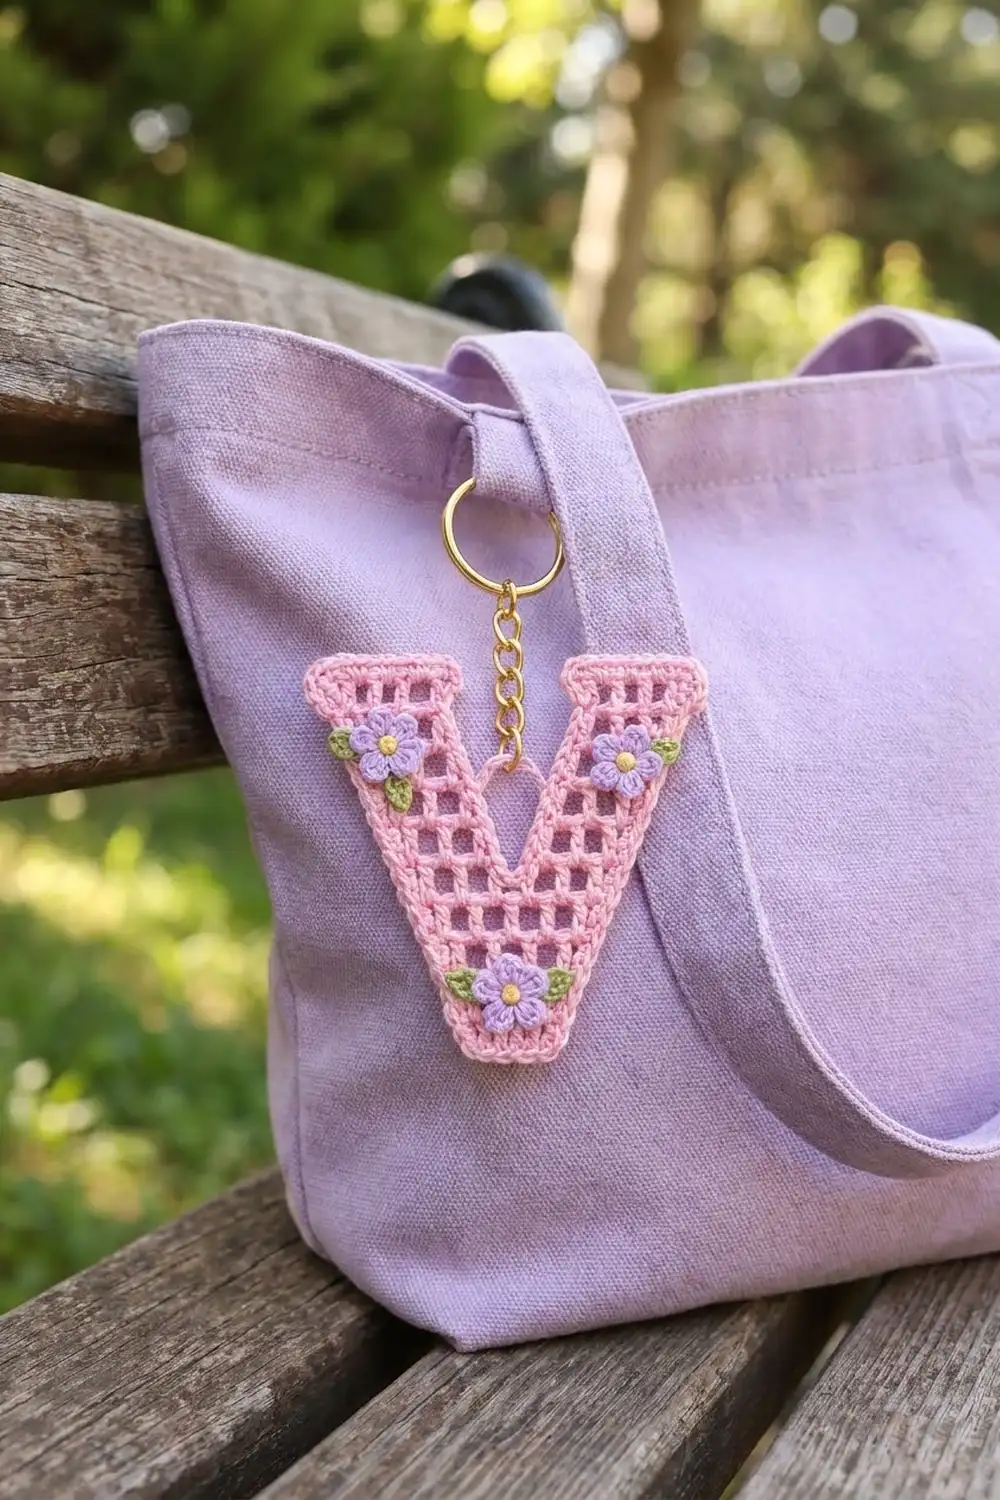
This little letter V is worked in airy filet mesh in soft cotton-candy pink. It is finished with a neat single crochet outline and three tiny lilac flowers with sunny yellow centers and green leaves. A gold split ring and a short chain turn it into a sweet keychain or bag charm.
The look is light and graphic. It has square open windows, solid bands at the base and at the top of each arm, and a smooth outline that rounds off the steps in the mesh.
The pattern uses US crochet terms. The finished letter measures 3.5 in (8.9 cm) wide and 3.25 in (8.3 cm) tall, not counting the hanger and hardware.
You work the base of the V in rows from the bottom up, widening as you go, and then split into two arms. Each arm shifts outward by one mesh every 2 rows and ends in a solid band. One round of single crochet outlines the letter, and then you sew on the flowers.
Finished Size and Construction
- Finished size: 3.5 in (8.9 cm) wide x 3.25 in (8.3 cm) tall
- Skill level: Intermediate (filet shaping)
- Terminology: US
- Yarn weight: Fingering, #1 super fine, cotton
- Hook: 2.25 mm (US B-1)
- Number of pieces: 1 letter, plus 3 flowers and 5 leaves as decoration
- Layout: Single piece, no joining
- Mesh grid: 13 meshes wide x 12 rows tall at the widest points
- One mesh: 0.25 in (0.6 cm) square
- Size before border: 3.25 in (8.3 cm) wide x 3 in (7.6 cm) tall
- Border depth: 0.125 in (0.3 cm) on every edge
Materials
Use a smooth mercerized cotton in fingering weight, about 170 m per 50 g. It makes crisp, square mesh that stays neat even when the keychain is handled every day.
- Pink (letter, border, hanger): 8 g, about 27 m
- Lilac (petals): 2 g, about 7 m
- Yellow (flower centers): 1 g, about 3 m
- Green (leaves): 1 g, about 3 m
All quantities include a margin for a gauge swatch and weaving in ends.
Tools:
- 2.25 mm (US B-1) crochet hook
- Tapestry needle and scissors
- Gold split key ring, about 1 in (2.5 cm) across
- Gold chain, about 1.5 in (3.8 cm) long
- 2 gold jump rings, about 0.25 in (0.6 cm)
- 2 pairs of flat-nose pliers
- Blocking pins and foam board
- Optional: fabric stiffener
Abbreviations (US Terms)
- ch – chain
- sl st – slip stitch
- sc – single crochet
- hdc – half double crochet
- dc – double crochet
- dtr – double treble crochet
- sk – skip
- sp – space
- st(s) – stitch(es)
- RS / WS – right side / wrong side
Special Stitches and Techniques
- Mesh: Ch 1, sk next st, dc in next dc. One mesh = 2 sts.
- Beg mesh: Ch 4 (counts as dc and ch 1), sk next st, dc in next dc.
- Inc-start: Ch 5 (counts as 1 base ch, a dc, and a ch-1), then dc in the first dc at the base of the chain. This adds a mesh outside the previous edge.
- Inc-end: Ch 1, dtr in the same st as the last dc. The long dtr forms the outer side of the new mesh.
- Dec-start: Sl st in next ch-1 sp and in next dc, then work a beg mesh.
- Dec-end: Stop one mesh before the end of the row and turn.
- Edge post rule: The last dc of every row goes into the top of the previous row’s edge post. That is the 3rd ch of a beg ch-4, the 4th ch of an inc-start ch-5, the top of a dtr, or the top of the beg ch-3 in Row 1.
A row of n meshes has n + 1 posts and n ch-1 sps, so it holds 2n + 1 sts.
Gauge and Checkpoints
Gauge: 4 meshes and 4 rows = 1 in (2.5 cm), so 8 sts = 1 in (2.5 cm).
Make a swatch first. Ch 14, dc in 6th ch from hook, then (ch 1, sk next ch, dc in next ch) 4 times. This makes 5 meshes. For Rows 2–5, work a beg mesh and 4 meshes, with the last dc in the 4th ch of the turning ch. The swatch should measure 1.25 in (3.2 cm) square. If it is too big, change to a 2.0 mm hook. If it is too small, change to a 2.5 mm hook.
Checkpoints:
- After Row 1: 0.75 in (1.9 cm) wide
- After Row 4: 1.75 in (4.4 cm) wide x 1 in (2.5 cm) tall
- After Row 8: 2.75 in (7.0 cm) across both arms x 2 in (5.1 cm) tall
- After Row 12: 3.25 in (8.3 cm) wide x 3 in (7.6 cm) tall
If you are off by more than 0.125 in (0.3 cm) at Row 4, restart with a different hook. Small errors grow quickly once the arms move outward.
Letter V
Number the mesh columns 1 to 13 from left to right as seen from the RS. RS rows travel right to left, and WS rows travel left to right.
Base
With pink, ch 9.
Row 1 (RS): Dc in 4th ch from hook (skipped ch count as dc) and in each ch across. Turn. 7 dc (3 solid meshes, columns 6–8)
Row 2 (WS): Inc-start, (ch 1, sk next dc, dc in next dc) 3 times, inc-end. Turn. 5 meshes, 11 sts (columns 5–9)
Row 3 (RS): Beg mesh, mesh 4 times. Turn. 5 meshes, 11 sts (columns 5–9)
Row 4 (WS): Inc-start, mesh 5 times, inc-end. Turn. 7 meshes, 15 sts (columns 4–10)
Row 4 is the bar at the bottom of the V notch. Column 7 stays open on top.
Right Arm
Row 5 (RS): Beg mesh, mesh 2 times. Turn, leaving the rest of the row unworked. 3 meshes, 7 sts (columns 8–10)
Row 6 (WS): Dec-start, mesh 1 time, inc-end. Turn. 3 meshes, 7 sts (columns 9–11)
Row 7 (RS): Beg mesh, mesh 2 times. Turn. 3 meshes, 7 sts (columns 9–11)
Row 8 (WS): Dec-start, mesh 1 time, inc-end. Turn. 3 meshes, 7 sts (columns 10–12)
Row 9 (RS): Beg mesh, mesh 2 times. Turn. 3 meshes, 7 sts (columns 10–12)
Row 10 (WS): Dec-start, mesh 1 time, inc-end. Turn. 3 meshes, 7 sts (columns 11–13)
Row 11 (RS): Beg mesh, mesh 2 times. Turn. 3 meshes, 7 sts (columns 11–13)
Row 12 (WS): Ch 3 (counts as dc), dc in each ch-1 sp and dc across. 7 dc (solid band, columns 11–13). Fasten off.
On each WS shaping row, the arm drops one mesh on the inside and adds one on the outside. It stays 3 meshes wide and shifts outward 1 mesh every 2 rows.
Left Arm
Row 5 (RS): With RS facing, sk the unworked ch-1 sp of column 7 on Row 4 and join pink with a sl st in the next dc. Beg mesh, mesh 2 times. Turn. 3 meshes, 7 sts (columns 4–6)
Row 6 (WS): Inc-start, mesh 2 times, dec-end. Turn. 3 meshes, 7 sts (columns 3–5)
Row 7 (RS): Beg mesh, mesh 2 times. Turn. 3 meshes, 7 sts (columns 3–5)
Row 8 (WS): Inc-start, mesh 2 times, dec-end. Turn. 3 meshes, 7 sts (columns 2–4)
Row 9 (RS): Beg mesh, mesh 2 times. Turn. 3 meshes, 7 sts (columns 2–4)
Row 10 (WS): Inc-start, mesh 2 times, dec-end. Turn. 3 meshes, 7 sts (columns 1–3)
Row 11 (RS): Beg mesh, mesh 2 times. Turn. 3 meshes, 7 sts (columns 1–3)
Row 12 (WS): Ch 3 (counts as dc), dc in each ch-1 sp and dc across. 7 dc (solid band, columns 1–3). Fasten off.
The gap between the arms on Row 12 spans columns 4–10, which is 1.75 in (4.4 cm).
Border
Border gauge: 8 sc = 1 in (2.5 cm). Work 1 sc per st along the tops and bottoms of rows, which is 2 sc per mesh. Work 2 sc per row end, since each row is 0.25 in (0.6 cm) tall. Both directions come out at the same density, so the border lies flat.
Step rule: The slanted edges are small staircases. At each step, work 1 sc into the exposed corner. On outer edges, that is the free base of the inc-start chain or the dtr. On inner edges, it is the exposed ch-1 sp.
Rnd 1 (RS): Work counterclockwise, turning the letter as you go. Join pink with a sc in the bottom-left free loop of the foundation ch, then work 2 more sc in the same loop.
- Bottom-left corner: 3 sc
- Bottom edge: 1 sc in each of the next 5 free loops (5 sc)
- Bottom-right corner: 3 sc in the last loop
- Right outer edge: 12 row ends x 2 sc + 5 steps x 1 sc = 29 sc
- Top-right outer corner: 3 sc in the corner st
- Top-right band: 5 sc
- Top-right inner corner: 3 sc
- Right inner edge: 8 row ends (Rows 12–5) x 2 sc + 3 steps x 1 sc = 19 sc
- Notch: 1 sc in the open ch-1 sp of column 7 on Row 4
- Left inner edge: 19 sc
- Top-left inner corner: 3 sc
- Top-left band: 5 sc
- Top-left outer corner: 3 sc
- Left outer edge: 29 sc
Sl st in the first sc to join. 130 sc. Fasten off.
Why the math works: Each outer edge has 12 rows and steps out 5 times (Rows 2, 4, 6, 8, and 10). Each inner edge has 8 rows above the notch and steps in 3 times (Rows 6, 8, and 10). The bottom and each top band have 7 sts. The 2 corner sts hold the 3-sc corner groups and are not counted again, which leaves 5 sc between them. Total: 11 + 29 + 11 + 19 + 1 + 19 + 11 + 29 = 130. The border adds 0.125 in (0.3 cm) on each side, so 3.25 in (8.3 cm) x 3 in (7.6 cm) becomes 3.5 in (8.9 cm) x 3.25 in (8.3 cm).
Hanger Loop
With RS facing, join pink with a sl st in the notch sc. Ch 8, then sl st in the same sc. Turn, work 10 sc in the ch-8 loop, and sl st in the notch sc. Fasten off. The loop is about 0.375 in (1.0 cm) across.
Flowers and Leaves
Center (make 3): With yellow, make a magic ring and work 5 sc into it. Pull the ring closed and sl st in the first sc. 5 sc. Fasten off. Each center is 0.25 in (0.6 cm) across.
Petals: Join lilac with a sl st in any sc of a center. Work (ch 2, 2 dc, ch 2, sl st) in the same sc. (Sl st, ch 2, 2 dc, ch 2, sl st) in the next sc; repeat from * 3 more times. 5 petals.* Fasten off, leaving an 8 in (20.3 cm) tail. Each flower is about 0.75 in (1.9 cm) across.
Leaf (make 5): With green, ch 4. Sc in 2nd ch from hook, hdc in next ch, sl st in last ch. Fasten off, leaving a 6 in (15.2 cm) tail. Each leaf is about 0.375 in (1.0 cm) long.
Placement: Sew one flower on each arm just below the top band, over Rows 9–11. Sew the third flower at the center of the base, over Rows 1–3. Tuck two leaves behind the bottom flower, one on each side. Tuck two behind the top-left flower, at the left and lower right, and one behind the right side of the top-right flower. Sew through the mesh bars only.
Final Blocking
- Weave in all ends through the border or the solid bands.
- Wet the letter, roll it in a towel, and press out the extra water.
- Draw a 3.5 in (8.9 cm) x 3.25 in (8.3 cm) V template and lay it under clear plastic on the foam board.
- Pin the 4 top corners and the 2 bottom corners first, then pin the notch.
- Use a pin to nudge each mesh hole square.
- Optional: brush on a light coat of fabric stiffener.
- Let the letter dry fully before you sew on the flowers.
- Open a jump ring with the two pliers, link the hanger loop to one end of the chain, and close the ring. Link the other end of the chain to the split ring with the second jump ring.
Final Quality-Control Checklist
- The letter measures 3.5 in (8.9 cm) x 3.25 in (8.3 cm).
- Each arm is 3 meshes wide on every row and topped by a solid 7-dc band.
- Both arms lean at the same angle.
- The border has 130 sc and lies flat.
- The flowers are secure and the jump rings are fully closed.
Troubleshooting
- Arms lean differently: Each arm shifts only on WS Rows 6, 8, and 10. Recount your shaping rows.
- Rectangular holes: Your dc are too tall. Use a smaller hook.
- Loose edge at increases: Snug the first loop of each dtr before you finish it.
- Border ruffles: Use only 1 sc per step.
- Border cups: Check that you didn’t skip any step sc.
- Petals curl: Steam them lightly and pin them flat before sewing.
Care
Hand wash in cool water with mild soap and lay flat to dry. If you used stiffener, spot clean only.
Final Notes
The measurements build in a simple chain. A 0.25 in (0.6 cm) mesh gives a 3.25 in (8.3 cm) x 3 in (7.6 cm) letter over 13 meshes and 12 rows. A 130-sc border at 8 sc per 1 in (2.5 cm) adds 0.125 in (0.3 cm) on every side, for a finished size of 3.5 in (8.9 cm) x 3.25 in (8.3 cm). Check your swatch and Row 4, and the rest follows.
Happy crocheting!