
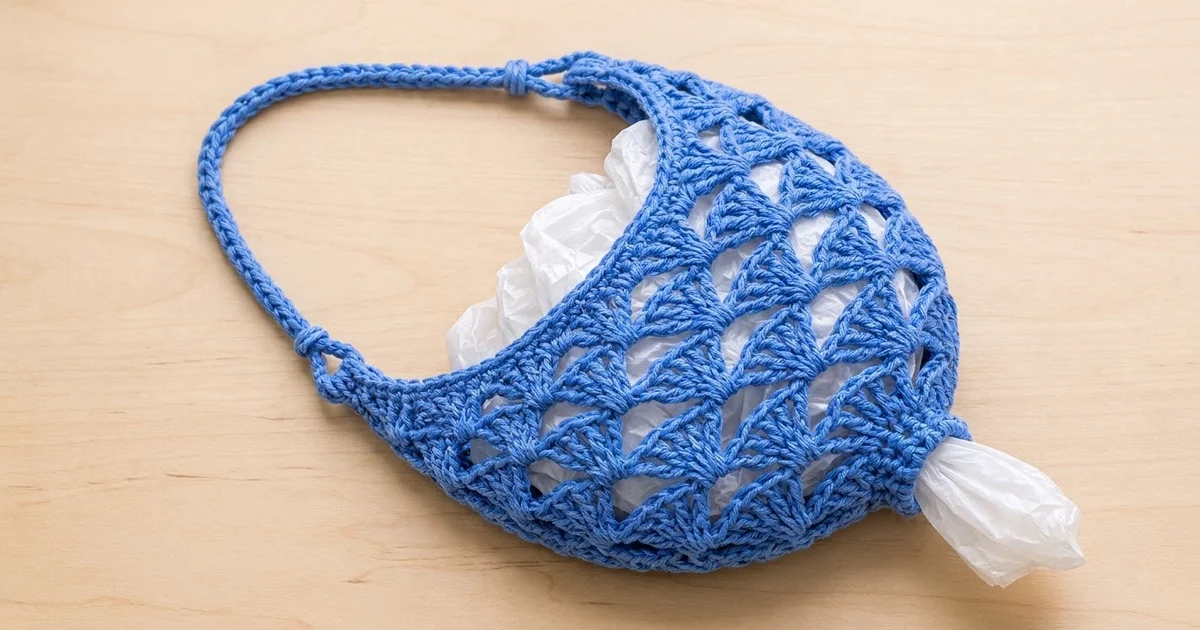
The Bluebell Shell Bag Holder is a hanging pocket for storing plastic grocery bags. It has an open, lacy look. You stuff bags in through the wide crescent opening at the top and pull them out one at a time through the small ring at the bottom. Rows of fan shells with open triangle spaces between them cover the whole body, so the fabric stays light and you can see how many bags are left.
The sample uses one color, a bright cornflower blue, in a smooth worsted-weight cotton. The style is simple and practical, and the blue looks good against a wooden cabinet or a plain kitchen wall. All instructions use US crochet terms.
The finished body measures 10″ (25.4 cm) wide when flattened. It is 8.5″ (21.6 cm) tall at the center front and 10″ (25.4 cm) tall at the raised side points. The strap is about 19″ (48.3 cm) long, including its end loops.
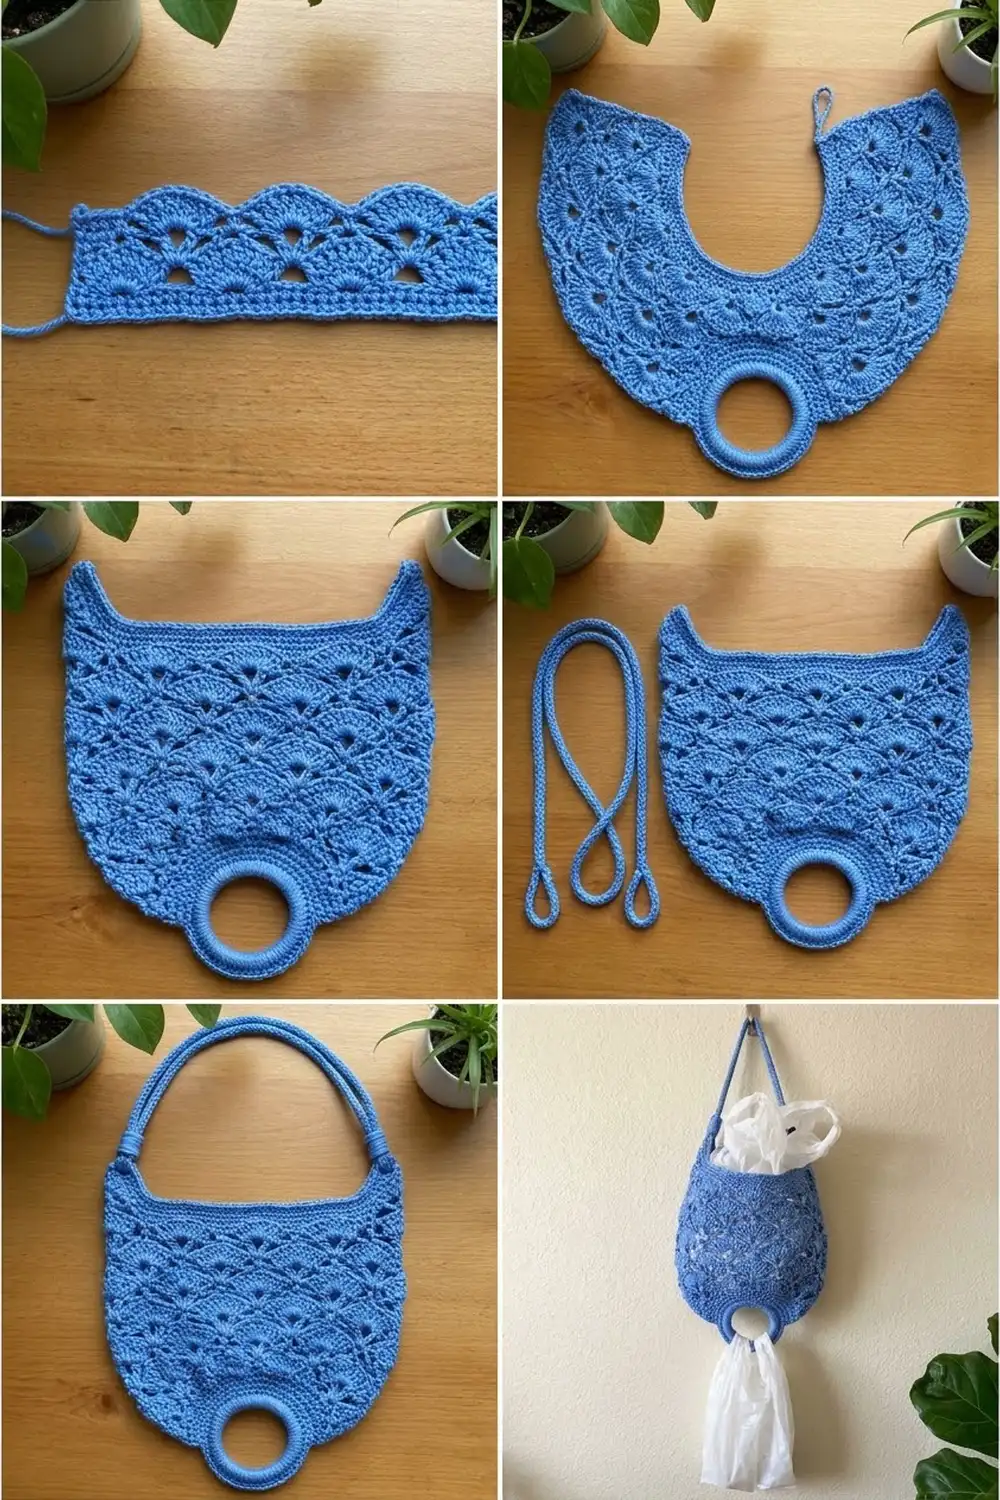
You work the body in joined rounds from the bottom ring upward. It starts as a firm sc collar, grows through alternating fan and arc rounds, and finishes with a sc rim that has two short-row wedges for the raised corners, each topped with a hanging loop. The strap is a separate sc cord with a loop at each end, and you bind those loops to the body’s corner loops.
Finished Size and Construction
- Finished size: 10″ (25.4 cm) wide × 8.5″ (21.6 cm) tall at center; 10″ (25.4 cm) at side points
- Skill level: Easy-intermediate
- Terminology: US
- Yarn weight: Worsted (#4), cotton
- Hook: 5.0 mm (H-8)
- Number of pieces: 2 (body and strap)
- Layout: Strap attached to the two top corner loops of the body
- Piece size: Body 10″ × 8.5″ (25.4 × 21.6 cm); strap 19″ (48.3 cm) long
- Size before border: 10″ × 7.75″ (25.4 × 19.7 cm) after Rnd 17
- Border depth: 0.75″ (1.9 cm) at center; 2.25″ (5.7 cm) at side points, not counting loops
Materials
Yarn: Use a smooth worsted-weight cotton or cotton blend. Cotton holds the fan shape well and does not stretch much when the holder is full. Avoid fuzzy yarns, because they hide the open spaces.
- Cornflower Blue: 140 g, about 240 m total
- Body: 120 g, about 205 m
- Strap: 20 g, about 35 m
These quantities include a margin of about 15% for your gauge swatch and for tension differences.
Tools:
- 5.0 mm (H-8) crochet hook
- 4 locking stitch markers
- Tapestry needle
- Scissors
- Measuring tape
- Blocking mat and pins
- Spray bottle
Abbreviations (US Terms)
- ch: chain
- sl st: slip stitch
- sc: single crochet
- dc: double crochet
- sc2tog: single crochet 2 together
- sk: skip
- sp: space
- st(s): stitch(es)
- Rnd: round
Special stitches:
- 5-dc shell: 5 dc in the same st or sp. Its center dc is the 3rd dc.
- 7-dc shell: 7 dc in the same st or sp. Its center dc is the 4th dc.
- Arc: a ch-space that runs from the center dc of one shell to the next st named in the pattern.
Gauge and Checkpoints
- Sc gauge: 14 sc and 16 rows = 4″ (10.2 cm)
- Pattern gauge: one 7-dc repeat (sc + 7-dc shell) = 1.25″ (3.2 cm) wide; one fan round + one arc round = 1″ (2.5 cm) tall
Test the body first: work Rnds 1–8 and check your measurements before you continue. Lace is easier to adjust early than late.
Checkpoints:
- After Rnd 2: outer collar diameter 2″ (5.1 cm), center opening about 1″ (2.5 cm)
- After Rnd 8: flattened width 8″ (20.3 cm), height 3.25″ (8.3 cm)
- After Rnd 16: flattened width 10″ (25.4 cm), height 7.25″ (18.4 cm)
- After Rnd 17: height 7.75″ (19.7 cm)
If your piece is too big, go down to a 4.5 mm hook. If it is too small, go up to a 5.5 mm hook. If only the height is off, check the chains in your arcs: arcs that are too tight make the piece short, and loose arcs make it tall.
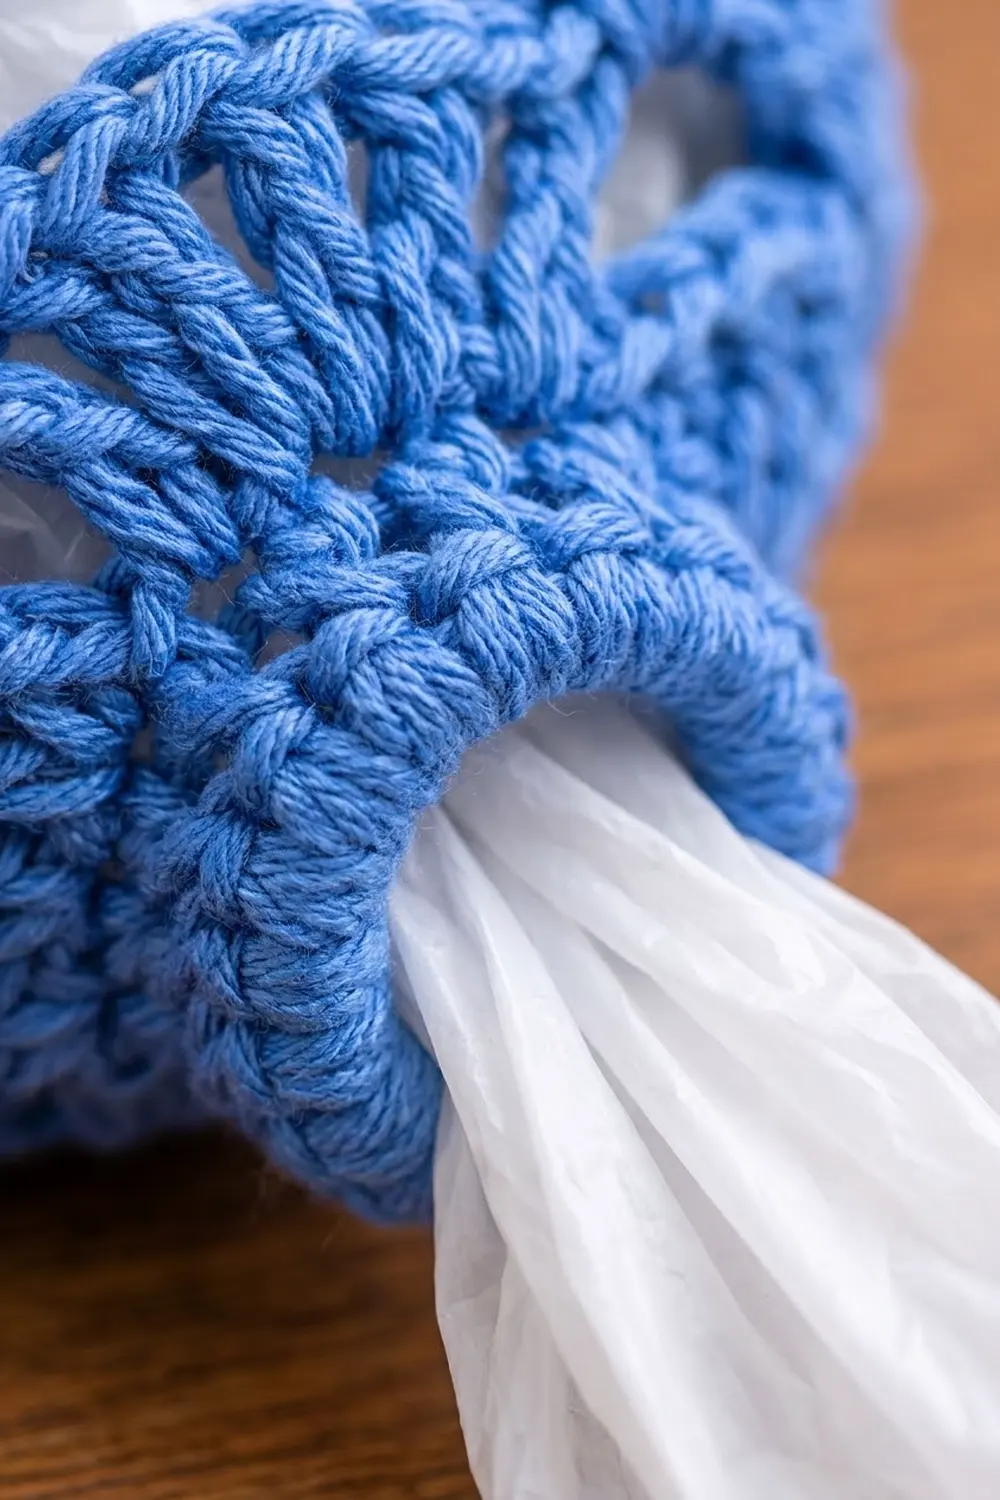
Body
Work in joined rounds with the right side facing you, and do not turn. The ch 1 at the start of a round never counts as a st.
Rnd 1: Ch 12 and join with a sl st to form a ring. Ch 1, then work 24 sc into the ring. Join with a sl st to the first sc. (24 sc)
Rnd 2: Ch 1, sc in each st around, join. (24 sc)
Rnd 3 (arc setup): Ch 1, sc in the first st, ch 2, sk 2, sc in next st, ch 2, sk 2; repeat from * 6 more times, join. (8 sc, 8 ch-2 sps)
Rnd 4 (fan): Ch 1, sc in the first sc, 5-dc shell in the next ch-2 sp, sc in next sc, 5-dc shell in next ch-2 sp; repeat from * 6 more times, join. (8 shells: 40 dc + 8 sc = 48 sts)
Rnd 5 (doubling arcs): Ch 1, sc in the first sc, ch 3, sc in the center dc of the next shell, ch 3, sc in next sc, ch 3, sc in center dc of next shell, ch 3; repeat from * 6 more times, join. (16 sc, 16 ch-3 arcs)
Rnd 6 (fan): Ch 1, sc in the first sc, 5-dc shell in the next arc, sc in next sc, 5-dc shell in next arc; repeat from * 14 more times, join. (16 shells: 80 dc + 16 sc = 96 sts)
From Rnd 6 on, the repeat count stays at 16. The body widens because the shells and arcs get bigger, not because you add repeats.
Rnd 7 (arc): Sl st in each of the next 3 sts so you reach the center dc of the first shell. Ch 1, sc in the same dc, ch 5, sc in center dc of next shell; repeat from * 14 more times, ch 5, join. (16 sc, 16 ch-5 arcs)
Rnd 8 (fan): Ch 1, sc in the first sc, 5-dc shell in the next arc, sc in next sc, 5-dc shell in next arc; repeat from * around, join. (16 shells, 96 sts)
Each new shell sits in an arc between two of the shells below it. This half-repeat offset is what creates the staggered fans and the open triangles.
Rnd 9 (arc): Repeat Rnd 7. (16 sc, 16 ch-5 arcs)
Rnd 10 (fan, growth): Ch 1, sc in the first sc, 7-dc shell in the next arc, sc in next sc, 7-dc shell in next arc; repeat from * around, join. (16 shells: 112 dc + 16 sc = 128 sts)
Rnd 11 (arc): Sl st in each of the next 4 sts so you reach the center dc. Ch 1, sc in the same dc, ch 6, sc in center dc of next shell; repeat from * 14 more times, ch 6, join. (16 sc, 16 ch-6 arcs)
Rnd 12 (fan): Repeat Rnd 10, working each shell into a ch-6 arc. (128 sts)
Rnds 13–16: Repeat Rnds 11 and 12 twice. (Rnd 16: 128 sts)
Rnd 17 (arc): Repeat Rnd 11. (16 sc, 16 ch-6 arcs)
Check now that the piece is 10″ (25.4 cm) wide when flattened and 7.75″ (19.7 cm) tall. Do not fasten off. Continue straight into the Border, Rnd 18.
Make All Pieces
- Body: 1, in Cornflower Blue (120 g, 205 m)
- Strap: 1, in Cornflower Blue (20 g, 35 m)
Layout, front view:
 loop ======= strap ======= loop
 [point]                 [point]
   |      body rim          |
   |   fan-shell mesh body  |
   |__________ring__________|
Strap
Row 1: Ch 10, then sl st in the first ch to form end loop A. Ch 60 for the strap. Ch 10 more, then sl st in the 10th ch from the hook to form end loop B.
Row 2: Work 14 sc into loop B. Then sc in the back bump of each of the 60 strap chains (60 sc). Work 14 sc into loop A, and sl st into the first strap sc to close. (60 strap sc + 2 × 14 loop sc = 88 sts)
Fasten off and leave a 12″ (30.5 cm) tail at each end. At sc gauge, the 60 sc measure about 17″ (43.2 cm), and each loop adds about 1″ (2.5 cm).
Joining
You join the strap to the body after you finish the border, so the corner loops exist.
- Push strap loop A through one corner loop on the body from front to back.
- Fold loop A down over the strap so the body loop sits in the fold.
- Thread the tail and wrap it tightly 6 times around both layers, just below the body loop. This makes the small bound collar at each corner.
- Pass the needle through the wraps twice to lock them, then weave in the tail.
- Repeat at the other corner with loop B, making sure the strap is not twisted.
Pull the wraps firm, but not so tight that the sc bend. When you hang the finished holder by the center of the strap, both corners should sit level and the strap peak should be about 7″ (17.8 cm) above the rim.
Border
The border gauge is the same as the sc gauge: 14 sc = 4″ (10.2 cm).
Rnd 18 (rim base, conversion): Ch 1, sc in the first sc, 4 sc in the next ch-6 arc, sc in next sc, 4 sc in next arc; repeat from * around, join. (16 sc worked 1 per sc + 64 sc added in arcs = 80 sts; 40 per face.) Fasten off.
Flatten the body so the round join sits at one side fold. Then place markers in sts 1, 33, 49, and 73. The side folds fall between sts 80 and 1 and between sts 40 and 41.
Side Wedge A (raised corner): Work in rows. Join the yarn in st 73.
- Row 1: Ch 1, sc in sts 73–80 and 1–8. (16 sc)
- Row 2: Ch 1, turn, sc2tog, sc in next 12, sc2tog. (14)
- Row 3: Ch 1, turn, sc2tog, sc in next 10, sc2tog. (12)
- Row 4: Ch 1, turn, sc2tog, sc in next 8, sc2tog. (10)
- Row 5: Ch 1, turn, sc2tog, sc in next 6, sc2tog. (8)
- Row 6: Ch 1, turn, sc2tog, sc in next 4, sc2tog. (6)
Fasten off. The wedge is 1.5″ (3.8 cm) tall.
Side Wedge B: Join the yarn in st 33 and work Rows 1–6 over sts 33–48. Fasten off.
The wedges use 32 of the 80 sts. That leaves 24 sts on each face for the dip of the crescent.
Rnd 19 (rim): Join the yarn in st 9. Ch 1, then:
- sc in sts 9–32 (24)
- Wedge B: 6 sc up the row-ends, then sc in the next 3 sts, ch 6, sc in the last 3 sts, then 6 sc down the row-ends (18 sc + ch-6 loop)
- sc in sts 49–72 (24)
- Wedge A: work it the same way as Wedge B (18 sc + ch-6 loop)
Join. (84 sc + 2 ch-6 loops; 42 sc per face)
Rnd 20: Ch 1, sc in each sc and 10 sc over each ch-6 loop. Join and fasten off. (84 sc worked 1 per st + 20 sc added in loops = 104 sts)
Why the math works: Rnd 18 sits exactly on the 16 repeats: 16 × (1 + 4) = 80. Each wedge loses 2 sts per row over 5 decrease rows, so it goes from 16 to 6 sts. Its row-ends give 6 sc on each side, which matches the wedge’s 6 rows. That makes 6 + 6 + 6 = 18 sc per wedge, and 48 + 36 = 84 sc around. Nothing is counted twice.
Final Blocking
- Weave in all ends except the strap tails.
- Dampen the body evenly with the spray bottle.
- Lay the body flat with the side folds at the wedge centers.
- Pin it to 10″ (25.4 cm) wide, 8.5″ (21.6 cm) tall at the center, and 10″ (25.4 cm) at the points.
- Open each fan with your fingers and pin the tips of the side points.
- Let it dry completely.
- Attach the strap as described under Joining.
Final Quality-Control Checklist
- The bottom ring is round and firm, with an opening of about 1″ (2.5 cm).
- Every fan round from Rnd 6 on has 16 shells.
- The fans are offset by half a repeat in each round.
- Each face has 8 shells across.
- The rim sits smooth, with no ruffling.
- Both side points are the same height.
- The corner loops are solid and the same size.
- The strap is not twisted and the bound collars are tight.
- All ends are secured.
Troubleshooting
- Ruffled rim: You have too many sc in the arcs. Work 3 sc per arc in Rnd 18 (64 sts) and reduce each wedge to 12 sts.
- Body cups inward: Your arcs are too short. Add 1 ch to each arc.
- Fans line up in columns: You worked a shell into a sc instead of into an arc. Rip back and check the offset.
- Bags slip out of the ring: Work Rnd 2 a second time to make the collar thicker.
- Uneven points: Count the wedge rows. Each wedge needs exactly 6.
- Strap stretches: Use 55 strap chains instead of 60, or use a cotton with less stretch.
Care
Hand wash or machine wash on a gentle cycle in cool water, then reshape and lay flat to dry. Avoid hot tumble drying, because it can shrink cotton unevenly.
Final Notes
Here is the full measurement chain. The sc gauge is 14 sc = 4″ (10.2 cm). The 2″ (5.1 cm) collar grows to an 8″ (20.3 cm) width at Rnd 8 and 10″ (25.4 cm) at Rnd 16, and the body reaches 7.75″ (19.7 cm) tall at Rnd 17. The 80-st rim base, two 6-row wedges, and 84-st rim bring the finished holder to 8.5″ (21.6 cm) at the center and 10″ (25.4 cm) at the points. If you check each step against these numbers, the bag holder will hang straight and stay neat for years.
Happy crocheting!