

This heart-shaped holder keeps plastic grocery bags in one place on the wall. You push bags in through the open top of the pocket and pull them out one at a time through a small opening at the point of the heart. The square mesh on the front shows what’s inside, and the solid back keeps the shape firm.
The sample uses one color, a warm coral pink, in worsted-weight cotton. Cotton holds its shape, takes a good block, and stays firm when the pocket is full. The style is simple and a little retro, so it suits a kitchen or pantry wall.
The pattern uses US crochet terms. The finished holder is about 9.5 in (24.1 cm) wide and 9.25 in (23.5 cm) tall, not counting the hanging loop. The loop adds about 3.25 in (8.3 cm) above the center dip.
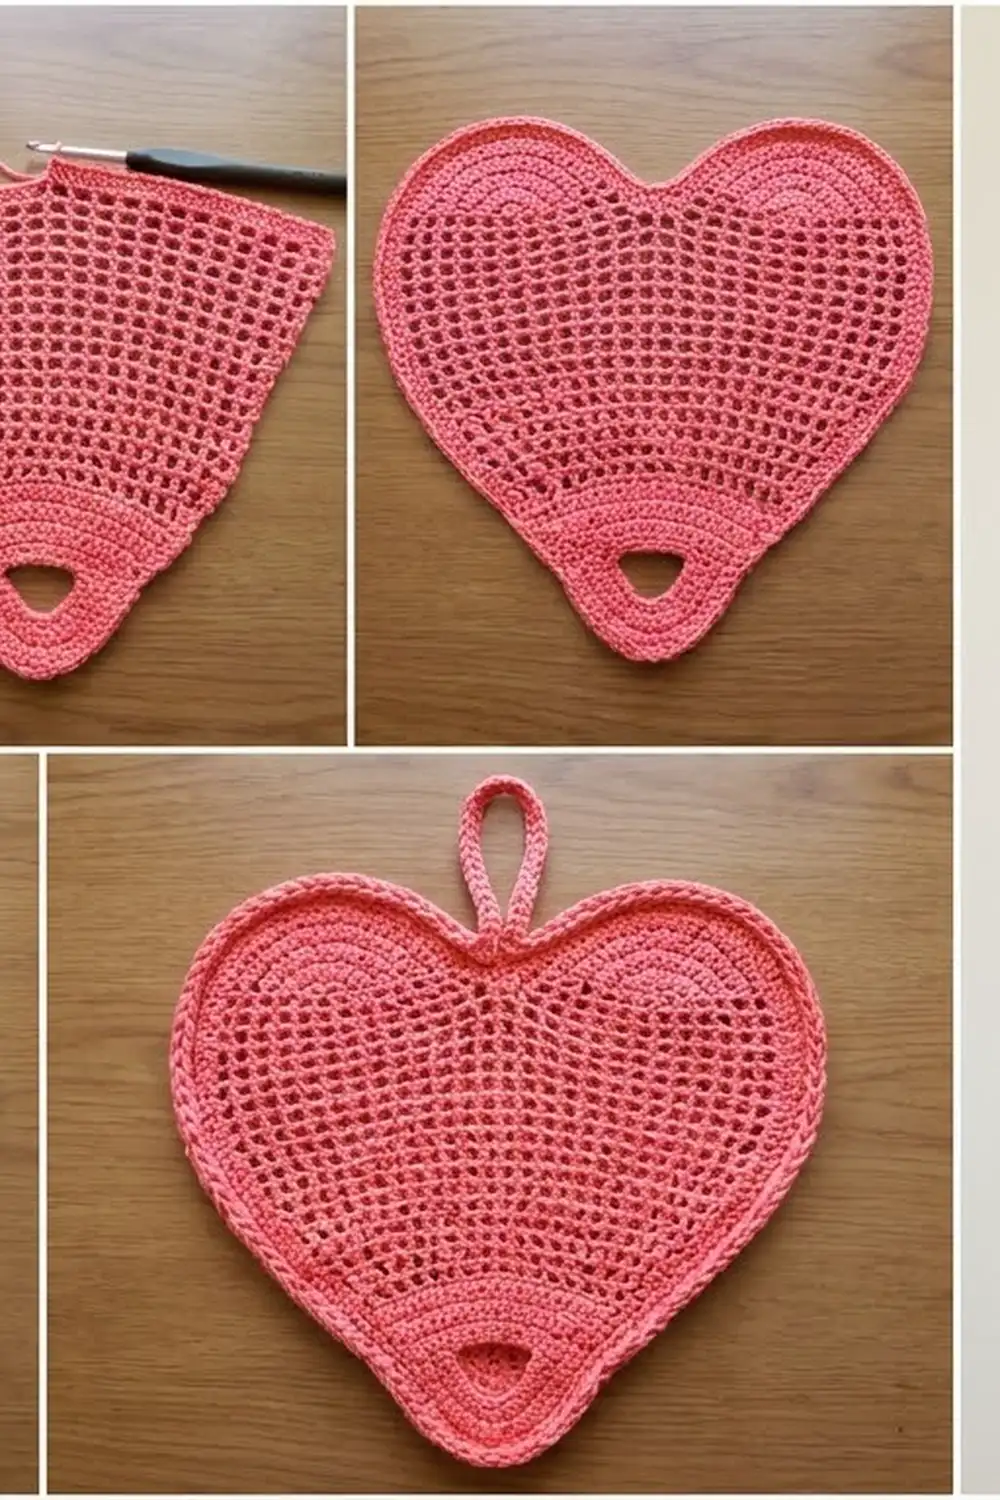
Construction is simple. You work two heart panels from the tip upward in rows: a front panel with the bag opening and filet mesh, and a solid back panel with two rounded lobes. A short strip folded in half makes the hanging loop. You then join the panels with a single crochet round through both layers and finish with a round of reverse single crochet.
Finished Size and Construction
- Finished size: 9.5 in (24.1 cm) wide x 9.25 in (23.5 cm) tall
- Skill level: Easy / advanced beginner
- Terminology: US
- Yarn weight: Worsted (#4), cotton
- Hook: 5 mm (H-8)
- Number of pieces: 3 (front panel, back panel, hanging loop)
- Layout: Front panel laid on the back panel, wrong sides together, with the bottom points matched
- Front panel size: 8.75 in (22.2 cm) wide x 6.9 in (17.5 cm) tall
- Back panel size (size before border): 8.75 in (22.2 cm) wide x 8.4 in (21.3 cm) tall
- Border depth: 0.4 in (1.0 cm), 2 rounds
Materials
Yarn: Use a smooth worsted-weight cotton or cotton blend. Pure acrylic works, but the pocket will sag more once it’s full. Choose a yarn with good stitch definition so the mesh squares stay crisp.
- Coral pink: 85 g, about 131 m (143 yd)
This amount includes a margin of about 15% for your gauge swatch and for differences in tension.
Tools:
– 5 mm (H-8) crochet hook
– Tapestry needle
– 4 stitch markers
– Scissors
– Measuring tape
– Blocking mat and rust-proof pins
– Spray bottle
Abbreviations (US Terms)
- ch – chain
- sc – single crochet
- dc – double crochet
- sc2tog – single crochet 2 together
- rev sc – reverse single crochet (crab stitch)
- sk – skip
- sp – space
- st(s) – stitch(es)
- RS / WS – right side / wrong side
Special stitch – reverse single crochet (rev sc): Work from left to right (left-handers work right to left). Insert the hook into the next stitch to the right, yarn over, pull up a loop, then yarn over and draw through both loops. This makes a twisted, rope-like edge.
Mesh note: A mesh square is one dc plus one ch-1. Every ch-1 counts as 1 stitch in the stitch counts below.
Gauge and Checkpoints
Gauge:
– 16 sc x 18 rows = 4 in (10.2 cm), which is 4 sts and 4.5 rows per inch
– 8 mesh squares (16 sts) x 8 dc rows = 4 in (10.2 cm), which is 2 dc rows per inch
Test one piece first. Make the front panel before anything else. It contains every stitch type in the project, so it works as your gauge piece.
Checkpoints:
– After Row 9: 19 sts, 4.75 in (12.1 cm) wide, 2 in (5.1 cm) tall
– After Row 13: 35 sts, 8.75 in (22.2 cm) wide, 4 in (10.2 cm) tall
– After Row 17: 6 in (15.2 cm) tall
– After Row 21: 6.9 in (17.5 cm) tall
– Back panel after the lobes: 8.4 in (21.3 cm) tall
If your piece is too big, go down to a 4.5 mm hook. If it’s too small, go up to a 5.5 mm hook. Check width rather than height: if width is right, small differences in height won’t matter, because both panels are worked with the same rows.
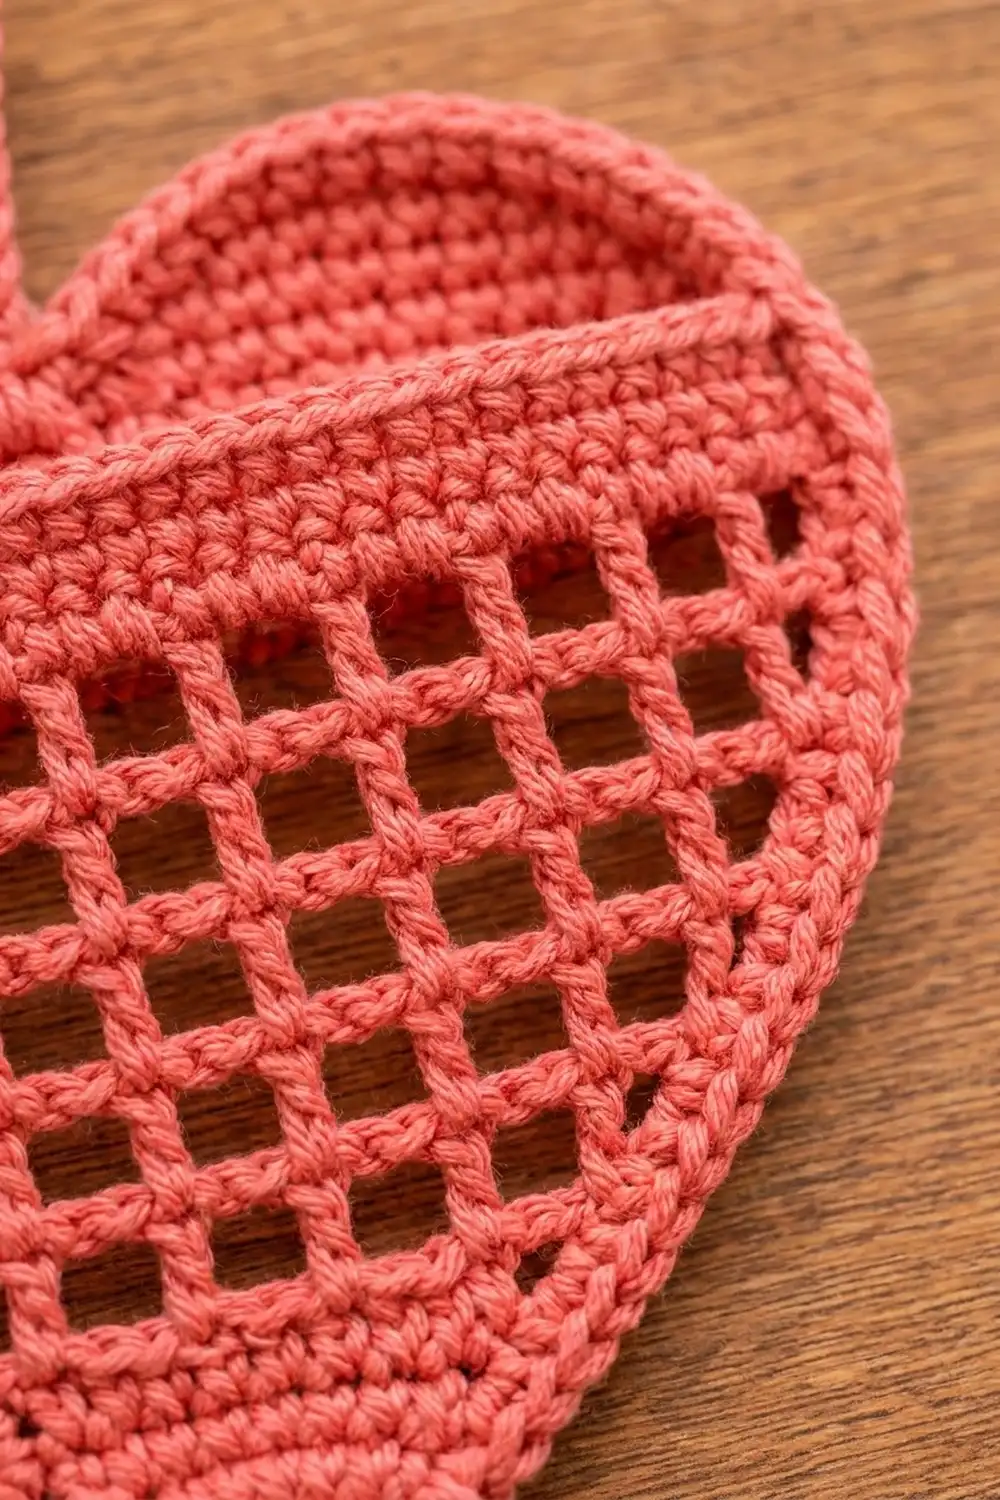
Front Panel
The front starts at the tip. The single crochet section has 1 increase at each edge per row, and the bag opening is made in Rows 5 and 6.
Row 1 (RS): Ch 2, 3 sc in 2nd ch from hook, turn. (3 sts)
Row 2: Ch 1, 2 sc in first st, sc in next st, 2 sc in last st, turn. (5 sts)
Row 3: Ch 1, 2 sc in first st, sc in next 3 sts, 2 sc in last st, turn. (7 sts)
Row 4: Ch 1, 2 sc in first st, sc in next 5 sts, 2 sc in last st, turn. (9 sts)
Row 5 (opening row): Ch 1, 2 sc in first st, sc in next st, ch 5, sk next 5 sts, sc in next st, 2 sc in last st, turn. (11 sts: 6 sc + 5 ch)
Row 6: Ch 1, 2 sc in first st, sc in next 2 sts, 5 sc in ch-5 sp, sc in next 2 sts, 2 sc in last st, turn. (13 sts)
The opening is about 1.25 in (3.2 cm) wide and stretches enough for a bag to pass through.
Row 7: Ch 1, 2 sc in first st, sc in each st to last st, 2 sc in last st, turn. (15 sts)
Rows 8–9: Repeat Row 7. (17 sts, then 19 sts)
Checkpoint: 4.75 in (12.1 cm) wide.
Mesh increase rows: Each of these rows adds 1 mesh square at each edge, which is 2 sts per side.
Row 10: Ch 4 (counts as dc + ch 1), dc in first st, [ch 1, sk next st, dc in next st] 9 times (the last dc goes in the last st), ch 1, dc in same last st, turn. (23 sts: 12 dc + 11 ch)
Row 11: Ch 4 (counts as dc + ch 1), dc in first dc, [ch 1, dc in next dc] across, working the last dc in the 3rd ch of the turning ch, ch 1, dc in same st, turn. (27 sts: 14 dc + 13 ch)
Row 12: Repeat Row 11. (31 sts: 16 dc + 15 ch)
Row 13: Repeat Row 11. (35 sts: 18 dc + 17 ch)
Checkpoint: 8.75 in (22.2 cm) wide, 4 in (10.2 cm) tall.
Straight mesh rows:
Rows 14–17: Ch 4 (counts as dc + ch 1), sk first ch-1 sp, dc in next dc, [ch 1, dc in next dc] across, working the last dc in the 3rd ch of the turning ch, turn. (35 sts: 18 dc + 17 ch)
Solid band:
Row 18 (conversion row): Ch 1, sc in each dc and in each ch-1 sp across, turn. (35 sts = 18 sc worked in dc + 17 sc worked in ch-1 sps)
Rows 19–21: Ch 1, sc in each st across, turn. (35 sts)
Fasten off and weave in the ends. Checkpoint: 8.75 in x 6.9 in (22.2 cm x 17.5 cm).
Back Panel
The back follows the same rows as the front, so the two edges match row for row. The mesh section is replaced by solid dc rows with the same increases, and the opening is left out.
Rows 1–4: Work as for Front Rows 1–4. (9 sts)
Row 5: Ch 1, 2 sc in first st, sc in next 7 sts, 2 sc in last st, turn. (11 sts)
Rows 6–9: Work as for Front Row 7. (13, 15, 17, 19 sts)
Row 10: Ch 3 (counts as dc), 2 dc in first st, dc in each st to last st, 3 dc in last st, turn. (23 sts)
Rows 11–13: Ch 3 (counts as dc), 2 dc in first st, dc in each st across to the turning ch, 3 dc in top of turning ch, turn. (27, 31, 35 sts)
Rows 14–17: Ch 3 (counts as dc), dc in each st across, turn. (35 sts)
Rows 18–21: Ch 1, sc in each st across, turn. (35 sts)
First lobe:
Row 22: Ch 1, sc in first 17 sts, turn. Leave the remaining 18 sts unworked. (17 sts)
Row 23: Ch 1, sc in each st across, turn. (17 sts)
Row 24: Ch 1, sc2tog, sc in next 13 sts, sc2tog, turn. (15 sts)
Row 25: Ch 1, sc in each st across, turn. (15 sts)
Row 26: Ch 1, sc2tog, sc in next 11 sts, sc2tog, turn. (13 sts)
Row 27: Ch 1, sc2tog, sc in next 9 sts, sc2tog, turn. (11 sts)
Row 28: Ch 1, sc2tog, sc in next 7 sts, sc2tog. (9 sts) Fasten off.
Second lobe: On Row 21, skip the center st (the 18th st). Join the yarn in the 19th st and work Rows 22–28 over the last 17 sts. Fasten off.
Checkpoint: 8.75 in (22.2 cm) wide, 8.4 in (21.3 cm) tall. Each lobe is 4.25 in (10.8 cm) wide at its base and 2.25 in (5.7 cm) wide across the top.
Hanging Loop
Row 1: Ch 31, sc in 2nd ch from hook and in each ch across, turn. (30 sts)
Row 2: Ch 1, sc in each st across. (30 sts) Fasten off, leaving a 12 in (30.5 cm) tail.
The strip measures 7.5 in x 0.5 in (19.1 cm x 1.3 cm).
Make All Pieces
Make one of each piece, all in coral pink:
- Front panel x 1 (about 25 g)
- Back panel x 1 (about 40 g)
- Hanging loop x 1 (about 5 g)
The remaining yarn covers the border, the swatch, and the margin.
Layout (seen from the front):
        [ LOOP ]
   (LOBE)  dip  (LOBE)    <- back panel only
  [ FRONT BAND, open top ]
  [ FRONT MESH  ]         <- front over back
   [ SOLID TIP ]
     ( opening )
        \ tip /
Joining
Method: You join the panels with Border Round 1, working single crochet through both layers. Before you start the border, attach the loop.
Attach the loop: Fold the strip in half so the short ends meet. Place the ends on the WS of the back panel at the center dip, overlapping the panel by 0.5 in (1.3 cm). Sew them on firmly with the tail. The loop should stand 3.25 in (8.3 cm) above the dip.
Stack the panels: Place the back panel RS down. Lay the front panel on top, RS up, so the panels are WS together. Match the tips and each row end. Rows 1–21 on the two panels line up exactly because they have the same row structure. Pin both side edges at Rows 1, 9, 13, 17, and 21.
Stitch-to-stitch logic: Each stitch of the joining round goes through the matching row end of both panels at the same time. Don’t let one layer creep ahead of the other.
Tension: Keep it even and medium. If you pull too tight, the sides will pucker. If you work too loose, the pocket will gape away from the back.
Size checkpoint: Before you start the border, the stacked pieces should measure 8.75 in (22.2 cm) across at Row 21.
Border
Border gauge: About 4 to 4.5 sc per inch (2.5 cm) along every edge, which matches the body gauge. Sloped edges get extra stitches so the border stays flat.
Round 1 (joining round): With the front facing, join the yarn in the skipped center st at the dip (the loop sits behind it). Work the following:
- Center dip: 1 sc
- Right lobe inner edge: 1 sc in each row end of Rows 22–28 (7 sc)
- Right lobe top: 2 sc in first st, sc in next 7 sts, 2 sc in last st (11 sc)
- Right lobe outer edge: 1 sc in each row end of Rows 28–22 (7 sc)
- Right side, through both layers, Rows 21 down to 1 (38 sc):
- Rows 21–18: 1 sc in each row end (4)
- Rows 17–14: 2 sc in each row end (8)
- Rows 13–10: 3 sc in each row end (12)
- Rows 9–1: 2 sc in each odd row end and 1 sc in each even row end (14)
- Tip, through both layers: 3 sc in the base of Row 1 (3 sc)
- Left side: work as for the right side in reverse, Rows 1 up to 21 (38 sc)
- Left lobe: outer edge 7 sc, top 11 sc, inner edge 7 sc
Sl st to the first sc to join. (130 sts)
The top edge of the front band stays open; this is the pocket opening. The 38 side stitches don’t include the tip stitches, and the tip’s 3 sc aren’t counted in the sides.
Round 2: Ch 1, rev sc in each st around, then sl st to join. (130 sts) Fasten off and weave in the ends.
Why the math works: 1 + (7 + 11 + 7) x 2 + 38 x 2 + 3 = 130. Each side is 3.2 in (8.1 cm) along the sloped tip edge, 2.8 in (7.1 cm) along the sloped mesh edge, and 2.9 in (7.4 cm) along the straight edge. Spread over those lengths, 38 sc works out to about 4.3 sts per inch, which matches gauge, so the border lies flat without cupping or ruffling.
Final Blocking
- Slip a folded towel or a piece of cardboard into the pocket.
- Mist the whole piece until it’s damp but not dripping.
- Pin the outline to 9.5 in x 9.25 in (24.1 cm x 23.5 cm).
- Square the mesh with your fingers so every opening is the same size.
- Pin the lobes into smooth curves and stretch the opening into a neat oval.
- Let it dry completely, then remove the insert.
Final Quality-Control Checklist
- Every mesh row has 18 dc and 17 ch-1 spaces at full width.
- The front band ends straight, 8.75 in (22.2 cm) across.
- The side edges are flat, with no pucker at Rows 10–13.
- The border has exactly 130 sts.
- The tip opening is centered and open.
- The loop is secure and centered at the dip.
- All ends are woven in on the WS.
Troubleshooting
- The mesh slants: You probably worked into the ch-1 spaces instead of the dc posts. Put every dc into the top of a dc.
- The sides ruffle: Work 2 sc instead of 3 in the row ends of Rows 10–13.
- The sides cup: Add 1 sc in every row end along the tip section.
- The panels don’t line up: Count rows on both pieces. Each one needs exactly 21 rows below the lobes.
- The opening is too tight: Rework Rows 5–6 with ch 6 and sk 6, then put 6 sc in the space on Row 6. This keeps Row 6 at 13 sts.
- The lobes are pointy: Pin them rounder during blocking.
Care
Hand wash in cool water, press out the water in a towel, and dry flat in shape. If the holder relaxes over time, re-block it.
Final Notes
The measurement chain runs like this:
- Gauge of 4 sts and 4.5 rows per inch
- 19 sts at 4.75 in (12.1 cm)
- 35 sts at 8.75 in (22.2 cm)
- Front height of 6.9 in (17.5 cm) and back height of 8.4 in (21.3 cm)
- A 130-stitch, 0.4 in (1.0 cm) border, for a finished size of 9.5 in x 9.25 in (24.1 cm x 23.5 cm)
Check each link in that chain and the holder will come out true to size. Happy crocheting!