

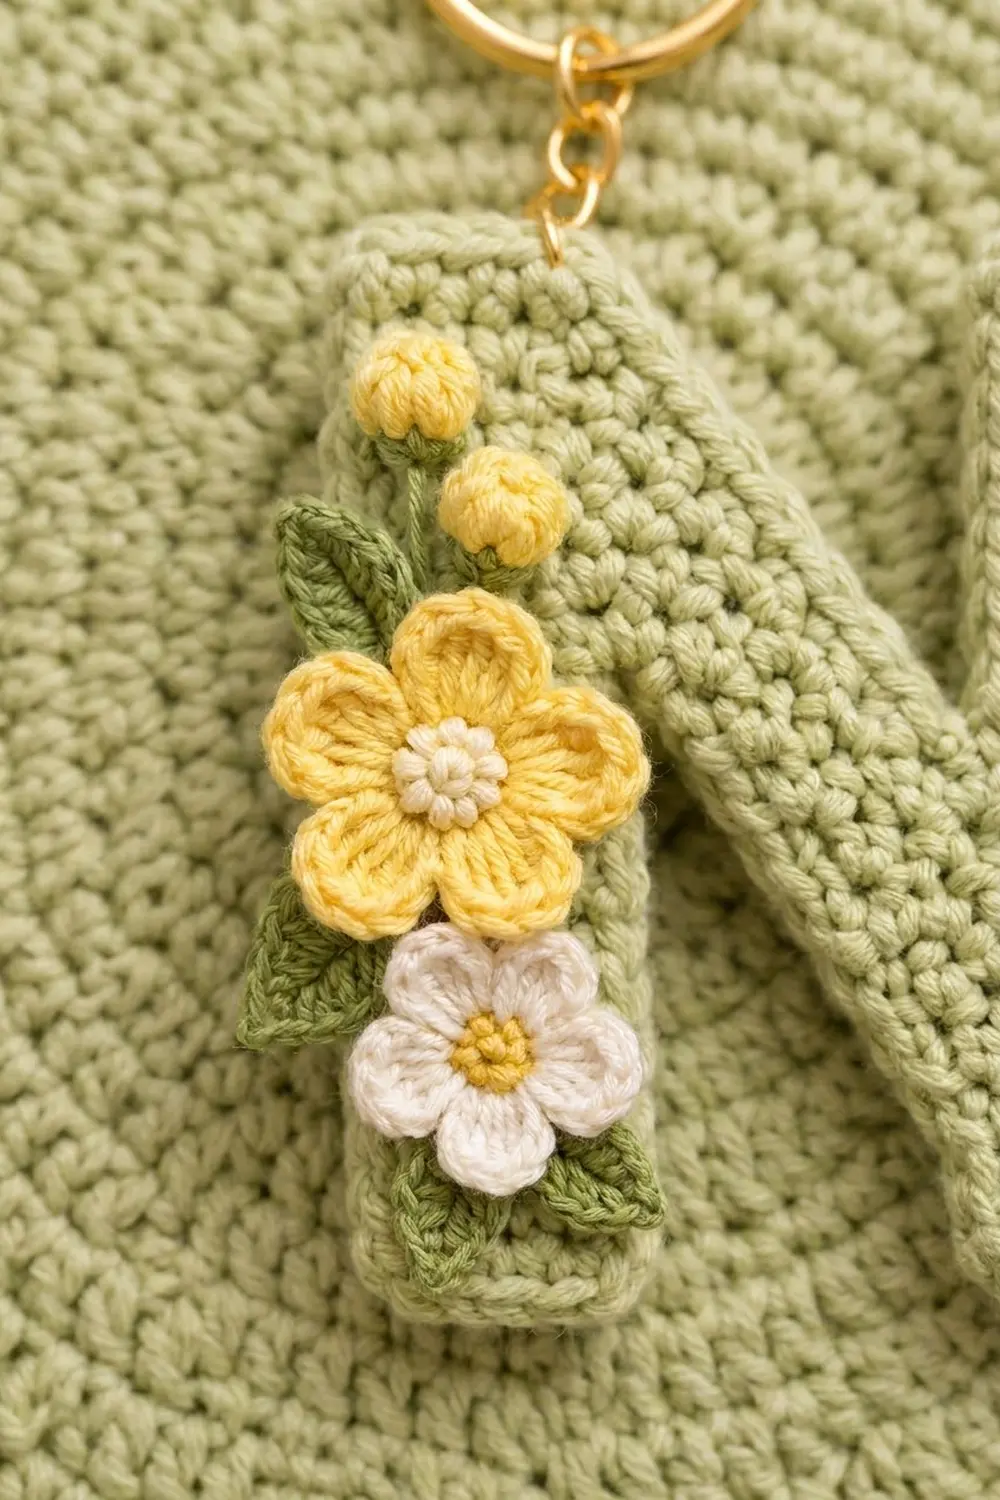
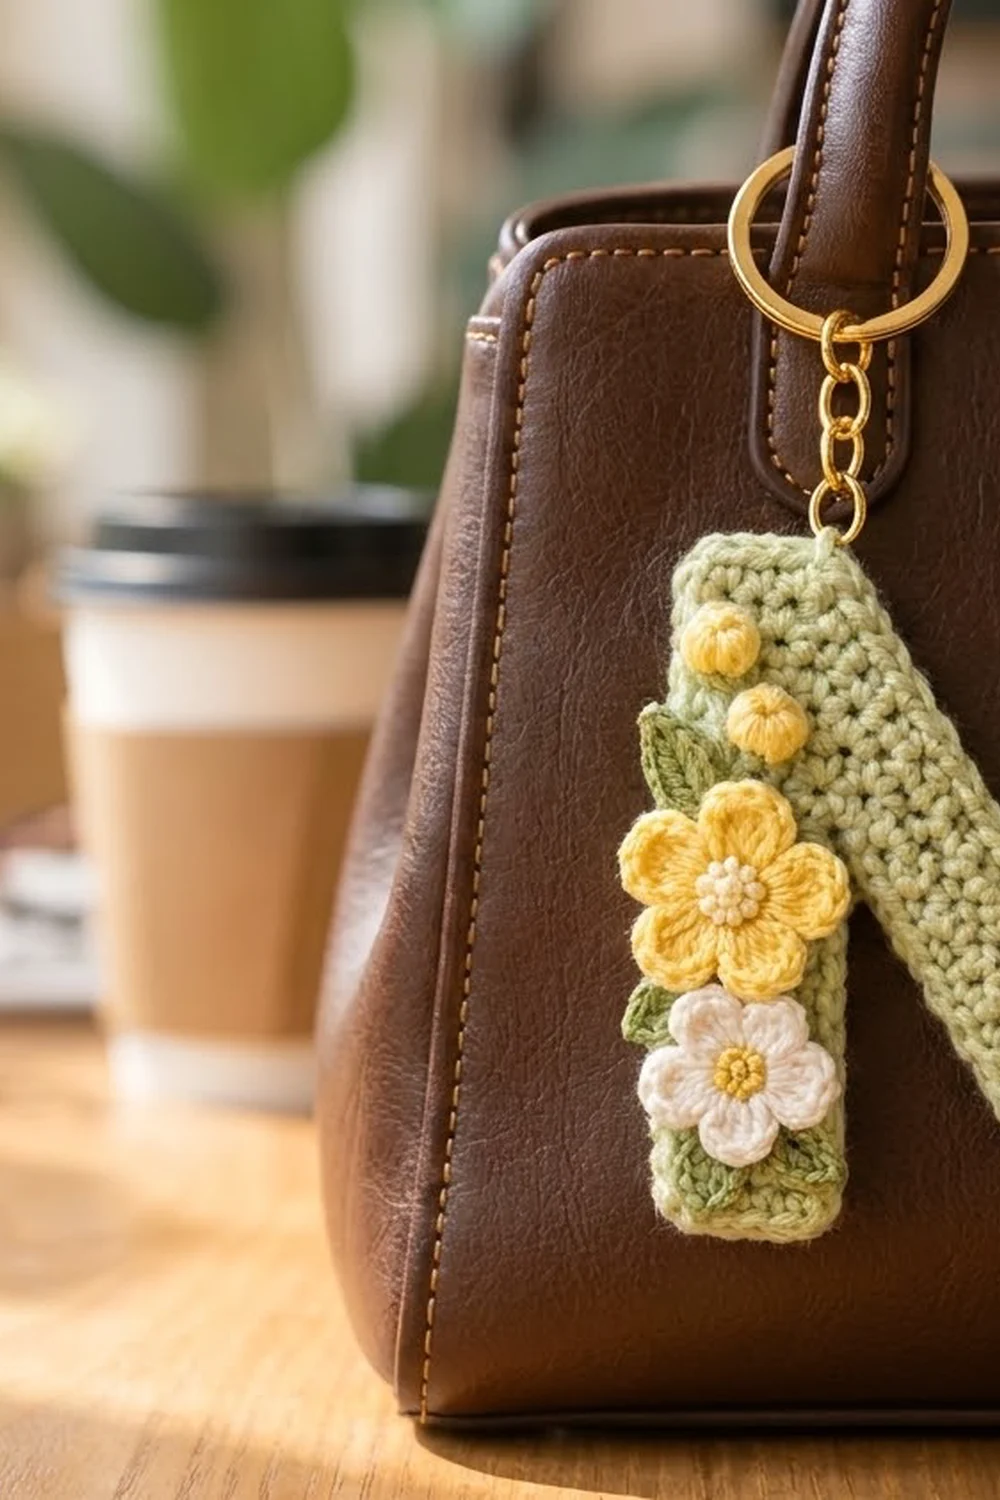
This little letter N is a soft sage green keychain decorated with a spray of spring flowers. It has a buttercup-yellow bloom, a cream daisy-style flower, two round yellow buds, and three green leaves, all stacked down the left upright. A gold keyring and short chain finish the piece, so it’s ready to clip onto a bag, a set of keys, or a gift.
The colors are sage, buttercup yellow, cream, and leaf green. The style is clean and graphic, with a tight, pebbled single crochet texture that keeps the letter firm and easy to read. The pattern uses US crochet terms throughout.
The finished keychain is 3 in (7.6 cm) wide and 4 in (10.2 cm) tall, not counting the hardware.
The letter is made in one piece. Rows run vertically from left to right: you work the left upright first, then shape the stepped diagonal with short rows and extensions, then work the right upright. One border round smooths the outline. The flowers, buds, and leaves are crocheted separately and sewn on.
Finished Size and Construction
- Finished size: 3 in x 4 in (7.6 cm x 10.2 cm)
- Skill level: Intermediate (short rows, foundation single crochet)
- Terminology: US
- Yarn weight: DK / light worsted (#3), cotton
- Hook: 3.25 mm (US D/3)
- Number of pieces: 1 letter, plus 7 small appliqués (2 flowers, 2 buds, 3 leaves)
- Layout: One letter N. The appliqués sit on the left upright.
- Piece size before border: 2.67 in x 3.67 in (6.8 cm x 9.3 cm)
- Border depth: 1 round of sc, about 0.17 in (0.4 cm) on each side
Materials
Use a smooth mercerized or matte cotton DK. Cotton keeps the letter crisp, holds its shape on a keyring, and shows the stitches clearly. Avoid fuzzy or very stretchy yarns.
- Sage green (main color): 10 g, about 22 m
- Buttercup yellow: 4 g, about 9 m
- Cream: 2 g, about 4 m
- Leaf green: 2 g, about 4 m
These quantities include a margin for your gauge swatch and sewing tails.
Tools:
- 3.25 mm (US D/3) hook, plus 3.0 mm and 3.5 mm (US E/4) in case you need to change size
- Tapestry needle
- Gold split keyring, 1 in (2.5 cm)
- Gold chain, about 1 in (2.5 cm), with 2 jump rings
- 2 pairs of jewelry pliers
- Stitch markers
- Blocking board and pins
- Optional: fabric stiffener
Abbreviations (US Terms)
- ch – chain
- sl st – slip stitch
- sc – single crochet
- hdc – half double crochet
- dc – double crochet
- sc2tog – single crochet 2 together
- MR – magic ring
- st(s) – stitch(es)
- RS – right side
Special stitches
fsc (foundation single crochet), used to extend a row: Insert your hook into the base of the last sc made, yarn over and pull up a loop, yarn over and draw through 1 loop (this makes the “chain” base), then yarn over and draw through 2 loops. Each fsc adds 1 stitch to the end of the row.
pc (popcorn): Work 4 dc into the same space. Drop the loop from your hook, insert the hook front to back through the top of the first stitch, pick up the dropped loop, and pull it through.
Gauge and Checkpoints
Gauge: 6 sc and 6 rows = 1 in (2.5 cm) in sc worked in rows.
Gauge matters for the letter, because the border works 1 sc into each stitch and 1 sc into each row-end. That only lies flat when your rows are the same height as your stitches are wide.
Make a swatch first. Chain 13, then work 12 sc for 12 rows. It should measure 2 in x 2 in (5.1 cm x 5.1 cm).
- Swatch too big: Change to a 3.0 mm hook.
- Swatch too small: Change to a 3.5 mm (US E/4) hook.
- Rows taller than your stitches are wide: Pull each loop snug before you yarn over.
Checkpoints as you work:
- After Row 5: 0.83 in x 3.67 in (2.1 cm x 9.3 cm)
- After Row 11: 1.83 in (4.6 cm) wide at the bottom edge
- After Row 16: 2.67 in x 3.67 in (6.8 cm x 9.3 cm)
- After the border: 3 in x 4 in (7.6 cm x 10.2 cm)
If you’re more than 0.25 in (0.6 cm) off at any checkpoint, change hooks before going further.
Letter N
How the rows are laid out. Every row runs vertically. Count the stitch positions from the top of the letter: position 1 is the top edge and position 22 is the bottom edge.
Odd rows run from bottom to top, and even rows run from top to bottom. When you finish Row 1, the starting tail should be at the top-left corner.
Left upright
Foundation: With sage, ch 23.
Row 1: Sc in the 2nd ch from the hook and in each ch across. (22 sts)
Rows 2–5: Ch 1, turn, sc in each st across. (22 sts)
Row 5 ends at the top.
Diagonal
The diagonal is 12 stitches tall. It moves 2 positions down on every row: odd rows add 2 stitches at the bottom with a chain, and even rows add 2 with fsc.
Row 6: Ch 1, turn. Sc in the first 12 sts (positions 1–12). Leave the remaining 10 sts unworked. (12 sts)
Row 7: Ch 3, turn. Sc in the 2nd ch from the hook and in the next ch (positions 14 and 13). Sc in the next 10 sts (positions 12–3). Leave the last 2 sts unworked. (12 sts)
Row 8: Turn, sl st in the first 2 sts (positions 3–4), then ch 1. Sc in the next 10 sts (positions 5–14), then work 2 fsc (positions 15–16). The sl sts don’t count as stitches. (12 sts)
Row 9: Ch 3, turn. Sc in the 2nd ch from the hook and in the next ch (positions 18 and 17). Sc in the next 10 sts (positions 16–7). Leave 2 sts unworked. (12 sts)
Row 10: Turn, sl st in the first 2 sts, then ch 1. Sc in the next 10 sts (positions 9–18), then work 2 fsc (positions 19–20). (12 sts)
Row 11: Ch 3, turn. Sc in the 2nd ch from the hook and in the next ch (positions 22 and 21). Sc in the next 10 sts (positions 20–11). Leave 2 sts unworked. (12 sts)
This leaves two triangle-shaped openings that form the N’s inner notches. Below the diagonal on the left, the opening is positions 13–22 of Row 6 and gets smaller with each row. Above it on the right, the opening is positions 1–10 of Row 11.
Right upright
Row 12: Ch 11, turn. Sc in the 2nd ch from the hook and in the next 9 chs (positions 1–10). Sc in the next 12 sts (positions 11–22). (10 + 12 = 22 sts)
Rows 13–16: Ch 1, turn, sc in each st across. (22 sts)
Fasten off and weave in the ends. Lay the letter flat and check it against the After Row 16 checkpoint.
Appliqués
Yellow flower (make 1)
Rnd 1: With cream, make an MR, ch 1, and work 10 sc into the ring. Join with a sl st to the first sc. (10 sts) Fasten off.
Rnd 2: Join yellow in any st. Sl st in the next st, then work (hdc, 3 dc, hdc) all in the next st. Repeat from * to * 4 more times, for 5 petals. Join with a sl st and fasten off.
Using yellow, embroider one French knot in the center. The flower should measure 1.25 in (3.2 cm) across.
Cream flower (make 1)
Rnd 1: With yellow, make an MR, ch 1, and work 10 sc into the ring. Join with a sl st. (10 sts) Fasten off.
Rnd 2: Join cream in any st. Sl st in the next st, then work (hdc, 2 dc, hdc) all in the next st. Repeat from * to * 4 more times, for 5 petals. Join with a sl st and fasten off.
The flower should measure 1 in (2.5 cm) across.
Buds (make 2)
With yellow, make an MR, ch 2, and work 1 pc into the ring. Pull the ring tight and fasten off, leaving a sewing tail. Each bud should measure 0.4 in (1.0 cm).
Leaves (make 3)
With leaf green, ch 6.
- First side: Sc in the 2nd ch from the hook, hdc in the next ch, dc in the next ch, hdc in the next ch, then work (sc, ch 2, sc) in the last ch.
- Second side: Working along the other side of the chain, hdc in the next ch, dc in the next ch, hdc in the next ch, sc in the next ch. Join with a sl st to the first sc.
Fasten off, leaving a tail. Each leaf should measure 0.75 in (1.9 cm) long.
Border
The border is worked in sage. Border gauge is 1 sc per stitch top, 1 sc per free chain loop, and 1 sc per row-end.
On each of the 8 outer corners, work 3 sc into one position. On each of the 2 inner points of the notches, work sc2tog across 2 positions.
Rnd 1: With the RS facing, join sage at the top-left corner and work clockwise. Each count below is the number of stitches made on that edge.
- Top edge, left: 1 sc in each row-end of Rows 1–6. (6)
- Upper stair, down to the inner point: This edge has 15 positions:
- 3 sc in the first exposed top of Row 6 (the corner)
- 1 sc in each of the next 13 positions, alternating 2 stitch tops (or sl sts) and 1 row-end
- 16 stitches made over those 14 positions; the 15th position, the Row 11 row-end, is used in the next step
- Inner point: Sc2tog over the Row 11 row-end and the first free loop of the Row 12 chain. (1)
- Chain edge, going up: 1 sc in each of the next 8 free chain loops, then 3 sc in the last loop. (11)
- Top of the right upright: 1 sc in each row-end of Rows 12–16. (5)
- Right edge: 22 sc across the tops of Row 16, with 3 sc in the first and the last st. (26)
- Bottom edge, right: 1 sc in each row-end of Rows 16–11. (6)
- Lower stair, going up: This edge also has 15 positions:
- 3 sc in the first chain loop at the base of Row 11 (the corner)
- 1 sc in each of the next 13 positions
- 16 stitches made over those 14 positions; the 15th position, the Row 6 row-end, is used in the next step
- Inner point: Sc2tog over the Row 6 row-end and the top of Row 5 at position 13. (1)
- Down the inside of the left upright: 1 sc in each of the Row 5 tops at positions 14–21, then 3 sc in position 22. (11)
- Bottom edge, left: 1 sc in each row-end of Rows 5–1. (5)
- Left edge: 22 sc into the free loops of the foundation chain, with 3 sc in the first and the last loop. (26)
Join with a sl st to the first sc. Total: 130 sts.
Why the math works:
- The outline has 116 working positions: 6 + 15 + 10 + 5 + 22 + 6 + 15 + 10 + 5 + 22.
- The 8 corners each add 2 stitches, for +16.
- The 2 sc2tog each remove 1 stitch, for −2.
- 116 + 16 − 2 = 130.
Because your rows match your stitch width, 1 sc per row-end lies flat. The border adds 1 sc on every side. The width goes from 16 rows to 18 stitch-widths, which is 3 in (7.6 cm). The height goes from 22 sts to 24, which is 4 in (10.2 cm).
Assembly
- Pin the cream flower on the left upright, about 0.75 in (1.9 cm) above the bottom edge.
- Pin the yellow flower just above it so their petals overlap slightly. Let the yellow flower hang about 0.25 in (0.6 cm) past the left edge.
- Pin one bud just above the yellow flower. Pin the second bud above that one and a little to the left.
- Tuck one leaf behind the yellow flower on the left, and the other two beneath the cream flower.
- Sew everything on with matching tails, using small stitches through the back loops only so nothing shows on the back.
- Open a jump ring and pass it through the border at the center top of the left upright. Add the chain, then attach the keyring with the second jump ring.
Final Blocking
- Lightly dampen the letter, or mist it with fabric stiffener for a firmer keychain.
- Pin it to the board at 3 in x 4 in (7.6 cm x 10.2 cm).
- Pin each of the 8 outer corners square and both inner points sharp.
- Keep the pins off the appliqués and pin through the border only.
- Let it dry completely, which usually takes 6–8 hours.
- Unpin it and check the measurements again.
Final Quality-Control Checklist
- [ ] The letter measures 3 in x 4 in (7.6 cm x 10.2 cm), within 0.125 in (0.3 cm).
- [ ] Both uprights are the same width.
- [ ] The diagonal runs from the top left to the bottom right.
- [ ] The border has 130 sts, with no ripples or cupping.
- [ ] Both inner notches are clean and open.
- [ ] Every appliqué is sewn securely and no stitches show on the back.
- [ ] The jump rings are fully closed, with no gap.
- [ ] All ends are woven in.
Troubleshooting
- The border ripples: Your rows are taller than your stitches are wide. Redo the round, skipping 1 row-end on each long edge, or tighten your row gauge.
- The border cups: Add 1 sc at the stair steps or loosen your tension.
- The diagonal looks jagged: That’s normal before the border. The border round and blocking smooth it out.
- There’s a hole at a fsc: Make sure you insert the hook under 2 loops of the base chain.
- The keyring tears the fabric: Pass the jump ring through the border and the row-end behind it, not the border alone.
- The letter is floppy: Use stiffener, or change to a smaller hook.
Care
Spot clean with cool water and mild soap, then lay flat to dry. Keep the metal hardware dry so it doesn’t tarnish.
Final Notes
The measurements build on each other:
- Gauge of 6 sc and 6 rows = 1 in (2.5 cm)
- Left upright of 0.83 in x 3.67 in (2.1 cm x 9.3 cm)
- Diagonal of 12 sts that steps down 2 positions per row
- Unbordered letter of 2.67 in x 3.67 in (6.8 cm x 9.3 cm)
- 130-stitch border, finishing at 3 in x 4 in (7.6 cm x 10.2 cm)
Check each stage and the flowers will sit neatly on a crisp, even letter.
Happy crocheting!