

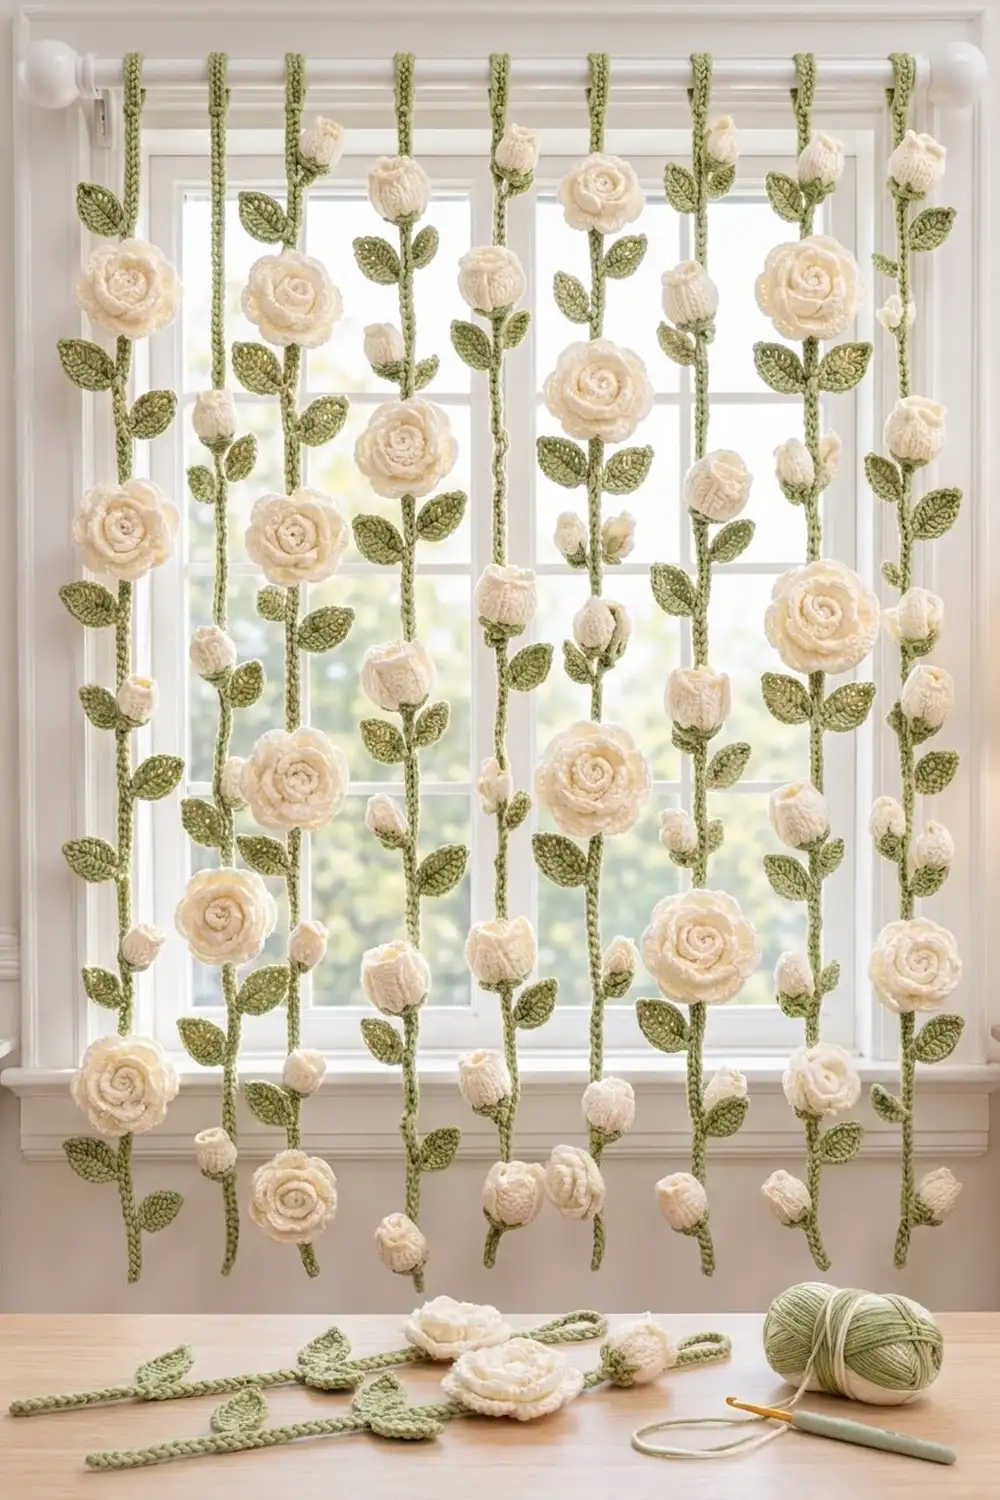
This curtain is a row of hanging rose vines. Each vine is a long green slip-stitch stem with ivory roses and small rosebuds spaced down its length, and a pair of sage leaves below every flower. Ten vines hang side by side from a curtain rod, and light comes through the gaps between them.
Only two colors are used: a warm ivory for the flowers and a soft sage green for the stems, leaves and bud cups. The style is soft and cottage-romantic.
The pattern uses US crochet terms. The finished curtain is about 40 in (101.6 cm) wide and hangs about 62.5 in (158.8 cm) from the top of the rod. Each strand is 60 in (152.4 cm) long below its hanging loop.
Construction is modular. You crochet the stems, roses, buds, calyxes and leaves separately, sew the flowers and leaves to the stems at fixed stitch positions, and finish each stem with a hanging loop. The strands are only spaced on the rod, not joined to each other.
Finished Size and Construction
- Finished size: about 40 x 62.5 in (101.6 x 158.8 cm) as hung
- Skill level: Intermediate
- Terminology: US
- Yarn weight: Worsted (#4)
- Hook: 4.5 mm (US 7)
- Number of pieces: 10 finished strands (5 Strand A, 5 Strand B), each assembled from a stem, 9 flowers and 18 leaves
- Layout: 10 strands in one row, 4 in (10.2 cm) apart center to center
- Piece size: one strand is 3.5 in (8.9 cm) wide at the roses x 60 in (152.4 cm) long
- Size before top edge: 60 in (152.4 cm) stem
- Top edge (hanging loop) depth: 2.5 in (6.4 cm) when folded over the rod
Materials
Choose a smooth worsted cotton or cotton blend so the stitches show clearly and the petals hold their shape. The amounts below assume about 200 m per 100 g.
- Ivory (Color A): 450 g / 900 m (45 roses and 45 buds)
- Sage green (Color B): 300 g / 600 m (10 stems, 180 leaves, 45 calyxes)
These quantities include a margin of about 10% to 20% for test pieces and sewing tails.
Tools:
- 4.5 mm (US 7) crochet hook
- Tapestry needle
- About 20 locking stitch markers
- Measuring tape
- Scissors
- Spray bottle and pins for blocking
- Curtain rod at least 40 in (101.6 cm) between finials and no more than 1.5 in (3.8 cm) in diameter
Abbreviations (US Terms)
- ch – chain
- sl st – slip stitch
- sc – single crochet
- hdc – half double crochet
- dc – double crochet
- st(s) – stitch(es)
- sp – space
- MR – magic ring
Special stitch: Back-bump slip stitch. Turn the chain over and find the horizontal bar on its back. Insert the hook under that bar only and work a sl st. This leaves both front loops of the chain free, so the stem shows a braided double row of Vs.
Back-post slip stitch. Insert the hook from back to front to back around the post of the stitch you’re told to use, then work a sl st. All of these are worked from the back of the flower.
Gauge and Checkpoints
Stem gauge: 16 back-bump sl sts = 4 in (10.2 cm), which is 4 sts per 1 in (2.5 cm).
Before you start, make a test stem section: work 41 ch and 40 back-bump sl sts. It should measure 10 in (25.4 cm). Then make one rose, one bud and one leaf.
Checkpoints:
- Rose after Rnd 3: 1.75 in (4.4 cm) across
- Rose after Rnd 5: 2.75 in (7.0 cm) across
- Rose after Rnd 7: 3.5 in (8.9 cm) across
- Bud with calyx: 1.75 in (4.4 cm) tall x 1.25 in (3.2 cm) wide
- Leaf: 2 in (5.1 cm) long x 1.25 in (3.2 cm) wide
If your pieces are too big, go down to a 4 mm hook. If they are too small, go up to a 5 mm hook. Stem length matters most, because every flower position is counted in stitches.
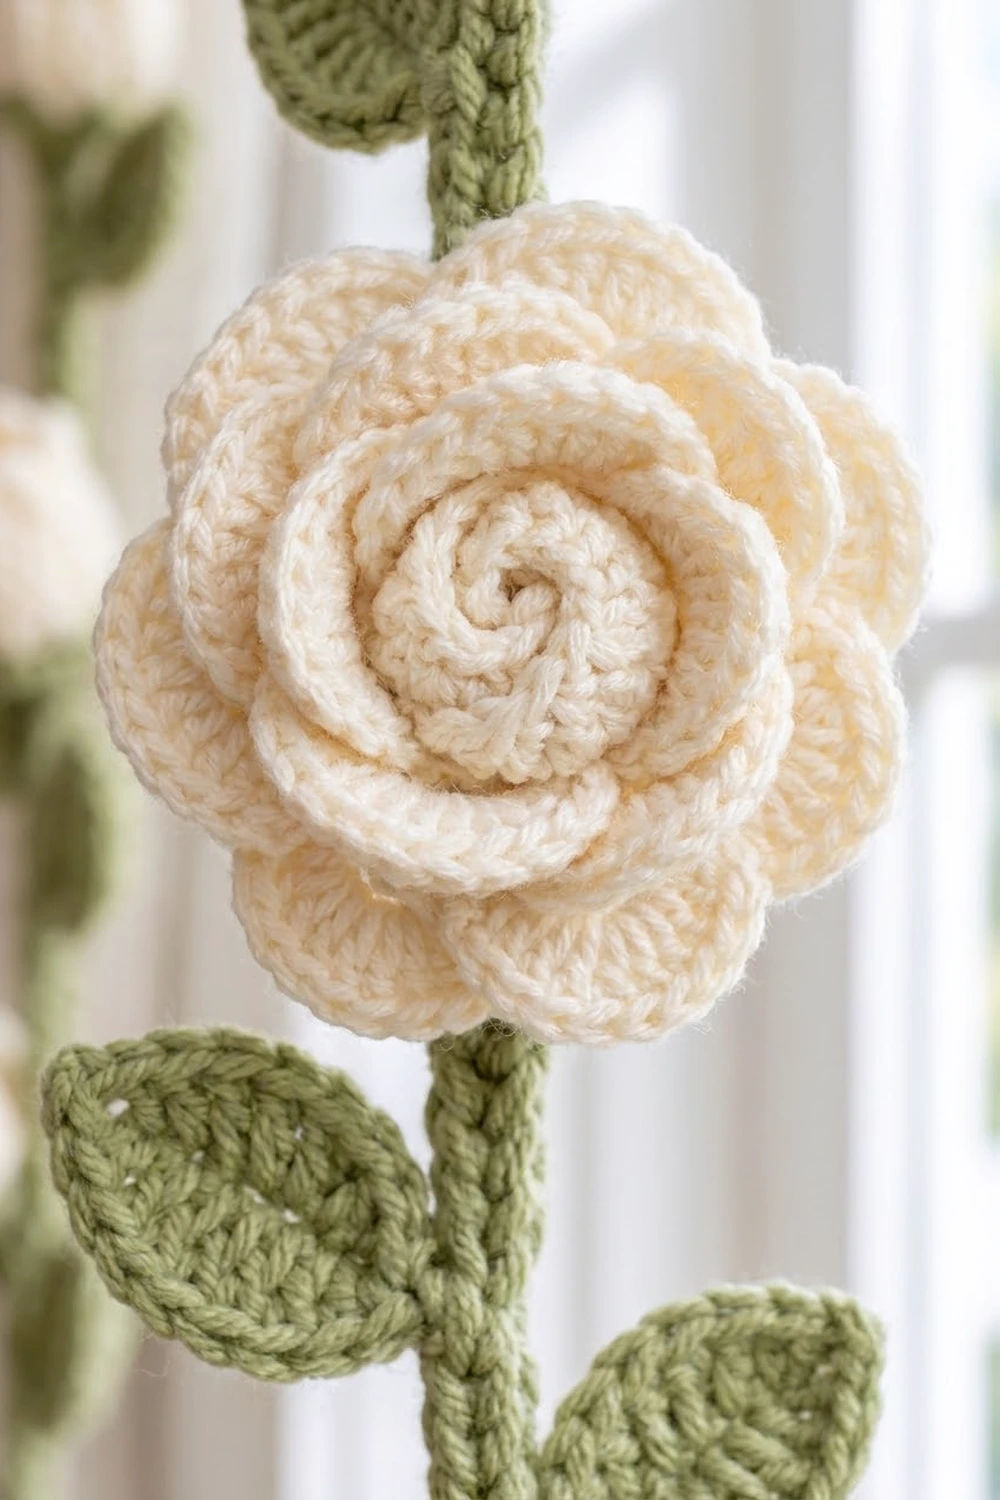
Stem (make 10, Color B)
Ch 241.
Row 1: Sl st in the back bump of the 2nd ch from hook and in the back bump of each ch across. (240 sl sts)
Don’t fasten off. The end where you finish is the top of the stem. Place a locking marker in the live loop. You’ll work the hanging loop from it in the Top Edge section.
Checkpoint: the stem measures 60 in (152.4 cm) when laid flat and not stretched.
Mark the flower positions. Count from the top stitch down and place a marker at sts 24, 48, 72, 96, 120, 144, 168, 192 and 216. (9 markers, every 6 in / 15.2 cm.) The 24 sts below the last marker form a 6 in (15.2 cm) tail.
Rose (Color A)
Center Coil
Ch 16.
Row 1: Sc in the 2nd ch from hook and in each ch across. (15 sc)
Fasten off and leave an 8 in (20.3 cm) tail. Roll the strip tightly with the sc edge on top to make a spiral about 0.75 in (1.9 cm) across. Pass the tail through all layers a few times to secure it.
Petal Rounds
Rnd 1: MR, ch 1, 6 sc in ring, sl st to first sc. (6 sc)
Rnd 2: Ch 1, [sc in next st, ch 3] 6 times, sl st to first sc. (6 sc, 6 ch-3 sps)
Rnd 3 (Layer 1): In each ch-3 sp around work (sc, hdc, 3 dc, hdc, sc). Sl st to first sc. (6 petals, 42 sts)
Rnd 4: Working behind Layer 1, [back-post sl st around the center dc of next petal, ch 4] 6 times, sl st to first sl st. (6 sl sts, 6 ch-4 sps)
Rnd 5 (Layer 2): Sl st into first ch-4 sp. In each ch-4 sp around work (sc, hdc, 5 dc, hdc, sc). Sl st to first sc. (6 petals, 54 sts)
Rnd 6: Working behind Layer 2, [back-post sl st around the center dc of next petal, ch 5] 6 times, sl st to first sl st. (6 sl sts, 6 ch-5 sps)
Rnd 7 (Layer 3): Sl st into first ch-5 sp. In each ch-5 sp around work (sc, hdc, 7 dc, hdc, sc). Sl st to first sc. (6 petals, 66 sts)
Fasten off and leave a 12 in (30.5 cm) tail for sewing to the stem.
Each layer is anchored behind the center of the petals in front of it. That offsets every layer by half a petal and gives the rose its stacked look. Sew the center coil into the magic ring so the spiral stands up in the middle of Layer 1.
Rosebud
Bud Petal Strip (Color A)
Ch 16.
Row 1: Dc in the 4th ch from hook and in each ch across. The skipped 3 ch count as the first dc. (14 dc)
Row 2: Ch 1, turn. [Sc in next st, (hdc, dc, hdc) in next st] 7 times. (7 scallops, 28 sts)
Fasten off. Roll the strip into a cone with the foundation edge at the bottom and the scallops at the top. Keep it tight at the base and loose at the top. Stitch through all layers at the base.
Calyx (Color B)
Rnd 1: MR, 6 sc in ring. (6 sc)
Rnd 2: 2 sc in each st around. (12 sc)
Rnd 3: Sc in each st around. (12 sc)
Push the rolled bud base into the cup.
Rnd 4 (sepals): [Sl st in next st, ch 4, sc in 2nd ch from hook, hdc in next ch, dc in next ch, skip next st, sl st in next st] 4 times. (4 sepals, 3 sts of Rnd 3 used per sepal)
Fasten off and leave a 12 in (30.5 cm) tail. Use the tail to sew the cup to the bud, then tack each sepal tip lightly to the petals.
Leaf (Color B)
Ch 9.
Rnd 1: Sc in 2nd ch from hook, hdc in next ch, dc in next 4 ch, hdc in next ch, (sc, ch 2, sc) in last ch for the tip. Working along the other side of the foundation ch: hdc in next ch, dc in next 4 ch, hdc in next ch, sc in next ch. Sl st to first sc. (16 sts plus ch-2 tip)
Fasten off and leave an 8 in (20.3 cm) tail. The foundation chain stays visible down the middle as the leaf vein.
Make All Pieces
Color A (ivory):
- 45 roses with 45 center coils
- 45 bud petal strips
Color B (sage):
- 10 stems
- 45 calyxes
- 180 leaves (18 per strand)
Strand A has a rose at markers 1, 3, 5, 7 and 9 and a bud at markers 2, 4, 6 and 8 (5 roses, 4 buds). Strand B is the reverse (4 roses, 5 buds). Alternate A and B across the rod so the flowers are staggered.
Layout grid (R = rose, b = bud; columns are strands 1 to 10, left to right):
Marker   1  2  3  4  5  6  7  8  9  10
st 24    R  b  R  b  R  b  R  b  R  b
st 48    b  R  b  R  b  R  b  R  b  R
st 72    R  b  R  b  R  b  R  b  R  b
st 96    b  R  b  R  b  R  b  R  b  R
st 120   R  b  R  b  R  b  R  b  R  b
st 144   b  R  b  R  b  R  b  R  b  R
st 168   R  b  R  b  R  b  R  b  R  b
st 192   b  R  b  R  b  R  b  R  b  R
st 216   R  b  R  b  R  b  R  b  R  b
Totals: 5 x 5 + 5 x 4 = 45 roses, and 5 x 4 + 5 x 5 = 45 buds.
Joining (Assembly on the Stem)
The strands are never joined to each other. Here, joining means sewing the flowers and leaves to the stem.
Flowers: Center each rose or bud on its marked stitch. With the Color A tail, sew through the back of Rnds 1 and 2 of the rose (or through the calyx base of the bud). Then sew through both front loops of the marked stem stitch and of the stitches directly above and below it. Spreading the weight over 3 stem sts keeps the stem from pulling. Remove the marker.
Leaves: Sew one pair of leaves 6 sts (1.5 in / 3.8 cm) below each flower, at stem sts 30, 54, 78, 102, 126, 150, 174, 198 and 222. Place one leaf on each side of the stem with its base touching the stem and its tip angled slightly upward. Sew through only the last 0.5 in (1.3 cm) of the leaf base so the tips stay free.
Tension: Pull the sewing yarn just snug. If it’s too tight, the stem will pucker and get shorter. If it’s too loose, the roses will tip forward.
Size checkpoint: after assembly, lay the strand flat. It should still measure 60 in (152.4 cm), with the flowers 6 in (15.2 cm) apart and the strand 3.5 in (8.9 cm) wide at the roses.
Top Edge: Hanging Loops
Gauge: the same as the stem, 4 sts per 1 in (2.5 cm).
Put the live loop at the top of the stem back on your hook.
Rnd 1: Ch 20, sl st into the top stitch of the stem (the last sl st of Row 1) to form a ring. (20 ch)
Rnd 2: Back-bump sl st in each of the 20 ch, then sl st into the top stem stitch. (20 sl sts)
Fasten off and weave the end into the stem.
Why the math works: 20 sts at 4 sts per inch make a loop with a 5 in (12.7 cm) circumference. A 1.5 in (3.8 cm) rod has a circumference of about 4.7 in (11.9 cm), so the loop slides freely with a little ease. Folded over the rod, the loop adds 2.5 in (6.4 cm), so each strand hangs 60 + 2.5 = 62.5 in (158.8 cm).
Spacing: with 10 strands 4 in (10.2 cm) apart, the outer strand centers are 9 x 4 = 36 in (91.4 cm) apart. Add half a rose width, 1.75 in (4.4 cm), at each end: 36 + 3.5 = 39.5 in (100.3 cm), or about 40 in (101.6 cm).
Final Blocking
- Lay each strand flat on a towel or blocking mat.
- Straighten the stem without stretching it and check that it measures 60 in (152.4 cm).
- Mist the roses, buds and leaves until damp.
- Shape the rose petals with your fingers so each layer cups slightly forward and the center coil stands up.
- Pin each leaf tip to a point and pin the leaves at matching angles.
- Let everything dry completely, usually 12 to 24 hours.
- Hang the strands and let them settle for a day.
Final Quality-Control Checklist
- All 10 stems have 240 sl sts and measure 60 in (152.4 cm)
- Every rose has 3 layers of 6 petals (42, 54 and 66 sts)
- Every bud has a 28-st scalloped strip and a 4-sepal calyx
- Every leaf has 16 sts plus a ch-2 tip and a visible vein
- Flowers sit at sts 24 through 216, every 24 sts
- Leaf pairs sit 6 sts below each flower
- Strands alternate A and B across the rod
- Hanging loops have 20 sts and slide freely on the rod
- All tails are woven in and secure
Troubleshooting
The stem twists: You may be working into a chain loop instead of the back bump. Rework into the back bumps only, then steam the stem flat.
The stem stretches under the roses: Use cotton yarn, or work the stem with a hook 0.5 mm smaller.
The rose looks flat: The back-post sl sts are too loose. Pull them snug so each ch loop sits firmly behind the layer in front.
The bud unrolls: Sew through every layer at the base before you add the calyx.
The leaves curl: Pin them flat for blocking and leave them until fully dry.
The strands bunch on the rod: Before hanging, mark the rod with tape every 4 in (10.2 cm).
Care
Hand wash in cool water with mild soap. Press out the water in a towel and dry flat, reshaping the petals while damp.
Final Notes
Each measurement builds on the last. Four stem sts make 1 in (2.5 cm), and 240 sts make a 60 in (152.4 cm) stem. With a flower every 24 sts, the flowers are 6 in (15.2 cm) apart. The roses grow from 1.75 in to 2.75 in to 3.5 in (4.4 cm to 7.0 cm to 8.9 cm), and a 20-st loop adds 2.5 in (6.4 cm). Ten strands 4 in (10.2 cm) apart make a curtain about 40 in (101.6 cm) wide.
Happy crocheting!