
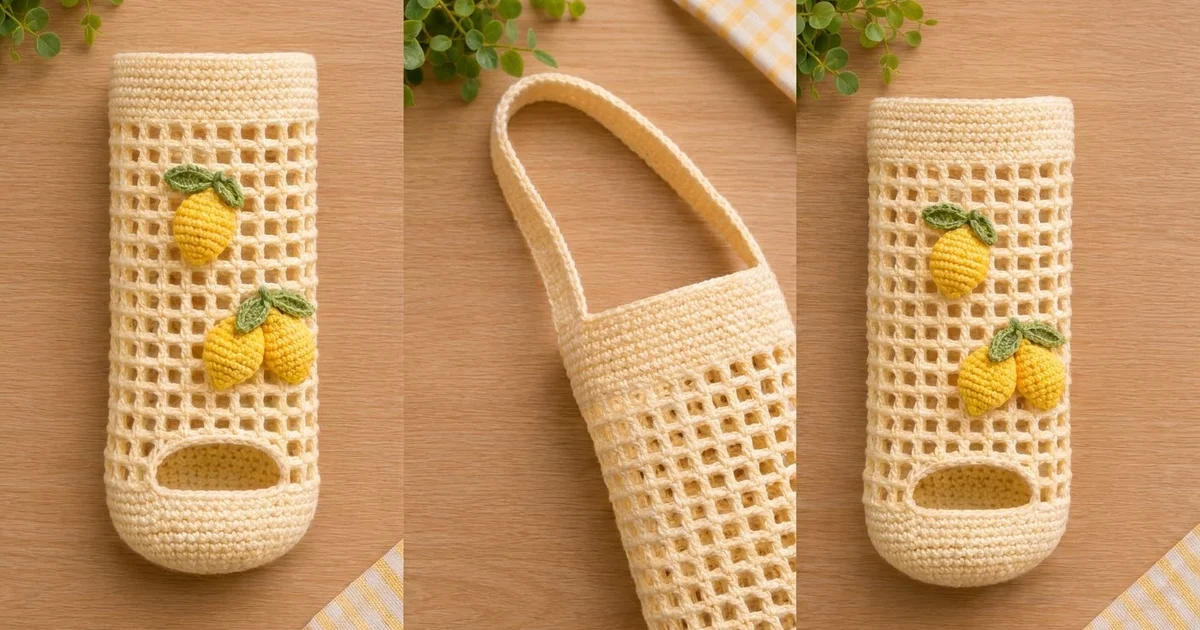
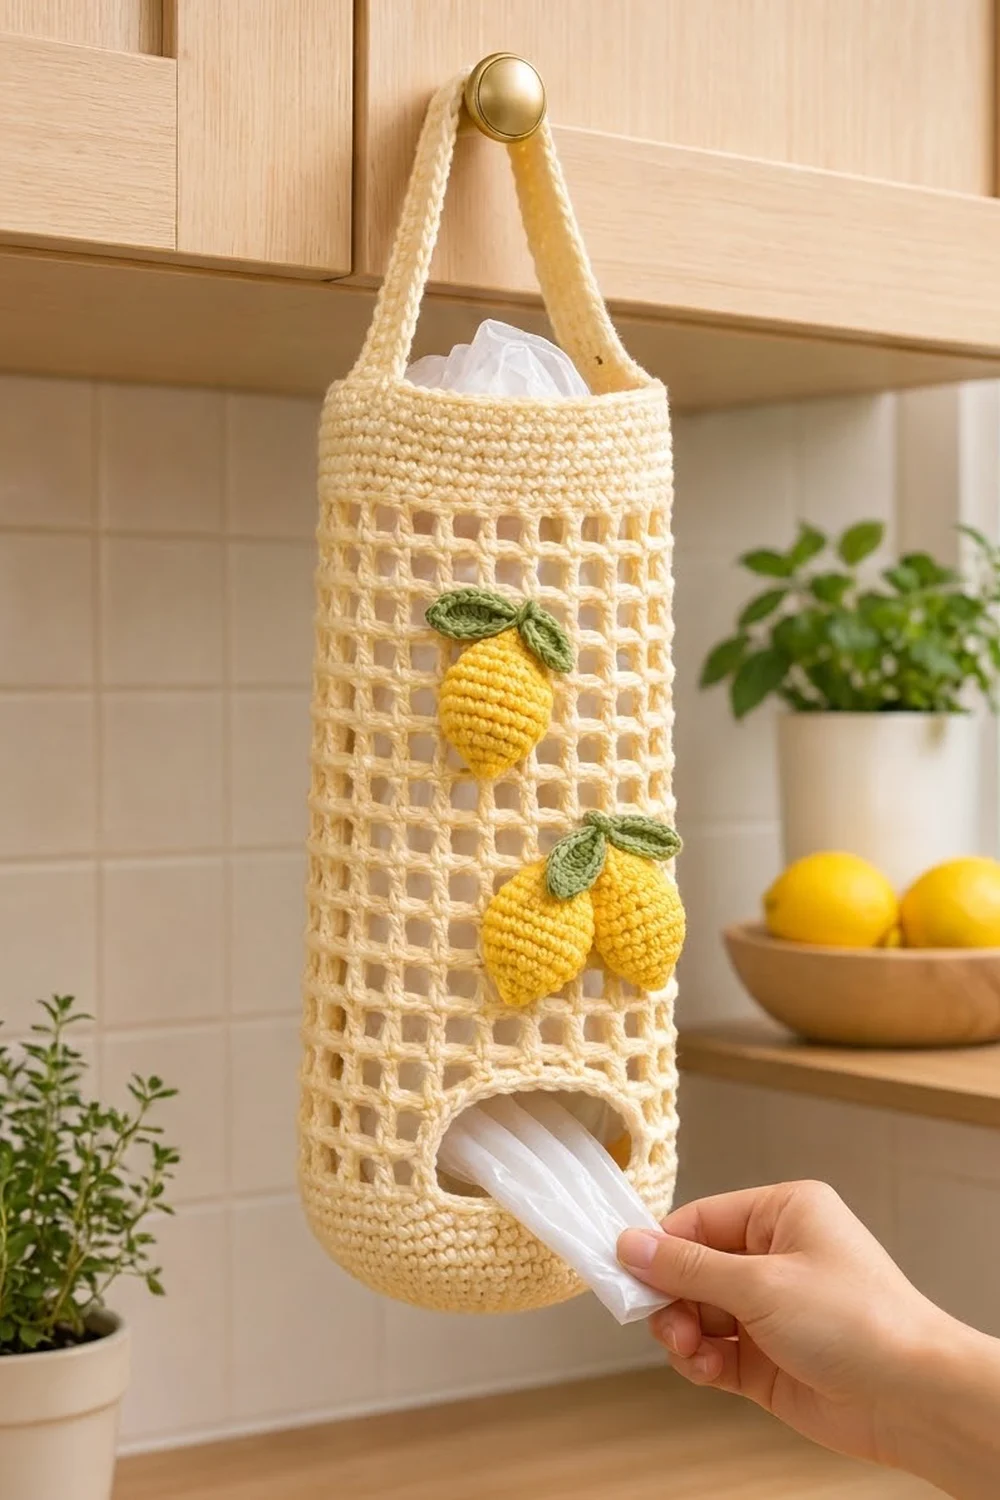
This hanging bag holder has a soft cream body, an open filet-mesh middle and three bright lemon appliqués with green leaves. Stuff plastic grocery bags in at the top and pull them out one at a time through the oval opening near the base.
The colors are simple: cream for the body and strap, sunny yellow for the lemons and sage green for the leaves. A solid single crochet base and top band frame a grid of square mesh windows.
All instructions use US crochet terms. The finished holder measures 6 in (15.2 cm) wide when flat and 14.5 in (36.8 cm) tall, not counting the strap. The strap leaves a hanging loop of about 10 in (25.4 cm).
You start with an oval base worked in rounds, then work the walls straight up. The opening is made with a few turned rows and a chain bridge. Next come the mesh and a solid top band, which acts as the border. The strap and lemons are made separately and sewn on.
Finished Size and Construction
- Finished size: 6 in (15.2 cm) wide flat × 14.5 in (36.8 cm) tall, excluding strap
- Skill level: Easy-Intermediate
- Terminology: US crochet terms
- Yarn weight: Worsted (#4) cotton
- Hook: 4.0 mm (US G-6)
- Number of pieces: One finished item: 1 tubular body, plus 1 strap, 3 lemons and 4 leaves sewn on
- Layout: Single vertical tube, oval opening centered on the front, lemons on the front mesh
- Base size: about 5 in × 2.25 in (12.7 cm × 5.7 cm)
- Size before border: 6 in (15.2 cm) wide × 12.75 in (32.4 cm) tall
- Border (top band) depth: 1.75 in (4.4 cm)
Materials
Use a smooth worsted-weight cotton or cotton blend. Cotton holds its shape under the weight of the bags and washes well. Stretchy acrylics will let the mesh sag.
- Color A, Cream: 130 g, about 220 m (body, opening edging, strap)
- Color B, Lemon Yellow: 15 g, about 25 m (3 lemons)
- Color C, Sage Green: 8 g, about 14 m (4 leaves)
Tools:
- 4.0 mm (US G-6) crochet hook
- Tapestry needle
- 4 locking stitch markers
- A small pinch of fiberfill (for puffy lemons)
- Measuring tape and rust-proof pins
- Spray bottle and blocking surface
All quantities include a margin of about 10–15% for a gauge swatch and differences in tension.
Abbreviations (US Terms)
- ch – chain
- sl st – slip stitch
- sc – single crochet
- hdc – half double crochet
- dc – double crochet
- inc – 2 sc in the same stitch
- BLO – back loop only
- st(s) – stitch(es)
- sp – space
- rnd – round
Special stitch – Mesh (ch-2 mesh): 1 dc, then ch 2 and skip 2 sts. Each mesh is 3 stitches wide.
Gauge and Checkpoints
Solid gauge: 16 sc × 18 rnds = 4 in (10.2 cm) in sc worked in the round.
Mesh gauge: 4 meshes × 5 mesh rnds = 3 in × 3 in (7.6 cm × 7.6 cm).
Make the base first as your test piece. It works up quickly.
Checkpoints:
- After Rnd 5, the base should measure about 5 in × 2.25 in (12.7 cm × 5.7 cm).
- After Rnd 14, the wall should be 2 in (5.1 cm) tall above the BLO ridge, and the tube should be 6 in (15.2 cm) wide when flat.
- After Rnd 22, the solid section should be about 3.75 in (9.5 cm) tall.
- After Rnd 37, the body should be about 12.75 in (32.4 cm) tall.
- After Rnd 46, the body should be 14.5 in (36.8 cm) tall.
Too big? Go down 0.5 mm in hook size. Too small? Go up 0.5 mm. If only the mesh is off, change hooks for the mesh rounds alone. Never change the stitch counts.
Body
The body is worked from the bottom up. Each round starts at one narrow end of the oval, which becomes a side fold when the holder is flattened. Do not turn at the end of a round unless the pattern says so.
Oval Base
With Color A, ch 12.
Rnd 1: Sc in 2nd ch from hook and in next 9 ch, 3 sc in last ch. Working along the opposite side of the foundation chain, sc in next 9 ch, 2 sc in last ch (same ch as first sc). Sl st to first sc. (24 sts)
Rnd 2: Ch 1, inc in first st, sc in next 9 sts, inc in each of next 3 sts, sc in next 9 sts, inc in each of last 2 sts. Sl st to first sc. (30 sts)
Rnd 3: Ch 1, sc in first st, inc, sc in next 9 sts, [sc 1, inc] 3 times, sc in next 9 sts, [sc 1, inc] 2 times. Sl st to first sc. (36 sts)
Rnd 4: Ch 1, sc in next 2 sts, inc, sc in next 9 sts, [sc 2, inc] 3 times, sc in next 9 sts, [sc 2, inc] 2 times. Sl st to first sc. (42 sts)
Rnd 5: Ch 1, sc in next 3 sts, inc, sc in next 9 sts, [sc 3, inc] 3 times, sc in next 9 sts, [sc 3, inc] 2 times. Sl st to first sc. (48 sts)
Lower Wall
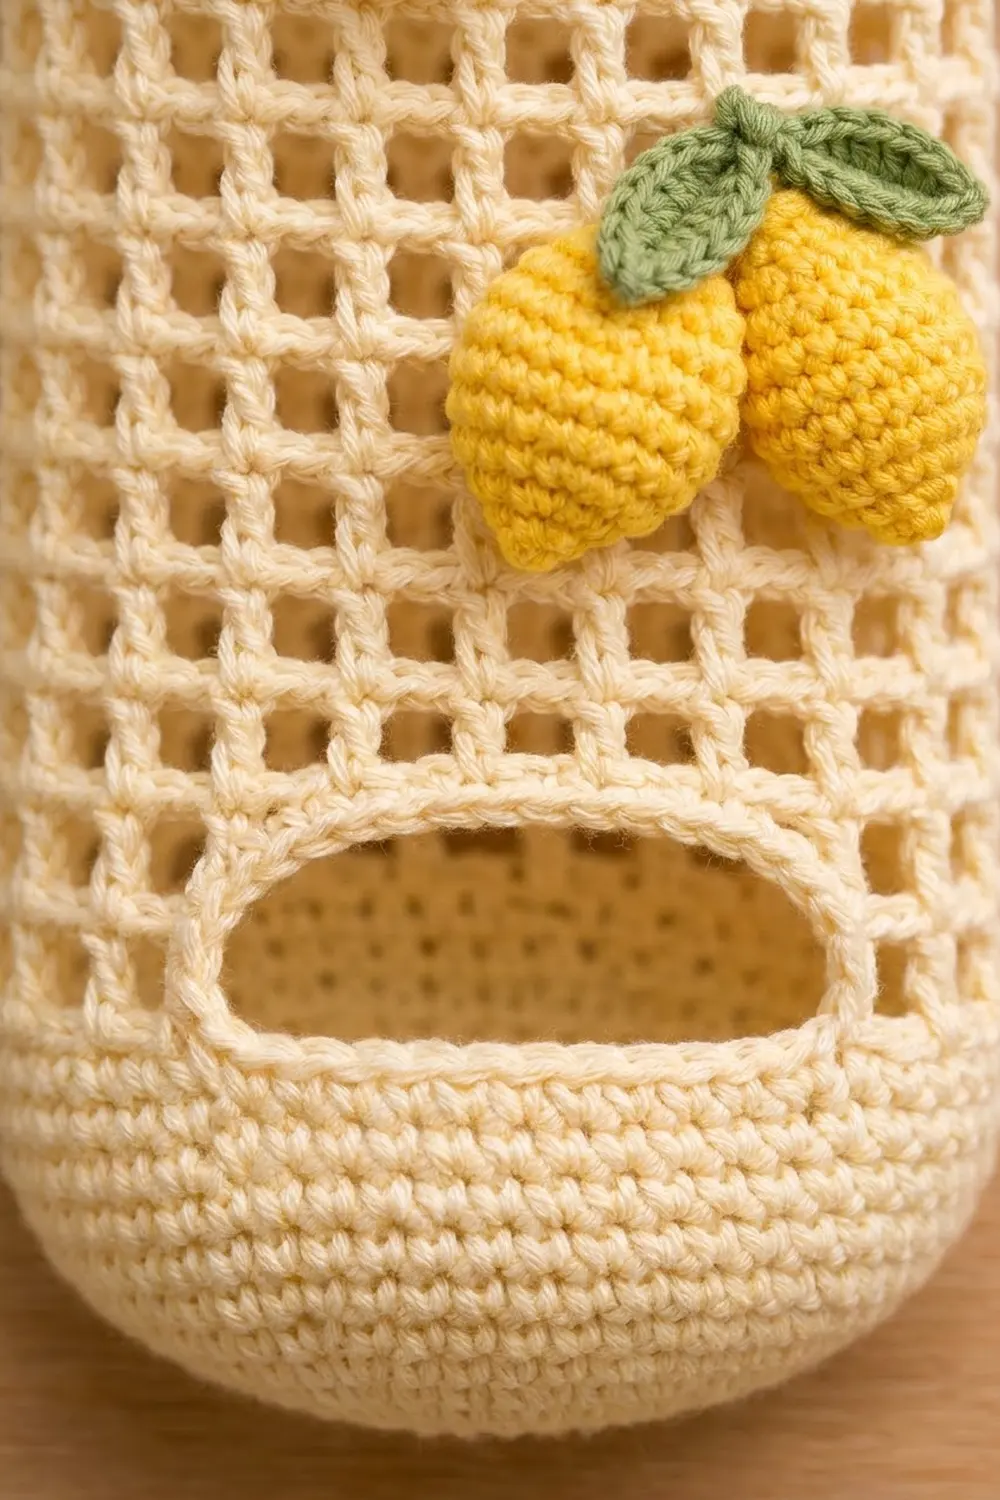
Rnd 6: Ch 1, sc in BLO of each st around. Sl st to first sc. (48 sts) This makes a crisp ridge where the base turns upward.
Rnds 7–14: Ch 1, sc in each st around. Sl st to first sc. (48 sts) That is 8 rounds.
Flatten the tube so the round join sits at one side fold. Sts 1–24 are the front, and sts 25–48 are the back. Place markers in st 6 and st 19. The 14 sts from st 6 to st 19 form the bottom edge of the opening. Fasten off.
Dispenser Opening
Row 15: Join Color A in st 20. Ch 1, sc in sts 20–48, then sc in sts 1–5. Turn. (34 sts) Leave the 14 marked front sts unworked.
Rows 16–20: Ch 1, sc in each st across. Turn. (34 sts) That is 6 rows in total.
Rnd 21: Ch 1, sc in each of the 34 sts, ch 14. Sl st to first sc to close the round. (34 sc + 14 ch = 48 sts)
Rnd 22: Ch 1, sc in each sc and each ch around. Sl st to first sc. (48 sts)
The opening is now about 3.5 in (8.9 cm) wide and 1.5 in (3.8 cm) tall. From here on, the round begins at the back of the holder.
Mesh Section
Rnd 23: Ch 5 (counts as dc + ch 2), skip next 2 sts, [dc in next st, ch 2, skip next 2 sts] 15 times. Sl st to 3rd ch of beginning ch-5. (16 dc, 16 ch-2 sps = 16 meshes)
Rnds 24–37: Ch 5 (counts as dc + ch 2), [dc in next dc, ch 2] 15 times. Sl st to 3rd ch of beginning ch-5. (16 meshes) That is 14 rounds here, for 15 mesh rounds in total.
Stack each dc directly on the dc below so the squares form straight columns. When the holder is flat, there are 8 meshes across the front and 8 across the back.
Checkpoint: The body should be 12.75 in (32.4 cm) tall and 6 in (15.2 cm) wide flat.
Opening Edging
Rnd 1: Join Color A at the bottom-right corner of the opening. Work these sc in order:
- 14 sc along the bottom edge (1 in each skipped st of Rnd 14)
- 7 sc along the left side (1 in each of the 6 row ends, plus 1 at the corner)
- 14 sc along the top edge (1 in each free loop of the ch-14)
- 7 sc along the right side
Sl st to first sc. (42 sts)
Rnd 2: Sl st in each st around. (42 sl sts) Fasten off.
The extra stitch on each side rounds off the corners, giving a smooth, raised oval rim.
Border (Top Band)
Border gauge: The band uses the solid gauge, 16 sc × 18 rnds = 4 in (10.2 cm). It has 8 sc rounds plus a sl st round, for a depth of 1.75 in (4.4 cm).
Rnd 38 (conversion round): Ch 1, sc in each dc and 2 sc in each ch-2 sp around. Sl st to first sc. (16 sc worked 1-per-dc + 32 sc worked into spaces = 48 sts)
Rnds 39–45: Ch 1, sc in each st around. Sl st to first sc. (48 sts) That is 7 rounds.
Rnd 46: Sl st loosely in each st around. (48 sl sts) Fasten off.
Per side when flattened: 24 sts across the front and 24 across the back, counted fold to fold. A tube has no corners, so no corner stitches are added.
Why the math works: 16 meshes × 3 sts = 48 sts, the same count as the base and lower wall. At 4 sts per inch, 48 sts is 12 in (30.5 cm) around, or 6 in (15.2 cm) flat. That’s why the band neither flares nor pulls in.
Strap
With Color A, ch 6.
Row 1: Sc in 2nd ch from hook and in each ch across. Turn. (5 sts)
Rows 2–54: Ch 1, sc in each st across. Turn. (5 sts)
Edging: Sl st along both long edges, 1 sl st per row end. Fasten off, leaving a 12 in (30.5 cm) tail.
The strap measures 1.25 in × 12 in (3.2 cm × 30.5 cm).
Attach: Flatten the body. Tuck one strap end inside the top band at each side fold, overlapping 1 in (2.5 cm). Check that the strap is not twisted. Whipstitch around each overlap. This leaves 10 in (25.4 cm) of strap free as the hanging loop.
Lemons (Make 3)
With Color B, ch 6.
Rnd 1: Sc in 2nd ch from hook and in next 3 ch, 3 sc in last ch. Working along the opposite side, sc in next 3 ch, 2 sc in last ch. Sl st to first sc. (12 sts)
Rnd 2: Ch 1, inc, sc in next 3 sts, inc in each of next 3 sts, sc in next 3 sts, inc in each of last 2 sts. Sl st to first sc. (18 sts)
Rnd 3 (tips): Ch 1, sc in next 8 sts, (sc, ch 2, sc) in st 9, sc in next 8 sts, (sc, ch 2, sc) in st 18. Sl st to first sc. (20 sc + 2 ch-2 tips)
Fasten off, leaving a 12 in (30.5 cm) tail. Each lemon is about 1.75 in × 1.25 in (4.4 cm × 3.2 cm), with a small point at each end.
Leaves (Make 4)
With Color C, ch 7.
Rnd 1: Sc in 2nd ch from hook, hdc in next ch, dc in next 2 ch, hdc in next ch, (sc, ch 2, sc) in last ch for the tip. Working along the opposite side, hdc in next ch, dc in next 2 ch, hdc in next ch, sc in next ch, sl st in same ch as first sc. (12 sts + ch-2 tip)
Fasten off, leaving an 8 in (20.3 cm) tail. Each leaf is about 1.5 in (3.8 cm) long.
Appliqué Placement
- Single lemon: Place it on the upper left of the front, about 1.5 in (3.8 cm) below the top band, tilted slightly. Tuck a pinch of fiberfill underneath. Whipstitch around the edge, catching the mesh bars behind it.
- Lemon pair: Place two lemons side by side, touching, on the lower right. Their tops should sit about 2.5 in (6.4 cm) below the single lemon. Pad and sew them the same way.
- Leaves: Sew 2 leaves above each lemon group, angled outward in a V. Stitch only the base and center so the tips lift slightly.
Keep all appliqués above the opening.
Final Blocking
- Weave in all ends through solid stitches.
- Fill the holder loosely with a rolled towel.
- Mist it until damp but not soaked.
- Push any slanted dc upright so the mesh columns are square.
- Pin it to 6 in (15.2 cm) wide flat and 14.5 in (36.8 cm) tall.
- Pin the strap flat at 12 in (30.5 cm).
- Let it dry completely, then remove the towel.
Final Quality-Control Checklist
- The base is a smooth oval with a clear BLO ridge.
- Every solid round has 48 sts.
- Every mesh round has 16 meshes, and the columns run straight.
- The opening is centered on the front, 3.5 in (8.9 cm) wide, with a smooth rim.
- The top band is 1.75 in (4.4 cm) deep and lies flat.
- The strap is untwisted and firmly sewn at both side folds.
- The lemons are puffy and secure, with leaves angled outward.
- The finished size is 6 in × 14.5 in (15.2 cm × 36.8 cm).
Troubleshooting
- Base cups: Your tension is too tight. Go up a hook size for Rnds 1–5.
- Base ruffles: Recount. Each round should add exactly 6 sts.
- Mesh columns spiral: Always ch 5 at the start, then work the next dc into the next dc.
- Mesh is too tall: Pull each dc snug, or drop one mesh round and add one sc round to the band.
- Opening is off-center: Recheck your markers. There should be 5 front sts on each side of the 14-st gap.
- Top band flares: Work Rnd 38 with a hook 0.5 mm smaller.
- Strap stretches: Use 100% cotton, or add a second sl st edging.
Care
Hand wash in cool water with mild soap and roll it in a towel to remove the water. Dry flat, reshaping the tube while it is damp.
Final Notes
Everything rests on 48 stitches. The base grows to 48, the wall and opening keep 48, the mesh divides 48 into 16 meshes of 3, and the band converts back to 48. That makes the holder 12 in (30.5 cm) around and 6 in (15.2 cm) flat. The height is 3.75 in (9.5 cm) of solid wall, plus 9 in (22.9 cm) of mesh, plus a 1.75 in (4.4 cm) band, for a total of 14.5 in (36.8 cm).
Happy crocheting!