

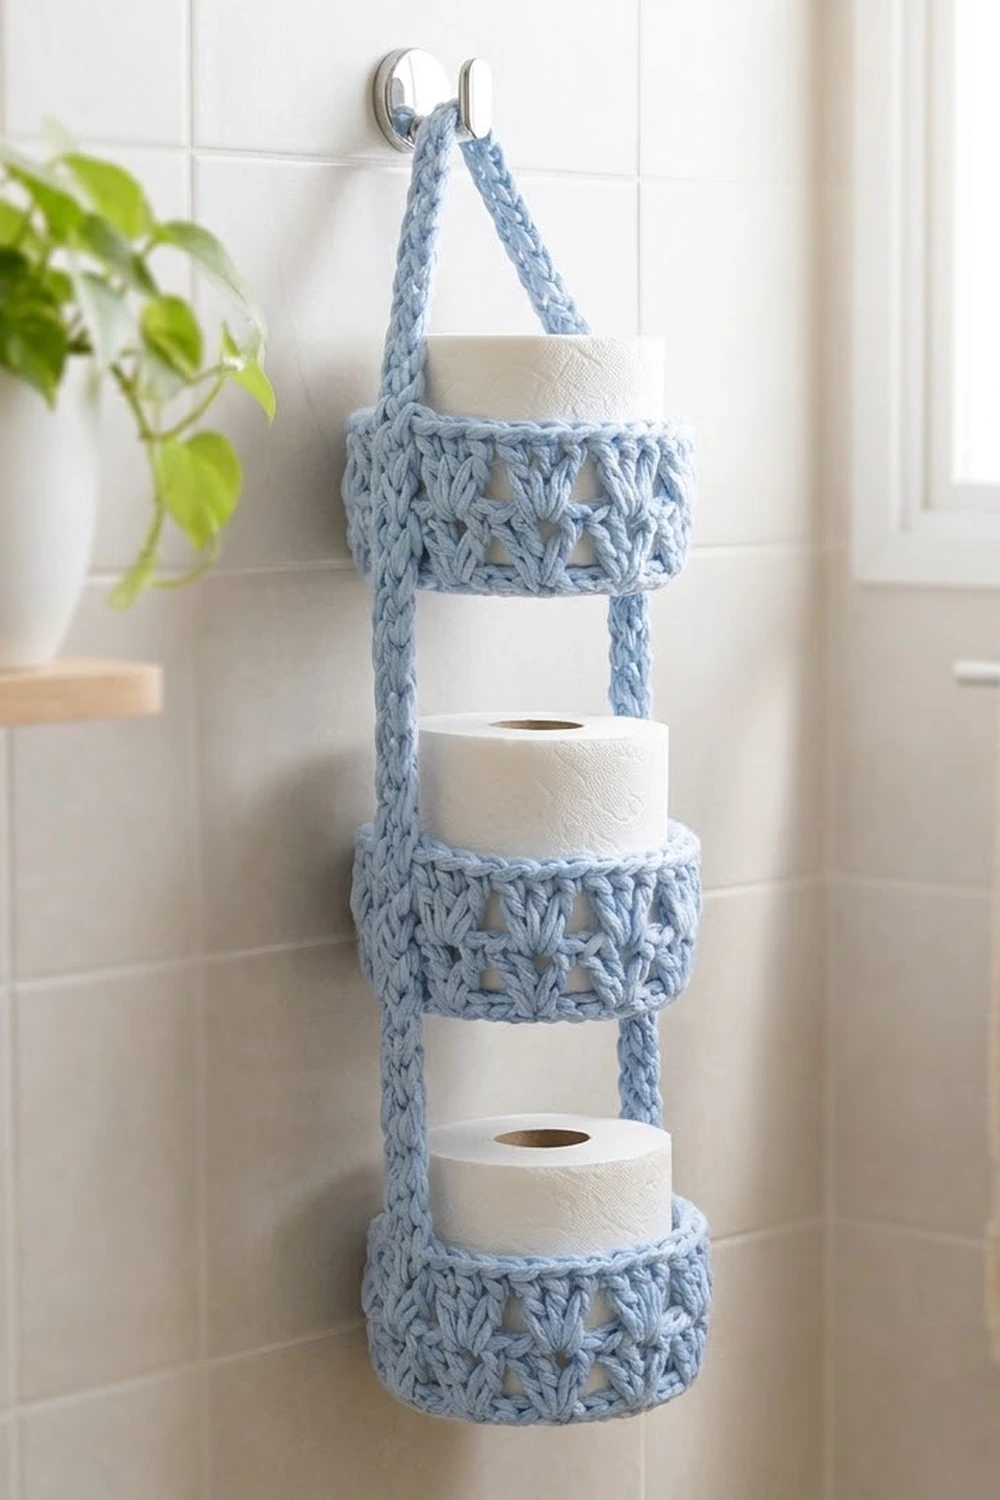
The Sky Tier holder is a hanging organizer for three toilet paper rolls. It has three round baskets stacked one above the other, held together by two sturdy cord straps that meet in a peaked hanging loop. It hangs from a single wall hook, so you don’t need to drill a shelf.
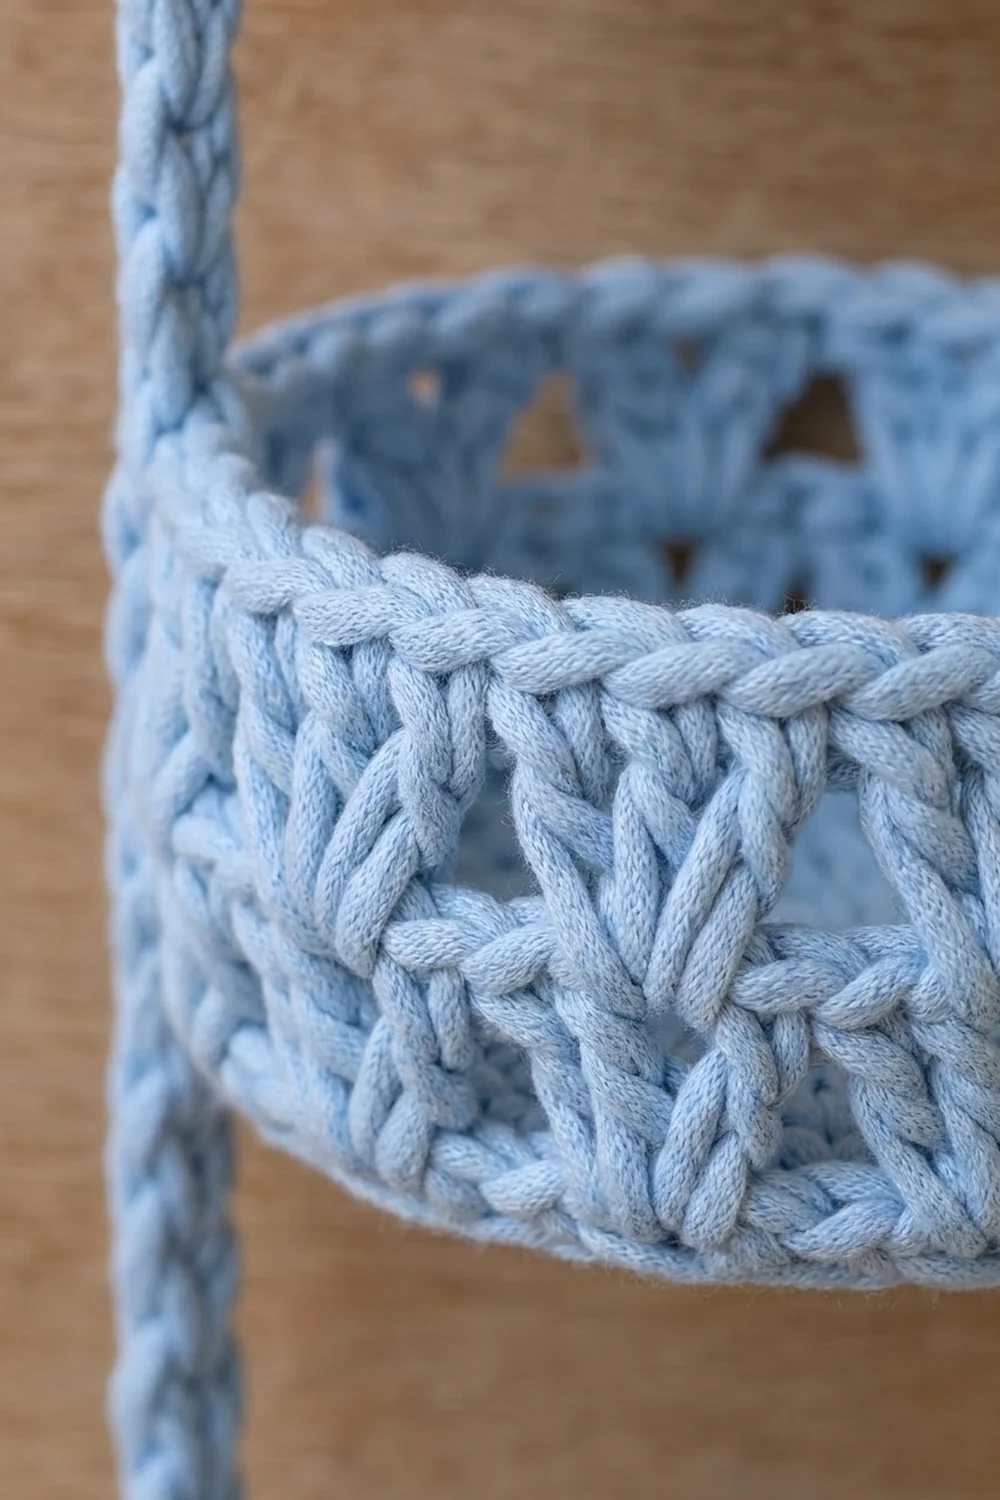
It’s worked in one soft sky-blue chunky yarn. Each tier has a ridged base edge, a band of V-stitches and shells that pull into small fans, and a rolled reverse single crochet rim. The look is clean and a little coastal, and it suits a white or tiled bathroom.
This pattern uses US crochet terms. The finished holder is about 6.75 in (17.1 cm) wide including the straps. The three tiers measure 14.7 in (37.3 cm) from bottom to top rim, and the loop rises about 7 in (17.8 cm) above that, for a total hanging length of about 21.7 in (55.1 cm).
Construction overview: You make three identical tier baskets in joined rounds, crochet one long single crochet cord, and then whipstitch the cord to the outside of each tier. The cord runs up one side, forms the loop, and runs down the other side.
Finished Size and Construction
- Finished size: 6.75 in (17.1 cm) wide × 21.7 in (55.1 cm) long, including the loop
- Skill level: Easy
- Terminology: US crochet terms
- Yarn weight: Bulky (#5)
- Hook: 6 mm (US J-10)
- Number of pieces: 4 (3 tiers, 1 cord)
- Layout: 1 column × 3 tiers, stacked vertically
- Piece size (one tier): 5.75 in (14.6 cm) outer diameter × 2.7 in (6.9 cm) tall
- Tier wall height before border: 2.0 in (5.1 cm)
- Border (rim) depth: 0.7 in (1.8 cm)
Materials
Yarn: Use a bulky (#5) cotton or cotton blend in light sky blue. Cotton holds its shape in a humid bathroom and won’t stretch much under the weight of the rolls. Avoid very soft acrylic chenille, which sags.
- Light Sky Blue: about 250 g / 350 m (383 yd) in total
- Tiers: about 70 g / 98 m (107 yd) each, 210 g / 294 m (321 yd) for all three
- Cord: about 40 g / 56 m (61 yd)
These quantities include a margin of about 15% for gauge swatches and joining.
Tools:
- 6 mm (US J-10) crochet hook
- Yarn needle
- 4 locking stitch markers (more are helpful)
- Measuring tape
- Scissors
- Spray bottle and pins for blocking
Abbreviations (US Terms)
- ch – chain
- sl st – slip stitch
- sc – single crochet
- dc – double crochet
- sc2tog – single crochet 2 together
- BLO – back loop only
- sp – space
- st(s) – stitch(es)
- rev sc – reverse single crochet (crab stitch)
Special stitches:
- V-stitch (V-st): (dc, ch 1, dc) in the same stitch.
- Shell: (2 dc, ch 1, 2 dc) in the same ch-1 space.
- Reverse sc: Working from left to right (right-handed), insert the hook in the next stitch to the right, yarn over, pull up a loop, yarn over, and pull through both loops on the hook.
Gauge and Checkpoints
Gauge: 11 dc = 4 in (10.2 cm) worked in rounds. For the cord, 6 sc = 2 in (5.1 cm).
Make one complete tier before you start the others. It’s your real gauge swatch, so check it against these numbers:
- After Round 1: 1.75 in (4.4 cm) across
- After Round 2: 3 in (7.6 cm) across
- After Round 3: 4.25 in (10.8 cm) across
- After Round 4: 5.5 in (14.0 cm) across. This is the base, and it’s the most important checkpoint, because a standard roll is about 4.5 in (11.4 cm) wide.
- After Round 8: the wall stands 2.0 in (5.1 cm) tall.
- After Round 10: the finished tier is 5.75 in (14.6 cm) across and 2.7 in (6.9 cm) tall.
If the base is too big: go down to a 5.5 mm hook. If it’s too small, or narrower than 5.25 in (13.3 cm), go up to a 6.5 mm hook. Don’t add stitches, because the 48-stitch count drives the whole pattern.
Tier Pattern (make 3)
Join every round with a sl st to the first stitch. The ch 3 at the start of a dc round counts as 1 dc. The ch 1 at the start of a sc round does not count as a stitch.
Base
Round 1: Make a magic ring, ch 3, then work 11 dc in the ring. Join. (12 dc)
Round 2: Ch 3, dc in the same st, then 2 dc in each st around. Join. (24 dc)
Round 3: Ch 3, 2 dc in the next st, dc in the next st, 2 dc in the next st; repeat from * around. Join. (36 dc)
Round 4: Ch 3, dc in the next st, 2 dc in the next st, dc in each of the next 2 sts, 2 dc in the next st; repeat from * around. Join. (48 dc)
Check that the base lies flat and measures 5.5 in (14.0 cm) across.
Wall
Round 5 (turning ridge): Ch 1, then work sc BLO in each st around. Join. (48 sc)
The unused front loops form the ridge around the bottom edge, and the wall starts to rise.
Round 6 (V round): Ch 4 (counts as dc + ch 1), then dc in the same st. Skip the next 3 sts, V-st in the next st; repeat from * 10 more times, then skip the last 3 sts. Join to the 3rd ch of the beginning ch 4. (12 V-sts: 24 dc + 12 ch-1 sps)
Round 7 (shell round): Sl st into the first ch-1 sp. Ch 3, then (dc, ch 1, 2 dc) in the same sp. Work a shell in each remaining ch-1 sp around. Join to the top of the ch 3. (12 shells: 48 dc + 12 ch-1 sps)
This round has 48 dc, the same as the base, so the wall stays straight instead of flaring.
Round 8 (gathering round, conversion): Ch 1. Sc in the next dc, sc in the ch-1 sp, sc in the next dc, sc2tog over the next 2 dc; repeat from * 11 more times. Each sc2tog joins the last dc of one shell to the first dc of the next shell. The final sc2tog uses the top of the beginning ch 3. Join.
(24 sc into dc + 12 sc into ch-1 sps + 12 sc2tog = 48 sts)
The sc2tog stitches pull the tops of neighboring shells together, which gives the fan or inverted-V texture.
Checkpoint: the wall should be 2.0 in (5.1 cm) tall.
Border (Tier Rim)
Border gauge: 48 sts around a 5.5 in (14.0 cm) opening. On a round tier, the strap points split the rim into two halves of 24 sts, which this pattern calls the two “sides.”
Round 9: Ch 1, then sc in each st around. Join. (48 sc; 24 per side)
Round 10: Ch 1, then work rev sc in each st around. Join. (48 rev sc; 24 per side)
Fasten off and leave a 6 in (15.2 cm) tail.
On every tier, place one marker in rim stitch 1 (the join) and one in rim stitch 25. These two points are exactly opposite each other, with 24 stitches between them on each side. Mark the same two columns on the Round 5 ridge.
Why the math works: The wall stays at 48 stitches from Round 5 through Round 10, and the base is also 48. That makes the rim the same size as the base, so it doesn’t ruffle or pull in. Forty-eight is 12 pattern repeats of 4 stitches each, and the two halves of 24 are 6 repeats each. Because the straps land at the same point in the pattern on both sides, the holder hangs evenly.
Cord (make 1)
Foundation: Ch 133.
Row 1: Sc in the back bump of the 2nd ch from the hook, then in the back bump of each ch across. (132 sc)
Fasten off and leave a 12 in (30.5 cm) tail. Weave the starting tail in neatly.
Checkpoint: The cord should be 44 in (111.8 cm) long, plus or minus 1 in (2.5 cm), and about 0.5 in (1.3 cm) wide. If it’s more than 1 in (2.5 cm) too long, rework it with a tighter chain. Don’t change the stitch count.
Make All Pieces
- Tiers: 3, in Light Sky Blue, about 70 g / 98 m (107 yd) each
- Cord: 1, in Light Sky Blue, about 40 g / 56 m (61 yd)
Lay out the pieces like this, with the cord stitch numbers shown on each side:
            /\        Loop: cord sc 45–88
           /  \
  44–37 [ TIER 3 ] 89–96
  36–27 |  gap   | 97–106
  26–19 [ TIER 2 ] 107–114
  18–9  |  gap   | 115–124
   8–1  [ TIER 1 ] 125–132
Joining
Mapping the cord: Place markers in the cord at these stitches:
- Left side:
- Bottom tier: sc 1–8
- Gap: sc 9–18
- Middle tier: sc 19–26
- Gap: sc 27–36
- Top tier: sc 37–44
- Loop: sc 45–88 (44 sts)
- Right side:
- Top tier: sc 89–96
- Gap: sc 97–106
- Middle tier: sc 107–114
- Gap: sc 115–124
- Bottom tier: sc 125–132
Each side uses 44 stitches (8 + 10 + 8 + 10 + 8), the loop uses 44, and 44 + 44 + 44 = 132.
Stitch-to-stitch logic: Each tier is 6 rounds tall, Round 5 through Round 10, and gets 8 cord stitches. At 3 sc per inch, 8 cord stitches measure 2.7 in (6.9 cm), the same as the wall. Each gap gets 10 cord stitches, which is 3.3 in (8.4 cm). That’s enough room to tip a roll in, even though a roll is about 4.2 in (10.7 cm) tall and stands above its tier.
Method:
- Line up the three tiers so all the stitch-1 markers face left and all the stitch-25 markers face right.
- Lay cord sc 1 at the ridge of the bottom tier, on the stitch-1 column. With a long length of yarn, whipstitch both edges of cord sc 1–8 flat to that column, from the ridge up to the rim. Go through both the cord and the wall stitches.
- Leave sc 9–18 free. Attach sc 19–26 to the middle tier the same way, leave sc 27–36 free, then attach sc 37–44 to the top tier. On each tier, the cord ends at the rim.
- Let sc 45–88 form the loop.
- Attach sc 89–96 down the stitch-25 column of the top tier, from the rim to the ridge. Leave sc 97–106 free, attach sc 107–114 to the middle tier, leave sc 115–124 free, and attach sc 125–132 to the bottom tier.
Tension: Make the whipstitches snug but not tight. If you pull too hard, the tier wall puckers inward under the cord. Work about 2 stitches per wall round so the cord can’t twist.
Size checkpoint: Hang the holder before you weave in the ends. Both sides should measure 14.7 in (37.3 cm) from the bottom ridge to the top rim, and the loop should rise about 7 in (17.8 cm) above the top rim. Each tier should hang level.
Final Blocking
- Weave in all the ends along the cord or inside the wall, never across the open shells.
- Lightly mist the whole holder with water.
- Push each tier into a round shape. A roll of toilet paper wrapped in a plastic bag makes a good form.
- Lay the holder flat and pin both cords straight, each 14.7 in (37.3 cm) long.
- Shape the loop into an even peak.
- Let it dry completely, then hang it and add the rolls.
Final Quality-Control Checklist
- Each base measures 5.5 in (14.0 cm) and lies flat.
- Each tier has 48 sts in Rounds 4, 5, 7 (dc only), 8, 9 and 10.
- Each tier has 12 V-sts and 12 shells.
- Every rim is 5.75 in (14.6 cm) across and doesn’t ruffle.
- The cord has exactly 132 sc and measures about 44 in (111.8 cm).
- Cord sts 1–8, 19–26, 37–44, 89–96, 107–114 and 125–132 are attached.
- Both straps are 14.7 in (37.3 cm) long, and the gaps are 3.3 in (8.4 cm).
- The holder hangs straight, with no tier tipping.
Troubleshooting
- The base ruffles: your tension is loose in Round 4. Remake it with a hook 0.5 mm smaller.
- The base cups: you skipped an increase. Count 48 stitches before Round 5.
- The wall flares: you probably made 5-dc shells. Check that each shell is (2 dc, ch 1, 2 dc).
- The rim waves: check that Round 8 has 12 sc2tog and a total of 48 sts.
- A tier tips forward: the strap columns aren’t opposite each other. Recount 24 sts between the markers.
- The rolls won’t fit: the gaps are too short. Check that 10 cord stitches are left free in each gap.
- The cord twists: add more whipstitches to each tier and block the cord flat.
Care
Hand wash in cool water with mild soap, press out the water in a towel, and dry it flat. Reshape the tiers while damp.
Final Notes
The measurements build on each other in this order:
- A 48-stitch base measures 5.5 in (14.0 cm).
- The wall stays at 48 stitches and finishes at 2.7 in (6.9 cm) tall, including a 0.7 in (1.8 cm) rim.
- Three tiers and two gaps of 3.3 in (8.4 cm) make a body 14.7 in (37.3 cm) long.
- A cord of 132 single crochet holds it all together with 44 stitches per side and 44 for the loop.
If you check each of these numbers as you go, the holder will hang level and hold three rolls neatly.
Happy crocheting!