
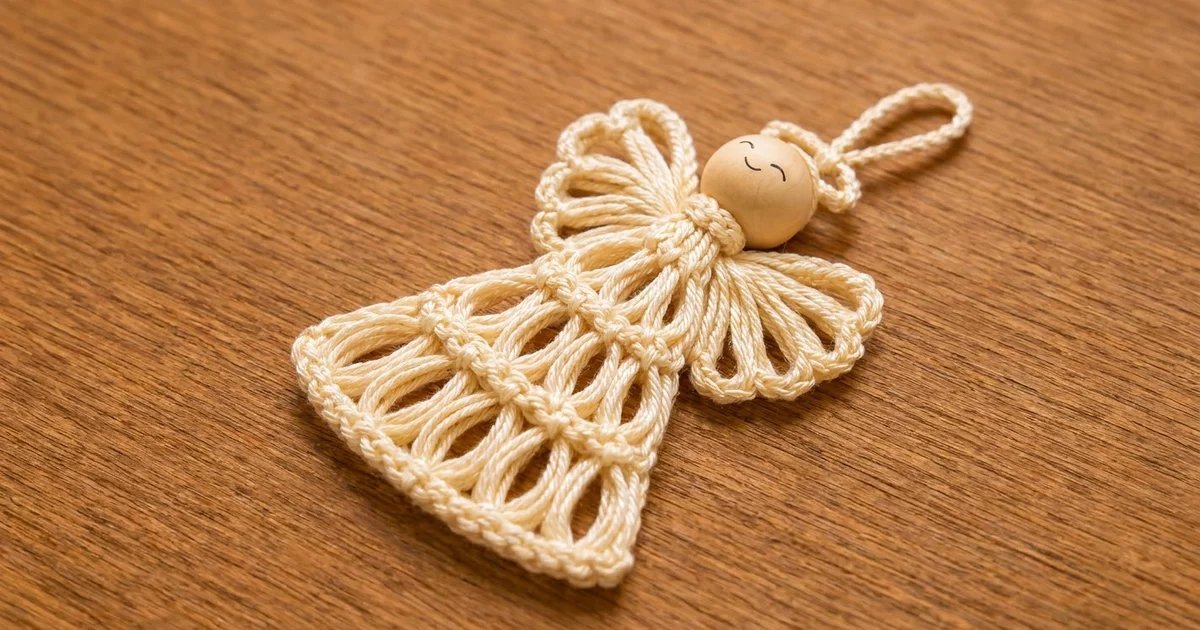
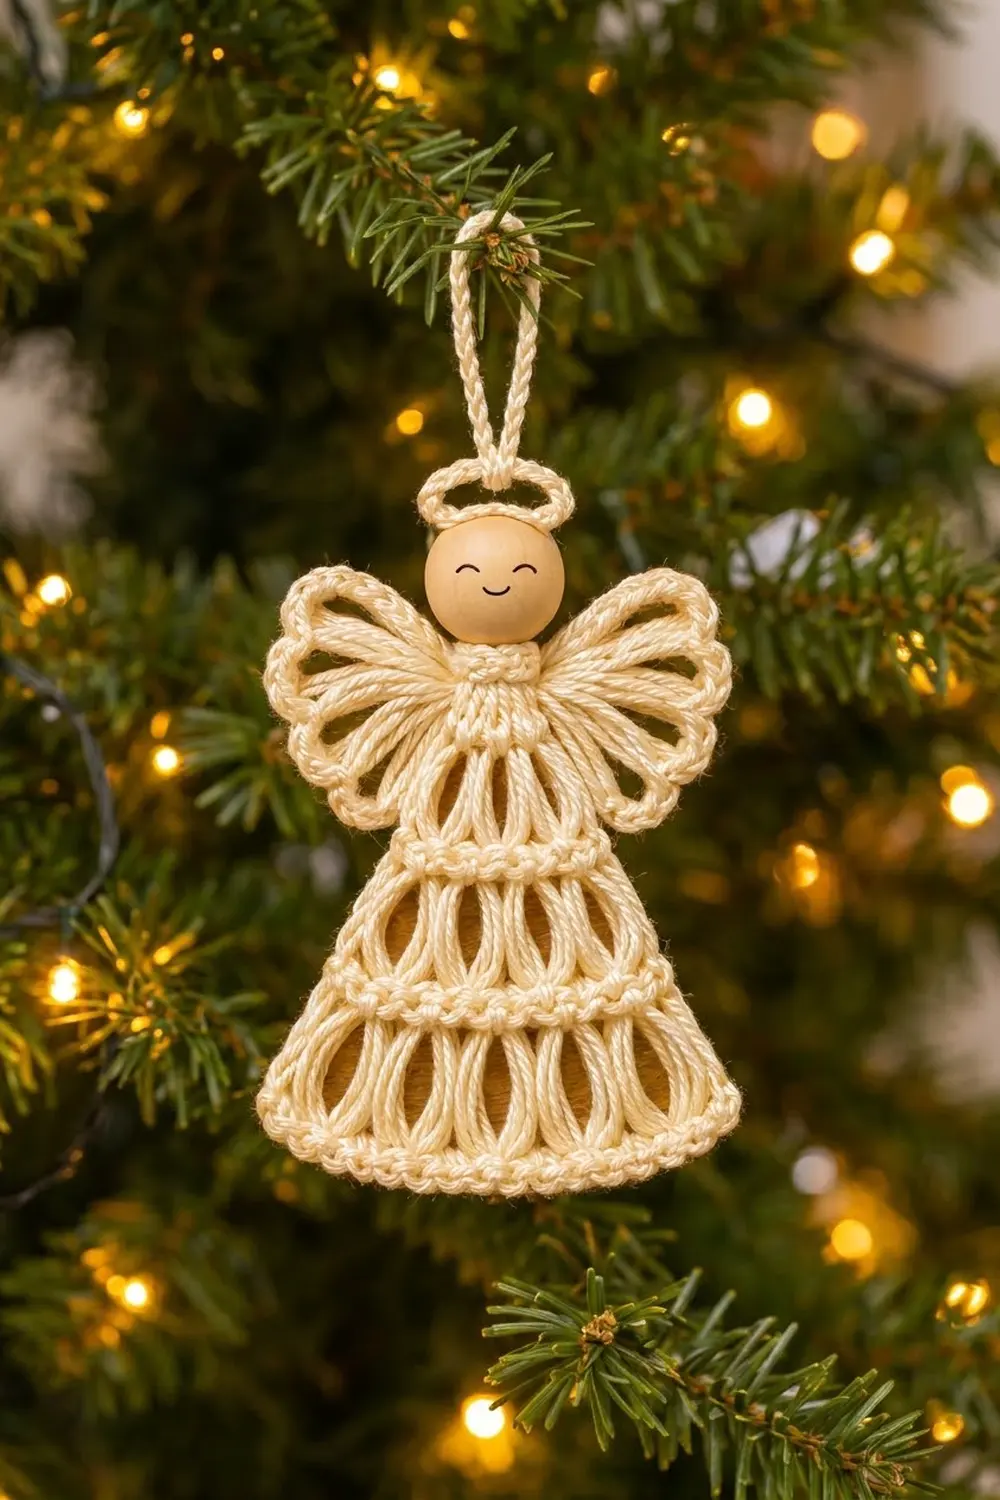
The Lantern Lace Angel is a small, airy tree ornament with a lot of texture for its size. Her skirt has three tiers of tall, eye-shaped openings, and a raised braided band separates each tier. Her wings fan out in two rounded lobes of open chain loops, each one framed by a corded edge. A smooth wooden bead forms her head, and a tiny crocheted halo with a corded hanging loop sits on top.
She is worked in a single cream cotton, so all the interest comes from the structure: light passes through the openings and the corded edges catch the tree lights. The look is soft, classic and heirloom-style, and it suits natural, Scandinavian or vintage-themed trees.
This pattern uses US crochet terms. The finished ornament measures about 4.5 in (11.4 cm) across the wings and 5.4 in (13.7 cm) tall from the bottom edge to the top of the bead. The hanging loop adds about 2.4 in (6.1 cm).
Here is how it goes together. You work the body flat from the bottom up, decreasing at each tier band, and finish with a ribbed neck. You make each wing from a small ring of chain loops and outline it with single crochet and reverse single crochet. The halo is a corded ring with a chain-cord hanger. Then you thread the bead onto the neck tail and sew the wings in place.
Finished Size and Construction
- Finished size: 4.5 in (11.4 cm) wide x 5.4 in (13.7 cm) tall, plus a 2.4 in (6.1 cm) hanging loop
- Skill level: Easy-intermediate
- Terminology: US crochet terms
- Yarn weight: DK (#3) cotton
- Hook: 4.0 mm (G-6)
- Number of pieces: 1 ornament, made from 4 crocheted parts (1 body, 2 wings, 1 halo with hanger) plus 1 wooden bead
- Layout: The wings sit behind the shoulders, the bead sits on the neck, and the halo sits on top of the bead
- Body size: 4.2 in (10.7 cm) wide at the hem x 4.65 in (11.8 cm) tall
- Body size before border: 4.2 in (10.7 cm) x 4.45 in (11.3 cm)
- Border depth: 0.2 in (0.5 cm) along the hem; 0.4 in (1.0 cm) around each wing
Materials
Yarn: Use a smooth mercerized or combed DK cotton. It shows the stitch definition clearly and holds its shape after blocking. Avoid fuzzy or acrylic-blend yarns, because the openings will blur and the wings will droop.
- Cream / ivory: 20 g, about 42 m (46 yd)
Tools:
- 4.0 mm (G-6) crochet hook
- One 20 mm (0.8 in) round wooden bead with a hole large enough for a tapestry needle
- A fine black permanent marker or acrylic paint and a fine brush, for the face
- Tapestry needle
- Scissors
- Fabric stiffener or a 1:1 mix of white craft glue and water
- Blocking mat and rust-proof pins
- Stitch marker
The yarn quantity includes a margin of about 30% over what one ornament actually uses (about 15 g).
Abbreviations (US Terms)
- ch – chain
- sl st – slip stitch
- sc – single crochet
- fsc – foundation single crochet
- sc2tog – single crochet 2 together
- tr – treble crochet
- rsc – reverse single crochet (crab stitch)
- BLO – back loop only
- sp – space
- sk – skip
- st(s) – stitch(es)
Special stitches:
- Beginning cluster (beg cl): Ch 3. Yarn over twice, insert hook in the same stitch, pull up a loop, [yarn over, pull through 2 loops] twice. Repeat from * to * once more. Yarn over and pull through all 3 loops on the hook.
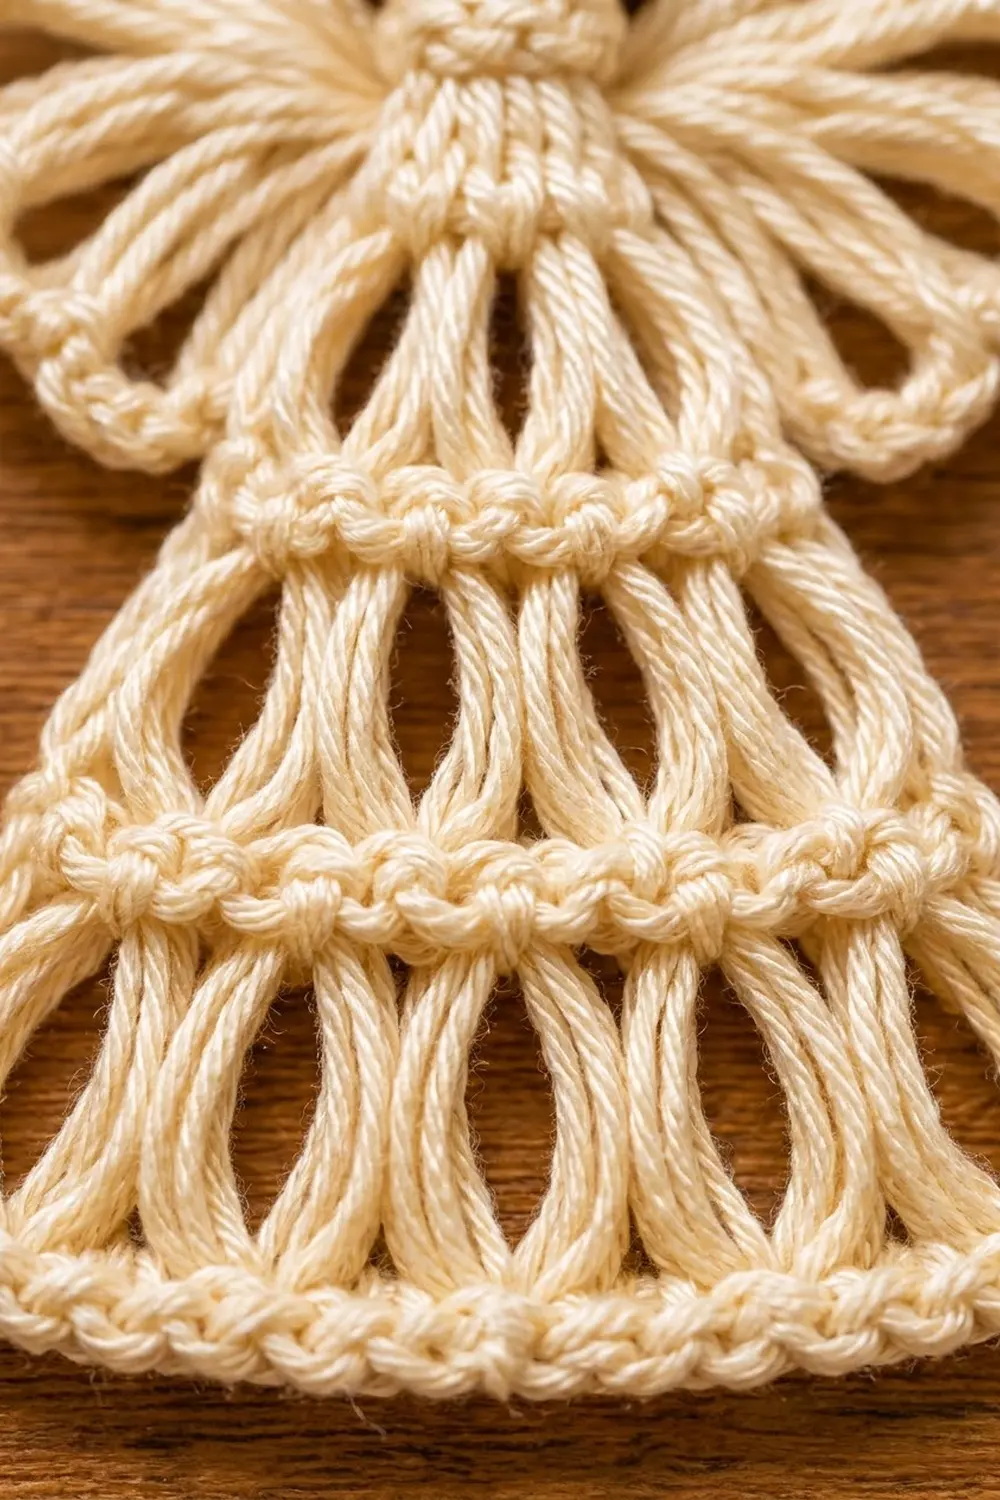
- Cluster (cl): Yarn over twice, insert hook in the stitch, pull up a loop, [yarn over, pull through 2 loops] twice. Repeat from * to * 2 more times in the same stitch. Yarn over and pull through all 4 loops on the hook. Each cluster makes a bundled post that pinches together at the top and bottom, which gives the eye-shaped openings.
Gauge and Checkpoints
Gauge: 18 sc and 20 sc rows = 4 in (10.2 cm). One cluster row is 0.75 in (1.9 cm) tall.
Work Rows 1–4 of the body first and measure them. This is your test piece. If it matches, keep going. If it doesn’t, rip it back and change hooks.
Checkpoints:
- After Row 1: 4.2 in (10.7 cm) wide
- After Row 4: 1.35 in (3.4 cm) tall, 3.6 in (9.1 cm) wide
- After Row 7: 2.5 in (6.4 cm) tall, 2.9 in (7.4 cm) wide
- After Row 10: 3.65 in (9.3 cm) tall, 2.0 in (5.1 cm) wide
- After Row 14: 4.45 in (11.3 cm) tall, neck 1.6 in (4.1 cm) wide
Too big? Go down 0.25–0.5 mm in hook size. Too small? Go up 0.25–0.5 mm. If only the cluster rows are too tall, wrap the yarn more snugly as you pull up each loop.
Body
The body is worked flat, from the bottom up.
Row 1: Fsc 19. Turn. (19 sts)
Tier 1
Row 2 (cluster row): Beg cl in first st. Ch 2, sk 2 sts, cl in next st. Repeat from * 5 more times. Turn. (7 clusters, 6 ch-2 sps)
The clusters fall on sts 1, 4, 7, 10, 13, 16 and 19, so the row ends exactly in the last stitch.
Row 3 (band): Ch 1, sc in top of first cluster. 2 sc in next ch-2 sp, sc in top of next cluster. Repeat from * 5 more times. Turn. (19 sc: 7 worked into clusters + 12 worked into spaces)
Row 4 (decrease band): Ch 1, sc2tog, sc in next 6 sts, sc2tog, sc in next 7 sts, sc2tog. Turn. (16 sts)
Row 4 uses up all 19 stitches: 2 + 6 + 2 + 7 + 2 = 19. It produces 1 + 6 + 1 + 7 + 1 = 16 stitches. Rows 3 and 4 together form the raised, braided-looking band.
Tier 2
Row 5: Beg cl in first st. Ch 2, sk 2 sts, cl in next st. Repeat from * 4 more times. Turn. (6 clusters, 5 ch-2 sps)
Row 6: Ch 1, sc in first cluster. 2 sc in ch-2 sp, sc in next cluster. Repeat from * 4 more times. Turn. (16 sc: 6 + 10)
Row 7: Ch 1, sc2tog, sc in next 5 sts, sc2tog, sc in next 5 sts, sc2tog. Turn. (13 sts)
This row uses up 2 + 5 + 2 + 5 + 2 = 16 stitches and produces 13.
Tier 3
Row 8: Beg cl in first st. Ch 2, sk 2 sts, cl in next st. Repeat from * 3 more times. Turn. (5 clusters, 4 ch-2 sps)
Row 9: Ch 1, sc in first cluster. 2 sc in ch-2 sp, sc in next cluster. Repeat from * 3 more times. Turn. (13 sc: 5 + 8)
Row 10: Ch 1, [sc2tog] twice, sc in next 5 sts, [sc2tog] twice. Turn. (9 sts)
Shoulders and Neck
Row 11: Ch 1, sc2tog, sc in next 5 sts, sc2tog. Turn. (7 sts)
Rows 12–14: Ch 1, sc in BLO of each st across. Turn. (7 sts)
Working in the back loop only makes the ribbed neck band. Fasten off and leave a 12 in (30.5 cm) tail for attaching the head.
Wings (Make 2)
Rnd 1: Make an adjustable ring. Ch 1, sc in ring. Ch 12, sc in ring. Repeat from * 2 more times. Ch 8, sc in ring. Repeat this once more. Pull the ring closed. (5 loops: three ch-12 loops for the upper lobe, two ch-8 loops for the lower lobe; 6 sc in the ring)
Row 2 (frame):
- Sl st in the first 6 ch of the first ch-12 loop. Sc in the next ch; this is the tip of the loop.
- Ch 4, sc in the 7th ch of the next ch-12 loop. Repeat once more, for the third ch-12 loop.
- Ch 2, sc in the 5th ch of the first ch-8 loop. The short ch 2 makes the notch between the lobes.
- Ch 4, sc in the 5th ch of the second ch-8 loop.
Turn. (5 sc, with 4 ch-sps: ch-4, ch-4, ch-2, ch-4)
Row 3: Ch 1, sc in first sc, 5 sc in ch-4 sp, sc in sc, 5 sc in ch-4 sp, sc in sc, 3 sc in ch-2 sp, sc in sc, 5 sc in ch-4 sp, sc in last sc. (23 sc: 5 + 5 + 5 + 3 + 5)
The wing measures about 1.6 in x 1.9 in (4.1 cm x 4.8 cm) before the edging is worked. Row 4, the edging, is in the Border section below.
Halo and Hanger
Rnd 1: Ch 14, sl st to the first ch to form a ring.
Rnd 2: Ch 1, work 20 sc into the ring (over the chain). Sl st to the first sc. (20 sc) The halo is about 1 in (2.5 cm) across.
Hanger: Ch 24. Sl st in the back bump of the 2nd ch from the hook and in each ch across. (23 sl sts) Sl st in the next sc of the halo. The folded cord now forms a loop about 2.4 in (6.1 cm) tall. Fasten off and weave in the ends.
Border
Border gauge: 1 rsc per sc, which is 4.5 rsc per inch (2.5 cm), the same as the base gauge.
Wing edging (Row 4): Don’t turn. Ch 1, rsc in each sc across. (23 rsc) Fasten off and leave an 8 in (20.3 cm) tail.
Hem edging: With the right side facing, join the yarn at the right corner of the foundation edge of the body. Ch 1, rsc in each fsc across. (19 rsc) Fasten off.
Why the math works: Each border stitch is worked into exactly one existing stitch: 23 on 23 for each wing and 19 on 19 for the hem. Nothing is added or skipped, so the edges stay flat. The edging adds height without adding width, which gives 0.2 in (0.5 cm) at the hem and, together with Row 3, 0.4 in (1.0 cm) around each wing. The body’s sides are left as they are, because the cluster posts already make a neat edge.
Assembly
- Face: Draw two curved closed eyes and a small smile on the bead with a fine marker. Let it dry fully.
- Head: Thread the neck tail onto a tapestry needle. Pass it up through the bead from the bottom, through the center of the halo, around the back of the halo next to the hanger, and back down through the bead. Pull it snug so the bead sits firmly on the neck and the halo rests flat on the bead. Knot the tail behind Row 13 and weave it in.
- Wings: Place each wing behind the body with its ring centered behind Rows 10–11. The upper lobe should point up and outward, and the lower lobe out to the side. Use the wing tail to sew through the ring and into the back loops of the shoulder stitches. Check that the wings are mirror images and that the total wingspan is 4.5 in (11.4 cm).
- Weave in all the remaining ends.
Final Blocking
- Mix the fabric stiffener, or glue and water at 1:1, in a small bowl.
- Dip the ornament, keeping the bead out of the liquid as much as you can. Squeeze out the excess gently.
- Pin the body flat on the blocking mat. Hem: 4.2 in (10.7 cm). Neck: 1.6 in (4.1 cm). Body height: 4.65 in (11.8 cm).
- Push a pin into each cluster opening to open it into a clean eye shape.
- Spread the wing loops into an even fan and pin the tips of each lobe.
- Pin the hanger straight up from the halo.
- Leave it to dry for 24 hours, then unpin it.
Final Quality-Control Checklist
- The hem measures 4.2 in (10.7 cm) and lies straight
- The tiers have 6, 5 and 4 openings, from the bottom up
- Each tier band is even, with no gaps at the decreases
- The neck rib is centered and the bead sits upright
- The halo is level and the hanger rises from its back
- The wings match in size and angle
- The wingspan is 4.5 in (11.4 cm)
- No ends are visible from the front
Troubleshooting
- The skirt flares into a fan: The clusters are too loose. Go down a hook size for the cluster rows only.
- Openings are round instead of eye-shaped: Close each cluster firmly. Pin each opening during blocking.
- The band looks lumpy: Make sure Rows 3, 6 and 9 have exactly 2 sc in each space.
- The wing lobes look alike: Check that the upper loops are ch 12 and the lower loops are ch 8, and that the notch is a ch 2.
- The bead wobbles: Pass the tail through the bead a second time and pull it tight.
- The hanger twists: Work the sl sts into the back bumps only, and keep the tension even.
Care
Spot clean only, with a damp cloth. Store the ornament flat in a box so the stiffened wings keep their shape.
Final Notes
The measurement chain: the 18-sc gauge sets the hem at 19 stitches, 4.2 in (10.7 cm). The three tiers step down from 19 to 16 to 13 stitches. The shoulders take the count to 9 and then 7, and the body finishes at 4.65 in (11.8 cm) tall. Each wing’s 23-stitch outline frames 5 chain loops. Adding the bead brings the angel to 5.4 in (13.7 cm), and the wings span 4.5 in (11.4 cm). Check each step against the checkpoints and the finished angel will hang neatly.
Happy crocheting!