

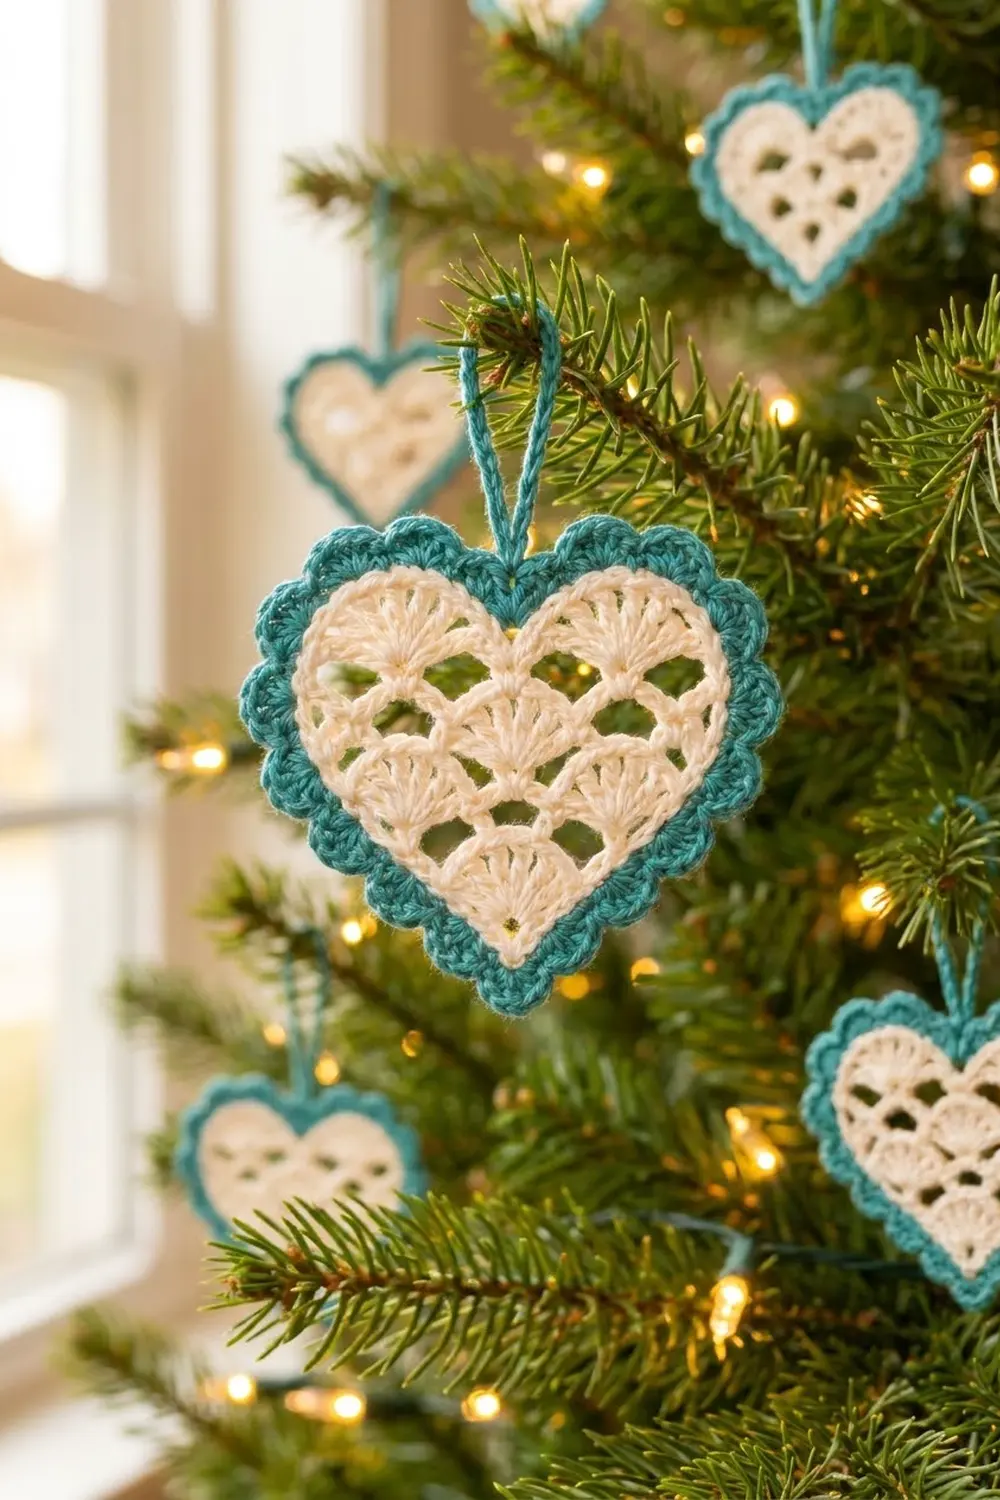
This little heart is a lacy cream shell-stitch center wrapped in a bright seafoam-teal scalloped border, with a matching teal loop for hanging. It looks delicate on a tree branch, but it’s quick to make and easy to repeat once you’ve done one.
The style is classic and a little vintage: soft fan shells, small open spaces between them, and a scalloped edge. Cream and teal make a fresh, wintry pair, but any two contrasting cotton colors will work.
The pattern uses US crochet terms. The finished ornament measures about 4.75 in (12.1 cm) wide and 4 in (10.2 cm) tall, not counting the loop, which hangs about 2 in (5.1 cm) above the heart.
Construction is simple. You start with a magic ring at the bottom point and work four rows of shells (1, 2, 3, then 4 shells), which shapes the heart naturally. A cream round of single crochet evens the edges and sets the lobes. Then two teal rounds add the border, and a chain loop finishes it. It’s one piece with no sewing beyond weaving in ends.
Finished Size and Construction
- Finished size: 4.75 in (12.1 cm) wide × 4 in (10.2 cm) tall, plus a 2 in (5.1 cm) loop
- Skill level: Easy+ (shells, simple shaping, working into row ends)
- Terminology: US
- Yarn weight: DK (#3) cotton
- Hook: 3.5 mm (E-4)
- Number of pieces: 1
- Layout: Single motif, worked in rows and then in rounds
- Cream heart after Row 4: 3.5 in (8.9 cm) wide × 2.75 in (7.0 cm) tall
- Size before border (after Rnd 5): 3.75 in (9.5 cm) wide × 3 in (7.6 cm) tall
- Border depth: 0.5 in (1.3 cm) on every side (Rnd 6 about 0.125 in / 0.3 cm, Rnd 7 about 0.375 in / 1.0 cm)
Materials
Use a smooth mercerized or soft matte cotton in DK weight. Cotton shows the shell texture clearly and holds its shape after blocking. Acrylic also works, but the scallops will be softer and less crisp.
- Cream (Color A): 8 g, about 17 m
- Teal (Color B): 5 g, about 11 m
These quantities include a margin for your gauge swatch and for weaving in ends.
Tools:
- 3.5 mm (E-4) crochet hook
- Tapestry needle
- Scissors
- Stitch marker
- Blocking mat and rust-proof pins
- Spray bottle with water
- Ruler or tape measure
Abbreviations (US Terms)
- ch – chain
- sl st – slip stitch
- sc – single crochet
- hdc – half double crochet
- dc – double crochet
- sc2tog – single crochet 2 together
- sk – skip
- st(s) – stitch(es)
- sp – space
- RS / WS – right side / wrong side
- tch – turning chain
Special stitches
- Shell: 7 dc worked into the same stitch. At the start of a row, a ch 3 plus 6 dc together count as one shell.
- Standing sc: With the new color’s slip knot on your hook, insert the hook into the stitch and work a sc as usual without joining first.
Gauge and Checkpoints
The ornament is small, so the first heart works as your gauge swatch. Make one, measure it at each checkpoint below, and adjust before you make more.
Base gauge: One shell (Row 1) measures about 1 in (2.5 cm) wide × 0.7 in (1.8 cm) tall.
Checkpoints:
- After Row 2: 2 in (5.1 cm) wide × 1.4 in (3.6 cm) tall
- After Row 3: 2.75 in (7.0 cm) wide × 2 in (5.1 cm) tall
- After Row 4: 3.5 in (8.9 cm) wide × 2.75 in (7.0 cm) tall
- After Rnd 5: 3.75 in (9.5 cm) wide × 3 in (7.6 cm) tall
- After Rnd 6: 4 in (10.2 cm) wide × 3.25 in (8.3 cm) tall
- After Rnd 7: 4.75 in (12.1 cm) wide × 4 in (10.2 cm) tall
If your heart is too big by more than 0.25 in (0.6 cm), go down to a 3.25 mm hook. If it’s too small, go up to a 3.75 mm hook. Shells stretch, so measure them lightly flattened, not pulled.
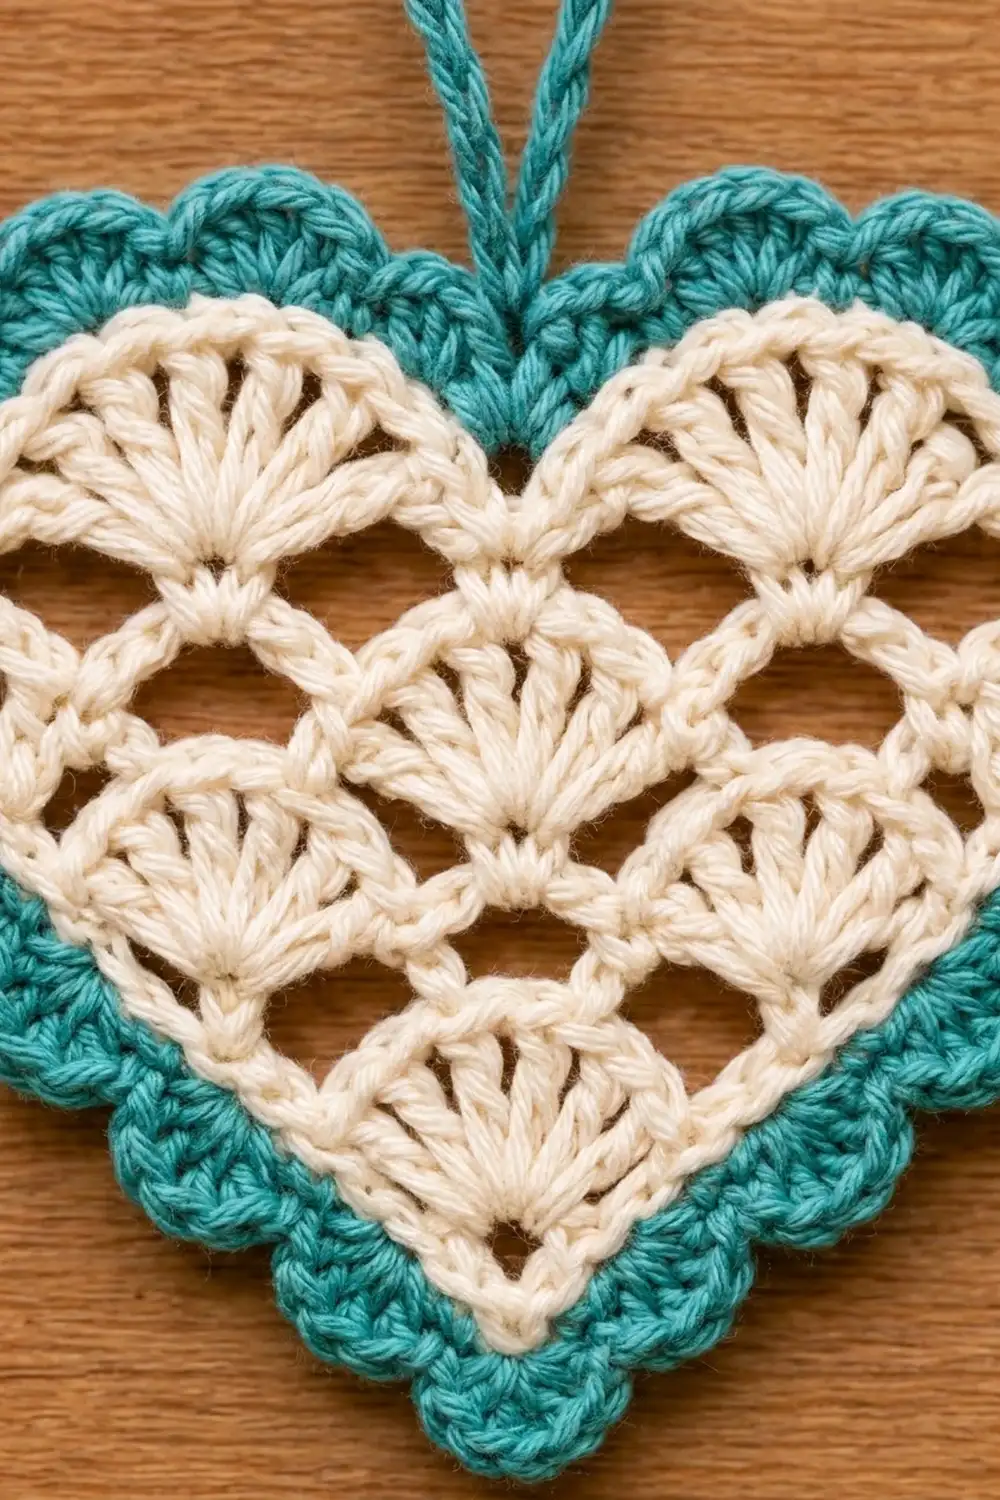
Pattern: Cream Shell Heart
The heart is worked in turned rows from the bottom point up. Row 1 is the RS.
Row 1 (RS): With Color A, make a magic ring. Ch 3 (counts as first dc here and throughout), 6 dc in ring. Pull the ring closed tightly. Turn.
Count: 1 shell (7 dc).
Row 2 (WS): Ch 3, 6 dc in the st at the base of the ch (first shell made). Ch 1, sk next 2 dc, sc in next dc (center dc of the shell). Ch 1, sk next 2 dc, 7 dc in top of tch. Turn.
Count: 2 shells (14 dc), 1 sc, 2 ch-1 sps.
Row 3 (RS): Ch 3, 6 dc in the st at the base of the ch. Ch 1, sc in the center (4th) dc of the same shell. Ch 1, 7 dc in next sc. Ch 1, sc in the center dc of the next shell. Ch 1, 7 dc in top of tch. Turn.
Count: 3 shells (21 dc), 2 sc, 4 ch-1 sps.
Each new shell sits in the sc between two shells below it, and each new sc sits in the center of a shell below. This gives the offset lattice and the small open spaces between fans.
Row 4 (WS): Ch 3, 6 dc in the st at the base of the ch. Ch 1, sc in the center dc of the same shell. Ch 1, 7 dc in next sc, ch 1, sc in the center dc of the next shell. Repeat from * to * once more. Ch 1, 7 dc in top of tch. Turn.
Count: 4 shells (28 dc), 3 sc, 6 ch-1 sps.
Check the size now: 3.5 in (8.9 cm) wide × 2.75 in (7.0 cm) tall. Call the four top shells A, B, C and D from right to left as you look at the RS.
Rnd 5: Cream Shaping Round
This round goes all the way around the heart. It rounds the lobes, makes the center dip and evens out the sides.
Top edge: With the RS facing, ch 1.
- Sc in each of the 7 dc of Shell A (7 sts).
- Valley fill: hdc in next ch-1 sp, dc in next sc, hdc in next ch-1 sp (3 sts).
- Sc in each of the 7 dc of Shell B (7 sts).
- Center dip: sc2tog, pulling up the first loop in the next ch-1 sp and the second loop in the following ch-1 sp, skipping the sc between them (1 st). Place a marker in this st.
- Sc in each of the 7 dc of Shell C (7 sts).
- Valley fill: hdc in ch-1 sp, dc in sc, hdc in ch-1 sp (3 sts).
- Sc in each of the 7 dc of Shell D (7 sts).
Top count: 7 + 3 + 7 + 1 + 7 + 3 + 7 = 35 sts.
First side: Rotate to work down the side. Work 3 sc evenly into each of the 4 row ends (12 sc).
Point: Work (sc, ch 1, sc) into the magic-ring point (2 sc plus a ch-1 point sp).
Second side: Work 3 sc evenly into each of the 4 row ends going up (12 sc). Sl st to the first sc of the round. Fasten off Color A.
Rnd 5 count: 35 + 12 + 2 + 12 = 61 sts, plus 1 ch-1 point sp.
Each half of the heart, counting from the marked center st to the point ch-1 sp, has 17 top sts + 12 side sts + 1 point sc = 30 sts.
Border
Border gauge: Rnd 6 has about 6 sc per inch (2.5 cm) along the edge. Each Rnd 7 scallop covers 4 sts, about 0.6 in (1.5 cm), and adds 0.375 in (1.0 cm) of depth.
Rnd 6: Teal Base Round
With RS facing, join Color B with a standing sc in the marked center st. Then work in this order:
- Sc in each st up to the dc at the center of the next valley fill.
- 2 sc in that dc (lobe increase).
- Sc in each st down to the point.
- 5 sc in the point ch-1 sp.
- Sc in each st up to the dc at the center of the next valley fill.
- 2 sc in that dc.
- Sc in each remaining st.
- Sl st to the first sc.
Count per section:
- Center: 1 st
- First half: 30 + 1 increase = 31 sts
- Point: 5 sts
- Second half: 31 sts
- Total: 1 + 31 + 5 + 31 = 68 sts
Rnd 7: Teal Scallops
- Ch 1, sc in the same st as the join (the center st).
- Sk 1, 5 dc in next st, sk 1, sc in next st. Repeat from * to * 16 times in total.
- Sk 1, 5 dc in next st, sk 1, sl st to the first sc.
Count: 17 scallops (85 dc) and 17 sc anchors.
Hanging loop: Without fastening off, ch 22 and sl st into the same center sc to close the loop. Sl st into each of the 22 ch around the loop to thicken it into a firm cord, then sl st once more into the center sc. Fasten off, leaving a 6 in (15.2 cm) tail.
Why the math works: Each scallop repeat uses exactly 4 sts, and Rnd 6 has 68 sts. 68 ÷ 4 = 17 scallops with nothing left over.
Number the Rnd 6 sts starting at 0 for the center st. The first half is sts 1–31, and the five point sc are sts 32–36. That puts the middle point sc at st 34, and 34 is 2 more than a multiple of 4, which is exactly where a scallop lands. So the bottom point gets a scallop and the top center gets a sc anchor, which keeps the heart’s dip.
The two lobe increases are what make this work. Without them, each half would have 30 sts and the point scallop would land off center.
Final Blocking
- Weave in all ends on the WS, running them through matching colors only.
- Spritz the heart until it’s evenly damp, not soaked.
- Lay it RS up on the blocking mat and gently open each shell into a fan.
- Pin the bottom point and the center dip first, so the heart stays symmetrical.
- Shape the lobes into smooth curves and pin the width to 4.75 in (12.1 cm) and the height to 4 in (10.2 cm).
- Pin the tip of each scallop so it stands out evenly.
- Lay the loop straight, centered above the dip.
- Let it dry completely before unpinning. For a stiffer ornament, spray lightly with fabric stiffener before drying.
Final Quality-Control Checklist
- Rows 1–4 have 1, 2, 3 and 4 shells, with 7 dc in every shell.
- Every sc sits in the center dc of a shell below.
- Rnd 5 has 61 sts plus the point ch-1 sp, and both halves look the same.
- The center dip is clearly lower than the lobe crests.
- Rnd 6 has 68 sts.
- There are 17 even scallops, with one centered on the bottom point.
- The loop is centered and firm.
- The finished size is within 0.25 in (0.6 cm) of 4.75 × 4 in (12.1 × 10.2 cm).
- There are no loose ends or cream showing through the teal.
Troubleshooting
The shells cup or ruffle. Your dc may be too loose, so go down a hook size. Blocking also flattens mild cupping.
The heart leans to one side. Count the row-end sc on each side; each side should have exactly 12.
The top looks flat, without a dip. Make sure you worked sc2tog at the center and skipped the sc between the two ch-1 sps.
There’s a valley or an extra st where the point scallop should be. Count Rnd 6 again; you need 68 sts with both lobe increases included.
The scallops are crowded. Your Rnd 6 is probably tight. Go up a hook size for the teal rounds only.
The magic ring loosens. Weave the starting tail in two directions, through the Row 1 dc.
Care
Hand wash in cool water with mild soap, then reshape and dry flat. Store the ornament flat or hanging so the scallops don’t get crushed.
Final Notes
The measurement chain is short. A 1 in (2.5 cm) shell grows to a 3.5 in (8.9 cm) shell heart by Row 4. Rnd 5 brings it to 3.75 × 3 in (9.5 × 7.6 cm), Rnd 6 gives 68 sts and 4 × 3.25 in (10.2 × 8.3 cm), and the 17 scallops finish it at 4.75 × 4 in (12.1 × 10.2 cm). If you check your size at each step, every heart in your batch will match.
Happy crocheting!