

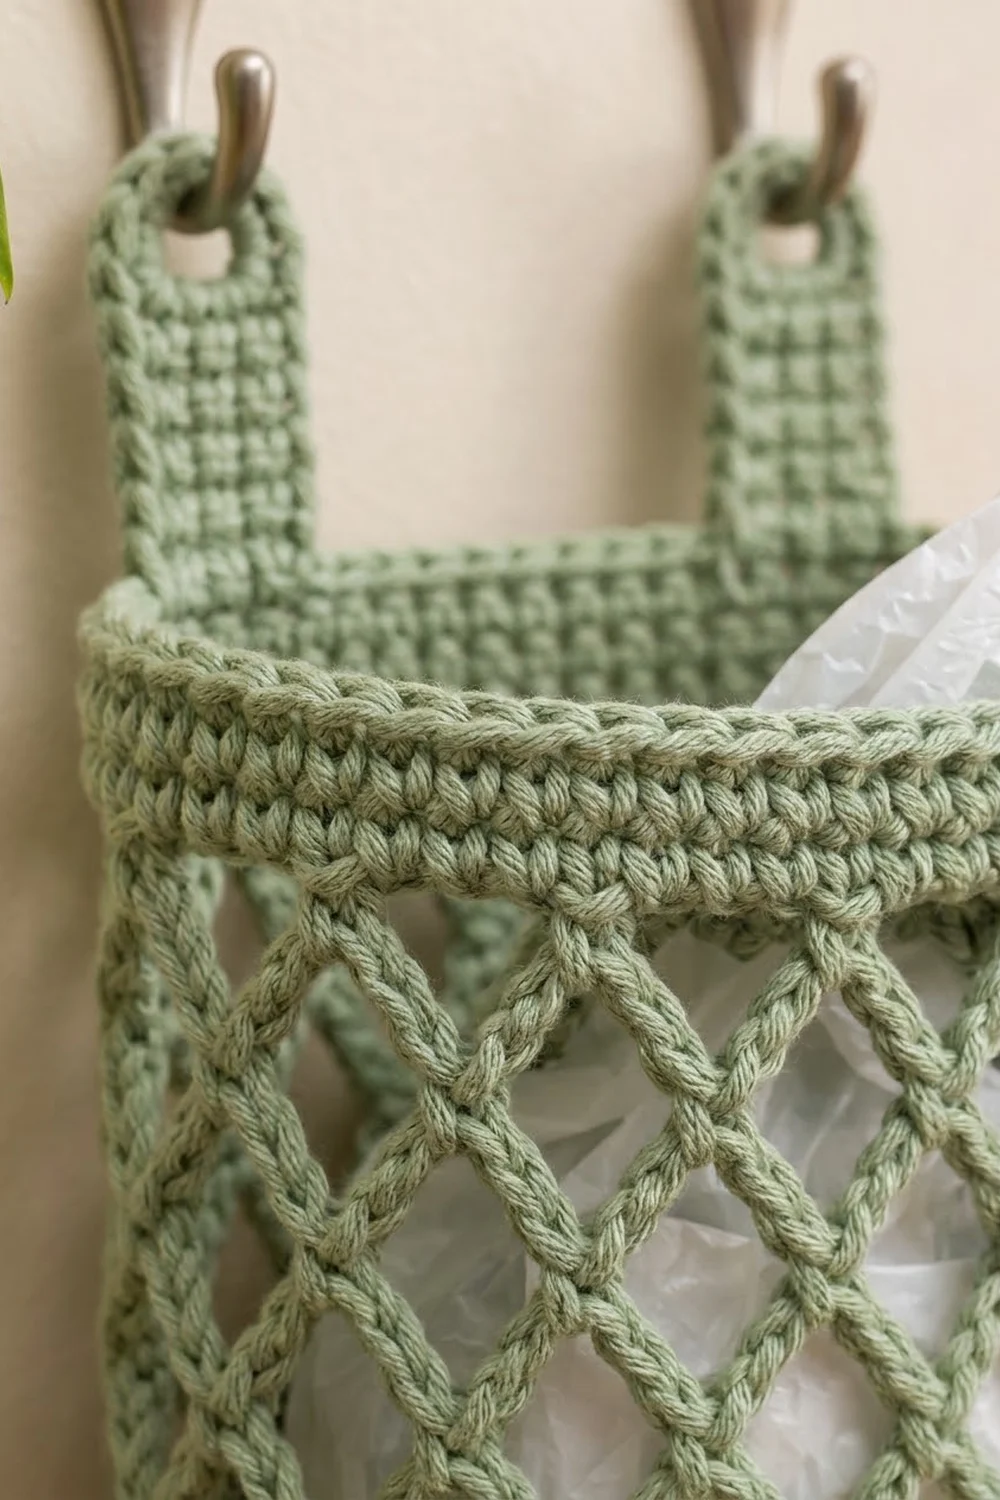
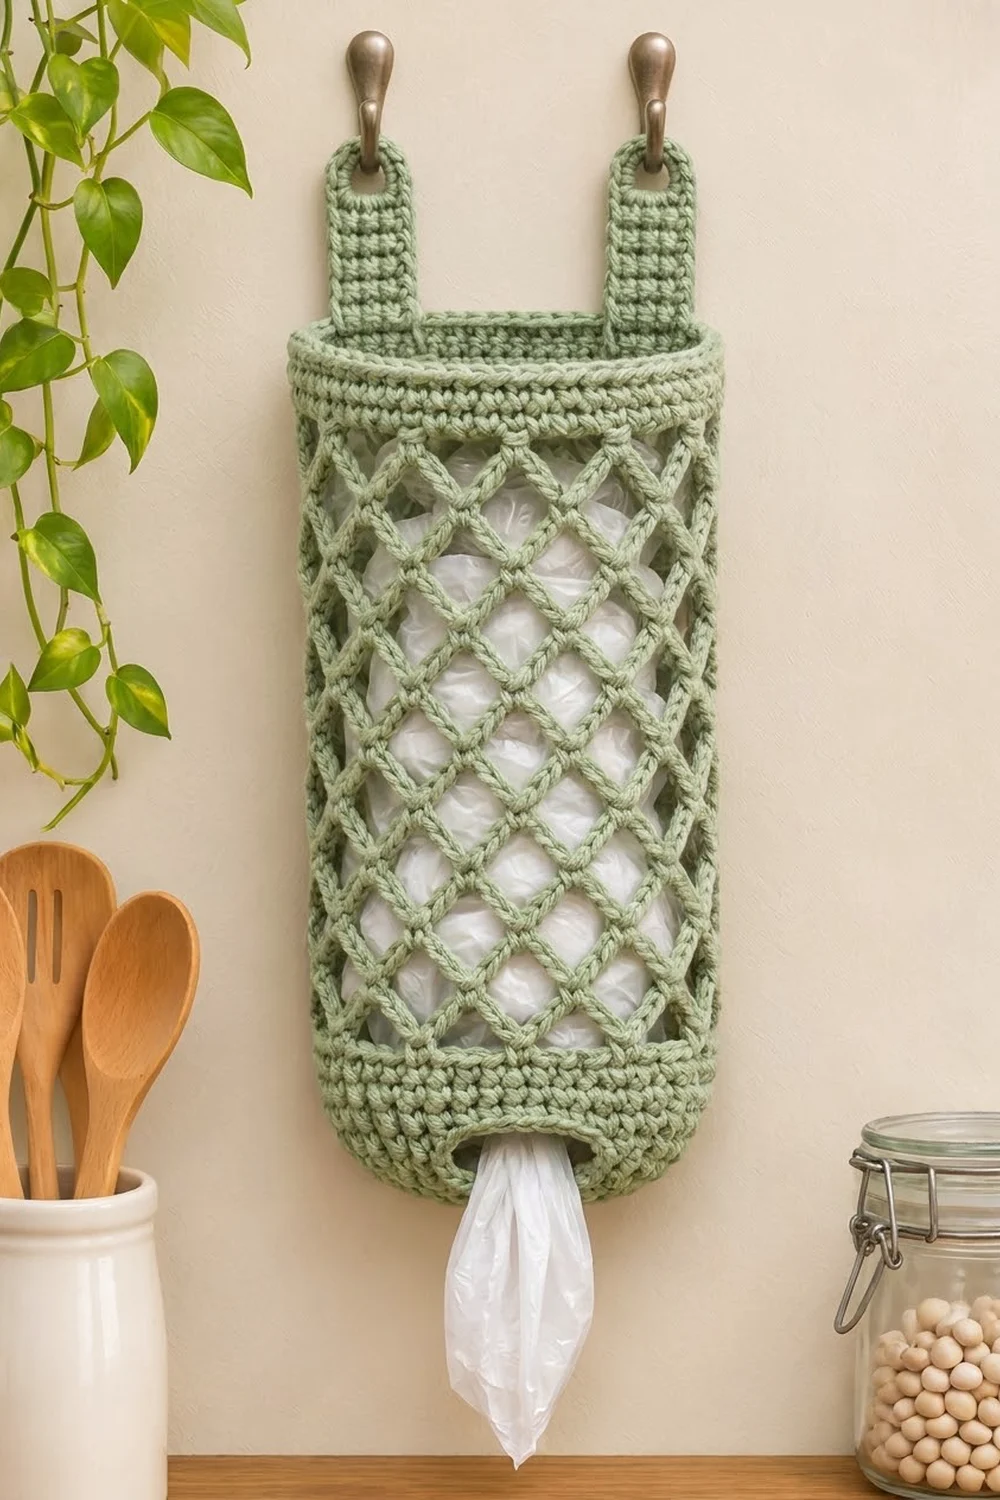
This hanging bag holder turns a messy pile of plastic grocery bags into a tidy kitchen accessory. The body is an open diamond lattice of chain loops between solid single crochet bands at the top and bottom. You can see the bags inside, and the shape stays neat on the wall.
The whole piece uses one soft sage green cotton. The color looks calm and natural next to wood, plants, and white walls, and the solid bands give the airy mesh a clean frame. The style is simple and practical, with a little farmhouse charm.
The pattern uses US crochet terms. The finished holder is about 7 in (17.8 cm) wide laid flat and 13 in (33.0 cm) tall, or about 15.25 in (38.7 cm) tall including the hanging tabs.
Construction is simple. First you work an oval base around a chain ring, which leaves a stretchy slot in the bottom for pulling bags out. Next you work the lower band, the lattice body, and the top band in joined rounds. Last, you make two small tabs with eyelets and sew them to the back of the top band so the holder hangs from two hooks.
Finished Size and Construction
- Finished size: about 7 in (17.8 cm) wide flat x 13 in (33.0 cm) tall; 15.25 in (38.7 cm) tall with tabs
- Skill level: Easy / Advanced Beginner
- Terminology: US crochet terms
- Yarn weight: Worsted (#4) cotton
- Hook: 5.0 mm (US H-8)
- Number of pieces: 3 (1 body, 2 hanging tabs)
- Layout: one tube-shaped body; 2 tabs side by side on the back of the top band
- Body circumference: 48 sts, about 13.75 in (34.9 cm)
- Size before border: about 7 in (17.8 cm) wide x 11.5 in (29.2 cm) tall after the last lattice round
- Border (top band) depth: about 1.5 in (3.8 cm)
- Tab size: about 1.75 in (4.4 cm) wide x 3.75 in (9.5 cm) long
Materials
Choose a smooth, firm worsted weight cotton or cotton blend. Cotton holds the lattice open, doesn’t stretch much under the weight of the bags, and washes well. Avoid very splitty or fuzzy yarns, because the chain loops look best with crisp stitch definition.
- Sage Green: 100 g, about 170 m (186 yd), based on a cotton with about 85 m (93 yd) per 50 g
Tools:
- 5.0 mm (US H-8) crochet hook
- Locking stitch marker
- Tapestry needle
- Scissors
- Measuring tape
- Rust-proof pins and a spray bottle for blocking
- Two wall hooks for hanging
The yarn amount includes a margin of about 15 percent for your gauge swatch and small differences in tension.
Abbreviations (US Terms)
- ch – chain
- sc – single crochet
- sl st – slip stitch
- st(s) – stitch(es)
- sk – skip
- BLO – back loop only
- inc – increase: 2 sc in the same st
- sc2tog – single crochet 2 together: insert hook in next st, pull up a loop, insert hook in following st, pull up a loop, yarn over and pull through all 3 loops on hook
- ch-5 loop – the space under a chain of 5 from the previous round
- Rnd – round
Special stitch – lattice loop: ch 5, then work 1 sc into the center of the next ch-5 loop. Repeat this around to build the diamond mesh. Each new sc sits in the middle of the loop below.
Gauge and Checkpoints
Single crochet gauge: 14 sc and 16 rnds = 4 in (10.2 cm).
Lattice gauge: 4 lattice rounds = about 3 in (7.6 cm), measured relaxed.
Test one piece first. A hanging tab is the best test because it is small and worked entirely in sc. A finished tab should measure about 1.75 in (4.4 cm) wide x 3.75 in (9.5 cm) long.
Measurement checkpoints:
- After Rnd 4 (base): oval about 4.75 in (12.1 cm) long x 2.75 in (7.0 cm) wide, 48 sts
- After Rnd 9 (lower band): flattened, about 2.5 in (6.4 cm) tall from the bottom fold and 7 in (17.8 cm) wide
- After Rnd 21 (lattice done): about 11.5 in (29.2 cm) tall
- After Rnd 27 (top band done): about 13 in (33.0 cm) tall
If your tab or base is too big, go down a hook size, such as 4.5 mm (US 7). If it is too small, go up to 5.5 mm (US I-9). The lattice height is easy to adjust: add or remove lattice rounds in pairs. Each pair changes the height by about 1.5 in (3.8 cm).
Body
The body is worked in joined rounds. Do not turn. Place a marker in the first st of each sc round.
Oval Base with Dispensing Slot
You work the base into the chains of a long chain ring. When the ring lies flat, its open center becomes a slot about 2.25 in (5.7 cm) long for pulling the bags out.
Foundation: Ch 20, sl st in first ch to form a ring, taking care not to twist. Flatten the ring so there are 8 chains along each side and 2 chains at each end.
Rnd 1: Ch 1, [sc in next 8 ch, inc in each of next 2 ch] twice, sl st in first sc to join. (24 sts)
Rnd 2: Ch 1, [sc in next 8 sts, inc in each of next 4 sts] twice, join. (32 sts)
Rnd 3: Ch 1, [sc in next 8 sts, (sc in next st, inc in next st) 4 times] twice, join. (40 sts)
Rnd 4: Ch 1, [sc in next 8 sts, (sc in next 2 sts, inc in next st) 4 times] twice, join. (48 sts)
The straight sides stay at 8 sts each round. Each curved end grows by 4 sts per round, giving 4, 8, 12, and 16 sts per end. That keeps the oval flat. The slot stays open because nothing is worked into its center.
Lower Band
Rnd 5: Ch 1, sc BLO in each st around, join. (48 sts) This turns the edge upward and forms the bottom ridge.
Rnds 6–9: Ch 1, sc in each st around, join. (48 sts)
You now have a shallow oval bowl with a solid band 5 rounds tall.
Lattice Body
Rnd 10 (setup): Ch 1, sc in first st, ch 5, sk next 3 sts, *sc in next st, ch 5, sk next 3 sts; repeat from * 10 more times, sl st in first sc to join. (12 ch-5 loops)
The setup uses exactly 48 / 4 = 12 repeats, so the loops are evenly spaced around the base.
Rnd 11: Sl st in each of first 3 ch of next ch-5 loop (this puts you at the loop’s center), ch 1, sc in same loop, ch 5, *sc in next ch-5 loop, ch 5; repeat from * 10 more times, sl st in first sc to join. (12 ch-5 loops)
Rnds 12–21: Repeat Rnd 11. (12 ch-5 loops in each round)
That makes 12 rounds of loops in total (Rnds 10–21), which forms the diamond lattice. Each new sc lands in the middle of the loop below, so every diamond sits centered over the one beneath it. The mesh stays straight instead of spiraling.
Border (Top Band)
The top band is this piece’s border. It firms up the rim and gives the tabs a solid place to sit.
Border gauge: the same 14 sc = 4 in (10.2 cm). At this gauge, 48 sts gives a circumference of 13.75 in (34.9 cm), or about 7 in (17.8 cm) across when flattened.
Rnd 22 (conversion round): Ch 1, sc in first sc, 3 sc in next ch-5 loop, *sc in next sc, 3 sc in next ch-5 loop; repeat from * 10 more times, join. Count: 12 sc worked 1 per existing sc + 36 sc worked into the 12 loops = 48 sts.
Rnds 23–26: Ch 1, sc in each st around, join. (48 sts)
Rnd 27: Sl st loosely in each st around. (48 sl sts) Fasten off and weave in the end.
Flattened, the band has 24 sts on the front and 24 sts on the back. The folds fall between stitches, so there are no corner stitches to count.
Why the math works: The base ends at 48 sts. The lattice divides those 48 sts into exactly 12 repeats of 4 sts. The conversion round puts back 4 sts per repeat (1 sc + 3 sc). So the top band matches the lower band stitch for stitch, and the holder hangs as an even tube that doesn’t flare or pinch at the rim.
Hanging Tabs
Make 2.
Row 1: Ch 7, sc in 2nd ch from hook and in each ch across, turn. (6 sts)
Rows 2–11: Ch 1, sc in each st across, turn. (6 sts)
Row 12 (eyelet): Ch 1, sc in next 2 sts, ch 2, sk next 2 sts, sc in last 2 sts, turn. (4 sc + 1 ch-2 sp)
Row 13: Ch 1, sc in next 2 sts, 2 sc in ch-2 sp, sc in last 2 sts, turn. (6 sts)
Row 14: Ch 1, sc in each st across, turn. (6 sts)
Row 15: Ch 1, sc2tog, sc in next 2 sts, sc2tog. (4 sts) Fasten off, leaving a 12 in (30.5 cm) tail for sewing.
The decrease row rounds off the top above the eyelet. The eyelet is about 0.5 in (1.3 cm) across and fits a standard wall hook.
Make All Pieces
All pieces use Sage Green:
- Body: 1 piece
- Hanging tabs: 2 pieces
This layout shows the 24 back stitches of the flattened band, read from left to right:
| 2 sts | TAB (6 sts) | 8 sts | TAB (6 sts) | 2 sts |
That’s 2 + 6 + 8 + 6 + 2 = 24 sts, which matches the back half of the band exactly.
Joining the Tabs
Flatten the body with the round join at one side fold. Turn the back toward you and count the 24 back stitches of Rnd 26.
- Place the first tab on the inside of the band, centered over back sts 3–8. Place the second tab over back sts 17–22.
- Slide each tab down so its bottom 6 rows overlap the band. The overlap is about 1.5 in (3.8 cm), so each tab rises about 2.25 in (5.7 cm) above the rim.
- Thread the tail on a tapestry needle and whipstitch each tab stitch to the band stitch directly behind it, 1 tab st to 1 band st, along the top. Then sew down both sides and across the bottom edge of the tab.
- Keep the stitches snug but not tight. The tab should lie flat against the band without puckering the front.
Size checkpoint: the tabs should be 8 sts apart, about 2.25 in (5.7 cm). The total height from the bottom fold to the top of the tabs should be about 15.25 in (38.7 cm).
Final Blocking
- Weave in all remaining ends along the solid bands, never through the lattice.
- Mist the whole holder lightly until it is damp, not soaking.
- Stuff the body loosely with a rolled towel to shape the tube.
- Gently tug the lattice lengthwise so the diamonds open evenly.
- Lay it flat and pin the tabs straight, with the eyelets fully open.
- Check the measurements: 7 in (17.8 cm) wide and 13 in (33.0 cm) tall.
- Let it dry completely before hanging.
Final Quality-Control Checklist
- The base is flat, with an even, open slot about 2.25 in (5.7 cm) long
- The lower band and top band each have 48 sts
- Every lattice round has 12 ch-5 loops
- The diamonds stack straight, without drifting
- The top band has no flare or ripple
- The tabs are the same length, with clean round eyelets
- The tabs are sewn level and evenly spaced
- All ends are secure and hidden
Troubleshooting
Base cups or ruffles: Recount the increases. Each end should gain exactly 4 sts per round, and the straight sides should stay at 8 sts.
Slot is too tight for bags: Remake the foundation ring with a looser chain, or go up one hook size for the chain only.
Lattice slants: Make sure you slip stitch exactly to the third chain before you start each round. Starting off-center shifts every diamond.
Lattice is too long: Remove 2 lattice rounds, which takes off about 1.5 in (3.8 cm).
Top band flares: Your loops are too loose for 3 sc each. Go down a hook size for Rnds 22–27.
Tabs pull the front out of shape: Sew through the back stitches only and keep the whipstitches looser.
Care
Hand wash, or machine wash cool on a gentle cycle, and reshape while damp. Lay flat or hang to dry, and avoid hot dryers so the lattice doesn’t shrink.
Final Notes
The measurements build in a simple chain. A 48-st oval base, about 4.75 in (12.1 cm) long, becomes a tube 7 in (17.8 cm) wide. Twelve lattice rounds bring the height to about 11.5 in (29.2 cm), and the 1.5 in (3.8 cm) top band finishes the body at 13 in (33.0 cm). Two 3.75 in (9.5 cm) tabs then bring the total height to 15.25 in (38.7 cm). Check your gauge on a tab and count to 48 at each band, and the rest falls into place.
Happy crocheting!