

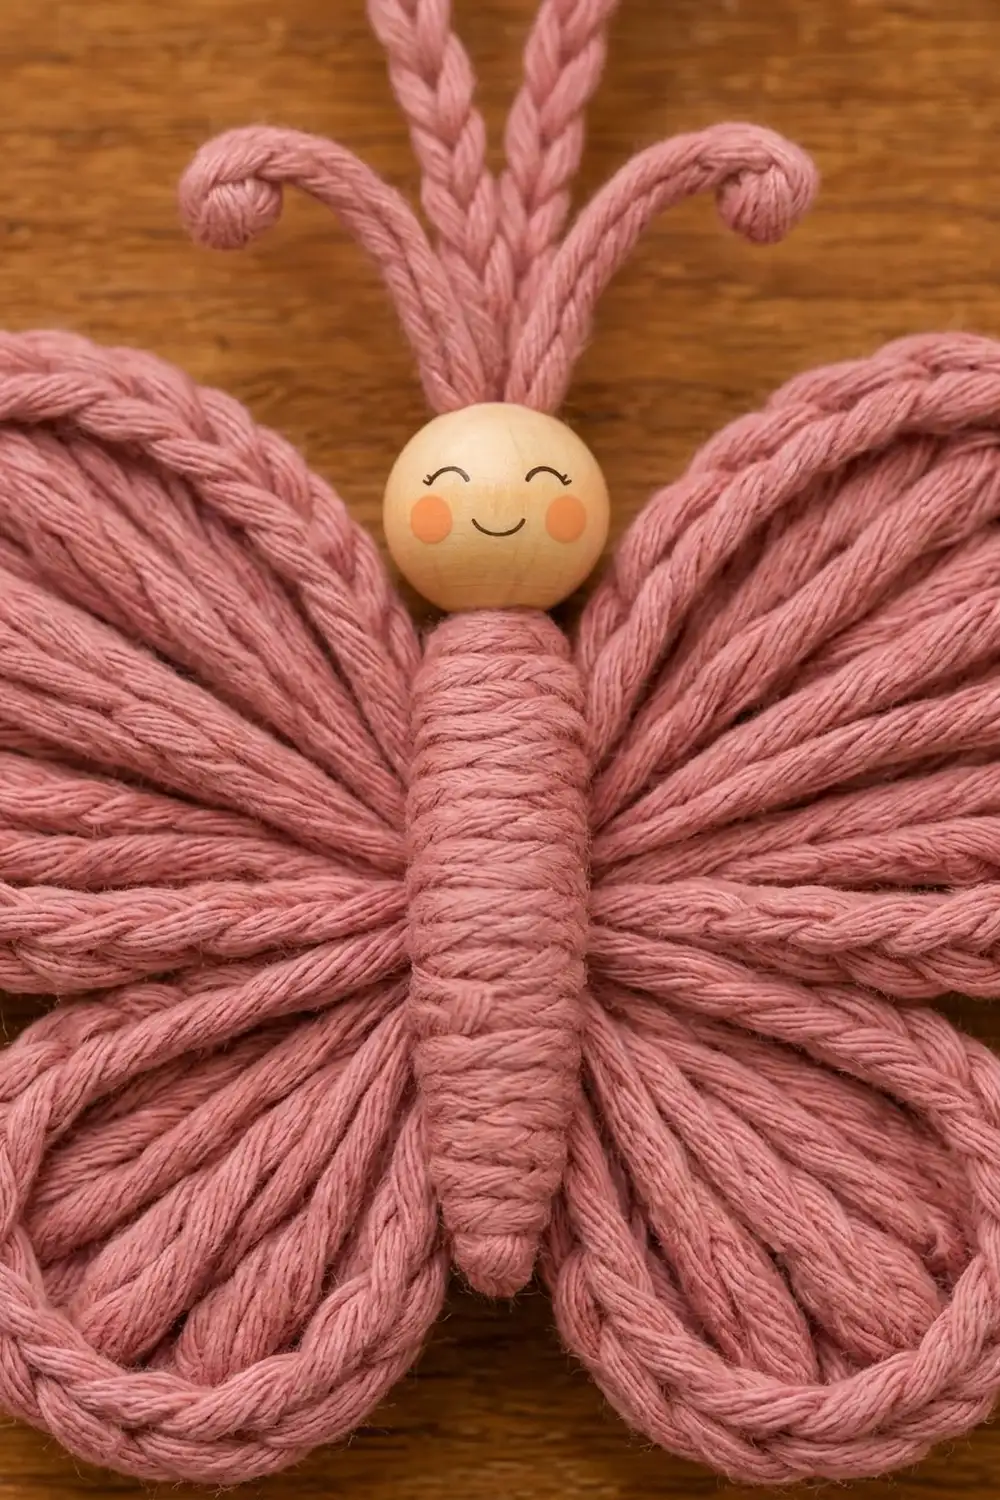
This little butterfly is a quick, cozy ornament with a lot of texture. Each of its four wing lobes is filled with tall stitches that fan out from one center ring like the veins of a wing. A thick corded edge outlines every lobe.
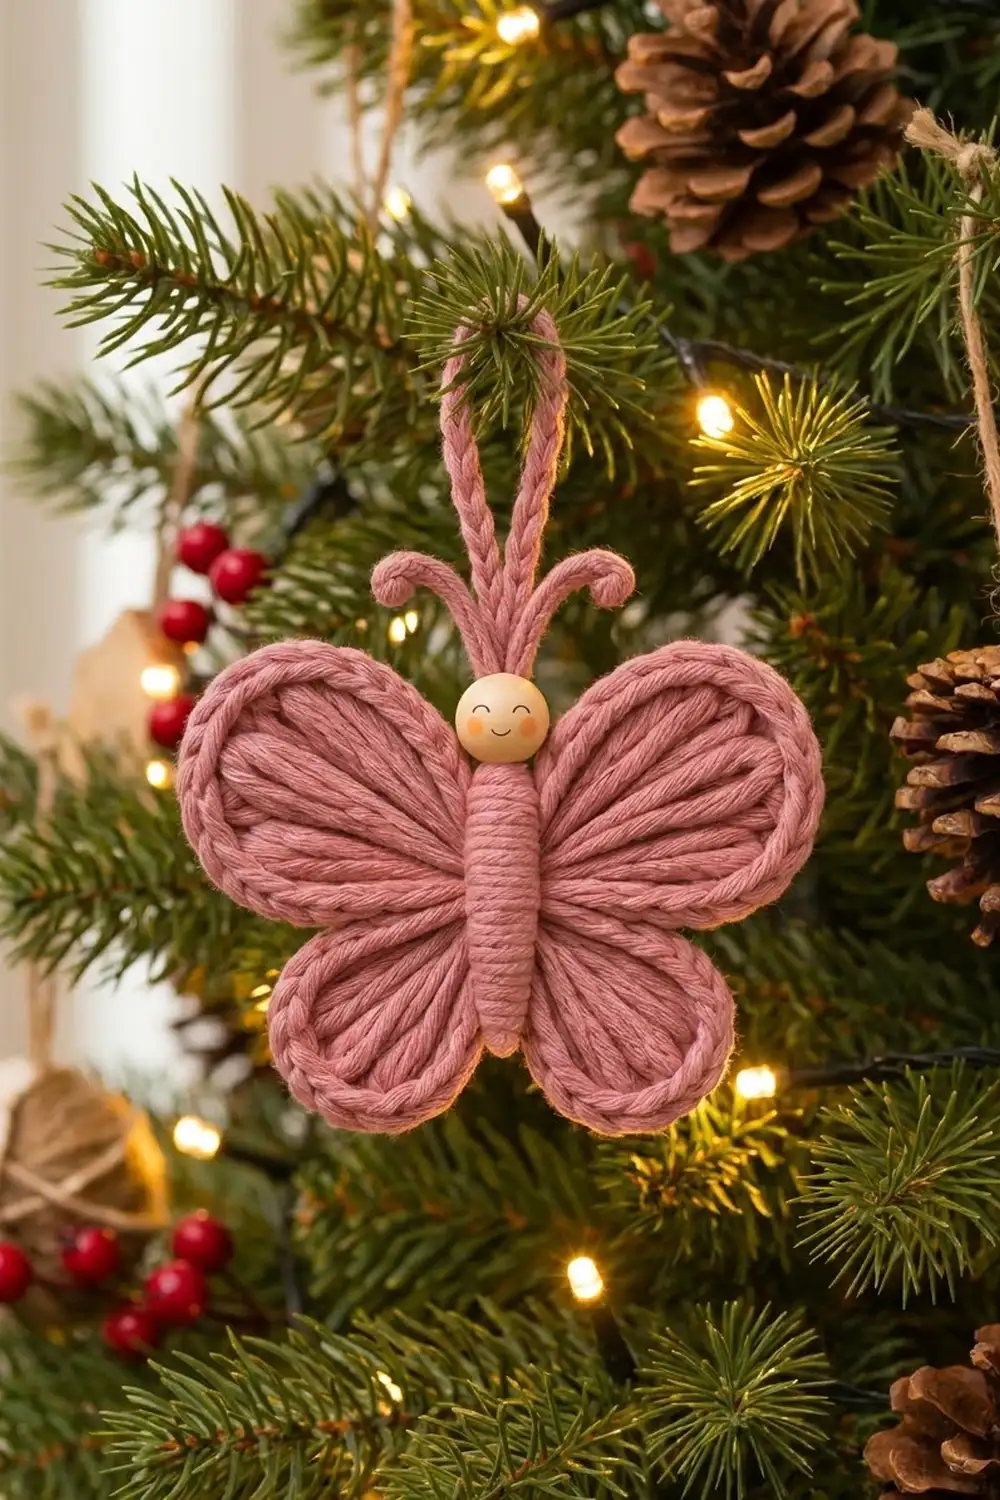
The sample is worked in one dusty rose cotton. The body has a ridged, segmented look, and the head is a natural wooden bead with a small painted smile and peach cheeks. Curled antennae and a braided hanging loop finish it, so it is ready to hang on a tree, a gift bag or a window latch.
The pattern uses US crochet terms. The finished wings measure 4.5 in (11.4 cm) wide by 3.75 in (9.5 cm) tall. With the antennae, the ornament is 4.75 in (12.1 cm) tall, and the loop rises another 2.75 in (7.0 cm).
You work the wings in the round as one piece: a center ring, a fan round that shapes four lobes, and a two-round corded edge. Then you make a small tube body and one antenna strip, chain a hanging loop, and sew everything onto the wing piece with the bead head.
Finished Size and Construction
- Finished size (wings): 4.5 in (11.4 cm) wide x 3.75 in (9.5 cm) tall
- Height with antennae: 4.75 in (12.1 cm)
- Skill level: Easy / advanced beginner
- Terminology: US crochet terms
- Yarn weight: Medium #4 (worsted) cotton or cotton blend
- Hook: 5.0 mm (H-8)
- Number of pieces: 1 ornament (1 wing piece plus a body, an antenna strip and a hanging loop sewn on)
- Layout: A single butterfly. There are no motifs to join.
- Wing piece before edging: 3.75 in (9.5 cm) wide x 3 in (7.6 cm) tall
- Edging depth: 0.375 in (1.0 cm) on every side
Materials
Yarn: Use a smooth, plied worsted cotton or cotton blend. Plied cotton shows off the twisted posts of the tall stitches and gives the corded edge its rope look. Avoid fuzzy yarns, because they blur the fan lines.
- Dusty rose: 15 g (about 25 m)
The quantity includes a margin for your gauge swatch and sewing tails.
Tools and notions:
- 5.0 mm (H-8) crochet hook
- Tapestry needle
- One 0.75 in (1.9 cm) round natural wooden bead with a hole through it
- Fine black marker or paint pen, plus peach acrylic paint or blush for the face
- A small amount of yarn scrap or fiberfill for the body
- 4 locking stitch markers
- Scissors, pins and a spray bottle for blocking
Abbreviations (US Terms)
- ch – chain
- sl st – slip stitch
- sc – single crochet
- dc – double crochet
- tr – treble crochet (yarn over twice)
- dtr – double treble crochet (yarn over 3 times)
- sc2tog – single crochet 2 together
- BLO – back loop only
- MR – magic ring
- st(s) – stitch(es)
- rev sc – reverse single crochet
Special stitch – reverse single crochet (rev sc / crab stitch): Don’t turn the work. Insert the hook into the next stitch to the right (left-handed crocheters go left), yarn over, and pull up a loop. Then yarn over and pull through both loops. This stitch makes the twisted, rope-like edge.
Gauge and Checkpoints
Gauge isn’t critical for an ornament, but it controls the final size and how the lobes sit. Make the wing piece first and check it at each stage before you make the smaller parts.
- After Rnd 1: The ring measures 0.75 in (1.9 cm) across.
- After Rnd 2: The flat disc measures 1.5 in (3.8 cm) across.
- After Rnd 3: The four-lobed piece measures 3.75 in (9.5 cm) wide x 3 in (7.6 cm) tall, measured flat without stretching.
- After Rnd 5: The finished wings measure 4.5 in (11.4 cm) x 3.75 in (9.5 cm).
If your piece is too big (more than 0.25 in / 0.6 cm over at Rnd 3), switch to a 4.5 mm hook, or pull the yarn snug between yarn-overs on the tall stitches. If it’s too small, switch to a 5.5 mm hook. If the lobes ruffle, your tall stitches are loose: pull each loop fully through before the next yarn-over. If the lobes cup, your tension is too tight, so go up a hook size.
Wing Piece
The wing is worked in joined rounds with the right side facing. Number the stitches of Rnd 2 from 1 to 28, starting with the stitch where you joined. You’ll use those numbers in Rnd 3.
Rnd 1: Make a MR. Ch 1 (doesn’t count as a stitch), work 14 sc into the ring, and pull the ring closed until only a tiny hole remains. Sl st in the first sc to join. (14 sc)
Rnd 2: Ch 3 (counts as the first dc), dc in the same st, then work 2 dc in each remaining sc around. Sl st in the top of the beg ch-3 to join. (28 dc)
This round is a growth round: 14 stitches doubled gives 28. The disc should lie flat and measure 1.5 in (3.8 cm).
Place markers before Rnd 3. The joining stitch is st 1. Counting forward in your working direction, place markers in st 1, st 9, st 15 and st 21. These four stitches become the notches: top, side, bottom and side. The stitches between them are shared out like this:
- Upper Wing A: sts 2–8 (7 sts)
- Lower Wing A: sts 10–14 (5 sts)
- Lower Wing B: sts 16–20 (5 sts)
- Upper Wing B: sts 22–28 (7 sts)
Check the total: 4 notches + 7 + 5 + 5 + 7 = 28. ✔
Rnd 3 (fan round): This round shapes the four lobes.
- Sl st in st 1 (top notch).
- Upper Wing A: dtr in st 2, 2 dtr in each of sts 3–7, dtr in st 8. (12 dtr)
- Sl st in st 9 (side notch).
- Lower Wing A: tr in st 10, 2 tr in each of sts 11–13, tr in st 14. (8 tr)
- Sl st in st 15 (bottom notch).
- Lower Wing B: tr in st 16, 2 tr in each of sts 17–19, tr in st 20. (8 tr)
- Sl st in st 21 (side notch).
- Upper Wing B: dtr in st 22, 2 dtr in each of sts 23–27, dtr in st 28. (12 dtr)
- Join with a sl st in the first sl st of the round. This joining sl st doesn’t count.
Rnd 3 total: 44 sts (12 + 8 + 8 + 12 tall sts, plus 4 notch sl sts).
The tall stitches form the fanned “veins” of the wings. The dtr make the upper lobes longer than the tr lower lobes, which gives the butterfly its silhouette. The notch sl sts pull the wing in tight between the lobes. Move each marker up into its notch sl st.
Checkpoint: 3.75 in (9.5 cm) wide x 3 in (7.6 cm) tall.
Corded Edging (Border)
Border gauge: The two edging rounds add 0.375 in (1.0 cm) all around. About 0.25 in (0.6 cm) of that comes from the sc round and 0.125 in (0.3 cm) from the rev sc cord.
Rnd 4 (outline round): This round turns the fan into a smooth outline. You work into the tops of the tall stitches and along their outer posts so each lobe gets fully enclosed sides.
- Ch 1 and sl st in the top notch sl st. (1)
- Upper Wing A: work 3 sc evenly up the post of the first dtr, then work along the tops of the dtr: 2 sc in the first dtr, sc in the next 4, 2 sc in each of the next 2, sc in the next 4, 2 sc in the last dtr. Finish with 3 sc evenly down the post of that last dtr. (3 + 16 + 3 = 22 sc)
- Sl st in the side notch sl st. (1)
- Lower Wing A: work 2 sc up the post of the first tr, then work along the tops: 2 sc in the first tr, sc in the next 2, 2 sc in each of the next 2, sc in the next 2, 2 sc in the last tr. Finish with 2 sc down the post. (2 + 12 + 2 = 16 sc)
- Sl st in the bottom notch sl st. (1)
- Lower Wing B: work as Lower Wing A. (16 sc)
- Sl st in the side notch sl st. (1)
- Upper Wing B: work as Upper Wing A. (22 sc)
- Join with a sl st in the first sl st.
Rnd 4 total: 80 sts. Here is how that breaks down:
- 44 sts worked one into each Rnd 3 stitch (40 tall-stitch tops + 4 notches)
- + 16 increases (4 per lobe)
- + 20 post sc (6 + 4 + 4 + 6)
- = 80
Rnd 5 (cord round): Ch 1. Without turning, work 1 rev sc in each st around, including the 4 notch sl sts. Join with a sl st in the first rev sc and fasten off. (80 rev sc)
Why the math works: Each upper lobe’s outer arc is made of 12 dtr tops. The tops of tall stitches are spaced farther apart than the edging stitches, so the arc needs about 4 extra stitches to lie flat. That’s why each upper lobe gets 16 sc. The shorter lower lobes have an 8-stitch arc and need the same 4 increases, which gives 12 sc. The 3 post sc on each dtr side and 2 on each tr side match the post lengths: about 1.1 in (2.8 cm) for a dtr and 0.75 in (1.9 cm) for a tr, with one sc covering roughly 0.375 in (1.0 cm). The rev sc round is worked one-for-one, so it doesn’t change the count, and the cord stays flat instead of flaring.
Body
You work the body in a spiral from the bottom tip upward. Don’t join the rounds; mark the first stitch of each round.
Rnd 1: MR, 4 sc into the ring. (4)
Rnd 2: (sc in the next st, 2 sc in the next st) twice. (6)
Rnd 3: (sc in the next 2 sts, 2 sc in the next st) twice. (8)
Rnds 4–10: Sc in BLO of each st around. (8 per round, 7 rounds)
The BLO rounds create the horizontal ridges that give the body its segmented look.
Checkpoint: The tube is 1.75 in (4.4 cm) long and 0.5 in (1.3 cm) wide when flattened. Stuff it lightly with yarn scrap so it stays round without bulging.
Rnd 11: Sc2tog 4 times. (4)
Fasten off and leave a 12 in (30.5 cm) tail for sewing.
Antennae
You make both antennae as one strip, then fold it in the middle.
Ch 20.
Row 1: 2 sc in the 2nd ch from the hook and in each of the next 2 ch (curled tip). Sl st in each of the next 13 ch. Then work 2 sc in each of the last 3 ch (second curled tip). (6 + 13 + 6 = 25 sts)
The 19 working chains break down as 3 + 13 + 3. The crowded increases force each end to curl. The strip measures about 3.25 in (8.3 cm) and gives two antennae of about 1.25 in (3.2 cm) visible each. Fasten off and weave in the ends.
Hanging Loop
Ch 36.
Row 1: Sl st in the back bump of the 2nd ch from the hook and in each ch across. (35 sl sts)
This makes a firm braided cord about 6 in (15.2 cm) long. Fasten off and leave an 8 in (20.3 cm) tail.
Assembly
- Paint the bead. Draw two small curved closed eyes and a smile with the marker, and dab peach cheeks on either side. Let it dry fully.
- Sew on the body. Center the body vertically over the wing ring, with the open-closed top just below the top notch and the tip reaching the bottom notch. Whipstitch both long sides to the wing using the body tail.
- Add the antennae. Fold the antenna strip in half and tack the fold just above the top of the body so the curls point up and outward.
- Add the head. Pass the remaining body tail up through the bead, over the antenna fold, and back down through the bead. Repeat once, then secure the tail on the back of the wing.
- Add the loop. Fold the hanging loop in half and sew both ends to the back of the wing behind the head. The loop should stand 2.75 in (7.0 cm) above the head.
- Weave in all ends on the back.
Final Blocking
- Spray the ornament lightly with water until it is damp, not soaked.
- Lay it face up on a blocking mat or folded towel.
- Pin the four lobes out to 4.5 in (11.4 cm) total width and 3.75 in (9.5 cm) height.
- Use your fingers to straighten the fan stitches so they run evenly from the center to the edge.
- Push a pin into each of the two side notches so they stay crisp.
- Roll each antenna tip around a toothpick to sharpen the curl.
- Leave everything pinned until it is completely dry, about 4–6 hours.
Final Quality-Control Checklist
- Rnd 3 has 44 sts: 12 dtr per upper lobe, 8 tr per lower lobe, and 4 notches.
- Rnd 4 and Rnd 5 each have 80 sts.
- The upper lobes are clearly larger than the lower lobes.
- The wings lie flat with no ruffling or cupping.
- The finished wings are 4.5 in (11.4 cm) x 3.75 in (9.5 cm), within 0.25 in (0.6 cm).
- The body is centered and covers the ring hole.
- The bead face is level and points forward.
- Both antennae curl outward symmetrically.
- The loop is secure, and the ornament hangs straight when you hold it by the loop.
- All ends are woven in on the back.
Troubleshooting
The lobes are lopsided. You probably shifted a notch marker. Recount Rnd 2 so the stitch counts are 7–1–5–1–5–1–7–1.
There are gaps at the notches. Pull the notch sl st snug, and stitch the post sc closer to the base of the stitch.
The cord edge flares. Your rev sc stitches are too loose. Go down half a hook size for Rnd 5 only.
The cord edge puckers. Your rev sc stitches are too tight. Pull each loop up a little taller.
The antennae won’t curl. Make sure you worked 2 sc in each of the 3 end chains. Then dampen the tips and roll them while blocking.
The ornament tips forward when hung. Move the loop ends lower on the back, level with the top of the body.
Care
Spot clean with cool water and mild soap, and keep the painted bead dry. Reshape and lay the ornament flat to dry, then store it flat or hang it away from direct sun.
Final Notes
The measurements build on each other:
- A 0.75 in (1.9 cm) ring grows into a 1.5 in (3.8 cm) disc.
- The fan round spreads the disc to 3.75 in (9.5 cm) x 3 in (7.6 cm).
- The 0.375 in (1.0 cm) corded edge on each side brings the wings to 4.5 in (11.4 cm) x 3.75 in (9.5 cm).
- The antennae add 1 in (2.5 cm) for an overall height of 4.75 in (12.1 cm).
If each checkpoint matches, the finished butterfly will too. Make one in rose, then try soft yellow, lilac or sky blue for a full tree of them.
Happy crocheting!