

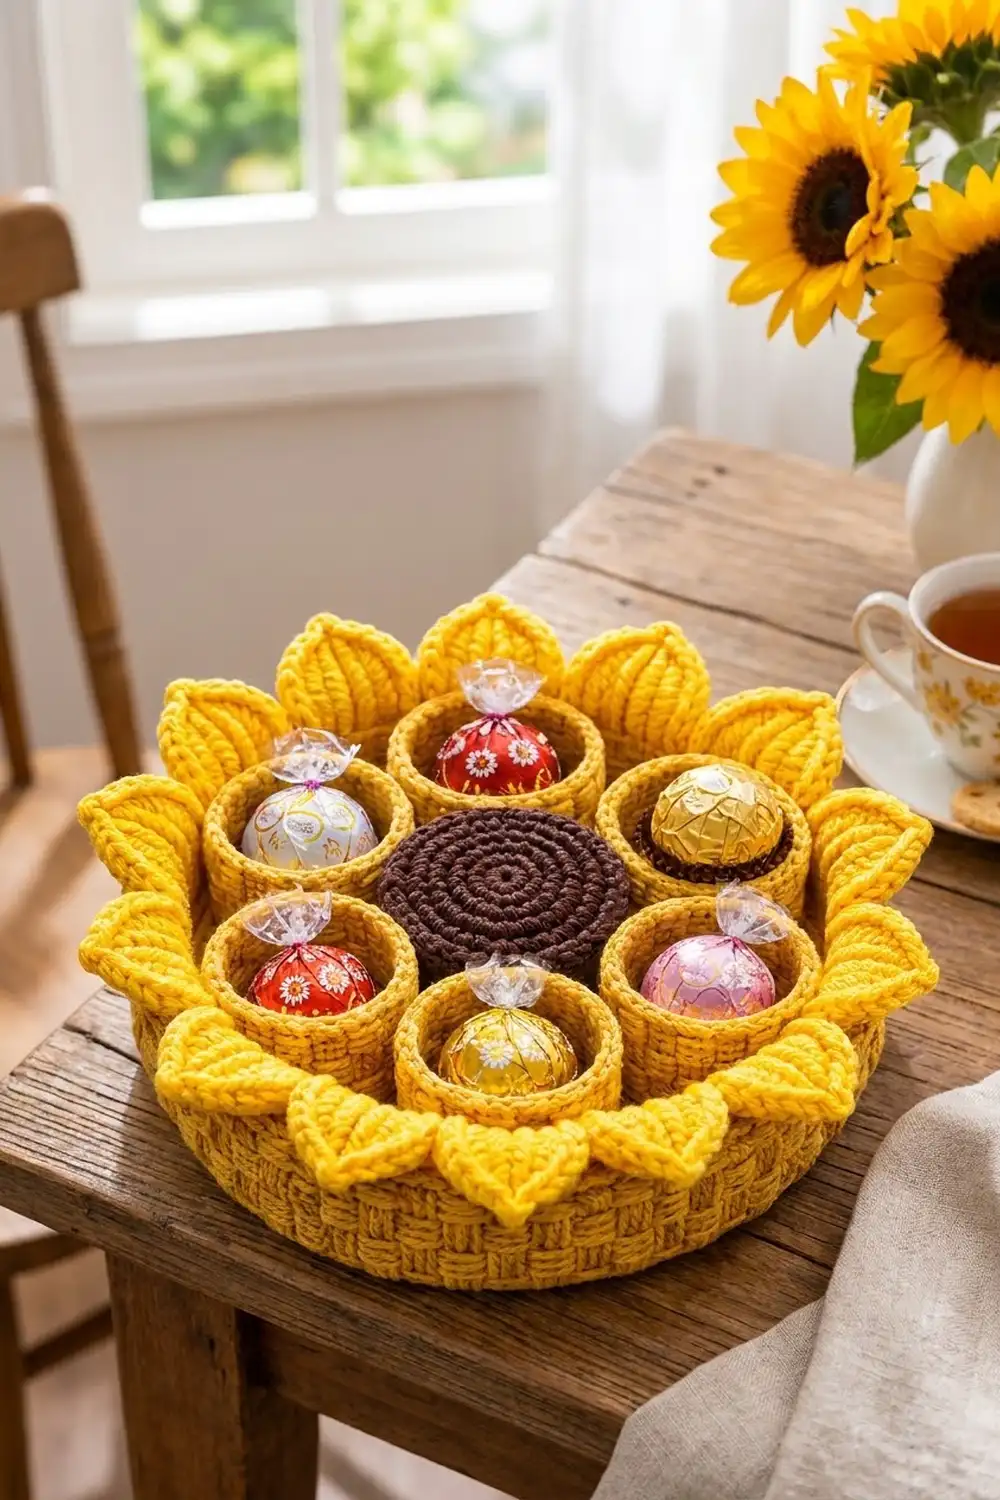
This sunflower candy tray turns a sturdy basketweave bowl into a bloom for your table. Six small cups ring a chocolate-brown center, and twelve bright petals fan out from the rim. It works well for wrapped sweets, but you can also use it for jewelry, buttons or desk clutter.
The palette is simple: mustard-gold for the tray and cups, lemon yellow for the petals and dark brown for the flower center. The basketweave texture on the walls gives the pieces a woven look and makes them stiff enough to stand up on their own.
This pattern uses US crochet terms. The finished tray is about 9.5 in (24.1 cm) across the base and 2.75 in (7.0 cm) tall. With the petals attached, it measures about 13.5 in (34.3 cm) across.
You will crochet a flat circle for each base, turn up a wall with a back-loop round, and then build the basketweave with post stitches. The petals are worked around a foundation chain, and the disc is a plain spiral. After assembly, a two-round border finishes the tray rim and gives the petals a solid edge to sit on.
Finished Size and Construction
- Finished size: about 13.5 in (34.3 cm) across, petals included
- Skill level: Intermediate
- Terminology: US crochet terms
- Yarn weight: Worsted (#4) cotton
- Hook: 4.0 mm (G-6)
- Number of pieces: 20 (1 tray, 6 cups, 12 petals, 1 disc)
- Layout: 1 disc in the center, a ring of 6 cups around it, 12 petals around the rim
- Piece sizes: cup 2.9 in (7.4 cm) across × 2.5 in (6.4 cm) tall; petal 2.75 × 1.5 in (7.0 × 3.8 cm); disc 2.9 in (7.4 cm) across
- Tray before border: 9.5 in (24.1 cm) across, wall 2.25 in (5.7 cm) tall
- Border depth: 0.5 in (1.3 cm), so the finished wall is 2.75 in (7.0 cm)
Materials
Use a smooth, firm cotton or cotton blend. Cotton holds the basketweave texture well and keeps the walls upright. Acrylic also works, but the cups will be softer.
- Color A, mustard-gold (tray and cups): 130 g, about 220 m
- Color B, lemon yellow (petals): 20 g, about 34 m
- Color C, dark brown (center disc): 10 g, about 17 m
These quantities include a margin of about 30% for your swatch and for sewing tails.
Tools:
– 4.0 mm (G-6) crochet hook
– Tapestry needle
– Stitch markers
– Scissors
– Rustproof pins
– Spray bottle and blocking mat
Abbreviations (US Terms)
- ch – chain
- sl st – slip stitch
- sc – single crochet
- hdc – half double crochet
- dc – double crochet
- inc – 2 sc in the same stitch
- BLO – back loop only
- FPdc – front post double crochet: yarn over, insert your hook from front to back to front around the post of the stitch, then complete a dc
- BPdc – back post double crochet: yarn over, insert your hook from back to front to back around the post, then complete a dc
- rev sc – reverse single crochet (crab stitch): working from left to right, insert your hook into the next stitch to the right, pull up a loop, yarn over and pull through both loops
- st(s) – stitch(es)
Gauge and Checkpoints
- Single crochet: 16 sts and 16 rnds = 4 in (10.2 cm)
- Double crochet and post stitches: 16 sts and 10 rnds = 4 in (10.2 cm), so each round is about 0.4 in (1.0 cm) tall
Test one piece first. Make one cup before you start the tray. The cup base is a 6-round circle, which makes it a natural gauge swatch.
Checkpoints:
– Cup or disc after Rnd 6 (36 sts): 2.9 in (7.4 cm) across
– Tray after Rnd 12 (72 sts): 5.7 in (14.5 cm) across
– Tray after Rnd 20 (120 sts): 9.5 in (24.1 cm) across
– Finished cup: 2.5 in (6.4 cm) tall
– Tray wall before border: 2.25 in (5.7 cm) tall
If your piece is too big, go down to a 3.5 mm hook. If it’s too small, go up to a 4.5 mm hook. Don’t skip increases to fix the size, because the cups must fit inside the tray. If your circle ruffles, your stitches are too loose for this yarn, so drop a hook size. If it cups upward, go up a size.
Pattern Notes
- Work in joined rounds. Join with a sl st to the first st, then ch 1. The ch 1 does not count as a stitch.
- For post-stitch rounds, start with ch 2. The ch 2 does not count as a stitch.
- To keep the bases round, alternate where your increases fall. On even rounds, put the inc at the end of each repeat. On odd rounds, split the plain sc so the inc falls in the middle.
Cups (make 6, Color A)
Base:
- Rnd 1: Make a magic ring and work 6 sc into it. Join. (6)
- Rnd 2: Inc in each st around. (12)
- Rnd 3: Sc 1, inc 6 times. (18)
- Rnd 4: Sc 2, inc 6 times. (24)
- Rnd 5: Sc 3, inc 6 times. (30)
- Rnd 6: Sc 4, inc 6 times. (36)
Checkpoint: 2.9 in (7.4 cm) across.
Wall:
- Rnd 7: Sc in BLO of each st around. (36) The unworked front loops form a crisp fold, and the wall turns upward.
- Rnd 8: Ch 2, dc in each st around. Join. (36)
- Rnd 9: Ch 2, FPdc around next 3 sts, BPdc around next 3 sts 6 times. Join. (36)
- Rnd 10: Repeat Rnd 9. Work FPdc over FPdc and BPdc over BPdc. (36)
- Rnd 11: Ch 2, BPdc around next 3 sts, FPdc around next 3 sts 6 times. Join. (36) The blocks are now offset, which creates the basketweave.
- Rnd 12: Repeat Rnd 11. (36)
- Rnd 13: Ch 1, sc in each st around. Join. (36)
Fasten off and leave a 12 in (30.5 cm) tail for sewing. Each cup is 2.5 in (6.4 cm) tall: two sc rounds at 0.25 in (0.6 cm) each, plus five dc-height rounds at 0.4 in (1.0 cm) each.
Tray (make 1, Color A)
Base:
- Rnds 1–6: Work the same as the cup base. (36)
- Rnd 7: Sc 5, inc 6 times. (42)
- Rnd 8: Sc 6, inc 6 times. (48)
Keep going the same way. Each round has 1 more plain sc per repeat and adds 6 sts:
- Rnd 9: (54)
- Rnd 10: (60)
- Rnd 11: (66)
- Rnd 12: (72). Checkpoint: 5.7 in (14.5 cm) across.
- Rnd 13: (78)
- Rnd 14: (84)
- Rnd 15: (90)
- Rnd 16: (96)
- Rnd 17: (102)
- Rnd 18: (108)
- Rnd 19: (114)
- Rnd 20: Sc 18, inc 6 times. (120) Checkpoint: 9.5 in (24.1 cm) across.
Wall:
- Rnd 21: Sc in BLO of each st around. (120)
- Rnd 22: Ch 2, dc in each st around. Join. (120)
- Rnds 23–24: Ch 2, FPdc around next 3 sts, BPdc around next 3 sts 20 times. Join. (120)
- Rnds 25–26: Ch 2, BPdc around next 3 sts, FPdc around next 3 sts 20 times. Join. (120)
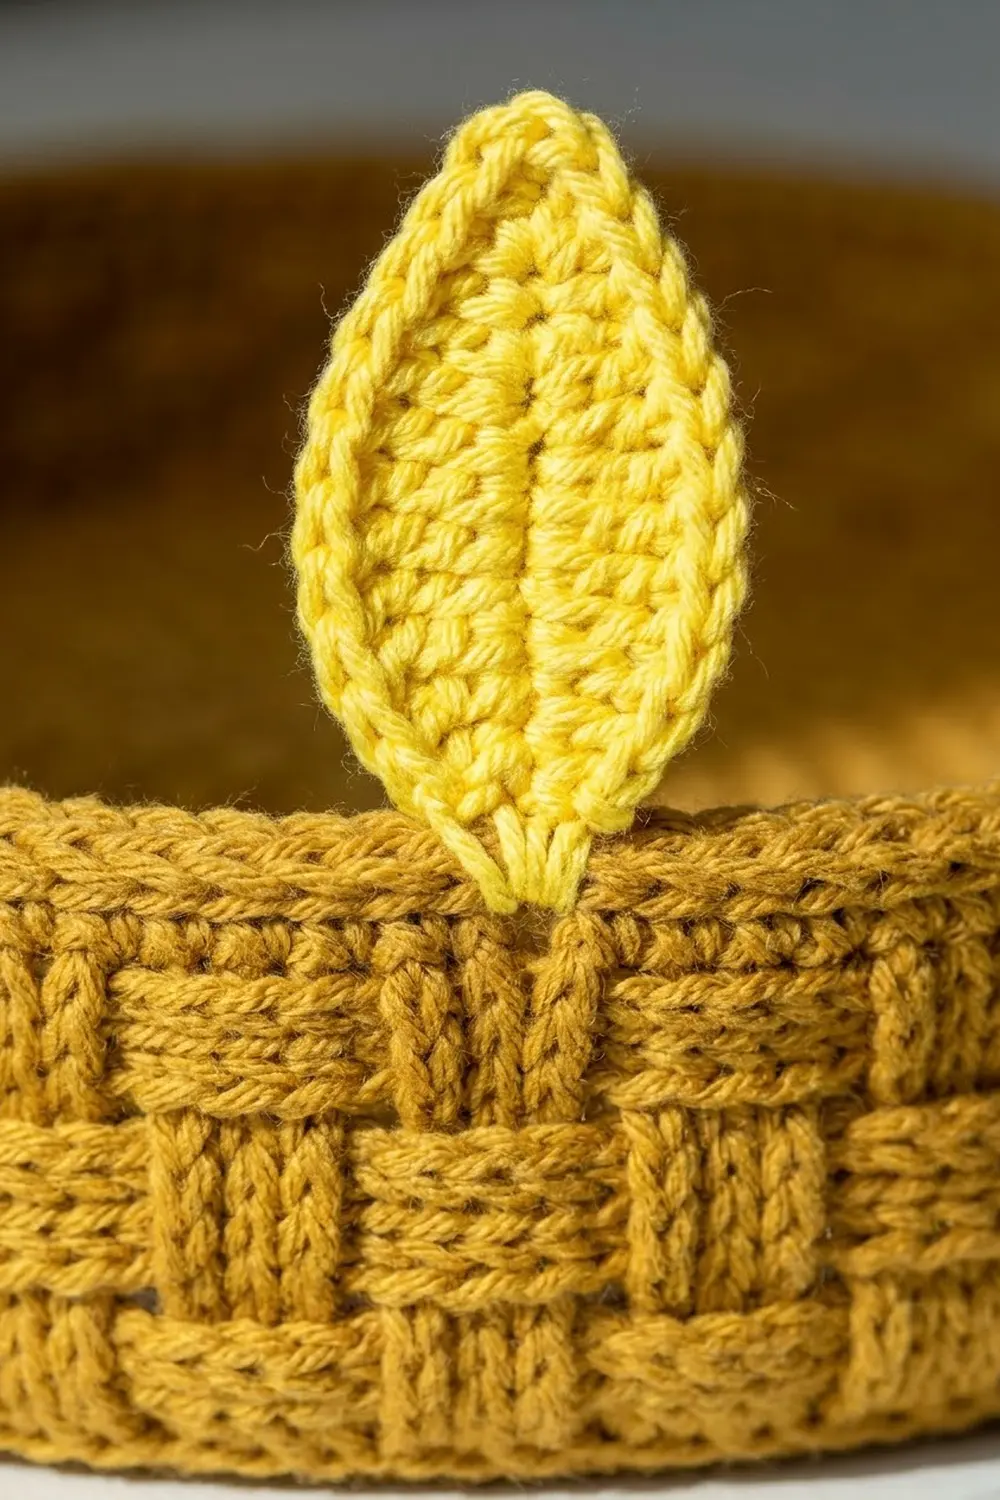
Don’t fasten off yet. Pull up a long loop and put it on a stitch marker. The border is worked later. The wall now measures 2.25 in (5.7 cm).
Petals (make 12, Color B)
- Foundation: Ch 10.
- Rnd 1: Sc in the 2nd ch from the hook, hdc in the next ch, dc in each of the next 5 ch, hdc in the next ch. That’s 8 sts on chs 1–8. Work (sc, ch 2, sc) in the last ch to make the tip. Rotate the piece and work along the other side of the chain: hdc in the next ch, dc in each of the next 5 ch, hdc in the next ch, then sc in the same ch as the first sc. That’s 8 more sts. Ch 2 and join to the first sc. (18 sts, plus 2 ch-2 spaces)
- Rnd 2: Ch 1, sc in each st around, and work (sc, ch 2, sc) in each ch-2 space. Join. (22 sc, plus 2 ch-2 spaces)
- Vein: Use the tail end. Starting at the base tip, surface sl st along the foundation chain to the top tip. (9 sl sts) This makes the raised center ridge.
Fasten off. Leave a 10 in (25.4 cm) tail on the base end. Each petal measures 2.75 × 1.5 in (7.0 × 3.8 cm), with a point at both ends.
Center Disc (make 1, Color C)
- Rnds 1–6: Work the same as the cup base. (36)
- Rnd 7: Sl st in BLO of each st around. (36) This gives the disc a tidy, flat edge.
Fasten off and leave a 12 in (30.5 cm) tail. Checkpoint: 2.9 in (7.4 cm) across.
Make All Pieces
- Color A: 1 tray and 6 cups
- Color B: 12 petals
- Color C: 1 disc
Top-view layout (D = disc, C = cup, P = petal; the petals sit on the rim):
            P    P    P
        P     C     C     P
      P    C     D     C    P
        P     C     C     P
            P    P    P
The six cups make a hexagon around the disc. Their centers sit 3.0 in (7.6 cm) from the tray center.
Joining
Method: Whipstitch with the matching yarn tail. Pull each stitch snug but not tight.
- Disc: Center the disc on the tray floor. Whipstitch the front loops of disc Rnd 6 to the tray base. Space your stitches evenly, using all 36 sts.
- Cups: Place the 6 cups in a ring around the disc. Every cup should touch the disc and the 2 cups beside it. Mark the 3 Rnd 13 sts on each side where neighboring cups meet. Sew those 3 sts to the matching 3 sts of the next cup, working stitch to stitch. Then tack each cup’s Rnd 7 front loops to the tray floor at 6 evenly spaced points, one every 6 sts.
- Tension: If you can see the seam stitches from above, they are too tight. Loosen them so the cup walls stay straight.
Size checkpoint: The cup ring measures about 8.8 in (22.4 cm) across. That leaves about 0.35 in (0.9 cm) of clearance inside the tray wall on each side. If the ring is tighter than the wall, adjust your cup gauge before sewing.
Border
Border gauge: 4 sts = 1 in (2.5 cm) in both sc and rev sc. That means 120 sts equals a 30 in (76.2 cm) circumference, which matches the base. Because the counts match, the rim stays straight and doesn’t flare.
Divide the rim into 12 sections of 10 sts. Each section is one petal position. Mark the first st of each section.
- Rnd 27: Put the live loop back on your hook. Ch 1, sc in each st around. Join. (120 total; 10 per section × 12 sections)
- Rnd 28: Ch 1, rev sc in each st around. Join. (120 total; 10 per section × 12 sections)
Fasten off and weave in the end.
Why the math works: 120 divides evenly by 6, which gives 20 basketweave repeats. It also divides evenly by 12, which gives 12 petal sections. Nothing is added or skipped, so the border stays 1 stitch per stitch all the way around.
Attaching petals: Find the 5th and 6th sts of each section. Line up the center of the petal base with them. The base of each petal tucks just below the rev sc. Sew 5 points of the petal base (the ch-2 space plus the 2 sc on each side) to sts 4–8 of Rnd 27, working stitch to stitch. That’s 12 petals × 10 sts = 120, so the spacing is perfectly even.
Final Blocking
- Lightly spray the tray with water until it’s damp but not soaked.
- Pack the cups and the outer ring with rolled towels so the walls stand straight.
- Lay the petals flat and angle them outward. Pin their tips so they sit at an even distance from the rim.
- Check that the finished piece measures 13.5 in (34.3 cm) across in several directions.
- Let it dry completely, at least 24 hours, before you remove the pins.
Final Quality-Control Checklist
- Tray base is 9.5 in (24.1 cm) across and lies flat
- All walls show offset 3-stitch basketweave blocks
- The tray has 120 sts and each cup has 36 sts at the top edge
- The cups are 2.5 in (6.4 cm) tall and stand upright
- The disc is centered and flat
- The 12 petals are evenly spaced, one per 10-stitch section
- All ends are woven in securely
Troubleshooting
- Base ruffles: Your stitches are too loose, or you added extra increases. Recount each round against the stitch counts and go down a hook size.
- Wall leans outward: You skipped the BLO on Rnd 7 or Rnd 21. Rework that round in the back loops.
- Basketweave blocks don’t line up: Count 3 sts per block, and make sure you aren’t working into the ch 2 at the start of the round.
- Cups don’t fit: Your cup gauge doesn’t match your tray gauge. Remake the cups with a smaller hook.
- Petals curl: Steam or wet-block them flat before you sew them on.
Care
Hand wash in cool water and reshape while damp. Lay the tray flat to dry and stuff the cups so they keep their shape.
Final Notes
Everything in this tray builds on the same measurement chain. A 36-st circle is 2.9 in (7.4 cm) across and makes each cup and the disc. Six of those circles in a ring fit inside a 120-st base that is 9.5 in (24.1 cm) across. The 2.25 in (5.7 cm) wall gets a 0.5 in (1.3 cm) border, which brings it to 2.75 in (7.0 cm). Twelve petals, one on each 10-st section, bring the finished flower to 13.5 in (34.3 cm). As long as your swatch cup matches gauge, everything else will fit.
Happy crocheting!