

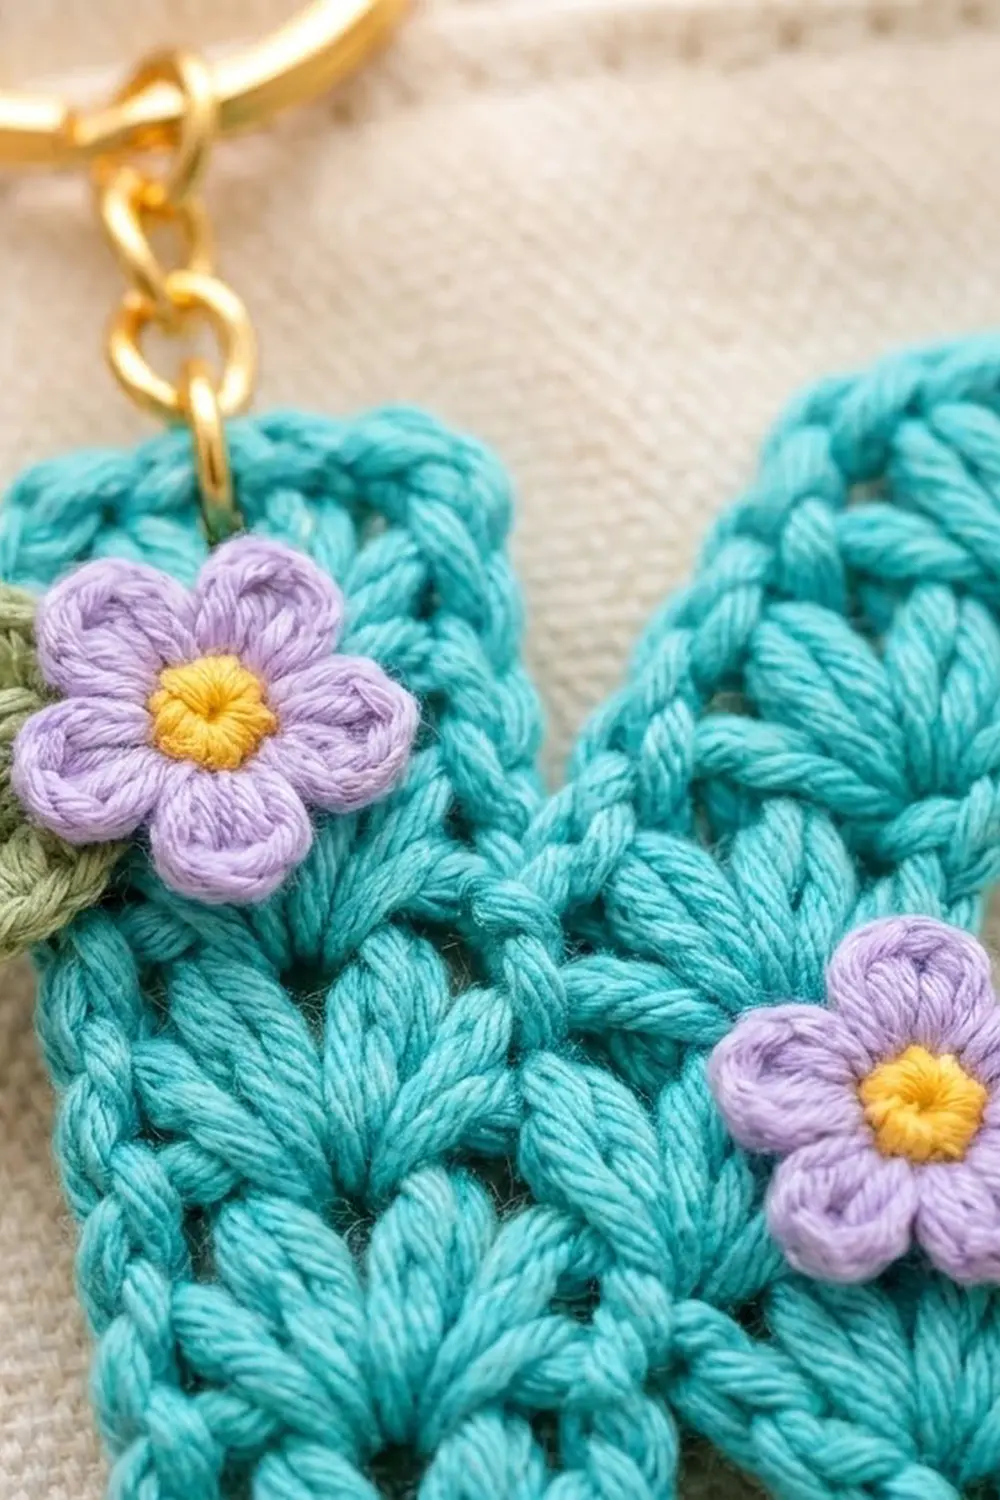
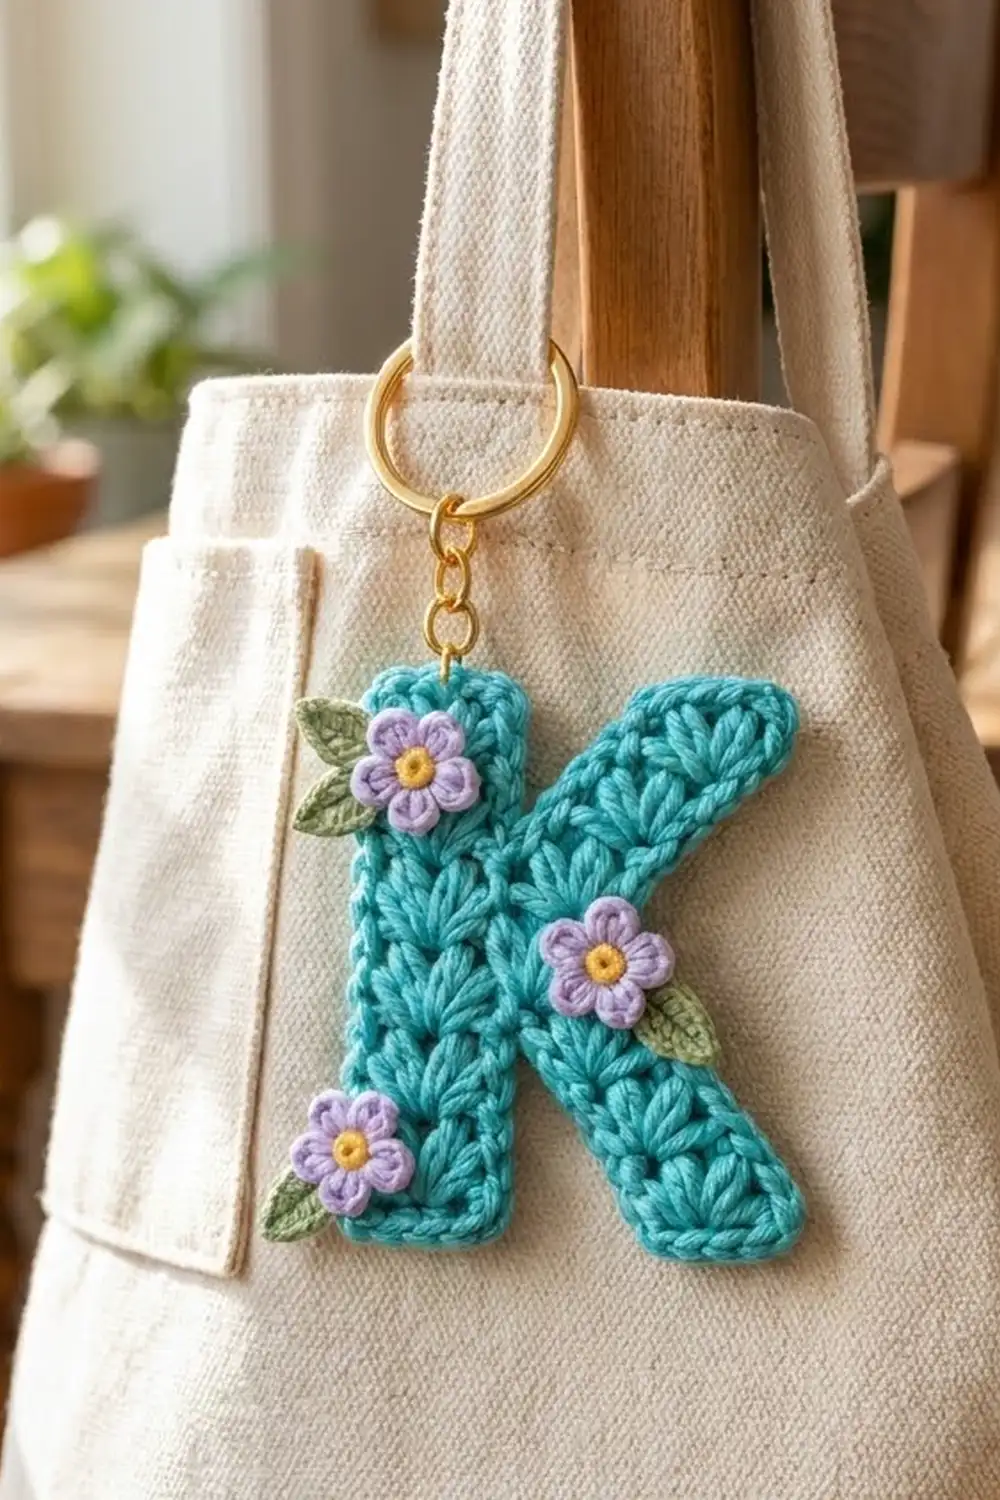
This letter K keychain is a quick, personal accessory with lots of texture. Stacked shell stitches cover the letter and look like tiny fans or wheat ears marching up each stroke. A neat single crochet border gives every edge a smooth, rope-like outline.
The main color is a bright turquoise teal. Three small lavender flowers with sunny yellow centers sit on the letter, each with a soft sage green leaf. A gold split ring on a short chain turns the letter into a bag charm or keychain.
The pattern uses US crochet terms. The finished letter is about 3.25 in (8.3 cm) wide and 4 in (10.2 cm) tall, not counting the hardware.
The construction is simple. You crochet three flat shell-stitch strips (the stem, the upper arm and the lower leg) and sew them into a K. Then you work one round of single crochet around the whole outline. Finally, you sew on the small flowers and leaves and attach the ring at the top of the stem.
Finished Size and Construction
- Finished size: 3.25 in (8.3 cm) wide x 4 in (10.2 cm) tall
- Skill level: Easy to intermediate
- Terminology: US crochet terms
- Yarn weight: Sport weight (#2) cotton
- Hook: 3.0 mm (US C/2 or D/3)
- Number of pieces: 1 finished keychain, built from 3 letter strips plus 3 flowers and 4 leaves
- Layout: The stem stands straight on the left, the arm angles up to the right, and the leg angles down to the right
- Piece sizes: Stem 1.25 x 3.75 in (3.2 x 9.5 cm); upper arm about 2.25 in (5.7 cm) long; lower leg about 2.5 in (6.4 cm) long
- Size before border: 3 in (7.6 cm) wide x 3.75 in (9.5 cm) tall
- Border depth: 1 round of sc, about 1/8 in (0.3 cm) on each edge
Materials
Choose a smooth mercerized or combed cotton in sport weight. Cotton shows the shell texture crisply and keeps its shape on a keychain that gets handled every day. Avoid fuzzy or very splitty yarns, because they blur the fans.
- Teal (main color): 12 g, about 37 m
- Lavender (flower petals): 2 g, about 6 m
- Yellow (flower centers): 1 g, about 3 m
- Sage green (leaves): 1 g, about 3 m
Tools:
- 3.0 mm crochet hook
- Tapestry needle
- Scissors
- Stitch markers (2 to 3)
- Rust-proof pins and a blocking mat or folded towel
- Gold split key ring, 1 in (2.5 cm) across, with a short chain
- 1 gold jump ring, about 0.25 in (0.6 cm), and 2 flat-nose pliers
All yarn amounts include a small margin for differences in gauge and for tails.
Abbreviations (US Terms)
- ch: chain
- sl st: slip stitch
- sc: single crochet
- hdc: half double crochet
- dc: double crochet
- sc2tog: single crochet 2 together
- sk: skip
- st(s): stitch(es)
- RS: right side
Special stitch: Shell. Work 5 dc into the same stitch.
Gauge and Checkpoints
Make the stem first and use it as your gauge swatch. It is the largest strip, and its numbers set the size of everything else.
- Row 1 of the stem (9 sc) should measure 1.25 in (3.2 cm) across.
- One shell row is about 0.4 in (1.0 cm) tall.
- 5 shell rows measure about 2 in (5.1 cm).
- Before the border, the finished stem measures 1.25 x 3.75 in (3.2 x 9.5 cm).
If your stem is too big, go down to a 2.75 mm hook. If it is too small or stiff, go up to a 3.25 mm hook. Even 0.25 in (0.6 cm) of difference in stem length changes the proportions of the K, so check before you make the arm and leg.
Stem
With teal, ch 10.
Row 1 (RS): Sc in 2nd ch from hook and in each ch across, turn. (9 sc)
Row 2: Ch 1 (does not count as a st here and throughout), sc in first sc, [sk 1 sc, shell in next sc, sk 1 sc, sc in next sc] twice, turn. (2 shells + 3 sc = 13 sts)
Row 3: Ch 1, sc in first sc, [sk 2 dc, shell in 3rd (center) dc of the shell, sk 2 dc, sc in next sc] twice, turn. (2 shells + 3 sc = 13 sts)
Each new shell sits directly on top of the shell below it. The fans stack into two neat vertical columns with a sc “spine” between them.
Rows 4–9: Repeat Row 3. (13 sts in each row)
You now have 8 shell rows. Checkpoint: the stem is about 3.5 in (8.9 cm) tall.
Row 10 (top trim, conversion row): Ch 1, sc in first sc, [sk 1 dc, sc in next 3 dc, sk 1 dc, sc in next sc] twice. (9 sc: 1 sc in each of 9 of the 13 existing sts, 4 dc skipped, 0 added)
Fasten off, leaving a 10 in (25.4 cm) tail for sewing. Checkpoint: the stem measures 1.25 x 3.75 in (3.2 x 9.5 cm).
Upper Arm
With teal, ch 10.
Row 1: Sc in 2nd ch from hook and in each ch across, turn. (9 sc)
Row 2: Work as Stem Row 2. (13 sts)
Rows 3–5: Work as Stem Row 3. (13 sts in each row)
You now have 4 shell rows.
Row 6 (slanted tip, conversion row): Ch 1, sc in first sc, sk 1 dc, sc in next 2 dc, hdc in next dc, sk 1 dc, hdc in next sc, sk 1 dc, dc in next 3 dc, sk 1 dc, dc in last sc. (9 sts: 3 sc, 2 hdc and 4 dc, 1 in each of 9 of the 13 existing sts, 4 dc skipped, 0 added)
The stitches rise from sc to dc, so the tip of the arm is cut at an angle, like a printed letter.
Fasten off with a 10 in (25.4 cm) tail. Checkpoint: the arm is about 1.25 in (3.2 cm) wide and 2.25 in (5.7 cm) along its longer (dc) edge.
Lower Leg
With teal, ch 10.
Row 1: Sc in 2nd ch from hook and in each ch across, turn. (9 sc)
Row 2: Work as Stem Row 2. (13 sts)
Rows 3–6: Work as Stem Row 3. (13 sts in each row)
You now have 5 shell rows.
Row 7 (slanted tip): Work as Upper Arm Row 6. (9 sts)
Fasten off with a 10 in (25.4 cm) tail. Checkpoint: the leg is about 1.25 in (3.2 cm) wide and 2.5 in (6.4 cm) along its longer edge.
Assemble the Letter
Lay the stem flat, RS up, with Row 1 at the bottom. Count the row ends on its right edge. From the top, Row 10 and Rows 9–7 stay open, Rows 6–4 hold the arm and leg, and Rows 3–1 stay open.
- Place the upper arm so its foundation edge touches the stem’s right edge at Rows 6–5, angled up and to the right at about 45 degrees. The dc end of the slanted tip should face up.
- Place the lower leg so its foundation edge tucks against the lower edge of the arm, close to the stem, with its inner corner touching the stem at Row 4. Angle it down and to the right, with the dc end of its tip on the inner (lower left) side.
- Pin the pieces and check that the K looks balanced. Whipstitch each seam on the wrong side through the outer loops. Keep the stitches snug but not tight so the seams stay flat.
Checkpoint: the assembled letter measures 3 in (7.6 cm) wide and 3.75 in (9.5 cm) tall. Weave in the sewing tails.
Border
Border gauge: Along a straight edge, work 1 sc into each sc-row end and 2 sc into each shell-row end. Along the tops and foundation edges, work 1 sc into each stitch. Each corner takes 3 sc in the corner stitch. At each inner corner where two strips meet, work 1 sc2tog across the seam.
The counts below are the stitches between the corner groups. The corner stitches are listed separately and are not part of the edge counts.
Round 1: With RS facing, join teal at the bottom left corner of the stem. Ch 1 and work around the outline in this order:
- Stem left edge: 18 sc (1 + 8 x 2 + 1 row ends)
- Top left corner: 3 sc
- Stem top: 7 sc
- Top right corner: 3 sc
- Stem right edge above the arm: 7 sc (Row 10 = 1, Rows 9–7 = 6)
- Inner corner: 1 sc2tog
- Upper arm top edge: 11 sc (1 + 4 x 2 + 2 for the dc tip end)
- Arm tip corner: 3 sc
- Arm tip: 7 sc
- Arm tip corner: 3 sc
- Upper arm lower edge, exposed part: 6 sc
- Inner corner: 1 sc2tog
- Leg outer edge, exposed part: 10 sc
- Leg tip corner: 3 sc
- Leg tip: 7 sc
- Leg tip corner: 3 sc
- Leg inner edge: 11 sc
- Inner corner: 1 sc2tog
- Stem right edge below the leg: 5 sc (Rows 3–2 = 4, Row 1 = 1)
- Bottom right corner: 3 sc
- Stem bottom: 7 sc
- Bottom left corner: 3 sc
Join with a sl st to the first sc. (123 sts: 96 edge sts + 24 corner sts in 8 corner groups + 3 sc2tog)
Fasten off and weave in the end.
Why the math works: Each strip is 9 stitches across. Its top and bottom edges therefore give 1 corner stitch at each end and 7 stitches between them (7 + 2 = 9). A shell row is about as tall as 2 sc are wide, so 2 sc per shell-row end keeps the long edges flat. The arm’s lower edge has 10 row-end units, and the leg covers 4 of them, which leaves 6. The leg’s two edges have 12 and 13 units. The arm and the stem seam each cover 2, which leaves 10 and 11. The sc2tog at each inner corner takes out extra fullness that would otherwise make the notches ripple.
Checkpoint: the bordered letter measures 3.25 in (8.3 cm) wide x 4 in (10.2 cm) tall.
Flowers (Make 3)
Round 1: With yellow, make a magic ring, ch 1, 5 sc in ring, pull the ring closed, and join with a sl st to the first sc. (5 sc) Fasten off yellow.
Round 2: Join lavender in any sc. In each sc around: (sl st, ch 2, 2 dc, ch 2, sl st). (5 petals) Fasten off with a 6 in (15.2 cm) tail.
Each flower is about 0.75 in (1.9 cm) across.
Leaves (Make 4)
With sage green, ch 6.
Row 1: Sl st in 2nd ch from hook, sc in next ch, hdc in next ch, dc in next ch, sc in last ch. (5 sts) Fasten off with a 6 in (15.2 cm) tail.
Each leaf is about 0.6 in (1.5 cm) long.
Finishing
- Sew one flower near the top of the stem. Tuck 2 leaves behind its left side, one pointing up and one pointing down.
- Sew one flower on the upper arm close to the stem, with 1 leaf showing at its lower right.
- Sew one flower on the lower left of the stem, with 1 leaf showing at its lower left.
- Open the jump ring with pliers and slip it through 2 border stitches at the center of the stem top. Add the chain end of the split ring and close the jump ring fully.
Final Blocking
- Mist the keychain with water until it is evenly damp, avoiding the hardware.
- Lay it RS up on a blocking mat or towel.
- Pin the stem straight, then pin the arm and leg tips so their angles match.
- Measure: it should be 3.25 in (8.3 cm) wide and 4 in (10.2 cm) tall.
- Press each shell gently with your fingertips so the fans open evenly.
- Let it dry completely before you unpin it.
Final Quality-Control Checklist
- Each strip has 9 stitches across its top and foundation.
- Every shell row has 13 stitches, and the shells stack in straight columns.
- The arm and leg tips slant cleanly from sc to dc.
- The seams are flat and can’t be seen from the RS.
- The border has 123 stitches, with no ripples at the inner corners.
- The letter measures 3.25 x 4 in (8.3 x 10.2 cm).
- The flowers and leaves are sewn on securely, with no loose petals.
- The jump ring is completely closed.
Troubleshooting
Shells lean to one side: You may be working into the 2nd or 4th dc. Count the 5 dc and place each new shell in the 3rd one.
Stem curls upward: Your shells are tighter than your sc. Loosen your dc tension slightly, or block a little more firmly.
Edges ripple after the border: You worked too many sc into the row ends. Use exactly 2 sc per shell row.
Edges pull in or cup: You worked too few sc into the row ends. Recount against the border list.
Gaps at the seams: Whipstitch again through both outer loops, or let the sc2tog in the border close the gap.
Flower petals curl: Steam-block the flowers flat before you sew them on.
Care
Hand wash in cool water with mild soap, press out the water with a towel, and lay flat to dry. Keep the metal hardware as dry as possible to protect the gold finish.
Final Notes
The size of this keychain follows one chain of measurements. If 9 sc measure 1.25 in (3.2 cm) and 5 shell rows measure 2 in (5.1 cm), the stem will be 1.25 x 3.75 in (3.2 x 9.5 cm). The assembled letter will then be 3 x 3.75 in (7.6 x 9.5 cm), and the bordered K will be 3.25 x 4 in (8.3 x 10.2 cm). Check each stage as you go and the letter will come out right.
Happy crocheting!