

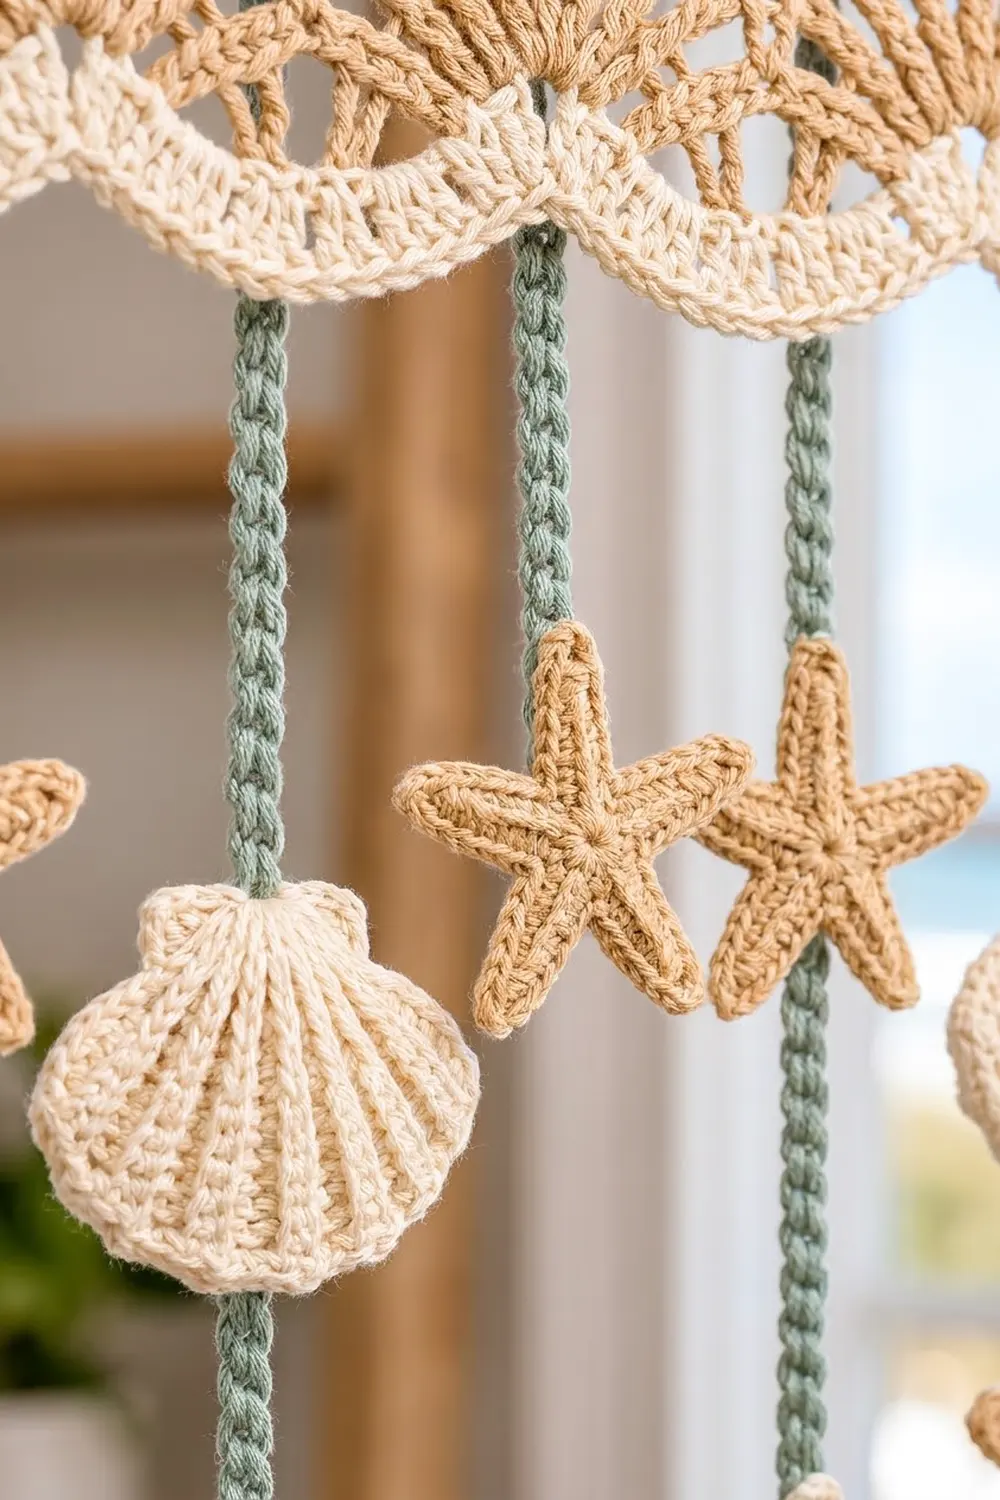
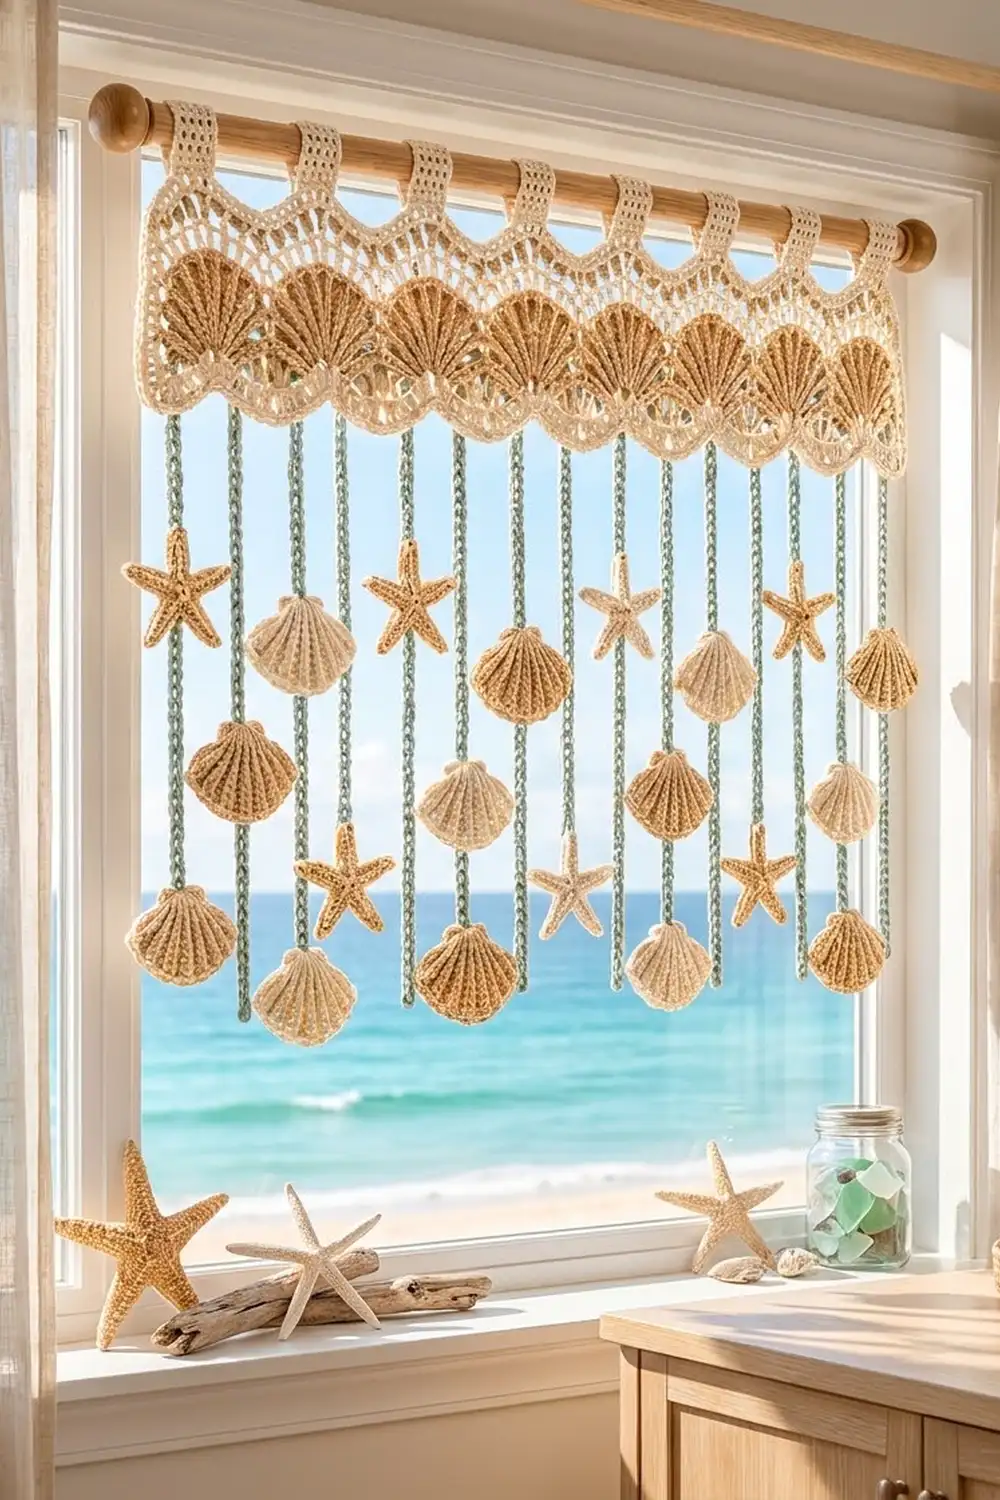
The Tidepool Shell Valance brings the beach to any window. A cream mesh header runs above a row of tan ribbed fan shells, and a scalloped edge with tiny chain loops finishes the bottom. Thirteen sage-green cords hang below, each with two shells or starfish at staggered heights.
The colors are cream, warm tan, and sage green, like sand, shells, and sea glass. They suit coastal, boho, or cottage rooms.
This pattern uses US crochet terms. The finished valance is 24.75 in (62.9 cm) wide. It hangs 26 in (66.0 cm) from the top of the rod loops to the ends of the cords.
You work the header flat in rows, and the tabs and edging are worked straight onto it. The cords are chained directly from the header’s bottom edge. The shells and starfish are made separately and sewn onto the cords.
Finished Size and Construction
- Finished size: 24.75 in (62.9 cm) wide × 26 in (66.0 cm) total drop
- Skill level: Intermediate (post stitches)
- Terminology: US
- Yarn weight: Worsted (#4) cotton
- Hook: 5.0 mm (H-8)
- Number of pieces: 1 header with 7 tabs, 13 cords, 18 shells, 8 starfish
- Layout: Header on top, with 13 cords spaced 1.75 in (4.4 cm) apart and 2 motifs on each cord
- Piece sizes: Each shell is 3 in × 2.5 in (7.6 × 6.4 cm). Each starfish is 3.5 in (8.9 cm) from tip to tip.
- Header size before edging: 24.75 in × 4 in (62.9 × 10.2 cm), measured to the fan points
- Edging depth: 0.5 in (1.3 cm), so the finished header is 4.5 in (11.4 cm) deep at the points
Materials
Use a smooth worsted cotton. Cotton keeps the fan ribs crisp, hangs straight, and stands up to sunlight and washing. Avoid acrylic, because the cords would stretch and curl.
Amounts assume about 1.6 m per gram:
- Cream (A): 160 g / 256 m, for the header mesh, edging, tabs, 9 shells, and 4 starfish
- Tan (B): 110 g / 176 m, for the fan row, 9 shells, and 4 starfish
- Sage green (C): 50 g / 80 m, for the 13 cords
These quantities include a margin of about 15 percent.
Tools:
- 5.0 mm (H-8) hook
- Tapestry needle
- 13 stitch markers
- Measuring tape
- Rust-proof pins and a blocking board
- Curtain rod up to 1 in (2.5 cm) in diameter
Abbreviations (US Terms)
- ch: chain
- sl st: slip stitch
- sc: single crochet
- hdc: half double crochet
- dc: double crochet
- sk: skip
- sp: space
- st(s): stitch(es)
- RS / WS: right side / wrong side
- FPdc (front post dc): Yarn over, insert the hook from front to back to front around the post of the stitch, then finish a dc.
- BPdc (back post dc): Yarn over, insert the hook from back to front to back around the post of the stitch, then finish a dc.
Special stitch: back-bump slip stitch. Insert the hook under the bump on the back of the chain only, then work a sl st. This makes a firm, round cord that doesn’t twist.
Gauge and Checkpoints
Gauge:
- 16 sts and 8 rows = 4 in (10.2 cm) in dc
- 16 sts and 16 rows = 4 in (10.2 cm) in sc
- 4 ch = 1 in (2.5 cm)
Test one piece first. Make one shell before you start the header. It uses the same dc and post stitches as the fan row. It should measure 3 in × 2.5 in (7.6 × 6.4 cm).
Checkpoints:
- After header Row 7: 24.75 in × 2.5 in (62.9 × 6.4 cm)
- After Row 10: 4 in (10.2 cm) deep at the fan points
- After the edging: 4.5 in (11.4 cm) at the points and 3.75 in (9.5 cm) at the valleys
- Each cord: 20 in (50.8 cm) long
If your pieces come out too big, go down one hook size. If they’re too small, go up one size. If the width is right but the header is too deep, your dc are too tall. Pull up a shorter loop on the first yarn over.
Header
With A, ch 100.
Row 1 (WS): Sc in 2nd ch from hook and in each ch across, turn. (99 sc)
Row 2 (RS): Ch 4 (counts as dc + ch 1), sk next sc, dc in next sc. *Ch 1, sk next sc, dc in next sc; repeat from * across, turn. (50 dc + 49 ch-1 sps = 99 sts)
Row 3: Ch 1, sc in first dc. *Sc in next ch-1 sp, sc in next dc; repeat from * across, working the last sc in the 3rd ch of the turning ch. Turn. (99 sc)
Rows 4–7: Repeat Rows 2–3 twice. Fasten off A. (99 sc)
Checkpoint: 24.75 in × 2.5 in (62.9 × 6.4 cm).
Row 8 (RS): Join B in the first st. Ch 1, sc in same st. *Sk 6 sts, 13 dc in next st, sk 6 sts, sc in next st; repeat from * 6 more times, turn. (8 sc + 91 dc = 99 sts; 7 fans)
Row 9 (WS): Ch 1, sc in first sc. *BPdc around each of next 13 dc, sc in next sc; repeat from * 6 more times, turn. (99 sts)
Row 10 (RS): Ch 1, sc in first sc. *FPdc around each of next 13 BPdc, sc in next sc; repeat from * 6 more times. Fasten off B. (99 sts)
Working BPdc on the WS and FPdc on the RS pushes every post toward the RS, which creates the raised ribs. The sc between fans are short, so the valleys stay high and the fan points hang about 0.75 in (1.9 cm) lower.
Checkpoint: 4 in (10.2 cm) deep at the fan points.
Tabs (Make 7)
Hold the header RS facing, with the foundation chain at the top. Count the 99 foundation loops from the right. Each tab is worked on 7 loops: 5–11, 19–25, 33–39, 47–53, 61–67, 75–81, and 89–95. Each tab sits directly above the center of a fan.
Row 1: Join A in the first loop of the tab. Ch 1, sc in the same loop and in each of the next 6 loops, turn. (7 sc)
Rows 2–16: Ch 1, sc in each sc across, turn. (7 sc)
Fasten off, leaving a 10 in (25.4 cm) tail. Each tab measures 1.75 in × 4 in (4.4 × 10.2 cm). Fold the tab to the WS and whipstitch Row 16 across the back of header Row 2. This makes a loop about 1.5 in (3.8 cm) tall that fits a rod up to 1 in (2.5 cm) thick.
Spacing check: 7 tabs × 7 sts (49), plus 6 gaps × 7 sts (42), plus 4 sts at each end (8) = 99 sts.
Shell Motif (Make 18)
Row 1 (RS): Ch 4. Work 6 dc in the 4th ch from hook; the skipped ch count as a dc. Turn. (7 dc)
Row 2 (WS): Ch 3 (counts as dc), dc in first st, 2 dc in each of next 5 sts, dc in top of turning ch, turn. (13 dc)
Row 3 (RS): Ch 3 (counts as dc). *FPdc around next st, 2 dc in next st; repeat from * 4 more times. FPdc around next st, dc in top of turning ch, turn. (18 sts; 6 ribs)
Row 4 (WS): Ch 3 (counts as dc), BPdc around next FPdc. *2 dc in next dc, dc in next dc, BPdc around next FPdc; repeat from * 4 more times. Dc in top of turning ch, turn. (23 sts; 6 ribs with 3 dc between each pair)
Row 5 (RS): Ch 1, sc in first st, sc in next BPdc. *Hdc in next dc, 3 dc in next dc, hdc in next dc, sc in next BPdc; repeat from * 4 more times. Sc in top of turning ch. (33 sts; 5 scallops)
Rnd 6 (outline): Don’t turn. Work 2 sc in each of the 4 dc row-ends down the side (8 sc). Work 3 sc into the center of the Row 1 base. Work 2 sc in each of the 4 row-ends up the other side (8 sc). Sl st to the first sc of Row 5. (19 sc)
Fasten off, leaving a 12 in (30.5 cm) tail. The shell measures 3 in × 2.5 in (7.6 × 6.4 cm).
Starfish Motif (Make 8)
Rnd 1: Make a magic ring. Ch 1, 10 sc in the ring, sl st to first sc. (10 sc)
Rnd 2: Ch 1. *Sc in next st, 2 sc in next st; repeat from * 4 more times, sl st to first sc. (15 sc)
Rnd 3: *Sc in next st, ch 6. Working back along the chain: sl st in 2nd ch from hook, sc in next ch, hdc in each of next 2 ch, dc in last ch. Sk next st, sl st in next st. Repeat from * 4 more times. (5 arms; each arm uses 3 sts)
Fasten off, leaving a 12 in (30.5 cm) tail. The starfish measures 3.5 in (8.9 cm) from tip to tip, and the graduated stitches taper each arm to a point.
Make All Pieces
- Shells: 9 cream and 9 tan (18 total)
- Starfish: 4 cream and 4 tan (8 total)
Number the cords 1–13 from left to right. On odd-numbered cords (fan points), place the motifs 3 in (7.6 cm) and 11 in (27.9 cm) below the header. On even-numbered cords (valleys), place them 6 in (15.2 cm) and 14 in (35.6 cm) below the header. Measure each distance to the top of the motif.
Cord:   1    2    3    4    5    6    7    8    9    10   11   12   13
Upper:  TSt  CSh  TSh  TSt  CSh  TSh  CSt  TSh  CSh  TSt  TSh  CSt  CSh
Lower:  CSh  TSh  CSt  CSh  TSh  CSh  TSh  CSh  TSt  TSh  CSh  TSh  CSt
Key: TSh = tan shell, CSh = cream shell, TSt = tan starfish, CSt = cream starfish.
Totals: 9 TSh, 9 CSh, 4 TSt, and 4 CSt, for 26 motifs.
Joining: Cords and Motifs
Attach the cords only after you finish the edging (see Border, below).
Placement: The cords attach to the sc of edging Row 12, not to the ch-3 loops. Number the 57 sc from either end (the count is symmetric). Place markers in sc 5, 9, 13, 17, 21, 25, 29, 33, 37, 41, 45, 49, and 53, which is every 4th sc. Sc 5, 13, 21, and so on through 53 sit at the 7 fan points. Sc 9, 17, and so on through 49 sit at the 6 valleys.
Cord: With RS facing, join C with a sl st in a marked sc and ch 81. Sl st in the back bump of the 2nd ch from hook and of each ch back up to the header (80 sl sts). Sl st into the same marked sc and fasten off. Weave the end into the cord.
Tension: Keep the chain loose and even. The sl st pass tightens it slightly, so measure your first cord and match the others to it.
Motifs: Lay the valance flat and center each motif over its cord at the height shown in the grid, with the cord running vertically behind it. Use the motif’s tail to sew through the cord twice. On a shell, sew at the base and at the center scallop. On a starfish, sew at the center and at the top arm. Keep the stitches small and hidden.
Checkpoint: Each cord measures 20 in (50.8 cm), and every motif ends at least 2.5 in (6.4 cm) above the end of its cord.
Border: Scalloped Edging and Sides
Border gauge: 16 sc = 4 in (10.2 cm) along the curve, and 4 sc = 1 in (2.5 cm) along the sides.
Row 11 (WS): With WS facing, join A in the last st of Row 10. Ch 1, sc in first sc. *Sc in each of next 6 FPdc, 3 sc in next FPdc, sc in each of next 6 FPdc, sc in next sc; repeat from * 6 more times, turn. (1 + 7 × 16 = 113 sc)
Row 12 (RS): Ch 1, sc in first sc. *Ch 3, sk next sc, sc in next sc; repeat from * 55 more times. (57 sc + 56 ch-3 loops)
First side: Ch 1 and rotate the work. Working down the row-ends of Rows 11 to 1, work 1 sc in each sc row-end (8 sc) and 2 sc in each dc row-end (6 sc). Fasten off. (14 sc)
Second side: Join A at the opposite top corner and work down to the bottom corner the same way. (14 sc)
Why the math works:
- Bottom edge: Each fan’s curved edge is about 4 in (10.2 cm) long, even though it spans only 3.5 in (8.9 cm) straight across. At 16 sc per 4 in, that gives 16 sc per repeat, so the edge lies flat.
- Chain loops: Row 12 needs an odd count so it starts and ends with sc. 113 is odd.
- Cord spacing: Each 16-st repeat of Row 11 becomes 8 sc in Row 12. A cord on every 4th sc therefore lands exactly on each point and each valley.
- Sides: Each side is 3.5 in (8.9 cm) long. At 4 sc per inch, that takes 14 sc.
Final Blocking
- Soak all pieces in cool water for 15 minutes. Roll them in a towel to press out water; don’t wring.
- Pin the header 24.75 in (62.9 cm) wide, keeping the top edge straight.
- Pin the fan points to 4.5 in (11.4 cm) deep and the valleys to 3.75 in (9.5 cm).
- Pin each ch-3 loop open.
- Pin the tabs straight and their folds flat.
- Pin each shell 3 in (7.6 cm) wide, scallop by scallop. Pin the starfish arms out to 3.5 in (8.9 cm) from tip to tip.
- Hang the cords to dry, clipping a clothespin to each end so they stay straight at 20 in (50.8 cm).
- Let everything dry completely before hanging.
Final Quality-Control Checklist
- Header is 24.75 in (62.9 cm) wide, with a straight top edge
- Seven even fans, with ribs raised on the RS
- Row 11 has 113 sc; Row 12 has 57 sc and 56 loops
- Seven tabs, each centered over a fan and securely sewn
- Thirteen cords, each 20 in (50.8 cm) long, attached at every 4th sc
- All 26 motifs placed as in the grid and centered over their cords
- All ends woven in on the WS
Troubleshooting
- Fans ruffle: Go down a hook size for Rows 8–10 only.
- Header cups: Loosen the ch-1 spaces in the mesh rows.
- Edge pulls in: Recount Row 11 (it should have 113 sc), and work the 3-sc points loosely.
- Cords twist: Work into the back bumps only, and block the cords hanging.
- Motifs spin: Add a tacking stitch near the top of each one.
- Tabs are too tight on the rod: Add 2 rows to each tab. Each 2 rows adds 0.5 in (1.3 cm).
Care
Hand wash in cool water with mild soap. Dry flat or hanging with the cords pinned straight, and never tumble dry.
Final Notes
Each measurement builds on the one before it. At a gauge of 16 sts per 4 in (10.2 cm), the 99-stitch header is 24.75 in (62.9 cm) wide. Its seven 14-stitch fan repeats become 113 edging sc. Every 4th sc of Row 12 carries one of the 13 cords, each 20 in (50.8 cm) long. Check your test shell, measure at every checkpoint, and the valance will hang straight and even.
Happy crocheting!