

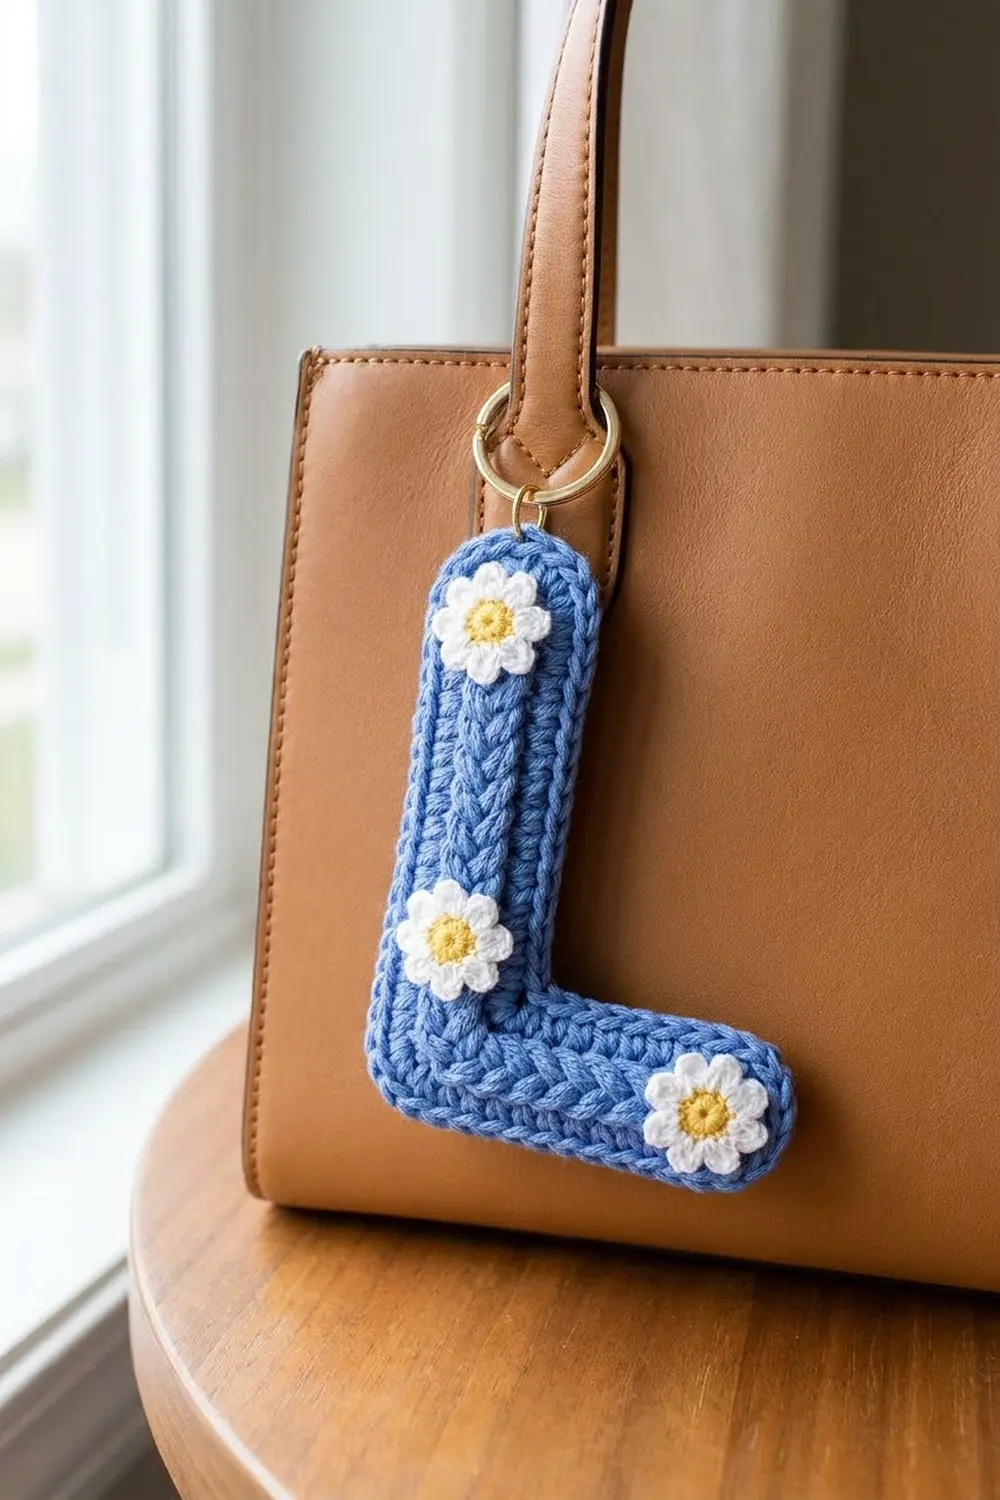
This letter L keychain is a quick, personal accessory. It is a chunky capital L in bright cornflower blue with a braided, rope-like texture, topped with three small white daisies with sunny yellow centers. A gold jump ring and split ring turn it into a bag charm or a key fob.
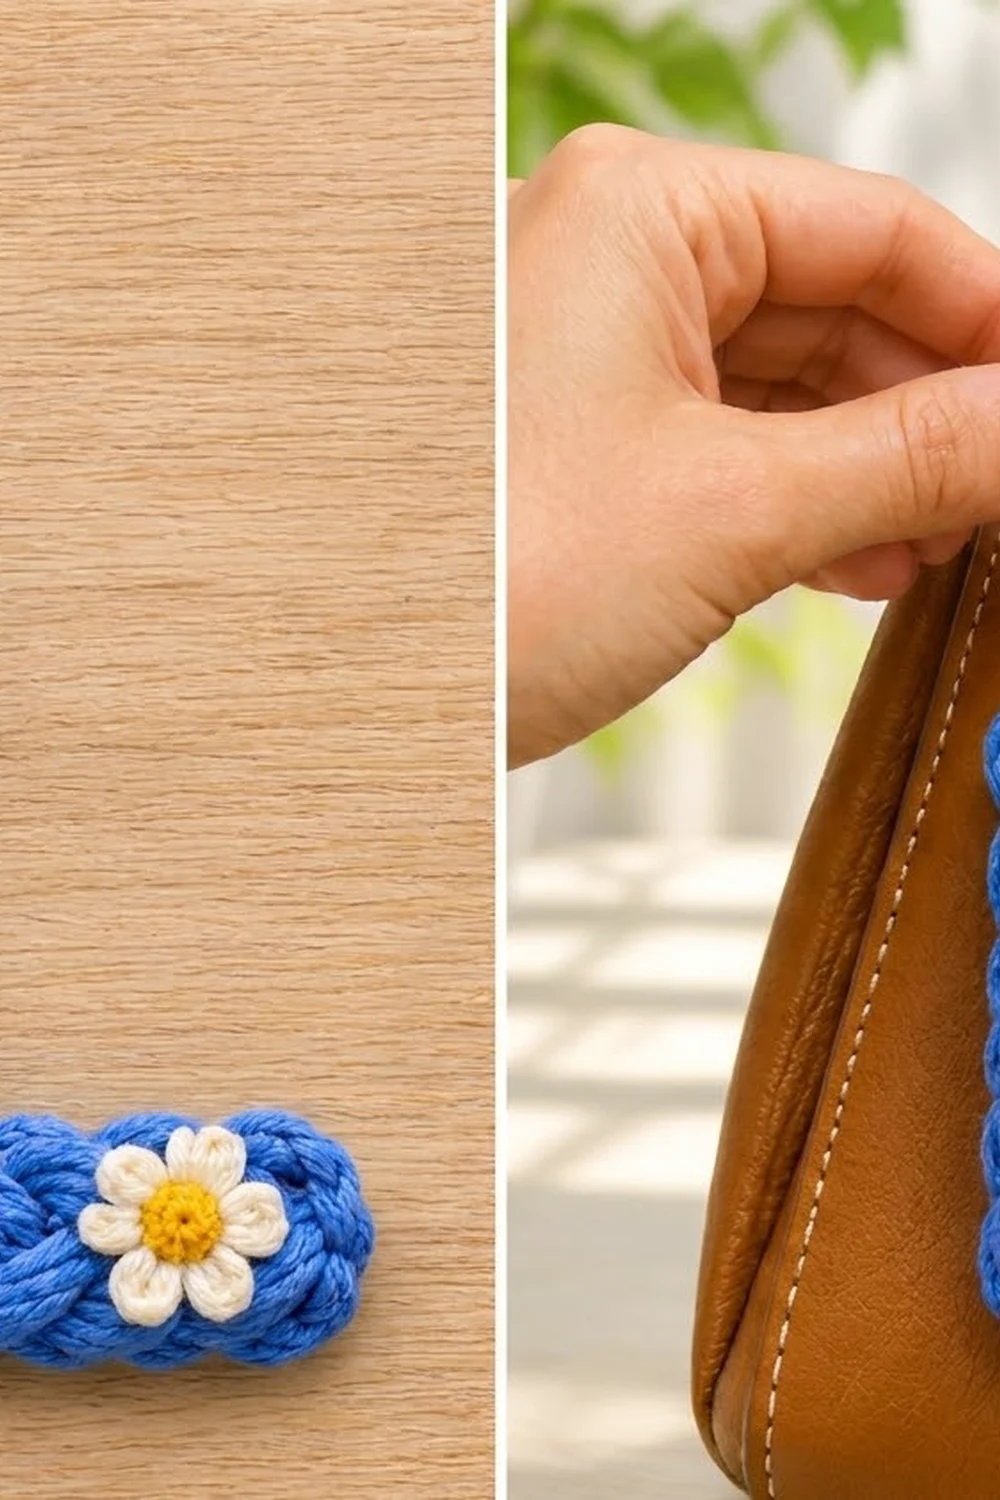
The braid comes from crossed half double crochet stitches worked around a foundation chain. The stitches on both sides of the chain lean toward each other, so they form a herringbone braid down the middle of each stroke of the letter. You crochet the daisies separately in a lighter cotton and sew them on flat.
This pattern uses US crochet terms. The finished letter measures about 4 in (10.2 cm) tall and 2.75 in (7.0 cm) wide, with strokes about 1 in (2.5 cm) wide. Each daisy is about 0.9 in (2.3 cm) across.
The construction is simple. Make one foundation chain, which becomes the centerline of the L. Work three rounds around it, shaping at both ends and at the corner. Then make three daisies, sew them on and add the hardware. It’s a good one-evening project and a lovely small gift.
Finished Size and Construction
- Finished size: 4 in (10.2 cm) tall x 2.75 in (7.0 cm) wide
- Stroke width: about 1 in (2.5 cm)
- Skill level: Easy / advanced beginner
- Terminology: US crochet terms
- Yarn weight: worsted (#4) cotton for the letter; DK (#3) cotton for the daisies
- Hooks: 4.0 mm (G-6) and 3.0 mm (C/D)
- Number of pieces: 1 letter body plus 3 daisy appliqués (sewn on)
- Layout: a single L shape, with two daisies on the vertical stem and one on the foot
- Piece size: 4 in (10.2 cm) x 2.75 in (7.0 cm)
- Size before border (after Round 2): about 3.9 in (9.9 cm) x 2.6 in (6.6 cm)
- Border depth: one slip-stitch round. It adds very little width; blocking brings the letter to final size.
Materials
Choose a smooth, multi-ply cotton or cotton blend. Cotton holds the braid crisply and keeps the letter firm enough to hang without drooping. Avoid fuzzy yarns, because they hide the crossed stitches.
- Cornflower blue, worsted (#4) cotton: 10 g (17 m)
- White, DK (#3) cotton: 3 g (7 m)
- Yellow, DK (#3) cotton: 2 g (4 m)
These amounts include a comfortable margin for a test piece and for weaving in ends.
Tools:
- 4.0 mm (G-6) crochet hook
- 3.0 mm (C/D) crochet hook
- Tapestry needle
- 1 gold split ring, 25 mm (1 in)
- 1 gold jump ring, 8 mm (0.3 in)
- 2 pairs of flat-nose pliers
- Stitch marker
- Scissors
- Pins and a spray bottle for blocking
Abbreviations (US Terms)
- ch – chain
- sl st – slip stitch
- sc – single crochet
- hdc – half double crochet
- dc – double crochet
- sc2tog – single crochet 2 together
- hdc2tog – half double crochet 2 together
- st(s) – stitch(es)
- rep – repeat
Special stitch – crossed hdc (X-hdc): Skip the next st and work 1 hdc in the st after it. Then work 1 hdc in the skipped st, in front of the hdc you just made. One X-hdc uses 2 sts and makes 2 sts.
Gauge and Checkpoints
Gauge: 18 sc and 18 ch = 4 in (10.2 cm) with worsted cotton and a 4.0 mm hook. That’s 4.5 sts per inch.
Because the item is so small, the letter itself is your gauge test. Work the foundation chain and Round 1, then measure before you go on.
Checkpoints:
- Foundation chain (not stretched): about 4.7 in (11.9 cm) long, not counting the turning chain.
- After Round 1 (bent into an L): about 3.5 in (8.9 cm) tall x 2.25 in (5.7 cm) wide, with strokes about 0.5 in (1.3 cm) wide.
- After Round 2: about 3.9 in (9.9 cm) tall x 2.6 in (6.6 cm) wide, with strokes about 0.9 in (2.3 cm) wide.
- After Round 3 and blocking: 4 in (10.2 cm) tall x 2.75 in (7.0 cm) wide, with strokes 1 in (2.5 cm) wide.
If your letter is too big, go down to a 3.5 mm hook. If it’s too small, go up to a 4.5 mm hook. Start over instead of adding chains, because the corner’s position depends on the exact chain count.
Letter Body
Foundation
With blue and the 4.0 mm hook, ch 22.
For reference, number the chains starting from the hook. Skip the first ch (the turning ch), then count chains 1–21:
- Ch 1 is the top of the stem.
- Ch 2–13 run down the stem.
- Ch 14 is the corner.
- Ch 15–20 run along the foot.
- Ch 21 is the tip of the foot.
Round 1 (sc around the chain)
Work into the top loops of the chain first.
- 3 sc in ch 1 (2nd ch from hook) – top end. [3]
- Sc in each of ch 2–13 – stem, outer edge. [12]
- 3 sc in ch 14 – outer corner. [3]
- Sc in each of ch 15–20 – foot, outer (bottom) edge. [6]
- 3 sc in ch 21 – foot tip. [3]
Rotate and work along the other side of the foundation chain:
- Sc in each of ch 20–15 – foot, inner (top) edge. [6]
- Sc2tog over ch 14 and ch 13 – inner corner. [1]
- Sc in each of ch 12–2 – stem, inner edge. [11]
Join with a sl st to the first sc. Total: 45 sts (3 + 12 + 3 + 6 + 3 + 6 + 1 + 11).
Gently bend the strip at the corner so the 3-sc group sits on the outside and the sc2tog sits on the inside. The chain now forms the centerline of the L. Check against checkpoint 2.
Round 2 (braid round)
This round makes the braid. For reference, here’s how the Round 1 sts are numbered:
- top end: sts 1–3
- stem outer: sts 4–15
- outer corner: sts 16–18
- foot outer: sts 19–24
- foot tip: sts 25–27
- foot inner: sts 28–33
- inner corner: st 34
- stem inner: sts 35–45
Ch 2 (does not count as a st).
- 2 hdc in each of sts 1–3 – top end. [6]
- X-hdc 6 times over sts 4–15 – stem outer. [12]
- Hdc in st 16, 3 hdc in st 17, hdc in st 18 – outer corner. [5]
- X-hdc 3 times over sts 19–24 – foot outer. [6]
- 2 hdc in each of sts 25–27 – foot tip. [6]
- X-hdc 3 times over sts 28–33 – foot inner. [6]
- Hdc2tog over sts 34 and 35 – inner corner. [1]
- X-hdc 5 times over sts 36–45 – stem inner. [10]
Join with a sl st to the first hdc. Total: 52 sts (6 + 12 + 5 + 6 + 6 + 6 + 1 + 10).
Each X-hdc section covers an even number of Round 1 sts (12, 6, 6 and 10), so no stitch is left over. The crossed pairs on the outer and inner edges lean toward the centerline, which makes the braided herringbone look down each stroke. Check against checkpoint 3.
Border
Round 3 (slip-stitch edge)
Border gauge: 1 sl st in every Round 2 st. Work loosely so the edge stays as long as the stitches below it. If your sl sts pull the edge inward, use a 4.5 mm hook for this round only.
Don’t chain. Working through both loops, sl st loosely in each st around:
- Top end: 6 sl st
- Stem outer: 12 sl st
- Outer corner: 5 sl st
- Foot outer: 6 sl st
- Foot tip: 6 sl st
- Foot inner: 6 sl st
- Inner corner: 1 sl st
- Stem inner: 10 sl st
Total: 52 sl sts. Fasten off and leave a 4 in (10.2 cm) tail. With a tapestry needle, make an invisible join into the first sl st, then weave both ends in along the back.
Why the math works:
- The border adds nothing. Round 3 is worked 1 sl st per st, so it adds no stitches and no length.
- The outer corner was shaped earlier. It gained 2 sts in Round 1 (3 sc in one ch) and 2 more in Round 2 (3 hdc in the center st), while the inner corner lost 1 st in each round. That lets the outer edge cover the longer outside of the bend while the inner edge stays shorter and flat.
- The ends are shaped like an oval. Each rounded end gained 3 sts in Round 2 (3 sts doubled to 6), as at the end of a normal oval.
The slip-stitch round just locks the edge in place and gives it a neat, cord-like finish.
Daisies (make 3)
Round 1 (center)
With yellow and the 3.0 mm hook, make a magic ring. Ch 1 (does not count), then work 8 sc in the ring. Pull the ring tight and join with a sl st to the first sc. Total: 8 sts. Fasten off yellow.
The center should measure about 0.35 in (0.9 cm) across.
Round 2 (petals)
Join white with a sl st in any sc.
Ch 2, 2 dc in the next sc, ch 2, sl st in the same sc; rep from * 7 more times. Work the eighth petal into the sc where you joined white. Total: 8 petals.*
Fasten off and leave a 10 in (25.4 cm) tail for sewing. Weave the yellow tail into the back of the center and trim it.
Each daisy should measure about 0.9 in (2.3 cm) across. If it’s wider than 1 in (2.5 cm), it will hang over the edge of the stroke; go down to a 2.75 mm hook.
Attaching the Daisies
Lay the letter flat, right side up (the side where the braid looks cleanest). Pin the daisies in place:
- Daisy 1: centered on the stem, with its center 0.6 in (1.5 cm) below the top edge.
- Daisy 2: centered on the stem, with its center 1.9 in (4.8 cm) below the top edge.
- Daisy 3: centered on the foot, with its center 0.6 in (1.5 cm) in from the foot tip.
With the white tail, sew each daisy down using small stitches at the base of each petal, between the petals, so the petals stay flat. Take one stitch through the yellow center so it doesn’t lift. Fasten off on the back and weave in the end.
Hardware
Open the 8 mm (0.3 in) jump ring with two pairs of pliers, twisting the ends sideways rather than pulling them apart. Push it through the top end of the letter, between the 3rd and 4th sts of the top-end group in Round 2, so it catches both Round 2 and Round 3. Slide the split ring onto the jump ring and close the jump ring completely.
Final Blocking
- Mist the letter lightly with water until it’s damp but not soaked.
- Lay it right side up on a blocking mat or folded towel.
- Ease the corner into a clean 90-degree angle.
- Pin the stem to 4 in (10.2 cm) tall and the foot to 2.75 in (7.0 cm) wide.
- Pat each stroke to an even 1 in (2.5 cm) width.
- Press the daisy petals flat with your fingertips.
- Let it dry completely, at least 4 hours, before you remove the pins.
- Measure again once the pins are out.
Final Quality-Control Checklist
- The letter measures 4 in (10.2 cm) x 2.75 in (7.0 cm).
- Both strokes are an even 1 in (2.5 cm) wide.
- The braid runs straight down the center of the stem and along the foot.
- The corner lies flat, with no cupping or ruffling.
- Round 1 has 45 sts, Round 2 has 52 sts and Round 3 has 52 sl sts.
- All three daisies have 8 petals and sit flat inside the edges of the strokes.
- The jump ring is fully closed with no gap.
- All tails are woven in on the back.
Troubleshooting
The corner cups or curls upward. The outer corner is too tight. Work the slip-stitch round more loosely, or use a larger hook for Round 3.
The corner ruffles. The corner has too much fullness. Work 2 hdc instead of 3 in st 17 of Round 2; Rounds 2 and 3 will then each have 51 sts.
The braid looks uneven. Make sure the second hdc of every X-hdc is worked in front of the first, never behind it.
The edges wave along the stem. The sl st edge is too loose. Go down one hook size for Round 3.
The daisies curl. Block them flat on their own before sewing them on.
The stitch count is off. Check each section against the numbers in brackets. Most mistakes come from an extra st in one of the end groups.
Care
Hand wash in cool water with mild soap, press the water out in a towel and dry flat. Reshape the corner while it’s still damp.
Final Notes
Here’s how the measurements build up:
- Foundation: 21 chains at 4.5 sts per inch give a centerline about 4.7 in (11.9 cm) long.
- Round 1: 45 sts make an L about 3.5 in (8.9 cm) tall.
- Round 2: the braid round brings it to 52 sts and about 3.9 in (9.9 cm) tall.
- Round 3 and blocking: the slip-stitch border and blocking set it at 4 in (10.2 cm) x 2.75 in (7.0 cm).
Three 0.9 in (2.3 cm) daisies and a gold ring finish it off. Once you’ve made one letter, try spelling a name or making a set of initials in different colors.
Happy crocheting!