

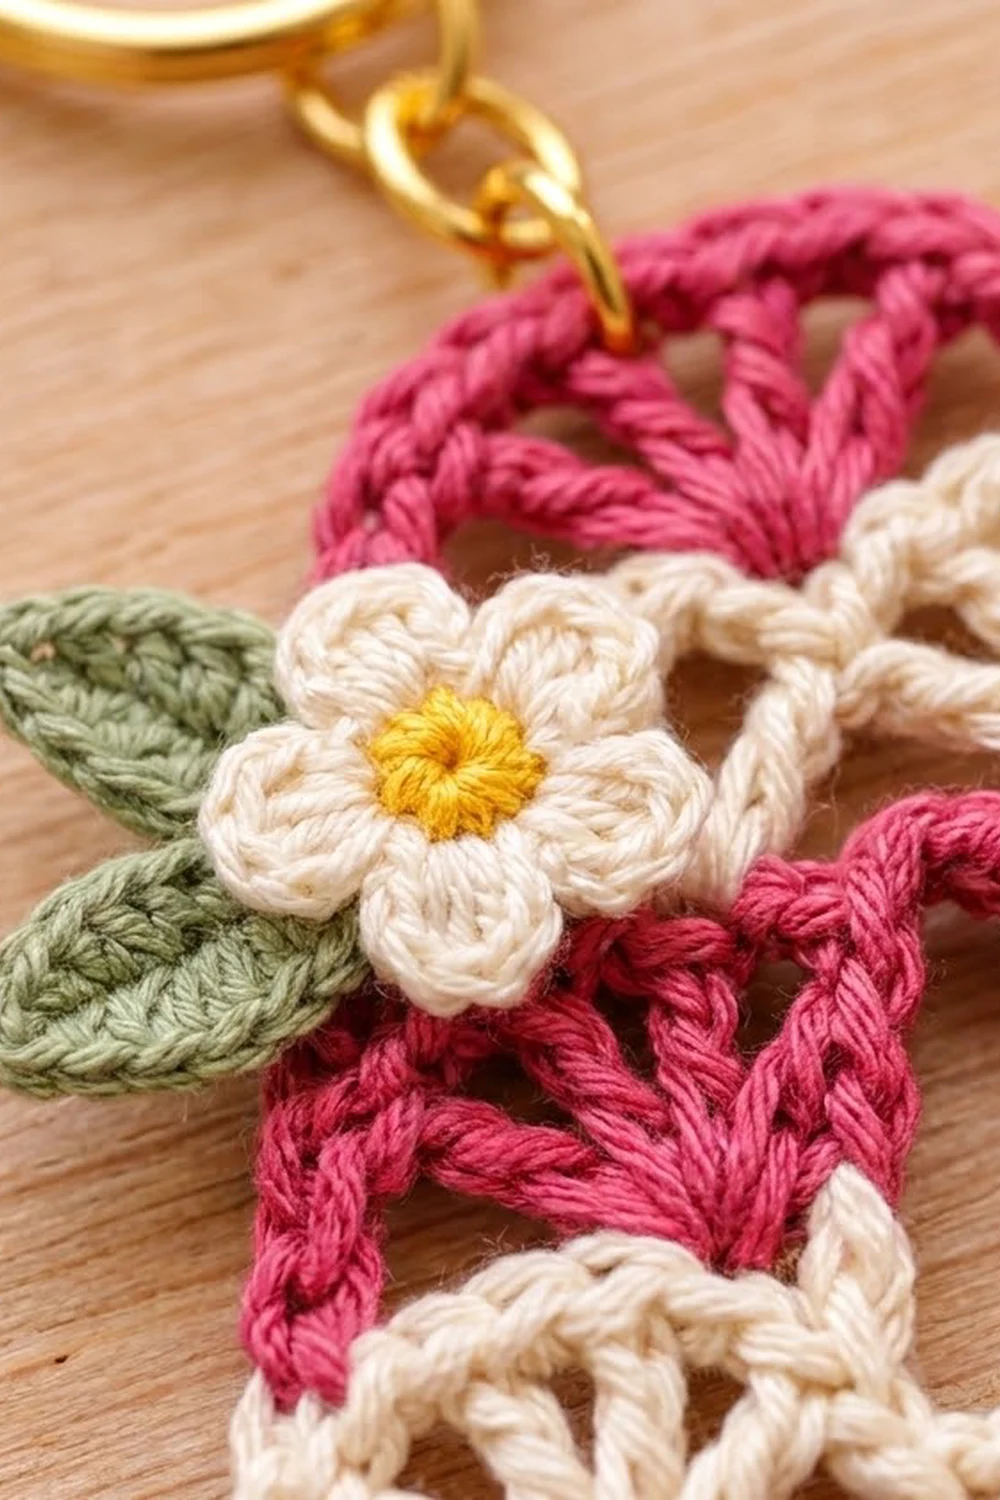
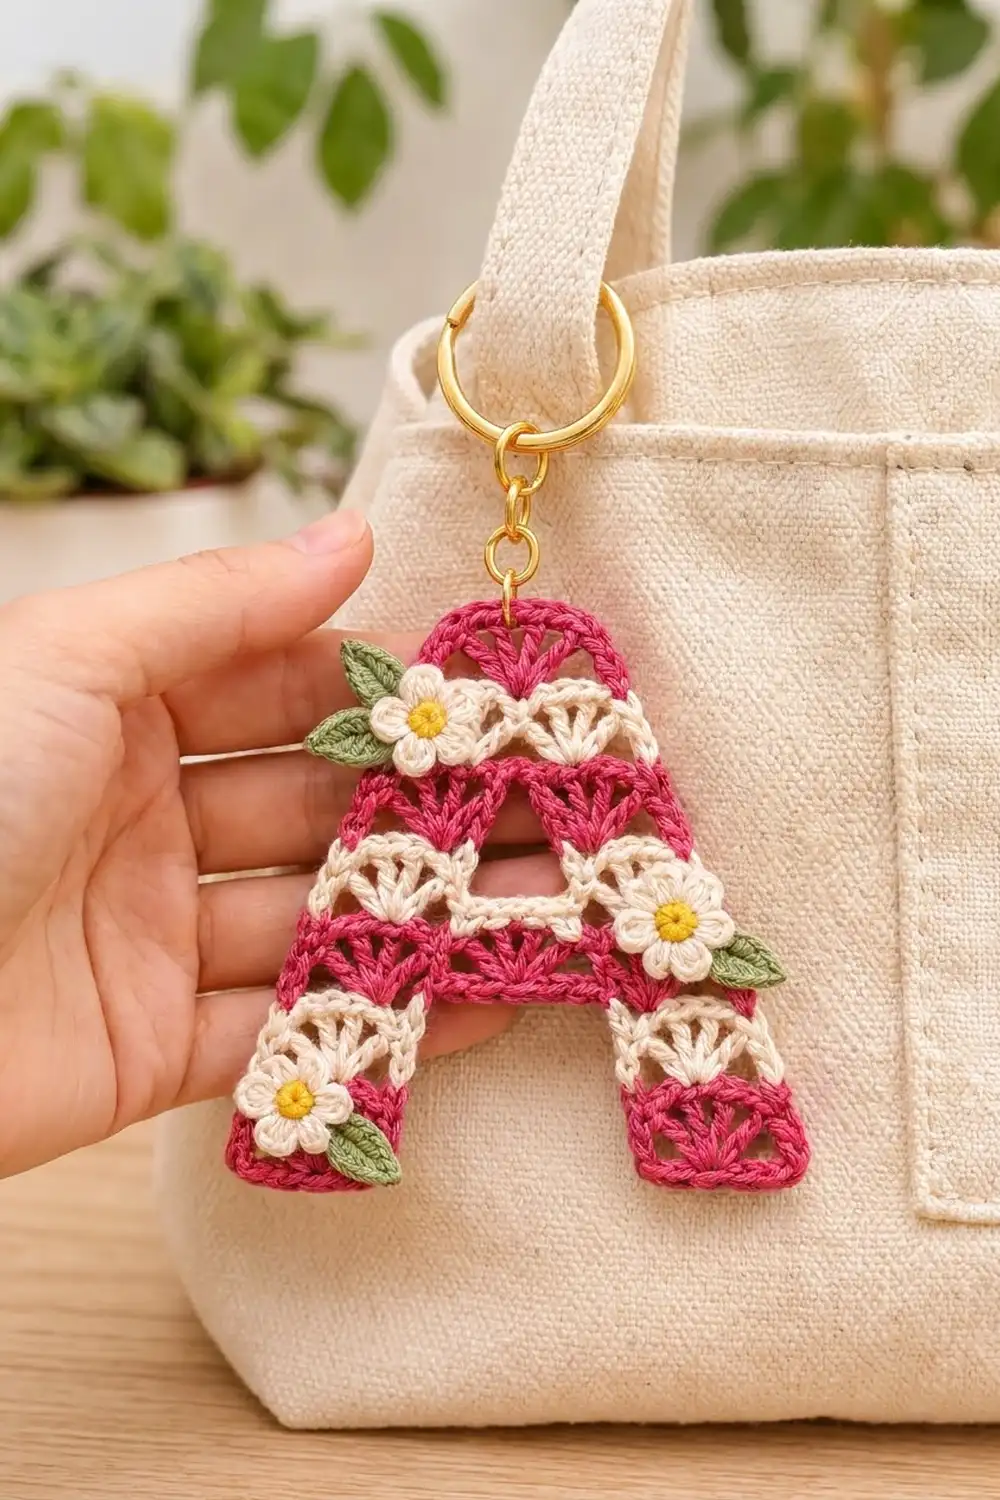
This little letter A is made from rows of lacy fan stitches in raspberry pink and cream stripes, with a firm raspberry border around the edge. Three tiny cream daisies with yellow centers and soft green leaves sit on the letter, and a gold key ring at the top turns it into a bag charm or keychain.
The look is sweet and vintage. All the fans open upward, so each stripe reads like a row of small scallops. The A has a real counter (the small hole above the crossbar) and an open gap between its legs.
The pattern uses US crochet terms. The finished letter measures 3.5 in (8.9 cm) wide at the base and 3.3 in (8.4 cm) tall, not counting the key ring.
The construction is easy to follow once you see the logic. You make the two legs first. After that, every row is worked with the right side facing, and you fasten off at the end of each stripe. Each row steps inward to form the slanted sides. A single chain joins the legs to make the crossbar, and one split row leaves the counter open. Two border rounds tidy the outline, and then you sew on the flowers and leaves.
Finished Size and Construction
- Finished size: 3.5 in (8.9 cm) wide x 3.3 in (8.4 cm) tall
- Skill level: Intermediate
- Terminology: US crochet terms
- Yarn weight: Super fine (#1) fingering-weight cotton
- Hook: 2.25 mm (US B-1), or the size needed for gauge
- Number of pieces: 1 letter, plus 3 flower appliqués and 4 leaves
- Layout: a single letter A, no joining
- Letter size before border: 3.0 in (7.6 cm) wide x 2.8 in (7.1 cm) tall
- Border depth: 0.25 in (0.6 cm) on every edge
Materials
Choose a smooth, mercerized cotton in fingering weight, roughly 170 m per 50 g. Mercerized cotton shows the fan texture clearly and keeps the letter crisp on a key ring. Avoid fuzzy or very stretchy yarn, because it will blur the small hole and the gap between the legs.
- Raspberry pink (R): 8 g, about 27 m
- Cream (C): 6 g, about 20 m
- Yellow (Y): 1 g, about 3 m
- Sage green (G): 1 g, about 3 m
These amounts include a margin for checking your gauge and for the many yarn tails.
Tools:
- 2.25 mm (US B-1) crochet hook
- Tapestry needle
- Split key ring, 1 in (2.5 cm), with a short chain or jump ring
- Small pliers for opening the jump ring
- Rust-proof pins and a blocking mat
- Spray bottle, and light spray starch if you want a stiffer letter
- Scissors and stitch markers
Abbreviations (US Terms)
- ch – chain
- sl st – slip stitch
- sc – single crochet
- hdc – half double crochet
- dc – double crochet
- sc3tog – single crochet 3 together
- sk – skip
- st(s) – stitch(es)
- yo – yarn over
- MR – magic ring
- RS – right side
Special stitches:
- Fan: 5 dc in the same stitch. The 3rd dc of a fan is its center.
- Half fan: 3 dc in the same stitch, used at a straight edge.
- Standing dc: with a slip knot on the hook, yo and work a dc into the stated stitch without a turning chain.
Important: work every row with the RS facing, from right to left. If you crochet left-handed, work from left to right and mirror the descriptions. Start each new row with a standing sc or standing dc as stated, and fasten off at the end of every row. Leave 4 in (10.2 cm) tails, which you will hide under the border.
Gauge and Checkpoints
Gauge: one fan repeat (1 sc + 1 fan = 6 sts) = 0.5 in (1.3 cm) wide; 1 row = 0.4 in (1.0 cm) tall.
The first leg is your gauge swatch. Make one leg and measure it before you go on.
- After Row 1 (one leg): 1.0 in (2.5 cm) wide, 0.4 in (1.0 cm) tall.
- After Row 3 (crossbar): crossbar 2.0 in (5.1 cm) wide; total width at the base 3.0 in (7.6 cm); height 1.2 in (3.0 cm).
- After Row 7: 3.0 in (7.6 cm) wide x 2.8 in (7.1 cm) tall.
- After the border: 3.5 in (8.9 cm) wide x 3.3 in (8.4 cm) tall.
If your leg is wider than 1.0 in (2.5 cm), use a hook one size smaller. If it is narrower, use a hook one size larger. If the width is right but the row is too tall, pull up shorter loops on your yarn-overs. If the row is too short, make your dc slightly taller. Every later measurement depends on this first check.
Letter
To keep track of where you are, picture the base of the letter divided into 12 equal units of 0.25 in (0.6 cm) each. A fan covers 2 units, so the full base is 3.0 in (7.6 cm). Each slanted row moves its outer edge 1 unit inward.
Row 1: Legs (Make 2, R)
With R, ch 14.
Row 1: Sc in 2nd ch from hook, [sk 2 ch, fan in next ch, sk 2 ch, sc in next ch] 2 times. Fasten off. (13 sts: 3 sc, 2 fans)
Make a second leg the same way. Lay both legs side by side, RS up, with a 1.0 in (2.5 cm) gap between them. Each leg is 1.0 in (2.5 cm) wide, so the full base is 3.0 in (7.6 cm).
Row 2: Legs Lean Inward (C)
Each leg moves 1 unit toward the center. Its outer edge moves in, and its inner edge pushes into the gap.
Right leg: Join C with a standing sc in the center of the outer (right) fan, fan in next sc, sc in center of next fan, fan in last sc (inner edge). Fasten off. (12 sts: 2 sc, 2 fans)
Left leg: Join C with a standing dc in the first sc (inner edge), then work 4 more dc in the same sc to complete a fan. Sc in center of next fan, fan in next sc, sc in center of last fan (outer edge). Fasten off. (12 sts: 2 sc, 2 fans)
The gap between the legs is now 0.5 in (1.3 cm).
Row 3: Crossbar (R)
This row joins the two legs. You work an extra fan into the edge dc on each inner edge, and the two new fans meet over a single chain.
Join R with a standing sc in the center of the outer fan of the right leg, fan in next sc, sc in center of next fan, fan in last (inner) dc of the same fan, ch 1. On the left leg: fan in first (inner) dc of the inner fan, sc in center of the same fan, fan in next sc, sc in center of last fan. Fasten off.
(25 sts: 4 sc, 4 fans, 1 ch)
The crossbar row is 2.0 in (5.1 cm) wide and closes the top of the gap. The letter is now 1.2 in (3.0 cm) tall.
Row 4: Counter Row (C)
You work this row in two halves, leaving the counter (the hole) open above the ch-1.
Right half: Join C with a standing sc in the center of the first fan, fan in next sc, sc in center of next fan. Fasten off. (7 sts)
Left half: Skip the last 2 dc of the fan you just ended in, the ch-1, and the first 2 dc of the next fan. Join C with a standing sc in the center of that next fan, fan in next sc, sc in center of last fan. Fasten off. (7 sts)
The row is 1.5 in (3.8 cm) wide overall. The hole in the middle is about 0.5 in (1.3 cm) wide and 0.4 in (1.0 cm) tall.
Row 5: Close the Counter (R)
Join R with a standing sc in the center of the outer fan of the right half, fan in next sc (inner edge of the right half), ch 1, fan in first sc of the left half (inner edge), sc in center of last fan. Fasten off.
(13 sts: 2 sc, 2 fans, 1 ch)
The two fans lean toward each other over the hole and meet at the ch-1, just like the crossbar. Width: 1.0 in (2.5 cm).
Row 6: Straight Edges (C)
The sides stop slanting here, so this row has a half fan at each end.
Join C with a standing dc in the first sc, then work 2 more dc in the same sc (half fan). Sc in center of next fan, fan in ch-1, sc in center of next fan, 3 dc in last sc (half fan). Fasten off.
(13 sts: 2 half fans, 2 sc, 1 fan)
Row 7: Top (R)
Join R with a standing sc in the outermost dc of the first half fan, fan in next sc, sc in center of fan, fan in next sc, sc in the outermost dc of the last half fan. Fasten off.
(13 sts: 3 sc, 2 fans)
The top is 1.0 in (2.5 cm) wide with two raspberry fans. The letter now measures 3.0 in (7.6 cm) wide x 2.8 in (7.1 cm) tall. Weave all tails along the edges, where the border will cover them.
Flowers (Make 3)
Rnd 1 (Y): 5 sc in MR, sl st to first sc. Fasten off. (5 sc)
Rnd 2 (C): Join C in any sc, [ch 2, 2 dc in same sc, ch 2, sl st in same sc, sl st in next sc] 5 times. Fasten off, leaving a 6 in (15.2 cm) tail. (5 petals)
Each flower is about 0.75 in (1.9 cm) across.
Leaves (Make 4, G)
Ch 6, sl st in 2nd ch from hook, sc in next ch, hdc in next ch, dc in next ch, sc in last ch. Fasten off. (5 sts)
Each leaf is about 0.5 in (1.3 cm) long. Leave a 6 in (15.2 cm) tail for sewing.
Border
Border gauge: 12 sc = 1 in (2.5 cm) along any edge.
You work a group of 3 sc at each of the 6 outer corners: the 2 top corners and the 2 bottom corners of each leg. The inner peak at the top of the gap is handled differently.
Rnd 1 (R): With RS facing, join R in the top-right corner sc of Row 7.
- Top: 3 sc in corner sc, sc in next 11 sts, 3 sc in corner sc. (17 sc)
- Left outer edge: 5 sc in the end of each of the 7 rows. (35 sc)
- Left leg bottom: working in the foundation ch, 3 sc in first ch, sc in next 11 ch, 3 sc in last ch. (17 sc)
- Inner edges: 5 sc in each of the 2 row ends of the left leg, 1 sc in the underside of the crossbar ch-1, 5 sc in each of the 2 row ends of the right leg. (21 sc)
- Right leg bottom: 3 sc in first ch, sc in next 11 ch, 3 sc in last ch. (17 sc)
- Right outer edge: 5 sc in the end of each of the 7 rows. (35 sc)
Sl st to first sc. (142 sc)
Check: 17 + 35 + 17 + 21 + 17 + 35 = 142.
Rnd 2 (R): Ch 1, sc in each sc around. Work 3 sc in the center sc of each of the 6 corner groups, and sc3tog over the 3 sc centered on the inner peak. Sl st to first sc. Fasten off. (152 sc)
Check: 142 + (6 corners x 2) − 2 = 152.
Why the math works: each row is 0.4 in (1.0 cm) tall. Working 5 sc per row end gives 12.5 sc per inch, which matches the border gauge. The leg bottoms and the top each have 13 sts across 1.0 in (2.5 cm), and each corner gets 2 extra sts so it can turn without pulling. At the inner peak the edge turns inward, so you remove stitches there instead of adding them. The two sc rounds add 0.25 in (0.6 cm) to every edge. That brings the width from 3.0 in (7.6 cm) to 3.5 in (8.9 cm) and the height from 2.8 in (7.1 cm) to 3.3 in (8.4 cm).
Final Blocking
- Mist the letter evenly until it is damp but not soaked.
- Pin the outline to 3.5 in (8.9 cm) wide x 3.3 in (8.4 cm) tall.
- Pin each leg bottom straight: 1.0 in (2.5 cm) of fan fabric plus the border.
- Push a pin through the leg gap and another through the counter so both dry fully open.
- Gently open each fan with your fingertip so the scallops sit evenly.
- Mist the flowers and leaves separately and press them flat.
- If you want a stiffer keychain, give the letter a light coat of spray starch.
- Let everything dry completely before sewing.
Assembly
Sew each flower down through the petal bases using its cream tail. Tuck the leaves behind each flower before stitching them down.
- Flower 1: upper left edge, across Rows 5–6, with 2 leaves.
- Flower 2: right edge, across Rows 3–4, with 1 leaf pointing outward.
- Flower 3: lower left leg, across Rows 1–2, with 1 leaf pointing outward.
Open the jump ring and pass it through Rnd 2 at the center of the top edge. Add the key ring chain, then close the jump ring firmly.
Final Quality-Control Checklist
- The letter measures 3.5 in (8.9 cm) x 3.3 in (8.4 cm).
- The stripes alternate R and C, starting and ending with R.
- All fans open upward on the RS.
- Both legs are the same width, 1.0 in (2.5 cm) before the border.
- The counter is open and roughly 0.5 in (1.3 cm) wide.
- Rnd 1 has 142 sc and Rnd 2 has 152 sc.
- No yarn tails show on either side.
- The flowers and leaves are sewn on securely, with no loose petals.
- The jump ring is fully closed with no gap.
Troubleshooting
- Edges ripple: there are too many border sts. Work 4 sc per row end instead of 5 on Rnd 1.
- Edges pull in or cup: there are too few border sts, or your tension is tight. Use a hook one size larger for the border only.
- Crossbar puckers: the ch-1 is too tight. Make it looser, or use ch 2 and work into the space.
- Counter closes up: stretch it open while blocking and keep it pinned until dry.
- Fans lean sideways: check that each fan went into the stated sc, not the dc beside it.
- Letter is too floppy for a key ring: use spray starch, or line the back with matching felt.
Care
Hand wash in cool water with mild soap, press out the water in a towel and dry flat. Reshape it, and starch it again if needed.
Final Notes
Every measurement starts from the first leg, which should be 1.0 in (2.5 cm) wide and 0.4 in (1.0 cm) tall. That gives a 3.0 in (7.6 cm) base, a 2.0 in (5.1 cm) crossbar, a 1.0 in (2.5 cm) top and a height of 2.8 in (7.1 cm) after Row 7. The border adds 0.25 in (0.6 cm) on every edge, for a finished letter of 3.5 in (8.9 cm) x 3.3 in (8.4 cm). Measure at each stage, and the flowers and key ring will finish it neatly.
Happy crocheting!