

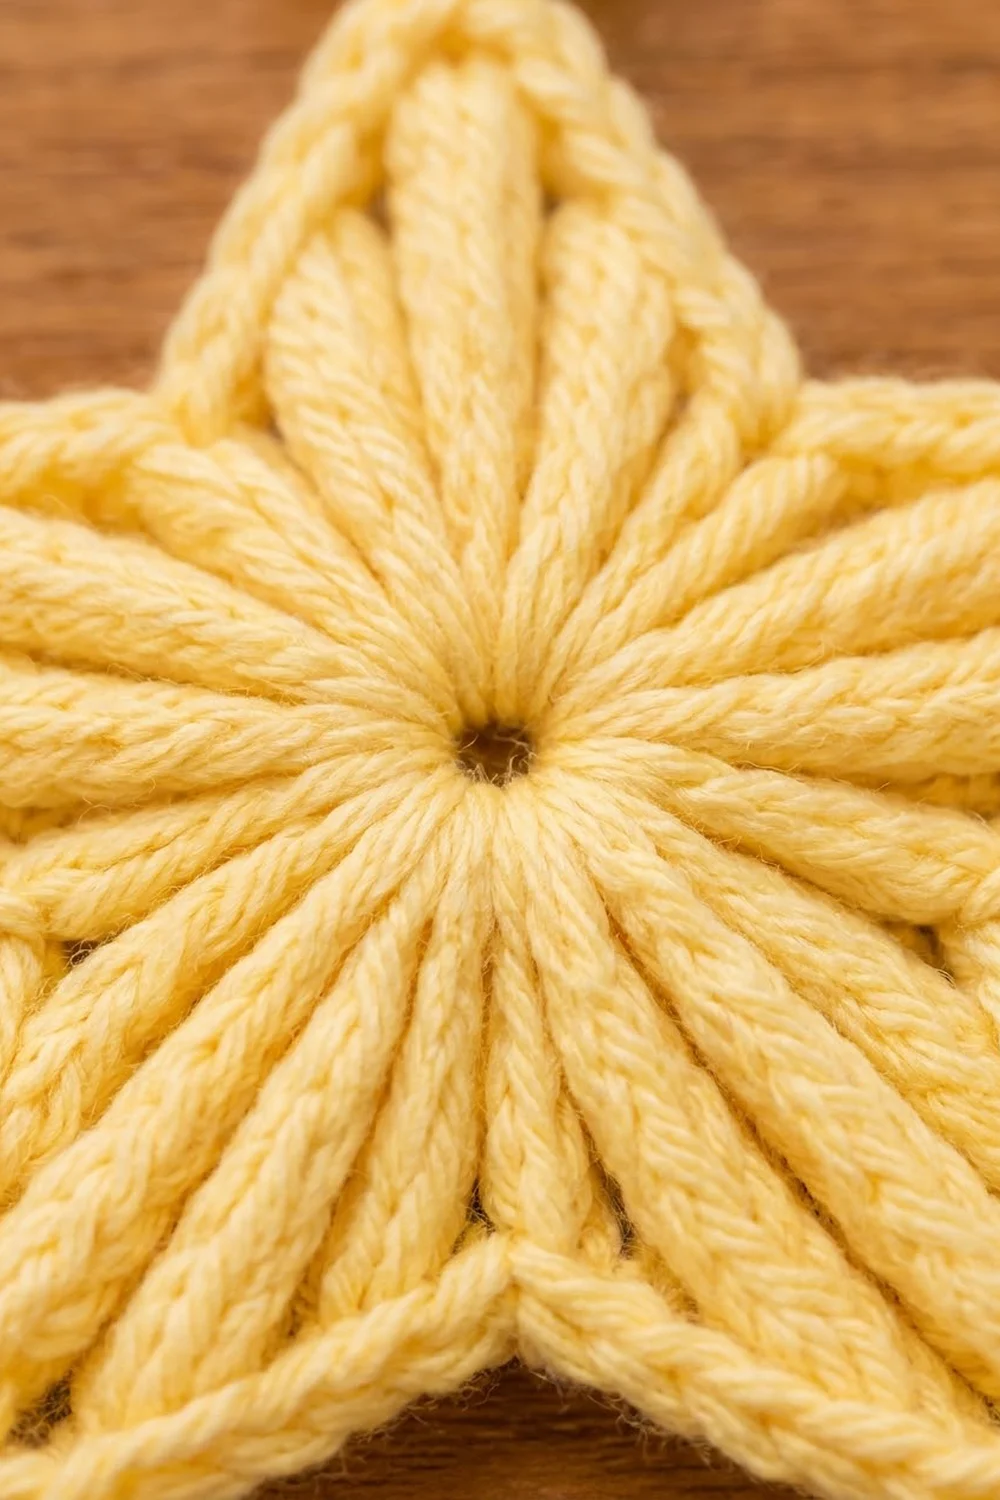
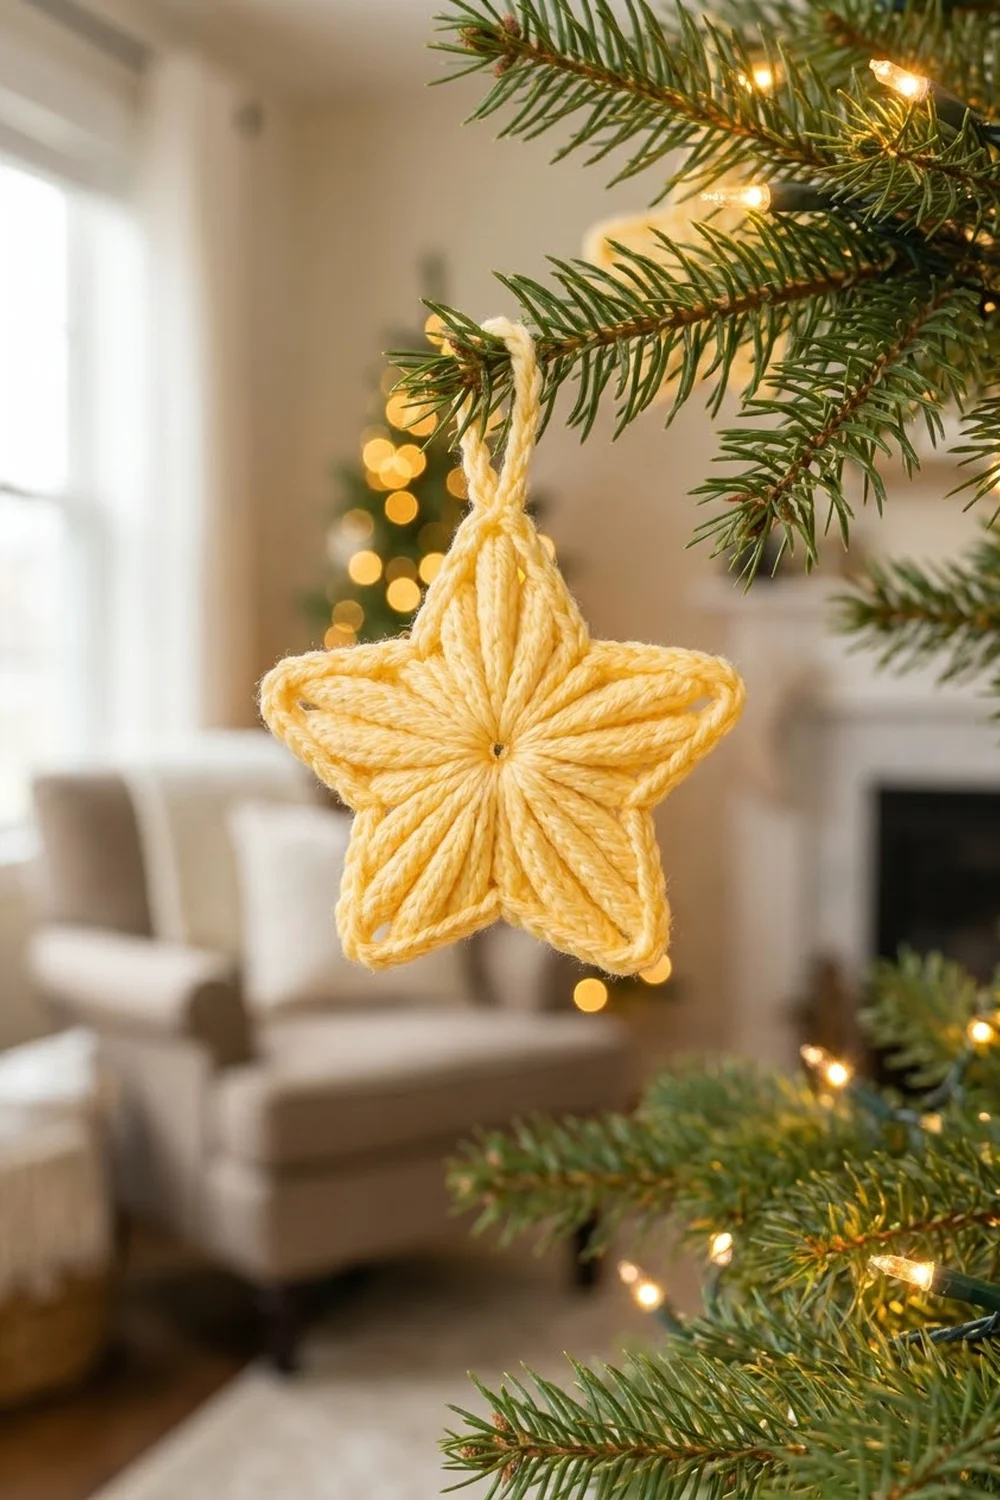
This Sunbeam Star is a soft, sculpted ornament with tall stitches that fan out from a tiny center hole like rays of light. Each of the five points is filled with long, ridged stitches. A rope-like corded edge frames the whole shape, so the star looks finished and tidy from the front and the back.
The sample uses one color, a pale butter yellow, which gives a warm, vintage feel on a tree. It is a quick, single-piece project. Make one in about 30 minutes, then make a few more for the tree, gift toppers, or a window.
The pattern uses US crochet terms. The finished star measures 4.5 in (11.4 cm) wide from side point to side point and about 4.25 in (10.8 cm) tall, not counting the hanging loop. The loop adds about 1.5 in (3.8 cm).
Construction is simple. You start with a ring of treble crochet stitches, add a single crochet round to make a flat disc, and then build five graduated points in one round. Two border rounds finish it: a single crochet outline and a crab stitch cord. Last, you add a chain loop at the top point.
Finished Size and Construction
- Finished size: 4.5 in (11.4 cm) wide x 4.25 in (10.8 cm) tall
- Skill level: Easy / advanced beginner
- Terminology: US crochet terms
- Yarn weight: Worsted (#4)
- Hook: 4.0 mm (US G-6)
- Number of pieces: 1
- Layout: Single star worked in the round, with a hanging loop at the top point
- Piece size before border: 4 in (10.2 cm) wide after Round 3
- Border depth: About 0.25 in (0.6 cm) on each edge (Rounds 4 and 5)
- Hanging loop: About 1.5 in (3.8 cm) tall
Materials
Yarn: Choose a smooth worsted weight yarn with good stitch definition. Cotton or a cotton blend shows the radiating stitches most clearly and blocks crisply. Soft acrylic also works well and is lighter on the tree. Avoid fuzzy or brushed yarns, because they hide the ray texture.
- Butter Yellow: 12 g, about 23 m (25 yd)
That quantity includes a safety margin of about 20 percent. The star itself uses close to 10 g.
Tools:
- 4.0 mm (US G-6) crochet hook
- Tapestry needle
- Scissors
- Stitch marker (optional)
- Blocking mat and rustproof pins
- Spray bottle with water
Abbreviations (US Terms)
- ch – chain
- sl st – slip stitch
- sc – single crochet
- hdc – half double crochet
- dc – double crochet
- tr – treble crochet (yarn over twice)
- dtr – double treble crochet (yarn over three times)
- rev sc – reverse single crochet (crab stitch)
- sp – space
- st(s) – stitch(es)
- MR – magic ring
Special stitch – reverse single crochet (rev sc): Work from left to right (right to left if you crochet left-handed). Insert the hook into the next stitch to the right, yarn over, and pull up a loop. Yarn over and pull through both loops on the hook. This twists each stitch into a rope-like cord.
Gauge and Checkpoints
Gauge: 16 sc = 4 in (10.2 cm) with a 4.0 mm hook. Exact gauge is not critical for an ornament, but it controls the final size and how firm the points are.
Make one test star before you make a batch. Measure at each checkpoint:
- After Round 1: Disc of rays measures about 1.75 in (4.4 cm) across.
- After Round 2: Flat disc measures 2.25 in (5.7 cm) across.
- After Round 3: Star measures 4 in (10.2 cm) from side point to side point.
- After Round 5: Star measures 4.5 in (11.4 cm) wide and 4.25 in (10.8 cm) tall.
If your star is too big: Go down to a 3.5 mm hook, or work the tall stitches with a little less height on each loop.
If your star is too small or stiff: Go up to a 4.5 mm hook. A tight star can also curl at the points, and a larger hook helps it lie flat.
Pattern
Round 1 – Treble Rays
Make a magic ring.
Ch 4 (counts as first tr). Work 14 tr into the ring. Join with a sl st to the top of the beginning ch-4. (15 tr)
Pull the ring closed firmly, leaving a small center hole about 0.125 in (0.3 cm) wide. These 15 tall stitches are the first set of rays.
Checkpoint: 1.75 in (4.4 cm) across.
Round 2 – Flat Disc
Ch 1 (does not count as a st). Work 2 sc in each tr around. Join with a sl st to the first sc. (30 sc)
This round turns the rays into a flat, round disc with a neat sc rim. It sets up 6 sc for each of the 5 star points (5 x 6 = 30).
Checkpoint: 2.25 in (5.7 cm) across, lying flat with no ruffling.
Round 3 – Five Points
Each point uses 6 sc from Round 2. The first sc of each repeat is the valley between points. The fourth sc is the tip.
Sl st in the first sc (valley).
Point repeat:
- Hdc in next sc.
- Dc in next sc.
- In the next sc work (tr, dtr, ch 2, dtr, tr). This is the tip.
- Dc in next sc.
- Hdc in next sc.
- Sl st in next sc (the next valley).
Repeat 4 more times. On the last repeat, end with the hdc and replace the final valley sl st with a join to the first sl st of the round.
Count per point: 1 sl st + 1 hdc + 1 dc + 1 tr + 1 dtr + ch-2 sp + 1 dtr + 1 tr + 1 dc + 1 hdc = 9 sts + 1 ch-2 sp.
Round total: 45 sts + 5 ch-2 sps (9 x 5 = 45).
The stitches step up in height from the valley to the tip (sl st, hdc, dc, tr, dtr) and back down. That is what makes the long ridged spokes that fill each point and line up with the rays from Round 1.
Checkpoint: 4 in (10.2 cm) from side point to side point. Gently pull each tip into shape before you continue.
Round 4 – Single Crochet Outline (Trim Round)
Ch 1 (does not count as a st).
Point repeat:
- Sl st in the valley sl st.
- Sc in the hdc, dc, tr, and dtr (4 sc).
- In the ch-2 tip sp work (2 sc, ch 2, 2 sc).
- Sc in the dtr, tr, dc, and hdc (4 sc).
Repeat 4 more times. Join with a sl st to the first sl st.
Count per point: 9 sts worked 1 per existing st (1 sl st + 8 sc) + 4 extra sc in the tip sp = 13 sts + 1 ch-2 sp.
Round total: 45 sts worked 1 per existing st + 20 extra sc (4 per tip x 5) = 65 sts (60 sc + 5 sl st) + 5 ch-2 tip sps.
Each edge, from valley to tip, has 6 sc (4 sc + 2 sc in the tip sp). The sl st in the valley keeps the inner corner sharp.
Round 5 – Crab Stitch Cord (Trim Round)
Ch 1 (does not count as a st). Working in reverse direction:
Point repeat:
- Rev sc in each of the next 6 sts.
- Work 3 rev sc in the ch-2 tip sp.
- Rev sc in each of the next 6 sts.
- Rev sc in the valley sl st.
Repeat around. Join with a sl st to the first rev sc. Fasten off, leaving an 8 in (20.3 cm) tail.
Count per point: 13 sts worked 1 per existing st + 3 rev sc in the tip sp = 16 rev sc.
Round total: 65 sts worked 1 per existing st + 15 extra rev sc (3 per tip x 5) = 80 rev sc.
Checkpoint: 4.5 in (11.4 cm) wide and 4.25 in (10.8 cm) tall.
Hanging Loop
Choose the top point. Thread the 8 in (20.3 cm) tail onto a tapestry needle and weave it behind the edge up to the center rev sc of that tip, or join new yarn there.
With the hook in the center rev sc of the top tip, ch 16. Sl st into the same st to close the loop. Fasten off and weave in the end through the back of the border.
Before you fasten off, give the loop a gentle twist so it hangs neatly. It should stand about 1.5 in (3.8 cm) above the tip.
Border
The border is Rounds 4 and 5 together. Each round adds about 0.125 in (0.3 cm) on every edge, so the border is 0.25 in (0.6 cm) deep in total.
Border gauge: The trim rounds are worked at the main gauge of 16 sc = 4 in (10.2 cm). Crab stitch is worked at the same hook size, but it sits shorter and firmer than sc.
Counts per point:
| Round | Edge 1 (valley to tip) | Tip | Edge 2 (tip to valley) | Valley | Total per point |
|---|---|---|---|---|---|
| Round 4 | 4 sc | 2 sc, ch 2, 2 sc | 4 sc | 1 sl st | 13 sts + ch-2 |
| Round 5 | 6 rev sc | 3 rev sc | 6 rev sc | 1 rev sc | 16 rev sc |
Why the math works:
- Round 3 has 9 stitches per point. Round 4 places 1 stitch in each of them and adds 4 sc in the tip space, which gives the extra length the outer edge needs to turn the sharp corner. 9 + 4 = 13.
- Round 5 places 1 rev sc in each of those 13 stitches and adds 3 in the tip space, which keeps the cord from pulling the tip blunt. 13 + 3 = 16.
- The valleys get no increase. The outer edge of a star is shorter at an inner corner, so extra stitches there would make it ruffle.
Width check: 4 in (10.2 cm) after Round 3 + 0.25 in (0.6 cm) on each side = 4.5 in (11.4 cm). That matches the finished size.
Final Blocking
- Weave in all remaining ends through the backs of the stitches before blocking.
- Lay the star face down on a blocking mat.
- Mist it evenly with water until it is damp, not soaked.
- Turn it face up. Gently press the center flat with your palm.
- Pin each of the 5 tips first, so the side tips are 4.5 in (11.4 cm) apart and the top tip is centered.
- Pin each valley so it points straight in toward the center hole.
- Use your fingers to straighten the ray stitches so they line up from the center into each point.
- Let the star dry completely, usually 4 to 6 hours.
- Unpin it. For a stiffer ornament, brush on a light fabric stiffener, re-pin, and dry again.
Final Quality-Control Checklist
- Center hole is small and closed, about 0.125 in (0.3 cm).
- Round 1 has 15 tr, and Round 2 has 30 sc.
- Round 3 has 45 sts and 5 ch-2 tip spaces.
- Round 4 has 65 sts and 5 ch-2 tip spaces.
- Round 5 has 80 rev sc.
- All 5 points are the same size and shape.
- Valleys are crisp and do not ruffle.
- Star measures 4.5 in (11.4 cm) wide and 4.25 in (10.8 cm) tall.
- Hanging loop is secure and about 1.5 in (3.8 cm) tall.
- All ends are woven in and invisible from the front.
Troubleshooting
Center hole will not close: Pull the magic ring tail before joining Round 1, then secure the tail by weaving it in two directions.
Disc cups after Round 2: Your tr stitches are short or your sc are tight. Try a larger hook for Round 2 only.
Disc ruffles after Round 2: Your tension is loose. Go down half a hook size.
Points lean to one side: Check that each repeat has hdc and dc on both sides of the tip. A missing stitch pulls the point off center.
Tips look blunt: Make sure you work the ch-2 at the tip in Rounds 3 and 4, and 3 rev sc into the tip in Round 5.
Crab stitch edge twists or flares: Loosen your tension slightly and pull each loop up to an even height.
Hanging loop sags: Use fewer chains, or work a sl st back along the chain for a thicker cord.
Care
Hand wash in cool water with mild soap, press out the water in a towel, and dry flat. Store the star flat or hang it so the points keep their shape.
Final Notes
The measurement chain is short and easy to check. The ray ring measures 1.75 in (4.4 cm) after Round 1 and grows into a flat 2.25 in (5.7 cm) disc in Round 2. Round 3 builds the five points to 4 in (10.2 cm). The two border rounds add 0.25 in (0.6 cm) per edge, for a finished star 4.5 in (11.4 cm) wide and 4.25 in (10.8 cm) tall, plus a 1.5 in (3.8 cm) hanging loop. If each checkpoint matches, every star in your batch will match.
Happy crocheting!