

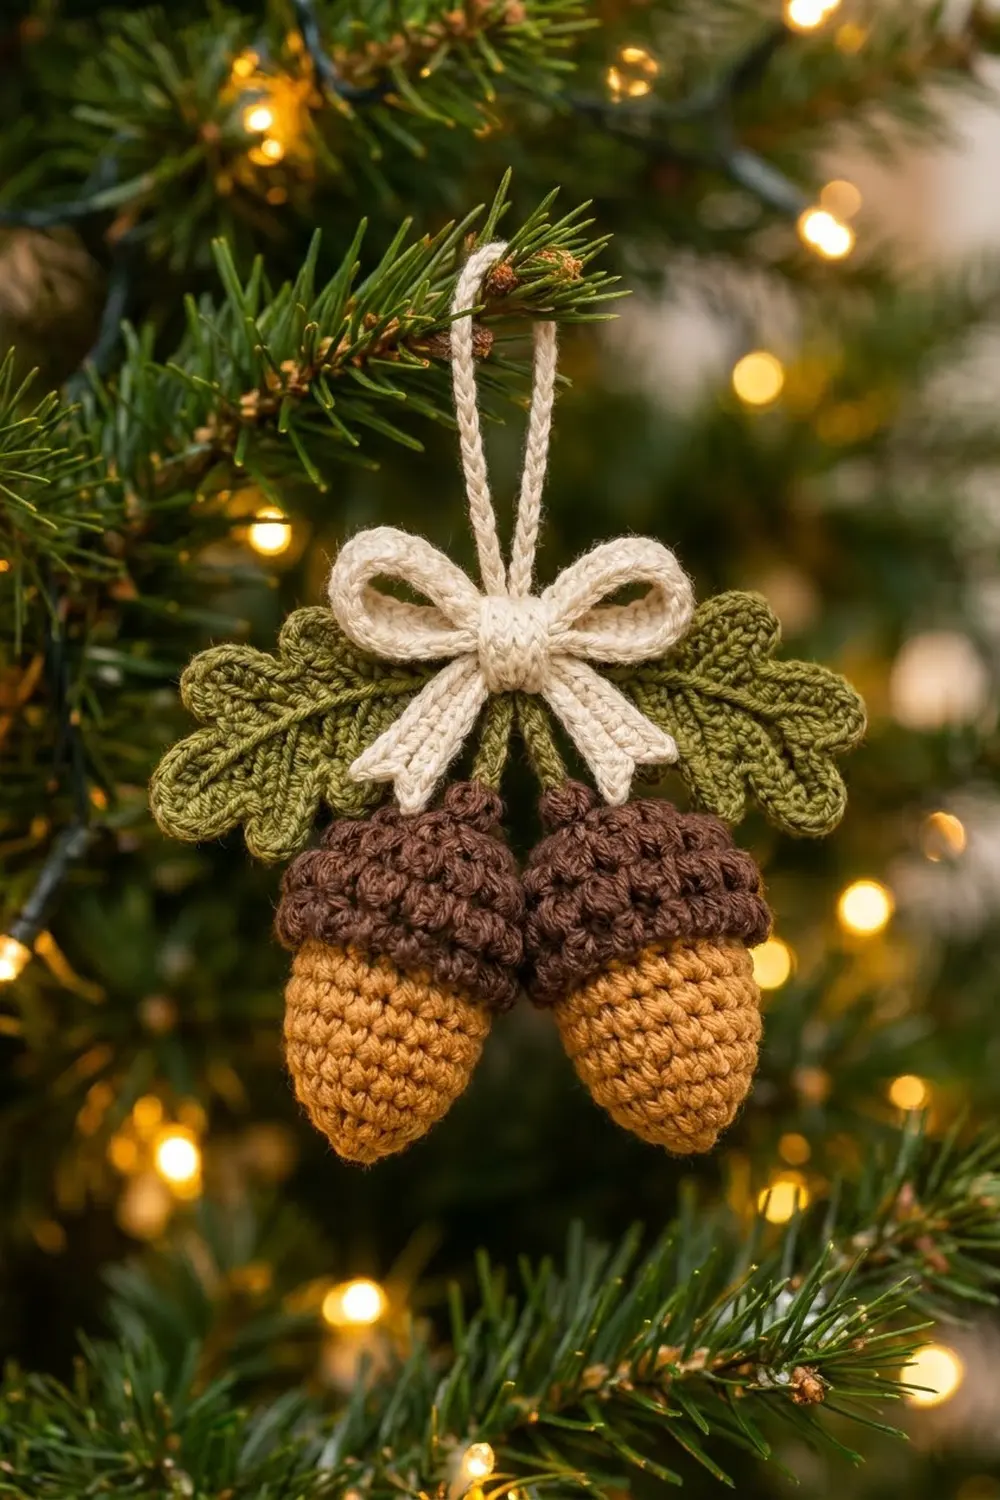
This ornament has two plump acorns under a pair of oak leaves, finished with a cream bow and a hanging loop. It looks rustic and handmade and suits both autumn and Christmas decorating.
The colors are a warm golden tan for the acorn bodies and a deep chocolate brown for the textured caps. The leaves are soft olive green, and the bow and loop are creamy off-white.
This pattern uses US crochet terms. The finished ornament measures about 5.5 in (14.0 cm) wide and 6.5 in (16.5 cm) tall including the loop. Without the loop, it is 4.25 in (10.8 cm) tall.
You crochet the acorn bodies and caps in the round as amigurumi and stuff the bodies. The leaves are worked around a foundation chain and given a single crochet edging. The bow is a flat strip that you fold and wrap, and the loop is a slip-stitch cord. At the end you sew everything together at one central point.
Finished Size and Construction
- Finished size: 5.5 in (14.0 cm) wide × 6.5 in (16.5 cm) tall with the loop; 4.25 in (10.8 cm) tall without it
- Skill level: Intermediate beginner
- Terminology: US
- Yarn weight: DK (#3)
- Hook: 3.0 mm
- Number of pieces: 9 (2 bodies, 2 caps, 2 leaves, 1 bow strip, 1 bow center band, 1 hanging loop)
- Layout: two acorns side by side under two leaves, with the bow centered and the loop on top
- Acorn size: 2.4 in (6.1 cm) tall × 1.75 in (4.4 cm) wide at the cap
- Leaf size before border: 2.75 in (7.0 cm) × 1.25 in (3.2 cm)
- Leaf size after border: 3 in (7.6 cm) × 1.5 in (3.8 cm)
- Border depth: 0.125 in (0.3 cm) on each leaf edge
Materials
Choose a smooth DK cotton or cotton blend. Matte fibers make the puff texture and the leaf edges stand out clearly. Avoid fuzzy yarns, because they blur the stitch definition.
- Golden tan (A): 10 g / 24 m
- Dark brown (B): 15 g / 36 m
- Olive green (C): 10 g / 24 m
- Cream (D): 8 g / 19 m
Tools:
– 3.0 mm crochet hook
– Fiberfill stuffing, about 10 g
– Tapestry needle
– Locking stitch marker
– Sewing pins
– Scissors
These quantities include a margin of about 20% for gauge swatches and sewing tails.
Abbreviations (US Terms)
- ch – chain
- sl st – slip stitch
- sc – single crochet
- hdc – half double crochet
- dc – double crochet
- inc – 2 sc in the same stitch
- dec – single crochet 2 together (invisible decrease recommended)
- MR – magic ring
- BLO – back loop only
- st(s) – stitch(es)
- sp – space
Special stitch – puff: (yarn over, insert hook in the stitch, yarn over, pull up a loop) 2 times in the same stitch. You now have 5 loops on the hook. Yarn over and pull through all 5 loops. Each puff counts as 1 stitch.
Gauge and Checkpoints
Gauge: 11 sc and 12 rounds = 2 in (5.1 cm), worked in continuous rounds.
Make one acorn body first and use it as your gauge test. Check these measurements as you go:
- Body after Round 7: circumference 4.4 in (11.2 cm)
- Body after Round 12: length from tip 2 in (5.1 cm)
- Cap after Round 8: opening 1.75 in (4.4 cm) across, height 1 in (2.5 cm)
- Leaf after Round 1: 2.75 in (7.0 cm) long
If your pieces come out too big, change to a 2.75 mm hook. If they are too small, change to a 3.25 mm hook. Work tightly so the stuffing doesn’t show through.
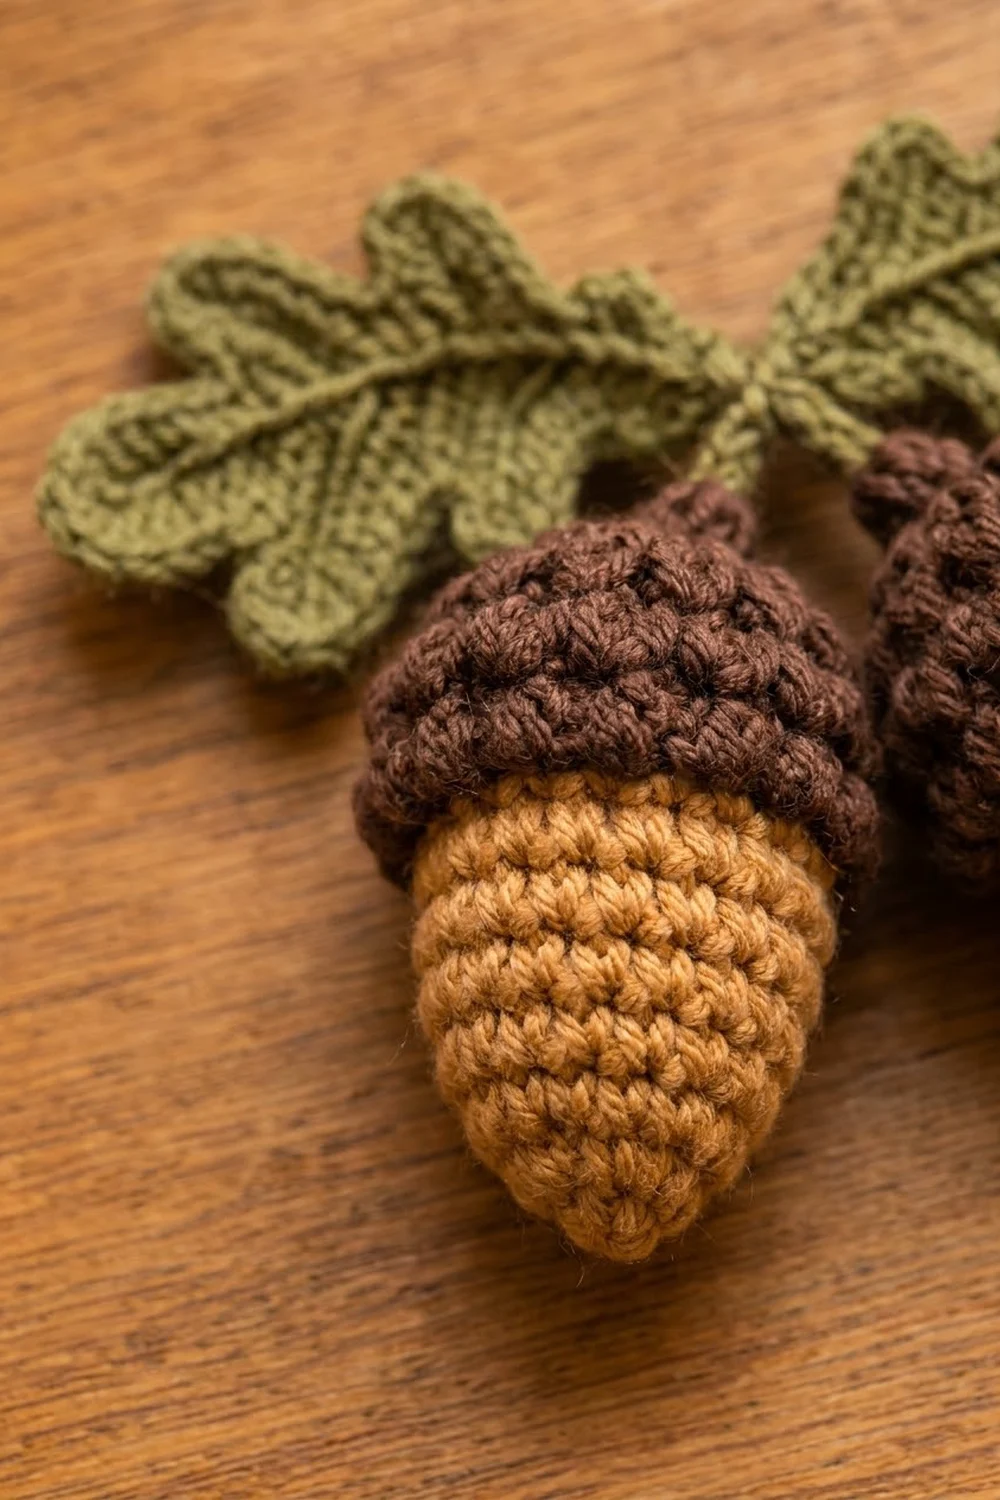
Acorn Body (make 2, color A)
Work in continuous rounds without joining. Move the marker up to the first stitch of each round.
- Rnd 1: 6 sc in MR. (6)
- Rnd 2: [sc, inc] 3 times. (9)
- Rnd 3: [2 sc, inc] 3 times. (12)
- Rnd 4: [3 sc, inc] 3 times. (15)
- Rnd 5: [4 sc, inc] 3 times. (18)
- Rnd 6: [5 sc, inc] 3 times. (21)
- Rnd 7: [6 sc, inc] 3 times. (24)
Increasing by only 3 stitches per round gives the body its tapered, pointed tip. Check the circumference now: it should be 4.4 in (11.2 cm).
- Rnds 8–12: sc in each st. (24)
The body should now be 2 in (5.1 cm) long.
- Rnd 13: [2 sc, dec] 6 times. (18)
Stuff the body firmly, shaping the point.
- Rnd 14: [sc, dec] 6 times. (12)
- Rnd 15: dec 6 times. (6)
Fasten off. Weave the tail through the front loops of the last 6 stitches, pull it closed and hide the end. The finished body is about 2.25 in (5.7 cm) long.
Acorn Cap (make 2, color B)
- Rnd 1: 6 sc in MR. (6)
- Rnd 2: inc in each st. (12)
- Rnd 3: [sc, inc] 6 times. (18)
- Rnd 4: [puff, sc, inc] 6 times. (24)
- Rnd 5: [puff, sc, puff, inc] 6 times. (30)
- Rnd 6: [sc, puff] 15 times. (30)
- Rnd 7: [puff, sc] 15 times. (30)
- Rnd 8: sc in each st. (30)
In Rounds 6 and 7, place each puff over the sc below it wherever you can. This staggers the bumps so they look like a real acorn cap.
Sl st in the next stitch and fasten off, leaving an 18 in (45.7 cm) tail for sewing. Round 8 forms a smooth rim that sits against the body. Check that the cap opening is 1.75 in (4.4 cm) across.
Stem: With color B, join with a sl st at the center of Round 1. Ch 5, then sl st in the 2nd ch from the hook and in the next 3 chains (4 sl st). Sl st at the base. Fasten off, leaving an 8 in (20.3 cm) tail. The stem is about 0.5 in (1.3 cm) long.
Oak Leaf (make 2, color C)
Foundation: Ch 17. The 16 working chains run from the tip (next to the hook) to the stem end (the slip knot).
Rnd 1, Side A (tip to stem):
1. sc in the 2nd ch from the hook (ch 1), then hdc in the next ch (ch 2).
2. [(hdc, 2 dc, hdc) in the next ch, sc in the next ch, sl st in the next ch] 4 times (chains 3–14). This makes 4 lobes.
3. sc in the next ch (ch 15), then 3 sc in the last ch (ch 16).
Side A total: 1 + 1 + 24 + 1 + 3 = 30 sts.
Rnd 1, Side B (stem to tip), working in the free loops of the foundation chain:
1. sc in ch 15.
2. [sl st in the next ch, sc in the next ch, (hdc, 2 dc, hdc) in the next ch] 4 times (chains 14–3).
3. hdc in ch 2, then (dc, ch 2, dc) in ch 1.
4. Join with a sl st to the first sc.
Side B total: 1 + 24 + 1 + 2 = 28 sts, plus the ch-2 tip space.
Round total: 58 sts plus 1 ch-2 sp. The lobes on Side B line up exactly with those on Side A, because the repeat is reversed.
Don’t fasten off. Go straight on to the leaf edging in the Border section. Add the stem and vein after the edging.
Leaf stem: Join color C in the center stitch of the stem-end corner. Ch 7, sl st in the 2nd ch from the hook and in the next 5 chains (6 sl st), then sl st in the same stitch. Fasten off.
Vein: Working on the right side, surface slip stitch along the foundation chain from the stem to the tip. If you like, backstitch a short side vein toward each lobe valley with the yarn tail.
Make All Pieces
- Color A: 2 acorn bodies
- Color B: 2 caps, each with a stem
- Color C: 2 leaves, each with edging, stem and vein
- Color D: 1 bow strip, 1 center band, 1 hanging loop
Bow strip (D): Ch 51.
– Row 1: sc in the back bump of the 2nd ch from the hook and in each ch across. (50)
– Row 2: Ch 1, turn, then sl st in the BLO of each st across. (50)
Fasten off. The strip measures 9 in (22.9 cm) × 0.35 in (0.9 cm), and the slip stitches give it a corded look.
Center band (D): Ch 6.
– Row 1: sc in the 2nd ch from the hook and across. (5)
– Rows 2–4: Ch 1, turn, sc across. (5)
Fasten off, leaving a 10 in (25.4 cm) tail. The band measures 0.9 in (2.3 cm) long.
Hanging loop (D): Ch 41, then sl st in the back bump of the 2nd ch from the hook and in each ch across. (40) The cord measures 5.5 in (14.0 cm).
Layout grid:
            [ Hanging Loop ]
 [ Leaf L ]   [   Bow   ]   [ Leaf R ]
        [ Acorn L ] [ Acorn R ]
Joining
Cap to body: Slide a cap over the closed top of a body so the cap rim lines up with body Round 11. The cap’s last round has 30 stitches and the body has 24 stitches around, so whipstitch in 6 groups. In each group, sew 5 cap stitches to 4 body stitches. This spreads the 6 extra cap stitches evenly, so the cap flares a little all the way around, like the overhanging cap in the photo. Repeat for the second acorn.
Bow:
1. Lay the strip flat and measure a 1.5 in (3.8 cm) tail at each end.
2. Use 3 in (7.6 cm) of strip for each loop, folding both loops toward the center.
3. Pinch the center, wrap the band around it and sew the band ends together at the back.
The bow should measure 2.75 in (7.0 cm) across.
Assembly:
1. Place the two leaves stem to stem, angled slightly upward, so the stems overlap by 0.25 in (0.6 cm). Sew them together.
2. Sew both acorn stems to the back of this junction so the acorns hang side by side and their caps touch.
3. Sew the bow over the junction, stitching through the center band.
4. Fold the loop in half. Sew both ends behind the bow, hiding 0.5 in (1.3 cm) of each end so the loop rises 2.25 in (5.7 cm) above the bow.
Keep your sewing tension firm but not puckering. The pieces should stay in position without the leaves cupping.
Size checkpoint: The ornament should measure 5.5 in (14.0 cm) wide and 4.25 in (10.8 cm) tall without the loop.
Border: Leaf Edging
Border gauge: One sc edging round adds 0.125 in (0.3 cm) to each edge. That takes each leaf from 2.75 in × 1.25 in (7.0 cm × 3.2 cm) to 3 in × 1.5 in (7.6 cm × 3.8 cm).
Rnd 2 (edging): Ch 1. Every stitch is worked 1 per existing stitch, with extra stitches added at the lobes, the stem corner and the tip. Ch 1 and sc in the same stitch as the join (the first sc of Side A), then continue as follows.
Side A:
– sc in the hdc.
– Around each of the 4 lobes and its valley, work 8 sts: sc in the hdc, 2 sc in each dc, sc in the hdc, sc in the sc, sl st in the sl st. That is 6 existing sts + 2 extra = 8.
– sc in the next sc.
– At the stem corner: sc, 3 sc in the center st, sc. That is 3 existing sts + 2 extra = 5.
Side A count: 1 + 1 + 32 + 1 + 5 = 40 (30 worked 1 per stitch + 10 extra).
Side B:
– sc in the first sc.
– Work 4 repeats of: sl st in the sl st, sc in the sc, then around the lobe sc in the hdc, 2 sc in each dc, sc in the hdc. That is 8 sts per repeat.
– sc in the hdc, then sc in the dc.
– In the ch-2 sp: (sc, ch 2, sc).
– sc in the last dc, then join to the first sc.
Side B count: 1 + 32 + 1 + 1 + 2 + 1 = 38 (28 worked 1 per stitch + 10 extra).
Round total: 78 sts plus 1 ch-2 tip space (58 worked 1 per stitch + 20 extra).
Why the math works: Each lobe is a convex curve, so it needs 2 extra stitches to lie flat. The 8 lobes need 16 extra stitches. The stem corner and the tip each need 2 more, for 20 in total. The valley sl sts aren’t increased, which keeps the notches between the lobes sharp. Fasten off, then add the stem and vein as described in the Oak Leaf section.
Final Blocking
- Lightly mist the leaves and bow with water. Don’t wet the stuffed acorns.
- Pin each leaf flat, opening every lobe and pointing the tip.
- Shape the bow loops into round arcs and pin the tails straight.
- Leave it to dry completely, about 2 hours.
- Roll each acorn gently between your palms to even out the stuffing.
Final Quality-Control Checklist
- Both bodies measure 2.25 in (5.7 cm) and are firmly stuffed.
- The caps overhang evenly, with puffs showing all around.
- Each leaf has 4 lobes per side and its edging count is 78.
- The center veins are straight from stem to tip.
- The bow is centered and the loop is 2.25 in (5.7 cm) tall.
- All tails are hidden inside the pieces.
Troubleshooting
- Puffs sinking inward: Pull the final loop snug, and push each puff outward with a fingertip.
- Cap too loose: Sew the cap rim one round lower, at body Round 12.
- Leaf ruffling: Your edging tension is too loose, or you added extra increases. Recount to 78.
- Leaf cupping: Skip one dc increase on each lobe.
- Bow loops flopping: Stitch the inside of each loop to the center band with one hidden stitch.
- Acorns twisting: Tack the caps together where they touch.
Care
Spot clean with a damp cloth and mild soap, then let it air dry flat. Store the ornament in a box so the bow and leaves keep their shape.
Final Notes
The measurement chain works like this. Gauge of 11 sc × 12 rounds = 2 in (5.1 cm) gives 2.25 in (5.7 cm) bodies. These sit inside caps 1.75 in (4.4 cm) wide. The leaves grow from 2.75 in (7.0 cm) to 3 in (7.6 cm) with a 78-stitch edging. Together with the 2.75 in (7.0 cm) bow, they assemble into an ornament 5.5 in (14.0 cm) wide and 6.5 in (16.5 cm) tall. Check each stage and the finished ornament will come out the right size.
Happy crocheting!