

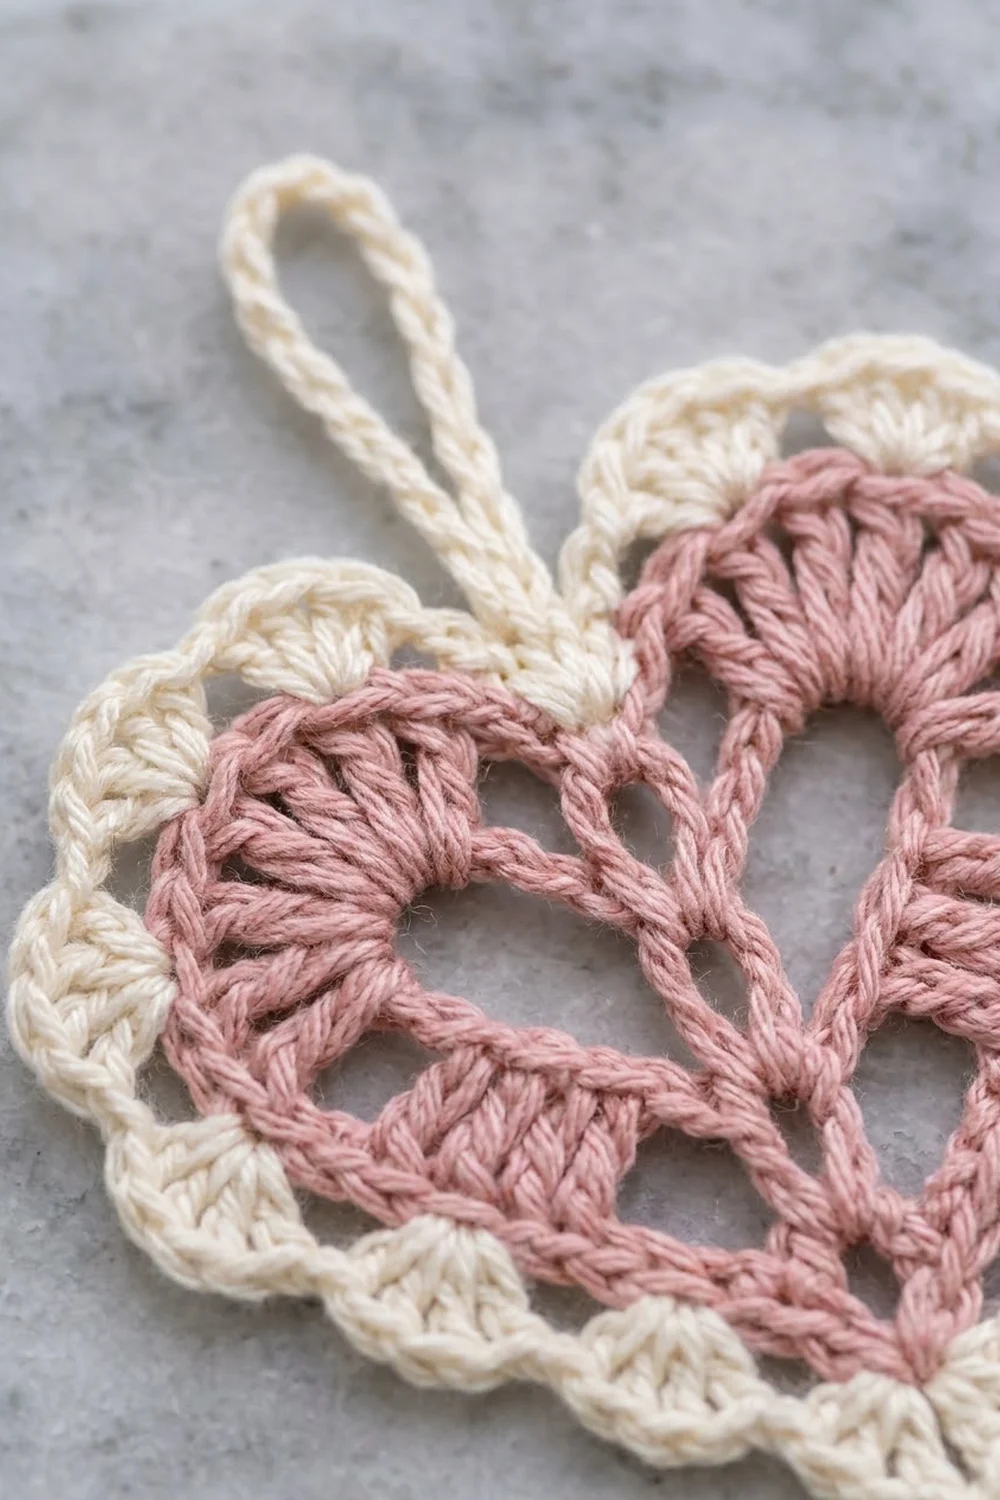
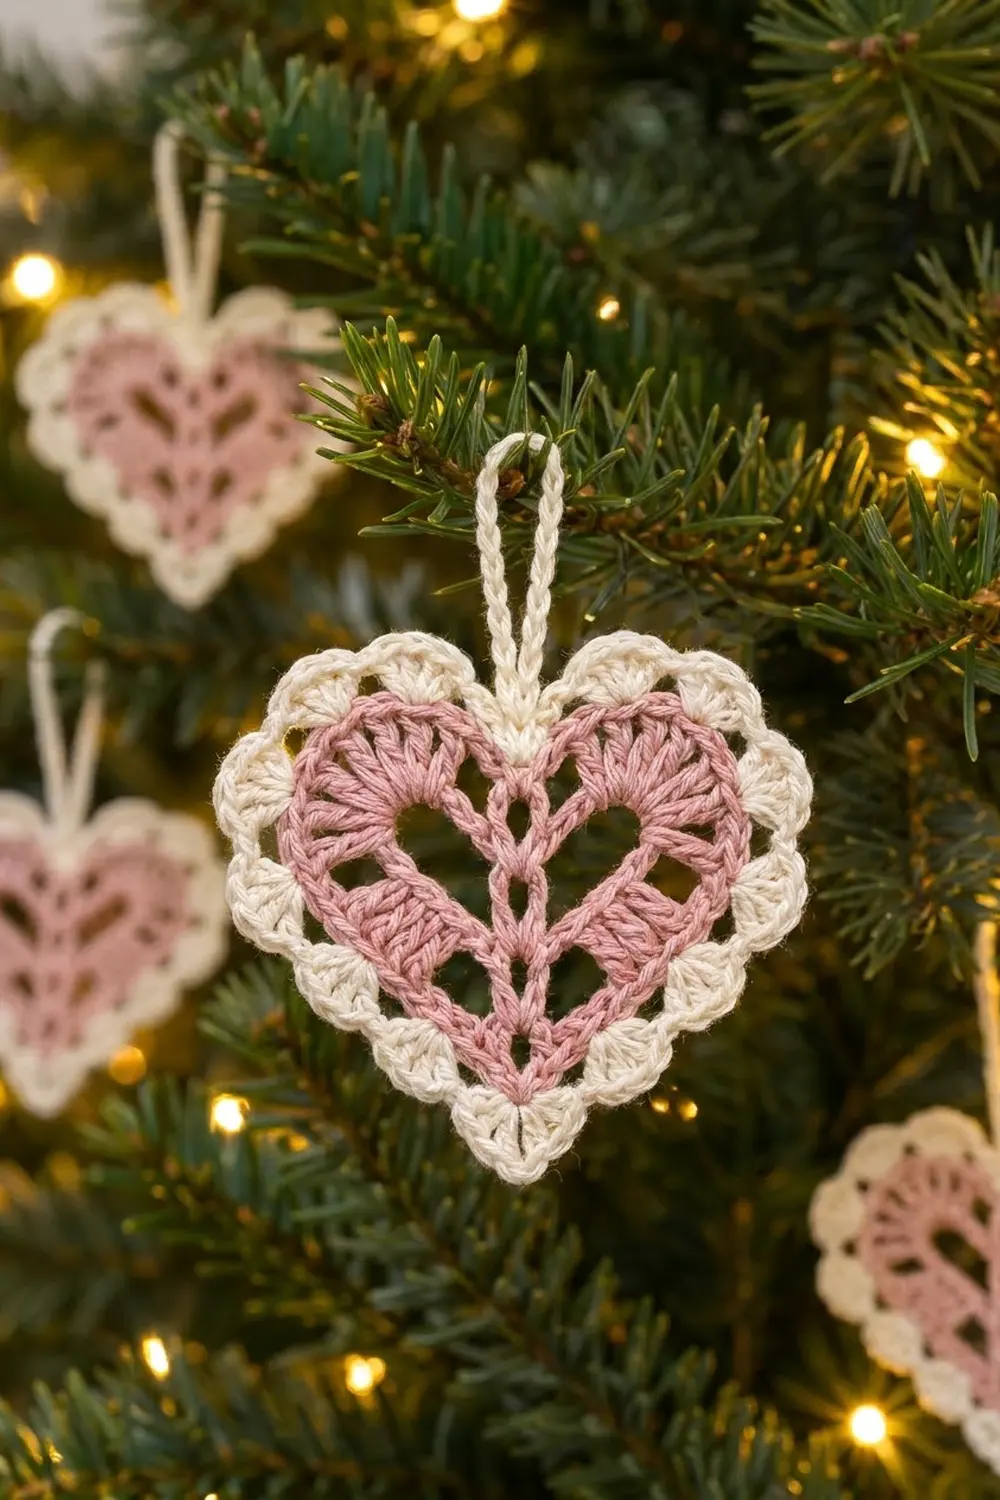
The Blush Lattice Heart is a small, lacy ornament with a dusty pink center and a cream scalloped edge. A column of stacked stitches runs up the middle like a spine. Two narrow windows sit on either side of it and widen toward the top, so the openings look like a little heart inside the heart.
The body is worked in dusty pink, and the shell border and hanging loop are cream. The look is vintage and cottage-style. Hang it on a Christmas tree, a Valentine’s garland, a gift tag or a doorknob. Cotton yarn shows the stitches crisply and blocks flat.
This pattern uses US crochet terms. The finished heart measures about 3.75 in (9.5 cm) wide and 3 in (7.6 cm) tall, not counting the hanging loop.
The construction is simple. You start at the bottom point with a magic ring and work 4 short rows upward. The edges increase while the center spine and the windows grow. Row 5 adds a fan of treble crochet stitches to make each rounded lobe. Then you work 2 rounds of cream border all the way around and finish with a chain loop at the top center.
Finished Size and Construction
- Finished size: 3.75 in (9.5 cm) wide x 3 in (7.6 cm) tall, plus loop
- Skill level: Easy-intermediate
- Terminology: US crochet terms
- Yarn weight: DK (#3), cotton or cotton blend
- Hook: 3.5 mm (US E-4)
- Number of pieces: 1 (a single heart motif)
- Layout: One heart worked in rows from the point up, then bordered in rounds
- Body size before border: 3 in (7.6 cm) wide x 2.25 in (5.7 cm) tall
- Border depth: 3/8 in (1.0 cm) on all sides
- Hanging loop: about 1.75 in (4.4 cm) tall
Materials
Choose a smooth mercerized or combed cotton in DK weight. Cotton holds the lace open and keeps the scallops crisp. Acrylic also works, but the windows may close up a little and the heart will be softer.
- Color A, dusty pink (body): 5 g, about 12 m
- Color B, cream (border and loop): 4 g, about 9 m
Quantities are for one ornament. They include a small extra margin for the magic ring, the joins and weaving in ends.
Tools:
- 3.5 mm (US E-4) crochet hook
- Tapestry needle
- Scissors
- Stitch markers (2)
- Blocking mat or folded towel and rustproof pins
- Spray bottle with water
- Ruler or tape measure
Abbreviations (US Terms)
- ch – chain
- sl st – slip stitch
- sc – single crochet
- sc2tog – single crochet 2 together
- dc – double crochet
- tr – treble crochet
- sp(s) – space(s)
- st(s) – stitch(es)
- tch – turning chain
- RS / WS – right side / wrong side
- rep – repeat
Special stitch – Shell: 5 dc worked into the same stitch.
Spine dc: The single center dc of each body row, worked into the spine dc of the row below. Stacked together, these form the vertical spine.
Gauge and Checkpoints
Gauge: 20 dc and 10 dc rows = 4 in (10.2 cm) in DK cotton with a 3.5 mm hook. One dc row is about 0.4 in (1.0 cm) tall.
Gauge matters less here than it does for a garment. It still controls whether the windows stay open and whether the border lies flat. Make one heart first and check it against these numbers:
- After Row 2: about 1.75 in (4.4 cm) wide at the top edge
- After Row 4: about 2.75 in (7.0 cm) wide and 1.5 in (3.8 cm) tall from the point
- After Row 5: about 3 in (7.6 cm) wide and 2.25 in (5.7 cm) tall
- After the border: about 3.75 in (9.5 cm) wide and 3 in (7.6 cm) tall
Too big? Go down to a 3.25 mm hook, or work the chain spaces more tightly. Too small? Go up to a 3.75 mm hook. If the height is right but the windows look squashed, loosen only the chains.
Heart Body
Use Color A. The body is worked in turned rows. Each row has 5 parts: a side group of dc, a chain space, the spine dc, a second chain space and a matching side group. The ch 3 at the start of each row counts as a dc throughout.
Row 1 (RS): Make a magic ring. Ch 3, dc in ring, ch 1, dc in ring (spine dc), ch 1, 2 dc in ring. Pull the ring closed firmly. Turn.
Count: 5 dc (2 + 1 + 2) and 2 ch-1 sps.
The closed ring forms the bottom point of the heart.
Row 2 (WS): Ch 3, dc in first st (at the base of the ch-3), dc in next dc, ch 1, skip ch-1 sp, dc in spine dc, ch 1, skip ch-1 sp, dc in next dc, 2 dc in top of tch. Turn.
Count: 7 dc (3 + 1 + 3) and 2 ch-1 sps.
Row 3 (RS): Ch 3, dc in first st, dc in next 2 dc, ch 2, skip ch-1 sp, dc in spine dc, ch 2, skip ch-1 sp, dc in next 2 dc, 2 dc in top of tch. Turn.
Count: 9 dc (4 + 1 + 4) and 2 ch-2 sps.
The chain spaces get longer each row. This is what makes the 2 windows widen toward the top.
Row 4 (WS): Ch 3, dc in next 3 dc, ch 3, skip ch-2 sp, dc in spine dc, ch 3, skip ch-2 sp, dc in next 3 dc, dc in top of tch. Turn.
Count: 9 dc (4 + 1 + 4) and 2 ch-3 sps.
This row has no edge increases, so the sides of the heart turn upward and straighten before the lobes begin. Check the Row 4 measurement now.
Row 5 (RS) – Lobes and center dip: Ch 1, sc in first dc, 9 tr in the space between the 2nd and 3rd dc of the group, sc in 4th dc, 3 sc in ch-3 sp, sl st in spine dc, 3 sc in next ch-3 sp, sc in first dc of next group, 9 tr in the space between the 2nd and 3rd dc, sc in top of tch. Fasten off.
Count: 18 tr, 10 sc, 1 sl st = 29 sts.
Each lobe is (sc, 9 tr, sc) = 11 sts. The center is 3 sc + 1 sl st + 3 sc = 7 sts. The 3 sc in each ch-3 sp close the tops of the windows. The sl st on the spine sits low between the tall tr fans and makes the dip at the top of the heart.
Weave in the Color A ends now, before the border covers them. Lay the body flat and gently open each window with your fingers.
Border
Use Color B. The border has 2 rounds: a single crochet foundation round, then a shell round.
Border gauge: In Rnd 1, aim for about 11 sc per 2 in (5.1 cm) of edge. Each shell repeat in Rnd 2 covers 4 sts of Rnd 1, which is about 0.75 in (1.9 cm) of edge.
Rnd 1 (RS): With RS facing, join B with a standing sc at the bottom point, working around the base of the magic ring. Work 2 more sc in the same place, for 3 sc at the point. Then work along the edges as follows:
- First side edge: 2 sc in each row end of Rows 1–4 = 8 sc
- First lobe: sc in the sc, then (sc in next 2 tr, 2 sc in next tr) 3 times over the 9 tr = 12 sc, then sc in the sc = 14 sc
- Center dip: sc in next sc, sc2tog over next 2 sc, sc in sl st, sc2tog over next 2 sc, sc in next sc = 5 sc
- Second lobe: sc in the sc, (sc in next 2 tr, 2 sc in next tr) 3 times, sc in the sc = 14 sc
- Second side edge: 2 sc in each row end of Rows 4–1 = 8 sc
Join with sl st to the first sc.
Count: 3 + 8 + 14 + 5 + 14 + 8 = 52 sc.
The sc2tog stitches pull the center in and keep the dip sharp. Place a marker in the 2nd sc of the point, which is the center point sc. Place another in the center sc of the dip, which is the sc worked into the sl st.
Rnd 2 (RS) – Shells: Sl st into the marked center point sc. Ch 3 (counts as dc), 4 dc in same st (first shell), skip next st, sc in next st, skip next st, shell in next st, skip next st, sc in next st, skip next st; rep from * 11 more times. Join with sl st to top of ch-3. Fasten off.
Count: 13 shells (65 dc) + 13 sc = 78 sts.*
Where the shells land:
- Bottom point: 1 shell, centered on the point sc
- Each side edge: 2 shells, 2 sc
- Each lobe: 3 shells, 4 sc
- Center dip: 1 shell at each end and 1 sc in the middle (the marked dip sc)
Why the math works: Each repeat (shell, skip, sc, skip) uses exactly 4 sts. Rnd 1 has 52 sts, and 52 / 4 = 13 repeats with nothing left over. Number the point sc as stitch 0 and count around. Shells land on stitches 0, 4, 8 and so on up to 48, and sc land on stitches 2, 6, 10 and so on up to 50. The marked dip sc is stitch 26, exactly halfway around. Because 26 = (6 x 4) + 2, it always gets an sc, never a shell. That gives you a pointed shell at the bottom, a neat sc at the top-center dip and 6 shells on each side between them, so the heart is symmetrical.
If your Rnd 1 count is off, fix it in the center dip or on the side edges before you start Rnd 2. Don’t fudge the shell spacing.
Hanging Loop
With Color B and RS facing, join with sl st in the sc at the center dip of Rnd 2. Ch 24, sl st in the same sc. Fasten off. Weave the tail into the base of the loop and back down through the border.
The loop stands about 1.75 in (4.4 cm) tall. For a longer loop, add chains in multiples of 4. Each 4 extra ch adds roughly 1/4 in (0.6 cm) of height.
Final Blocking
Blocking opens the lace and makes the scallops crisp.
- Weave in all remaining ends, keeping each tail inside stitches of its own color.
- Lay the heart RS up on a blocking mat or folded towel.
- Pin the bottom point and the center dip first, about 3 in (7.6 cm) apart.
- Pin the widest point of each lobe so the heart is 3.75 in (9.5 cm) across.
- Pin out each shell along the sides and lobes so every scallop is round and even.
- Use a pin or toothpick to open each window into a clean teardrop shape beside the spine.
- Spray with water until damp but not soaking.
- Let the heart dry completely, at least 6 hours, before you unpin it.
- If you want the loop to hang neatly, pin it straight up while the heart dries.
For a firmer ornament, use a light spray starch in step 7.
Final Quality-Control Checklist
- [ ] Body has 29 sts in Row 5, with a fan of 9 tr on each lobe
- [ ] Spine is one straight vertical column of dc from point to dip
- [ ] Both windows are open and the same size
- [ ] Border Rnd 1 has exactly 52 sc
- [ ] Border Rnd 2 has 13 shells and 13 sc
- [ ] A shell sits centered on the bottom point
- [ ] An sc sits at the center dip, with the loop attached there
- [ ] Heart measures about 3.75 in (9.5 cm) wide and 3 in (7.6 cm) tall
- [ ] All ends are woven in and trimmed
Troubleshooting
The point is loose or has a hole. Pull the magic ring tighter and weave the starting tail through the base twice.
The heart is lopsided. Check that both side groups in Rows 2–4 have the same dc count. Recount the Row 5 lobes: each must be sc, 9 tr, sc.
The lobes cup or ruffle. Your tr may be too tight or too loose. Change hook size for Row 5 only, then block the lobes firmly.
The border waves. You probably have too many sc in Rnd 1. Recount each section: 8 per side edge and 14 per lobe.
The border pulls the heart into a cup. You have too few sc, or your tension is tight. Loosen up and check that you used 2 sc per row end.
The dip is shallow. Make sure you worked both sc2tog in the center, and pin the dip firmly during blocking.
The windows close up. Chain a little more loosely in Rows 2–4.
Care
Hand wash in cool water with mild soap, press the water out in a towel and dry flat, reshaping the scallops. Store flat or hanging, away from direct sunlight so the pink doesn’t fade.
Final Notes
The measurement chain is short and easy to check. Row 2 reaches 1.75 in (4.4 cm) wide. Row 4 reaches 2.75 in (7.0 cm) wide and 1.5 in (3.8 cm) tall. Row 5 brings the body to 3 in (7.6 cm) by 2.25 in (5.7 cm), with 29 sts. Border Rnd 1 sets 52 sc around the edge. Rnd 2 turns those into 13 shells that add 3/8 in (1.0 cm) all around. The finished heart is 3.75 in (9.5 cm) wide and 3 in (7.6 cm) tall, with a 1.75 in (4.4 cm) loop.
Once your first heart matches those numbers, the rest will go quickly. Make a few for the tree, tie one to a gift or work a set in different pinks.
Happy crocheting!