

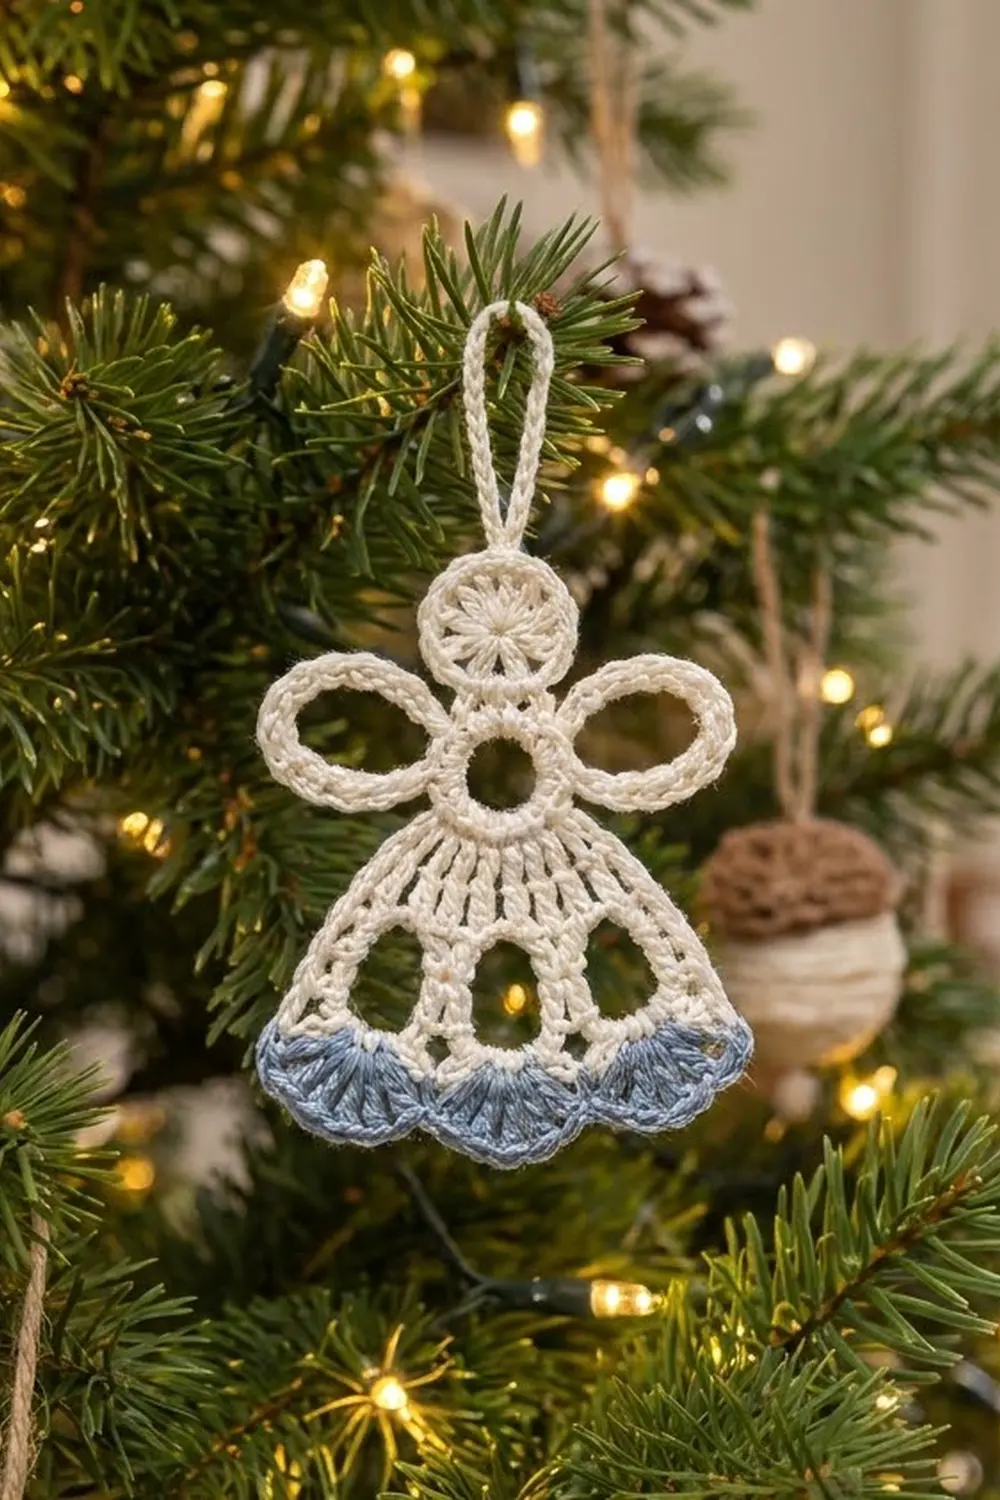
This little angel is a light, lacy ornament with a round head, open loop wings, and a bell skirt with arched windows. A row of dusty-blue scallops finishes the hem. It looks delicate on a tree branch but is quick to make.
The palette is simple: soft cream for the angel and a muted blue for the hem. The style is classic Scandinavian-inspired thread lace, worked in a sport-weight cotton so it is sturdier than true thread crochet. All terms in this pattern are US crochet terms.
The finished angel is 4 in (10.2 cm) wide across the wings and 4 in (10.2 cm) tall, with a 1.5 in (3.8 cm) hanging loop above the head. The skirt hem is 4.25 in (10.8 cm) wide.
You work the angel as one piece. You start with the head in the round, then make a short neck, a covered chain ring, and the first wing. Next you work the skirt flat in rows from the bottom of the ring. The second wing and the hanging loop are added with a separate join. The blue shell row goes on last as the border.
Finished Size and Construction
- Finished size: 4 in (10.2 cm) wide x 4 in (10.2 cm) tall, plus 1.5 in (3.8 cm) loop
- Skill level: Easy
- Terminology: US
- Yarn weight: Sport (#2), cotton
- Hook: 2.5 mm (US B/1 or C/2)
- Number of pieces: 1
- Layout: Single standalone ornament
- Piece size: Head 1 in (2.5 cm) across; ring 1 in (2.5 cm) across; each wing extends 1.5 in (3.8 cm)
- Size before border: 4 in (10.2 cm) wide at hem x 3.65 in (9.3 cm) tall
- Border depth: 0.35 in (0.9 cm), one blue shell row
Materials
Use a smooth, mercerized sport-weight cotton. Mercerized cotton gives clean stitch definition and holds its shape after starching. Avoid fuzzy or very stretchy yarns, because the windows and wing loops will lose their crisp outline.
- Cream (main color): 10 g, about 34 m
- Dusty blue (hem): 5 g, about 17 m
- 2.5 mm crochet hook
- Tapestry needle
- Scissors
- Stitch marker
- Blocking mat and rustproof pins
- Fabric stiffener or spray starch (optional but recommended)
These yarn quantities include a comfortable margin. One angel actually uses about 6 g of cream and 2 g of blue.
Abbreviations (US Terms)
- ch – chain
- sl st – slip stitch
- sc – single crochet
- dc – double crochet
- tr – treble crochet
- sk – skip
- sp – space
- st(s) – stitch(es)
- RS – right side
Special stitch – Shell: 9 dc worked into the same stitch.
Working over a chain loop: Insert the hook into the open space under the chain loop, not into individual chains. This lets you slide the stitches along and space them evenly.
Gauge and Checkpoints
Gauge: 7 sc = 1 in (2.5 cm) in sport cotton with a 2.5 mm hook.
Make the head first and measure it before you go any further. It is your test piece.
- After Head Round 2: 1 in (2.5 cm) across
- After the ring: 1 in (2.5 cm) outer diameter
- After Wing 1: the wing extends 1.5 in (3.8 cm) out from the ring edge
- After Skirt Row 1: the fan is 2 in (5.1 cm) across
- After Skirt Row 3: 3.25 in (8.3 cm) across
- After Skirt Row 5: 4 in (10.2 cm) across the hem; total height 3.65 in (9.3 cm)
- After the border: 4.25 in (10.8 cm) at the hem; total height 4 in (10.2 cm)
If your head measures more than 1 in (2.5 cm), go down to a 2.25 mm hook. If it is smaller than 0.75 in (1.9 cm), go up to a 2.75 mm hook. Do not change the stitch counts; all the shaping depends on them.
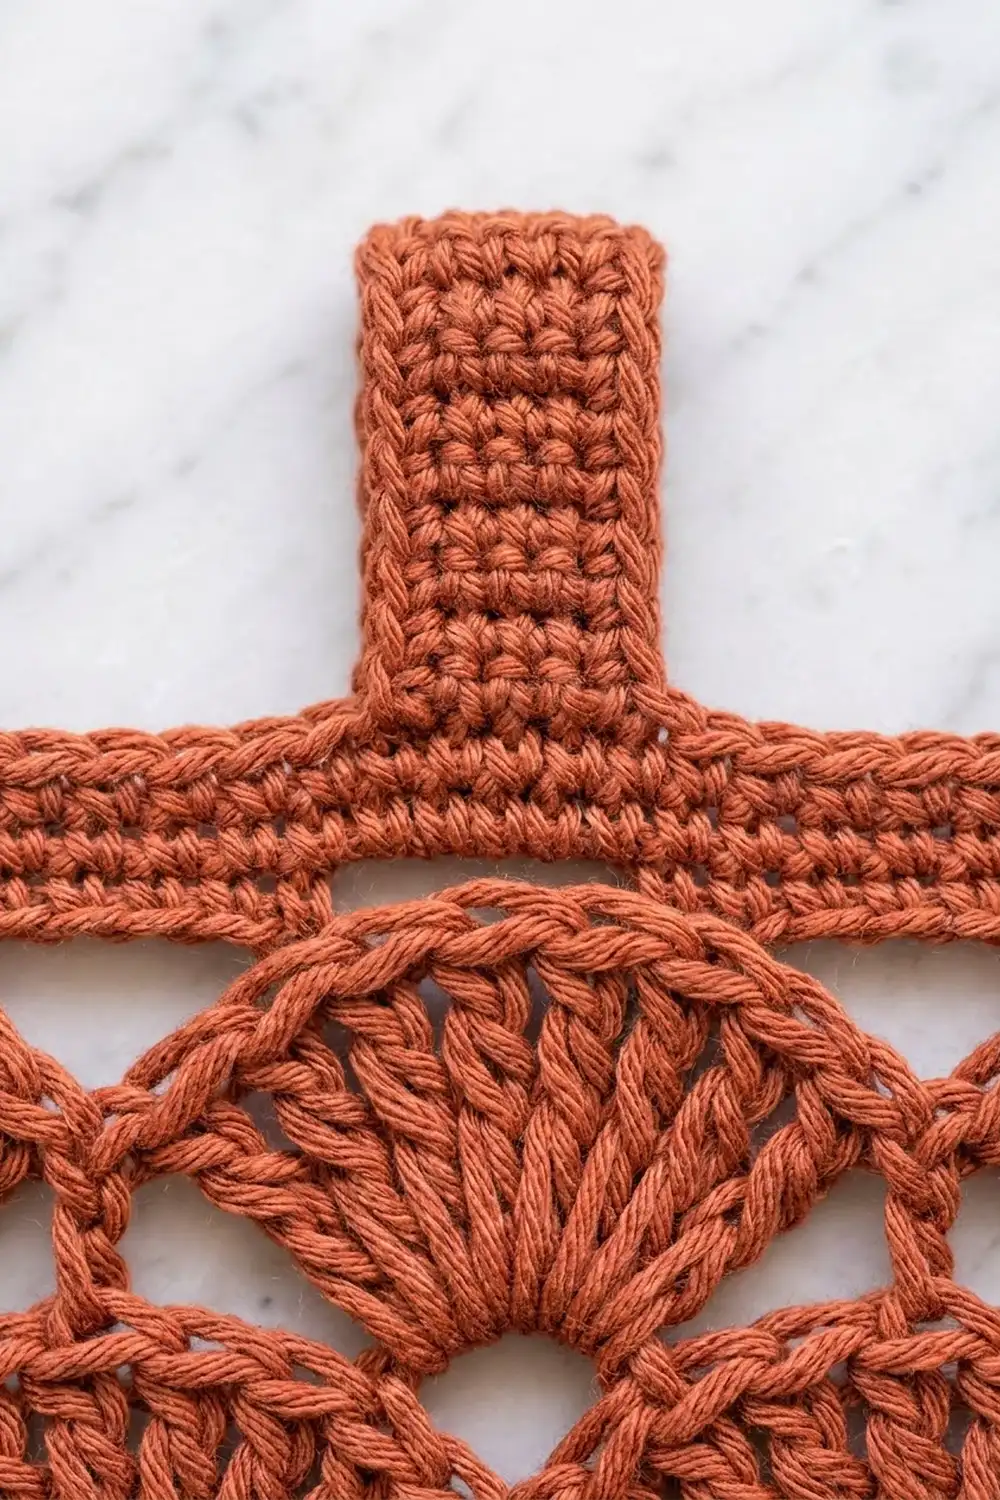
Head
Round 1: With cream, make a magic ring. Ch 3 (counts as first dc), work 11 dc into the ring. Pull the ring closed and sl st to the top of the beginning ch-3. (12 dc)
Round 2: Ch 1, 2 sc in each st around. Sl st to the first sc. (24 sc)
The head is now a flat disc with twelve dc spokes radiating from a small center hole. Check it: 1 in (2.5 cm) across.
Neck
Row 1: Ch 1, sc in the same st as the join and in the next 2 sts. (3 sc)
Row 2: Ch 1, turn, sc in each st across. (3 sc)
The neck is about 0.25 in (0.6 cm) long.
Body Ring
Foundation: Ch 14, then sl st in the first sc of Neck Row 2 (the one at the far end). This makes a chain loop hanging below the neck.
Ring Round: Ch 1, work 24 sc over the ch-14 loop. Sl st in the last sc of Neck Row 2, where the ch-14 began. (24 sc)
Number these ring stitches 1 to 24 in the order you made them. Stitch 1 is beside the neck on one side, stitches 12 and 13 sit at the bottom center, and stitch 24 is beside the neck on the other side.
Push the stitches along the loop so they sit evenly. The ring should lie flat with a round opening about 0.5 in (1.3 cm) across. Its outer diameter is 1 in (2.5 cm).
Wing 1
Turn the work. Sl st in ring sc 24, 23, 22, and 21.
Wing: Ch 16, sl st in the same sc 21 to form a loop. Ch 1, work 24 sc over the ch-16 loop, then sl st in sc 21. (24 sc)
Pinch the wing into an oval that angles slightly upward. It extends 1.5 in (3.8 cm) beyond the ring edge.
Skirt
Sl st in ring sc 20, 19, 18, and 17. Keep these slip stitches loose so the ring edge stays round.
The skirt is worked over ring sc 17 down to sc 8, which is 10 stitches. That leaves sc 18–20 and sc 5–7 free on either side, so the skirt is centered under the ring.
Row 1: Ch 3 (counts as first dc), dc in the same sc 17, then 2 dc in each of sc 16 through sc 8. (20 dc)
Row 1 fans around the lower half of the ring like rays. It measures 2 in (5.1 cm) across.
Row 2 (growth): Ch 3 (counts as dc), turn. Dc in the next 2 sts, 2 dc in the next st, dc in the next 3 sts, 2 dc in the next st 4 times. The last 2 dc go into the top of the turning ch. (25 dc)
Row 3 (growth): Ch 3 (counts as dc), turn. Dc in the next 3 sts, 2 dc in the next st, dc in the next 4 sts, 2 dc in the next st 4 times. (30 dc)
Check it: 3.25 in (8.3 cm) across. These dc rows make the solid upper bell, with clear vertical columns.
Row 4 (windows): Ch 4 (counts as first tr), turn. Tr in the next 4 sts. Ch 4, sk 4 sts, tr in the next 4 sts twice. Ch 4, sk 4 sts, tr in the last 5 sts, with the final tr in the top of the turning ch.
That gives four pillars of 5, 4, 4, and 5 tr, with three windows between them. Check that the row used all 30 stitches: 5 + 4 + 4 + 4 + 4 + 4 + 5 = 30. (18 tr and 3 ch-4 sps)
The skipped dc of Row 3 form the rounded tops of three arched windows. The tall tr pillars give the windows their height.
Row 5 (conversion): Ch 1, turn. Sc in the first 5 tr, 5 sc in the ch-4 sp, sc in the next 4 tr, 5 sc in the ch-4 sp, sc in the next 4 tr, 5 sc in the ch-4 sp, sc in the last 5 sts.
Count it as stitches worked 1-per-existing-stitch plus extras. You work 18 sc into the 18 tr, plus 15 sc into the three spaces (5 each). (33 sc)
The 5 sc in each ch-4 space close the bottom of each window with a firm bar. Check it: 4 in (10.2 cm) across the hem and 3.65 in (9.3 cm) total height. Fasten off the cream.
Wing 2
With the RS facing, join cream with a sl st in ring sc 4.
Wing: Ch 16, sl st in the same sc 4. Ch 1, work 24 sc over the loop, then sl st in sc 4. (24 sc) Fasten off.
Sc 4 and sc 21 are mirror positions on the ring, so both wings sit at the same height and angle.
Hanging Loop
Join cream with a sl st in the Head Round 2 sc directly opposite the neck.
Loop: Ch 24, sl st in the same st. Ch 1, work 30 sc over the ch-24 loop, then sl st in the base st. (30 sc) Fasten off.
The covered loop stands 1.5 in (3.8 cm) above the head.
Border: Blue Shell Hem
Border gauge: One shell row adds 0.35 in (0.9 cm) of depth, and it flares the hem from 4 in (10.2 cm) to 4.25 in (10.8 cm).
Row 6: With the RS facing, join blue with a sl st in the first sc of Row 5. Ch 1, sc in the same st. Sk 3 sts, shell (9 dc) in the next st, sk 3 sts, sc in the next st 4 times. Fasten off. (4 shells: 36 dc + 5 sc)
Why the math works: Each repeat uses 8 stitches of Row 5: 3 skipped, 1 shell stitch, 3 skipped, and 1 sc. The opening sc uses 1 more stitch, so 1 + (8 x 4) = 33, which matches Row 5 exactly.
The five sc anchors fall on stitches 1, 9, 17, 25, and 33. The two end anchors sit at the hem corners, so the scallops are symmetrical. Nine dc in one stitch fan out wider than the 7 stitches each shell spans, which makes the soft rounded scallops.
Final Blocking
- Weave in all ends along stitches of the same color. Weave cream ends into cream stitches and blue ends into blue stitches.
- Soak the angel in cool water, or spray it with starch or fabric stiffener until it is damp throughout.
- Gently press out the excess liquid with a towel. Do not wring it.
- Lay the angel flat on the blocking mat with the RS up.
- Pin the head into a circle 1 in (2.5 cm) across. Pin the ring into a circle 1 in (2.5 cm) across.
- Shape each wing into an oval angled slightly upward. Pin so the wingspan is 4 in (10.2 cm).
- Pin the hem to 4.25 in (10.8 cm) wide, placing one pin at the tip of each shell to round the scallops.
- Open each window into a clean arch, using a pin or a rolled scrap of paper inside it.
- Check that the total height is 4 in (10.2 cm), not counting the loop.
- Let it dry completely before you unpin.
Final Quality-Control Checklist
- Head: 12 dc spokes and 24 sc edge, 1 in (2.5 cm) across
- Ring: 24 sc, lying flat and round
- Wings: 24 sc each, attached at sc 4 and sc 21, the same size
- Skirt rows: 20, 25, 30, 18 tr + 3 spaces, then 33
- Three windows, the same size and evenly spaced
- Four blue shells, with an sc anchor at each hem corner
- Hanging loop: 30 sc, centered above the head
- Finished: 4 in (10.2 cm) wide x 4 in (10.2 cm) tall
- No visible tails on the RS
Troubleshooting
Ring or wing loops are puckered: Too many sc are crowded on one section of the chain. Slide them along the loop before you join, or work the loop on a slightly longer chain.
Skirt cups or curls up: The tension is too tight in Rows 2–3. Redo the rows with a looser hand, or go up half a hook size for the skirt only.
Skirt ruffles: Your increases may have drifted. Recount Rows 2 and 3 (25 and 30).
Windows lean sideways: You skipped a different number of stitches between pillars. Each window skips exactly 4.
Shells don’t line up at the ends: Row 5 is not 33 stitches. Check that you put 5 sc in each window space.
Wings sit at different heights: One wing is attached to the wrong ring stitch. Recount from the neck so the wings are at sc 4 and sc 21.
Care
Hand wash in cool water with mild soap, then reshape and dry flat. Re-starch after washing if you want crisp windows and wings.
Final Notes
The measurement chain keeps this angel accurate. The head is 1 in (2.5 cm) across and the ring is 1 in (2.5 cm) across. Each wing reaches 1.5 in (3.8 cm), for a 4 in (10.2 cm) wingspan. The skirt grows from 20 to 25 to 30 stitches, the window row uses all 30, and Row 5 gives 33 stitches at 4 in (10.2 cm). The blue shell border needs exactly those 33 stitches and adds 0.35 in (0.9 cm), for a finished angel 4 in (10.2 cm) tall. If you check each stage as you go, every angel you make will match the last. Make one for the tree, or a whole choir for gifts.
Happy crocheting!