

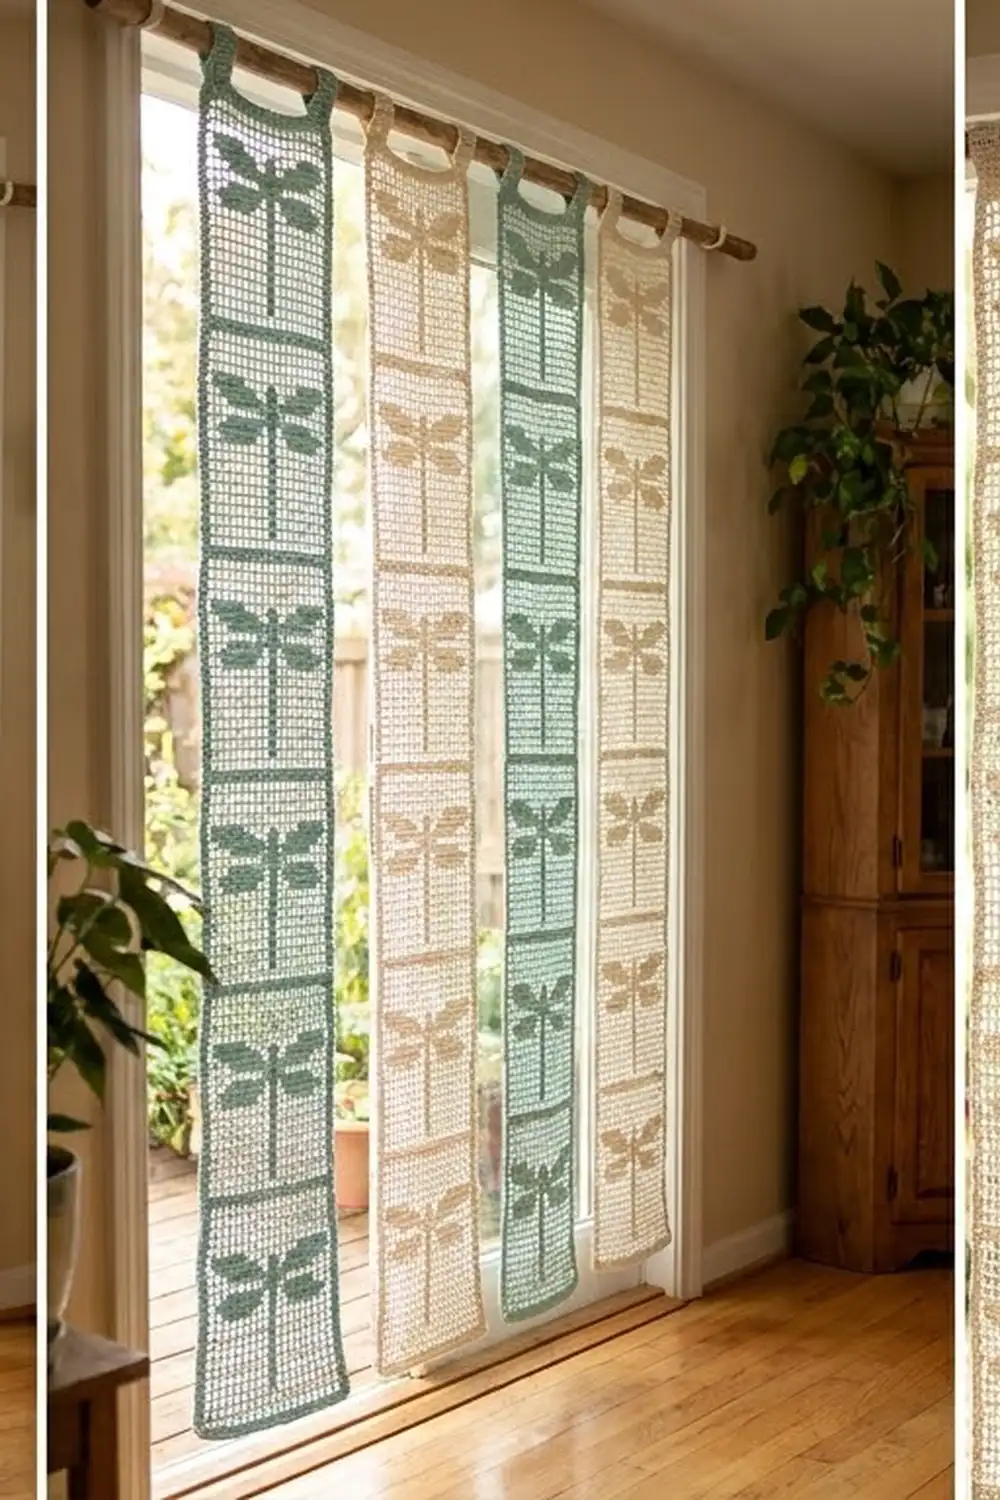
This pattern makes one long filet strip with six dragonflies. It’s light, airy and graphic: an open grid of squares with a column of solid dragonflies running down the middle. Two small loop tabs at the top let the strip slide onto a curtain rod. A single strip works as a wall hanging or door decoration, and several strips hung next to each other make a breezy, beaded-style curtain.
The sample is shown in soft teal and in cream. The dragonflies are the same color as the mesh, so the design comes from texture rather than color changes. You work with one color for the whole strip, with no carrying and no bobbins.
The pattern uses US crochet terms. The finished strip measures 7.25 in (18.4 cm) wide by 38.25 in (97.2 cm) long, not including the tabs. With the tabs, the total height is about 39.5 in (100.3 cm).
Construction is simple. You start at the bottom with a foundation chain and work 75 filet rows upward, following a written block-and-space map. Then you add two rounds of single crochet border and finish with two chain-loop tabs covered in single crochet.
Finished Size and Construction
- Finished size: 7.25 in × 38.25 in (18.4 cm × 97.2 cm), not including tabs
- Height with tabs: about 39.5 in (100.3 cm)
- Skill level: Easy–Intermediate (you need to know basic filet crochet)
- Terminology: US
- Yarn weight: DK (light #3) cotton
- Hook: 4.0 mm (G-6)
- Number of pieces: 1
- Layout: one vertical strip, 13 meshes wide by 75 rows tall
- Piece size before border: 6.5 in × 37.5 in (16.5 cm × 95.3 cm)
- Border depth: about 0.375 in (1.0 cm) per side, 2 rounds
Materials
Yarn: Use a smooth, mercerized or matte DK cotton or cotton blend at about 115 m per 50 g (126 yd per 50 g). Cotton gives crisp squares and hangs straight. Fuzzy or very stretchy yarns blur the mesh and can make a long strip stretch out over time.
- Main color (one strip): Teal or Cream, 60 g / 138 m (151 yd)
To make the strip in the second colorway, you need another 60 g / 138 m (151 yd) of that color.
Tools:
– 4.0 mm (G-6) crochet hook
– Tapestry needle
– Scissors
– Stitch markers (2–3)
– Measuring tape
– Blocking mats and rust-proof pins
– Spray bottle
The yarn quantities include about a 15% margin for your gauge swatch and tension differences.
Abbreviations (US Terms)
- ch – chain
- sl st – slip stitch
- sc – single crochet
- dc – double crochet
- sp – space
- st(s) – stitch(es)
- RS – right side
Special stitches (filet):
– Sp (space / open mesh): ch 2, skip 2 sts (or one ch-2 sp), dc in next dc.
– Bl (block / filled mesh): over a space, 2 dc in the ch-2 sp, then dc in next dc. Over a block, dc in each of the next 3 dc.
– Beginning sp: ch 5 (counts as dc + ch 2), skip 2 sts, dc in next dc.
Every mesh, whether open or filled, is 3 sts wide. Every row contains 40 sts: 14 “post” dc plus 13 three-stitch meshes sharing those posts.
Gauge and Checkpoints
Gauge: In filet pattern, 5 meshes × 5 rows = 2.5 in × 2.5 in (6.4 cm × 6.4 cm). That’s 1 mesh = 0.5 in (1.3 cm) wide and 1 row = 0.5 in (1.3 cm) tall.
Gauge swatch: Ch 20. Work Row 1 as written below, but stop after 5 sp. Work 4 more rows of all spaces. Pin it flat, spray it lightly, let it dry, then measure.
Checkpoints:
– After Row 3: about 1.5 in (3.8 cm) tall, 6.5 in (16.5 cm) wide
– After Row 12 (first dragonfly done): 6 in (15.2 cm)
– After Row 36 (third dragonfly done): 18 in (45.7 cm)
– After Row 75: 37.5 in (95.3 cm)
If your work is too big, go down to 3.5 mm. If it’s too small, go up to 4.5 mm. If the width is right but the rows are too short, pull up a slightly taller loop in each dc rather than changing hooks.
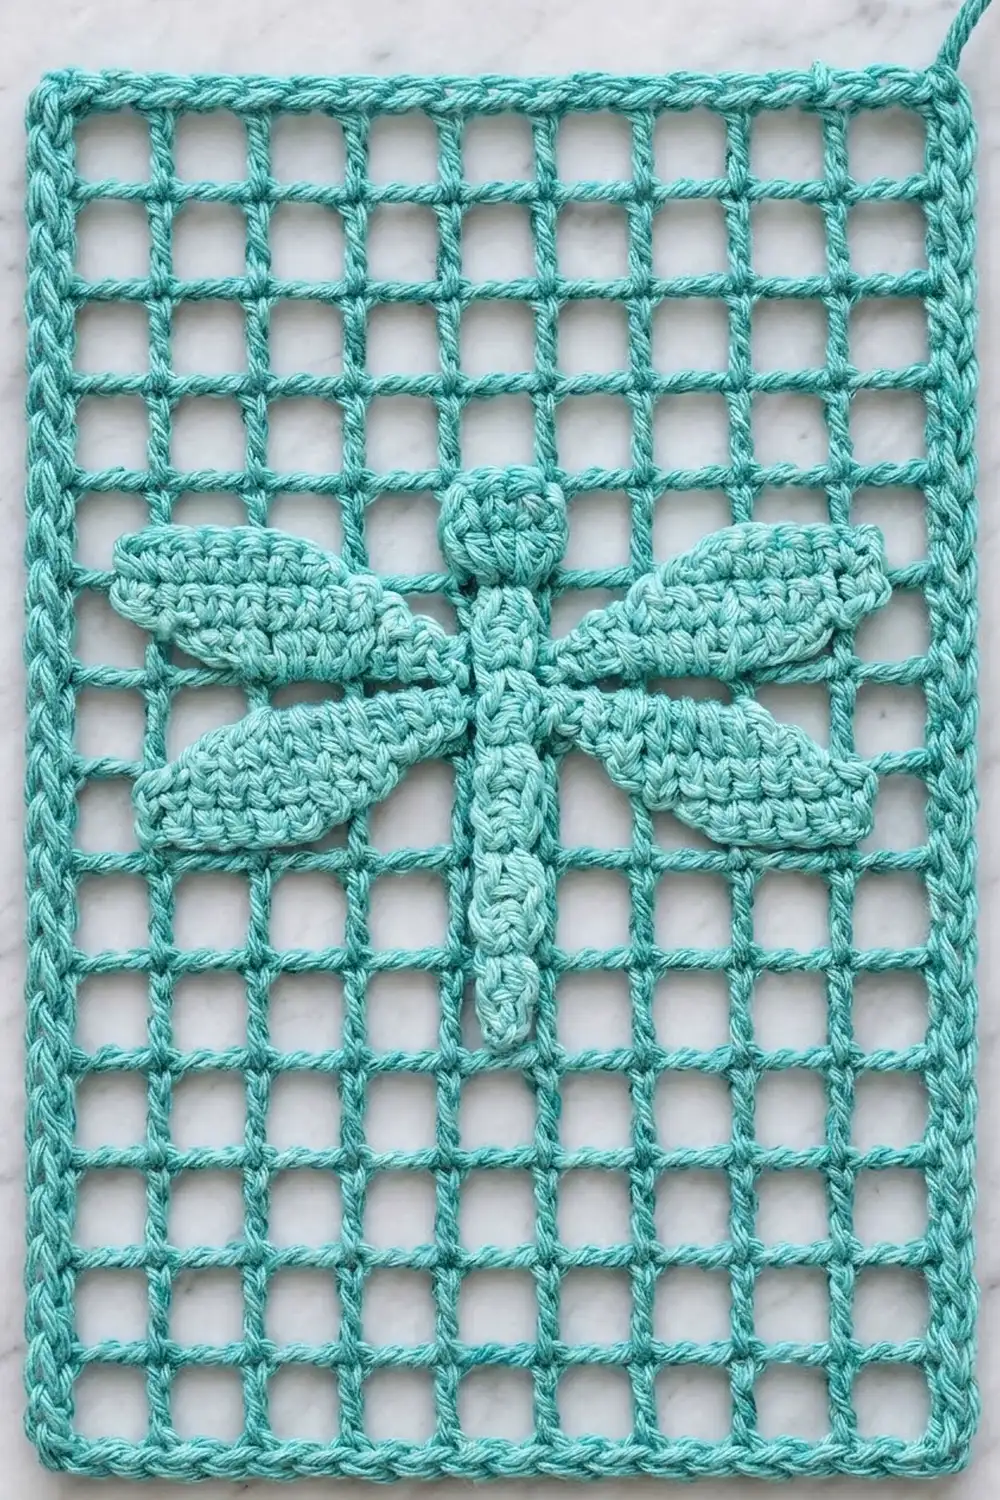
The Strip
Foundation
Ch 44.
Row 1 (RS): Dc in 8th ch from hook (the skipped chs count as dc + ch 2 + base), ch 2, skip 2 ch, dc in next ch; repeat from * to end. Turn.
13 sp (14 dc + 13 ch-2 sps = 40 sts).*
Rows 2–3: Beginning sp, sp; repeat from * to end, working the last dc in the 3rd ch of the turning ch-5. Turn.
13 sp each row.*
Width checkpoint: 6.5 in (16.5 cm).
Dragonfly Motif (9 rows)
The columns are numbered 1–13, and column 7 is the center. Each motif row is symmetrical, so you read it the same way in both directions. Every row starts and ends with a space, so you always begin with a beginning sp and finish with a dc in the 3rd ch of the turning ch.
You work from the bottom up, so the tail comes first and the head comes last. When the strip hangs from its tabs, the head points toward the rod.
Motif Row 1 (tail): 6 sp, 1 bl, 6 sp.
16 dc, 12 ch-2 sps = 40 sts.
Motif Row 2 (tail): 6 sp, 1 bl, 6 sp.
16 dc, 12 sps.
Motif Row 3 (tail): 6 sp, 1 bl, 6 sp.
16 dc, 12 sps.
Motif Row 4 (lower wings, narrow): 3 sp, 7 bl, 3 sp. These are columns 4–10.
28 dc, 6 sps = 40 sts.
Motif Row 5 (lower wings, full): 2 sp, 9 bl, 2 sp. These are columns 3–11.
32 dc, 4 sps = 40 sts.
Motif Row 6 (waist): 6 sp, 1 bl, 6 sp.
16 dc, 12 sps.
This one-block row separates the lower wings from the upper wings, so the two wing pairs read clearly.
Motif Row 7 (upper wings, inner): 2 sp, 9 bl, 2 sp.
32 dc, 4 sps.
Motif Row 8 (upper wings, full span): 1 sp, 11 bl, 1 sp. These are columns 2–12.
36 dc, 2 sps = 40 sts.
Motif Row 9 (head): 6 sp, 1 bl, 6 sp.
16 dc, 12 sps.
Check: Every motif row has 40 sts. For any row, dc = 14 + (2 × blocks) and ch-2 sps = spaces. Blocks plus spaces always equal 13.
Spacer Rows
Spacer (3 rows): 13 sp in each row.
Row Map
| Rows | Content |
|---|---|
| 1–3 | Open mesh |
| 4–12 | Dragonfly 1 |
| 13–15 | Spacer |
| 16–24 | Dragonfly 2 |
| 25–27 | Spacer |
| 28–36 | Dragonfly 3 |
| 37–39 | Spacer |
| 40–48 | Dragonfly 4 |
| 49–51 | Spacer |
| 52–60 | Dragonfly 5 |
| 61–63 | Spacer |
| 64–72 | Dragonfly 6 |
| 73–75 | Open mesh |
Row total: 3 + (6 × 9) + (5 × 3) + 3 = 75 rows. Each dragonfly starts 12 rows after the one before it. Put a marker on the first row of each motif.
Don’t fasten off after Row 75. Continue straight into the border.
Size checkpoint before border: 6.5 in × 37.5 in (16.5 cm × 95.3 cm).
Border
Border gauge: 6 sc = 1 in (2.5 cm), or 3 sc per 0.5 in (1.3 cm) mesh or row.
In this border, the per-side counts do not include the corners. Each corner is a separate ch-2 space.
Round 1: Ch 1. Do not turn. Work along the top edge of Row 75: sc in the same st, sc in each dc and 2 sc in each ch-2 sp across. That’s 40 sc along the top.
Ch 2 for the corner. Rotate the strip and work down the side: 3 sc in each row end. That’s 75 rows × 3 = 225 sc.
Ch 2 for the corner. Work across the foundation chain: sc in the base of each dc and 2 sc in each ch-2 sp. That’s 40 sc along the bottom.
Ch 2 for the corner. Work up the second side: 3 sc in each row end, for another 225 sc. Ch 2 and join with a sl st to the first sc.
Top 40, side 225, bottom 40, side 225 = 530 sc + 4 corner ch-2 sps.
Round 2: Ch 1. Sc in each sc around, and work (sc, ch 2, sc) in each corner ch-2 sp. Join with a sl st to the first sc.
Each side gains 2 sc: top 42, side 227, bottom 42, side 227 = 538 sc + 4 corner ch-2 sps.
Fasten off.
Why the math works: Each mesh is 3 sts wide and 0.5 in (1.3 cm) across. On the top and bottom edges, 1 sc per dc plus 2 sc per space gives 3 sc per mesh, which is 6 sc per inch, the same as the border gauge. Each dc row is also 0.5 in (1.3 cm) tall, so 3 sc per row end keeps the same 6 sc per inch on the long sides. Because the gauge is the same on all four edges, the edges neither flare nor pull in. The ch-2 corners give the 90° turn some ease without adding bulk.
Hanging Tabs (make 2)
Hold the strip RS facing with the top edge up. Number the 42 top-edge sc of Round 2 from 1 to 42, starting at the right-hand corner.
Tab 1:
1. Join yarn with a sl st in sc 4.
2. Ch 14 and sl st in sc 6. Sc 5 stays underneath the loop.
3. Turn and work 20 sc into the ch-14 loop.
4. Sl st in sc 4 and fasten off.
Tab 2: Make it the same way using sc 37 and sc 39. These mirror sc 6 and sc 4.
Each loop stands about 1.25 in (3.2 cm) tall and fits rods up to 0.75 in (1.9 cm) thick. For a thicker rod, add 2 ch for every extra 0.25 in (0.6 cm) of rod diameter, and add 3 sc to the covering round for every 2 ch you add.
Weave in all ends along the border, not through the open mesh.
Final Blocking
- Pin the strip RS up on blocking mats, keeping it straight with a long ruler or a taut string.
- Pin the corners first to exactly 7.25 in (18.4 cm) wide.
- Pin the long sides every 3 in (7.6 cm), checking that the length is 38.25 in (97.2 cm).
- Square the mesh as you go. Line each column up with the ruler and tug any slanted squares upright.
- Spray with water until it’s damp but not dripping. Pat the dragonflies flat with your palm.
- Let it dry completely, about 12–24 hours.
- Unpin and hang the strip from its tabs for a day so it settles.
Final Quality-Control Checklist
- [ ] Every row has 40 sts and 13 meshes
- [ ] 75 rows total, and the bordered strip is 38.25 in (97.2 cm) long
- [ ] Six dragonflies, centered on column 7, with 3 open rows between motifs
- [ ] The waist row clearly separates the upper and lower wings
- [ ] Head points toward the tabs
- [ ] Border Round 2 has 42 / 227 / 42 / 227 sc
- [ ] Corners are square and the edges lie flat
- [ ] Both tabs are the same height and placed symmetrically
- [ ] Ends are woven into the border
Troubleshooting
The mesh squares look like tall rectangles. Your dc are too tall for your chains. Make your chains a little looser, or pull up a shorter loop on each dc.
The strip leans to one side. Make sure you work the final dc of every row into the 3rd ch of the turning ch-5, and that the beginning ch-5 skips exactly 2 sts.
A dragonfly is off-center. Count the spaces on both sides. The two sides must match, for example 6 and 6 or 2 and 2.
The long sides ripple. Your sc are tighter than the mesh. Work Round 1 with a hook one size larger, keeping 3 sc per row end.
The long sides cup inward. Work Round 1 with a hook one size smaller.
The tabs are floppy. Pack the covering sc closer together, or add 2 more sc to the covering round.
Care
Hand wash in cool water with mild detergent. Roll the strip in a towel to remove water, then dry it flat and pinned to shape. Don’t hang it while wet, because the weight will stretch the mesh.
Final Notes
The whole design depends on one measurement: a 0.5 in (1.3 cm) mesh. Thirteen meshes give a width of 6.5 in (16.5 cm), and 75 rows give a length of 37.5 in (95.3 cm). Two border rounds bring the strip to 7.25 in × 38.25 in (18.4 cm × 97.2 cm), and the tabs bring the hanging height to about 39.5 in (100.3 cm). If your gauge swatch matches, every later checkpoint will too. Make one strip for a single hanging, or make several in alternating teal and cream and slide them onto a rod side by side.
Happy crocheting!