
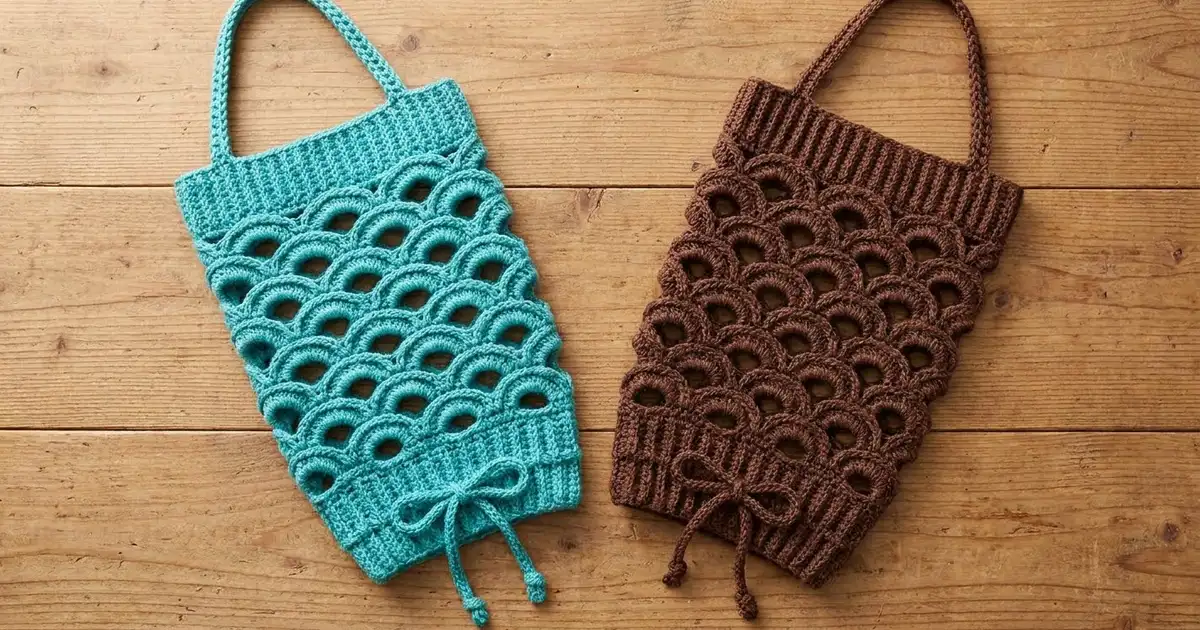
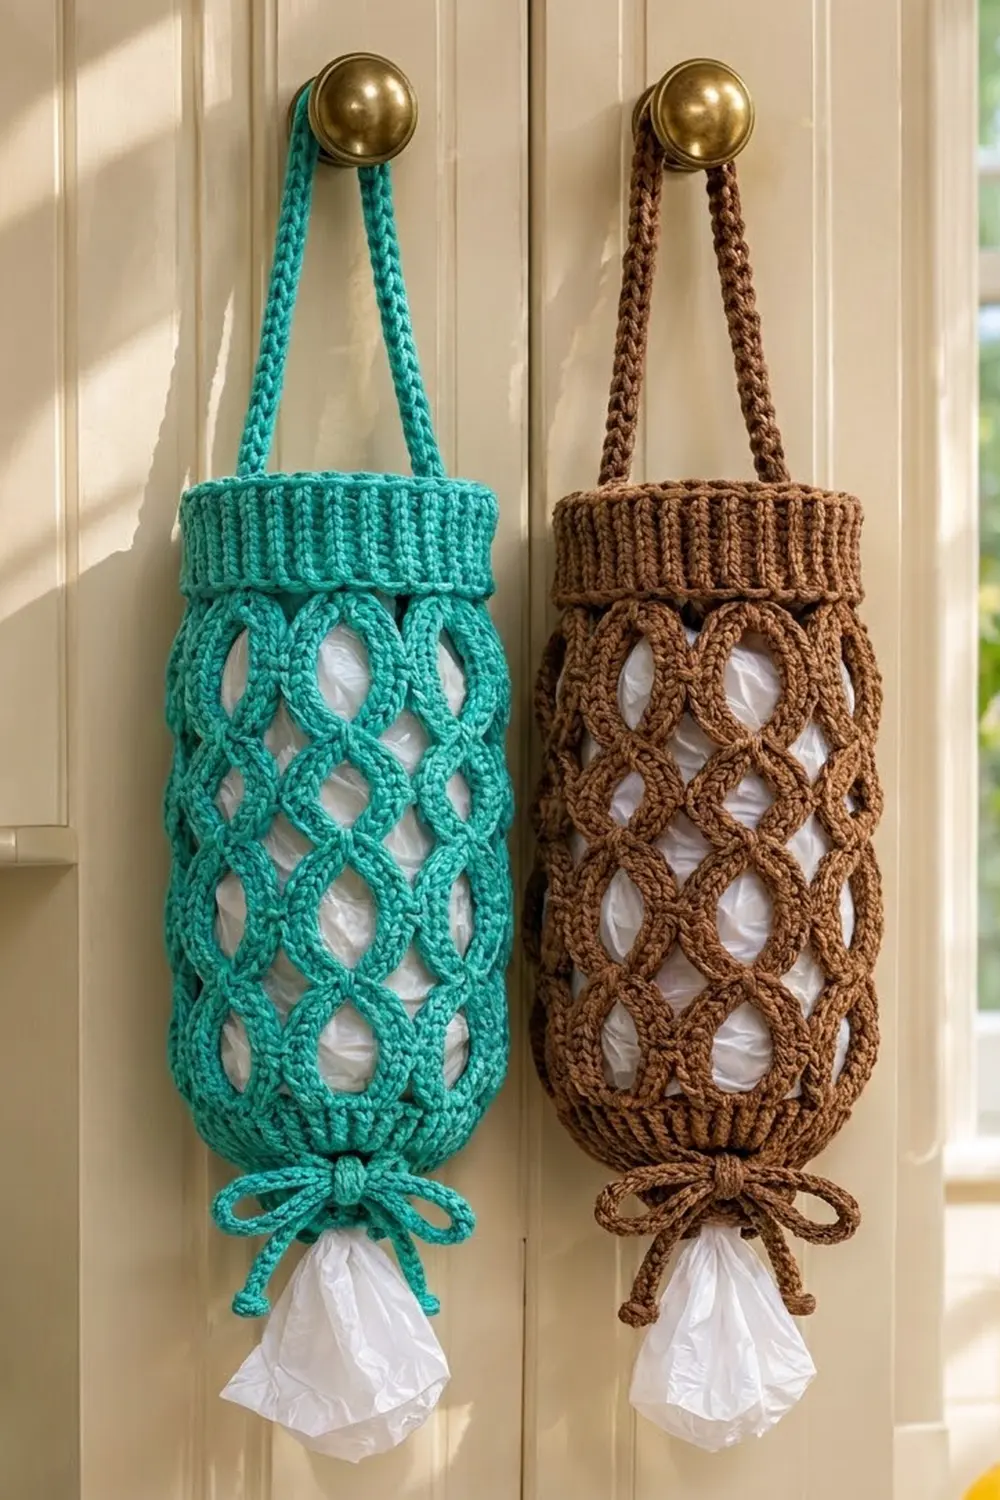
This bag holder keeps grocery bags tidy behind a cabinet door or in the pantry. The body is a lattice of rounded, eye-shaped openings. Each opening is outlined by a thick, covered arch, so the mesh looks like a column of linked rings. Bags show through the lattice, and you pull them out from the cinched bottom.
The sample is worked in a bright turquoise-teal, and the same pattern looks just as good in chocolate brown. Each version uses one color only. Ribbed bands at the top and bottom keep the shape crisp, and the knotted bow at the bottom adds a finished look.
The pattern uses US crochet terms. The finished holder measures 5 in (12.7 cm) wide laid flat, 10 in (25.4 cm) around, and 18.5 in (47.0 cm) tall, not counting the strap.
You’ll work bottom-up in joined rounds. Start with a ribbed band, build the arch lattice, decrease into a ribbed top cuff, then add a slip-stitch strap and a drawstring.
Finished Size and Construction
- Finished size: 5 in (12.7 cm) wide flat, 10 in (25.4 cm) circumference, 18.5 in (47.0 cm) tall
- Skill level: Easy-Intermediate
- Terminology: US crochet terms
- Yarn weight: Worsted (#4), cotton or cotton blend
- Hook: US H-8 (5.0 mm)
- Number of pieces: 1 body (one piece), plus 1 strap and 1 drawstring
- Layout: Vertical tube, open at both ends
- Piece size: Body before cuff is 15.5 in (39.4 cm) tall
- Size before border (top cuff): 15.5 in (39.4 cm) tall, 10 in (25.4 cm) around
- Border depth: Top cuff is 3 in (7.6 cm) deep; bottom band is 1.5 in (3.8 cm) deep
Materials
Choose a smooth worsted-weight cotton or cotton blend. Cotton holds the arches firmly and doesn’t stretch out under the weight of bags. Avoid fuzzy or very soft acrylic, because it blurs the lattice and sags.
- Turquoise-teal (or chocolate brown for the alternate version): 140 g / 230 m (about 252 yd)
Quantities include a margin of roughly 15% for your gauge swatch and any tension differences.
Tools:
- US H-8 (5.0 mm) crochet hook
- Tapestry needle
- 2 stitch markers
- Scissors
- Measuring tape
- Spray bottle and blocking pins
- A cardboard tube or rolled towel about 10 in (25.4 cm) around, for blocking
Abbreviations (US Terms)
- ch – chain
- sl st – slip stitch
- sc – single crochet
- dc – double crochet
- sp – space
- st(s) – stitch(es)
- rnd(s) – round(s)
- FPdc – front post double crochet: yarn over, insert hook from front to back to front around the post of the stitch, then complete as a dc.
- BPdc – back post double crochet: yarn over, insert hook from back to front to back around the post of the stitch, then complete as a dc.
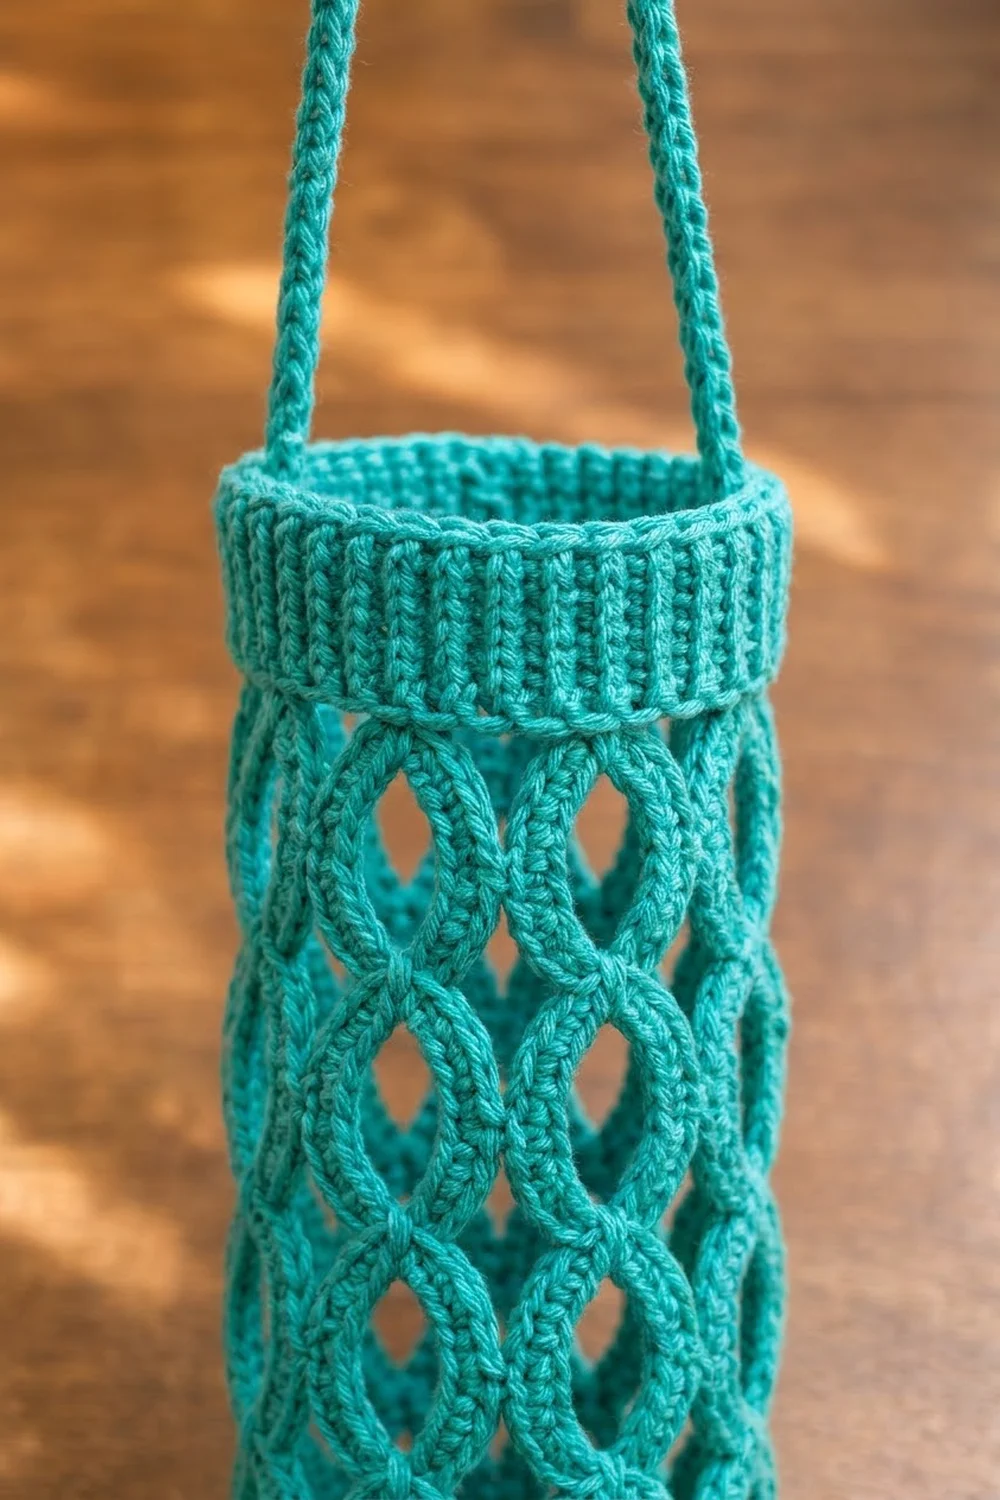
Special stitch – Covered Arch: Work 9 sc into one ch-7 loop, packing them tightly so the loop is completely covered. This makes the thick, rounded outline of each opening.
Gauge and Checkpoints
Ribbing gauge: 16 sts and 4 rnds of FPdc/BPdc ribbing = 4 in (10.2 cm) wide and 2 in (5.1 cm) tall.
Lattice gauge: One Covered Arch (9 sc) spans 1.25 in (3.2 cm) across. One pair of rounds (arch round plus cover round) adds 1.5 in (3.8 cm) of height when relaxed.
Test first: Work Rnds 1–7 and then stop to measure. This is your gauge swatch, and it becomes the bottom of the holder if it measures correctly.
Checkpoints:
- After Rnd 3: 10 in (25.4 cm) around, 5 in (12.7 cm) flat, 1.5 in (3.8 cm) tall
- After Rnd 7: 4.5 in (11.4 cm) tall
- After Rnd 21: 15 in (38.1 cm) tall
- After Rnd 22: 15.5 in (39.4 cm) tall
- After Rnd 28: 18.5 in (47.0 cm) tall
If too big: If the band measures more than 10.5 in (26.7 cm) around, go down to a US G-6 (4.0 mm) hook and restart.
If too small: If the band measures less than 9.5 in (24.1 cm) around, go up to a US I-9 (5.5 mm) hook.
Height can vary a little, because the lattice stretches lengthwise once it is filled with bags. Width is the measurement that matters most.
Bottom Band
Foundation: Ch 40 and join with a sl st to the first ch to form a ring, taking care not to twist the chain.
Rnd 1: Ch 2 (does not count as a st). Dc in each ch around and join with a sl st to the first dc. (40 dc)
Rnd 2: Ch 2 (does not count). FPdc around the next st, BPdc around the next st; repeat from * around. Join with a sl st to the first FPdc. (40 sts: 20 FPdc, 20 BPdc)
Rnd 3: Repeat Rnd 2. (40 sts)
The FPdc columns stack on top of each other, which creates the short vertical ribs. Check your first gauge measurement here.
Lattice Body
Each opening is formed by a covered arch below and a covered arch above, staggered by half a repeat. There are 8 repeats around, since 40 sts ÷ 5 sts per repeat = 8.
Rnd 4 (first arch round): Ch 1, sc in the first st, ch 7, skip the next 4 sts. Sc in the next st, ch 7, skip the next 4 sts; repeat from * 6 more times. Join with a sl st to the first sc. (8 sc, 8 ch-7 loops)
The sc land on sts 1, 6, 11, 16, 21, 26, 31, and 36.
Rnd 5 (cover round): Sl st into the first ch-7 loop and ch 1. Work a Covered Arch (9 sc) in the same loop and in each ch-7 loop around. Join with a sl st to the first sc. (72 sc, 8 groups of 9)
Rnd 6 (offset arch round): Sl st in each of the next 4 sc, which puts you in the 5th (center) sc of the group. Ch 1, sc in the same st, ch 7. Sc in the 5th sc of the next group, ch 7; repeat from * 6 more times. Join with a sl st to the first sc. (8 sc, 8 ch-7 loops)
Each new arch is anchored to the peak of an arch below. Each new loop spans the dip between two lower arches, which closes off the eye-shaped opening.
Rnd 7 (cover round): Repeat Rnd 5. (72 sc)
Rnds 8–21: Repeat Rnds 6 and 7 seven more times, for 9 arch/cover pairs in total (Rnds 4–21). Each odd-numbered round ends with 72 sc, and each even-numbered round ends with 8 sc and 8 ch-7 loops.
Rnd 22 (conversion round): Sl st in each of the next 4 sc to reach the center sc. Ch 1, sc in the same st, ch 4. Sc in the 5th sc of the next group, ch 4; repeat from * 6 more times. Join with a sl st to the first sc. (8 sc, 8 ch-4 sps)
The shorter chains pull the lattice in to the width of the ribbing. The body should now measure 15.5 in (39.4 cm) tall.
Border: Top Cuff
The top cuff works as the border. It uses the same ribbing gauge as the bottom band, 16 sts = 4 in (10.2 cm), so the top and bottom openings are both 10 in (25.4 cm) around.
Rnd 23 (conversion round): Ch 2 (does not count). Dc in the next sc, 4 dc in the next ch-4 sp; repeat from * around. Join with a sl st to the first dc. (8 dc worked 1-per-sc + 32 dc worked into the ch-4 sps = 40 dc)
Rnds 24–28: Ch 2 (does not count). FPdc around the next st, BPdc around the next st; repeat from * around. Join. (40 sts each rnd: 20 FPdc, 20 BPdc)
Fasten off and weave in the end.
Count per side: When the tube is laid flat, each side shows 20 sts, which is 10 rib pairs. The fold lines fall between st 40 and st 1 and between st 20 and st 21. There are no corner stitches.
Why the math works: The bottom band has 40 sts, and 40 = 8 repeats × 5 sts. The lattice keeps 8 repeats all the way up, and Rnd 22 keeps one sc per repeat. Rnd 23 rebuilds 5 sts per repeat (1 + 4), so 8 × 5 = 40 again. The cuff matches the bottom band exactly, and the holder hangs straight instead of flaring.
Strap
Foundation: Ch 97.
Row 1: Sl st in the back bump of the 2nd ch from the hook and in the back bump of each ch across. (96 sl sts)
Fasten off and leave an 8 in (20.3 cm) tail at each end. The strap measures about 24 in (61.0 cm). Working into the back bumps gives it the firm, braided-chain look of the sample.
Attach: Flatten the holder so st 1 and st 21 of the cuff sit at the two side folds. On the inside of the cuff, overlap 1 in (2.5 cm) of one strap end at st 1 and whipstitch it securely to Rnds 25–28. Attach the other end at st 21 the same way, making sure the strap isn’t twisted. The hanging loop drops about 11 in (27.9 cm) above the cuff.
Drawstring
Foundation: Ch 81.
Row 1: Sl st in the back bump of the 2nd ch from the hook and in each ch across. (80 sl sts)
Fasten off. The drawstring measures about 20 in (50.8 cm).
Tie a tight overhand knot about 0.5 in (1.3 cm) from each end. Double it if you want the small round knot ends shown in the sample, then trim the tails.
Thread: Starting at the center front of the bottom band, weave the drawstring in and out around the posts of Rnd 1, going over 2 sts and under 2 sts, all the way around. Both ends come out at the front. Pull the drawstring until the bottom opening is about 2 in (5.1 cm) across, then tie a bow.
Final Blocking
- Untie the drawstring and remove the strap from any hook.
- Slide the holder over a cardboard tube or a rolled towel that measures 10 in (25.4 cm) around.
- Spray it evenly with water until damp, not soaking.
- Use your fingers to round each opening into a smooth eye shape, and line the arches up in straight vertical columns.
- Gently stretch the holder lengthwise to 18.5 in (47.0 cm) and pin the cuff and band edges in place.
- Straighten the ribs on the cuff and band so they run vertically.
- Let it dry completely. Then re-thread and tie the drawstring.
Final Quality-Control Checklist
- Circumference is 10 in (25.4 cm) at the bottom band and at the top cuff.
- Total height is 18.5 in (47.0 cm).
- There are 8 openings around in every lattice round, staggered evenly.
- Every Covered Arch has exactly 9 sc and no chain shows through.
- The cuff and band both have 40 sts, with ribs running straight up.
- The strap is attached at opposite side folds and isn’t twisted.
- The drawstring cinches the bottom evenly and the knots are secure.
- All ends are woven in on the inside.
Troubleshooting
The lattice spirals or leans: You may be starting each round in the wrong place. Always sl st over exactly 4 sc so each new anchor sits on the 5th (center) sc.
The arches look thin or gappy: Pack the 9 sc tightly toward the start of each loop. Don’t work fewer sc.
The arches ruffle: Your chains are too loose. Chain more firmly, or work 6 ch instead of 7 in every arch round (Rnds 4, 6, 8, and so on), keeping 9 sc per cover.
The cuff flares: Recount Rnd 23. You should have 40 sts. If the count is right, work Rnds 24–28 with a hook one size smaller.
Bags fall out of the bottom: Pull the drawstring tighter so the opening is about 1.5 in (3.8 cm) across.
The strap stretches: Cotton will relax over time. Shorten the strap by re-sewing a bigger overlap, or work a second row of sl sts along the strap.
Care
Hand wash or machine wash on a gentle cycle in cool water, then reshape and dry flat. Remove the drawstring before washing so it doesn’t tangle.
Final Notes
The measurement chain is simple to follow. You start with 40 sts at 16 sts per 4 in (10.2 cm), which gives a 10 in (25.4 cm) circumference. That makes 8 lattice repeats of 1.25 in (3.2 cm) each. Nine arch pairs at 1.5 in (3.8 cm) each bring the holder to 15 in (38.1 cm). The conversion round adds 0.5 in (1.3 cm), and the cuff adds 3 in (7.6 cm), for 18.5 in (47.0 cm) in total. If you check your width after the bottom band and your height every few pairs, the holder will come out the right size.
Happy crocheting!