
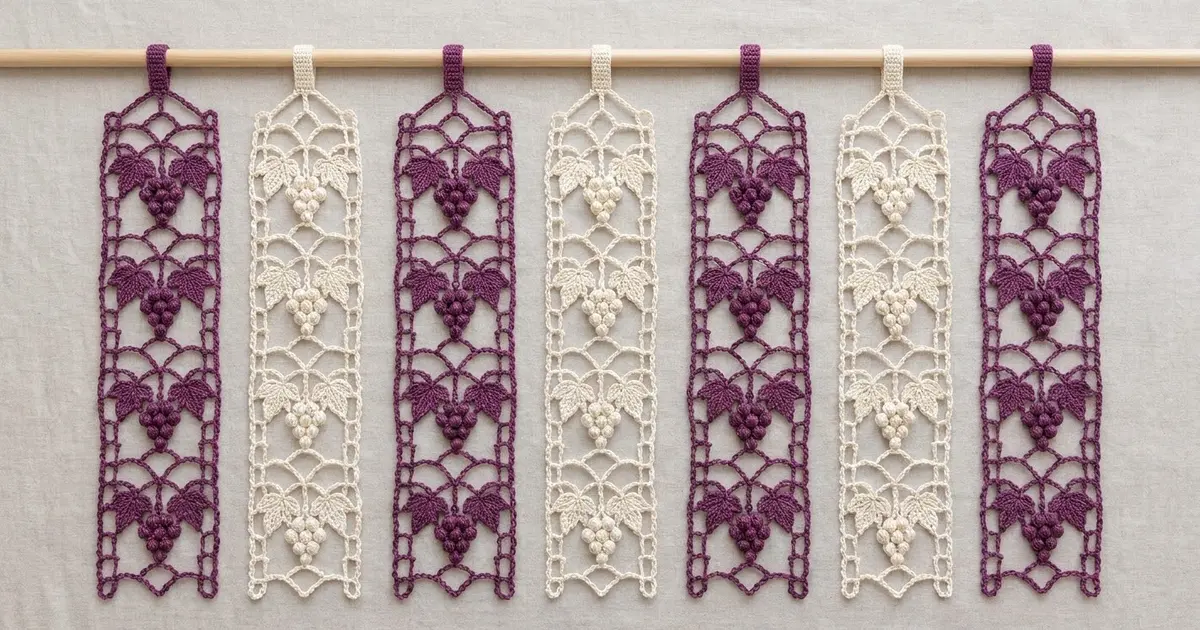
This curtain turns a grapevine into seven long lace ribbons. Each strip has open ladder rails, chain arches, and a repeating grape motif. In each motif, a cluster of puff-stitch grapes hangs from a short stem between two solid pointed leaves.
The sample alternates rich plum and soft cream: four plum strips and three cream. The strips hang separately, so they move when someone walks through and you can push them aside by hand. The look is part vintage filet lace, part farmhouse vineyard.
The pattern uses US crochet terms. Each finished strip measures 5½ in (14.0 cm) wide by 72½ in (184.2 cm) long, plus a 2 in (5.1 cm) hanging tab. Seven strips spaced on a rod cover about 43 in (109.2 cm).
Each strip is worked flat in rows from the bottom up, using a 12-row motif repeat 15 times. You then work two rounds of border around the strip and add a single crochet tab at the top. Blocking finishes it.
Finished Size and Construction
- Finished strip size: 5½ × 72½ in (14.0 × 184.2 cm), excluding the tab
- Skill level: Intermediate
- Terminology: US
- Yarn weight: DK (#3) cotton
- Hook: 3.5 mm (US E-4)
- Number of pieces: 7 separate strips, not joined to each other
- Layout: 7 strips in a single row on a rod, alternating plum and cream
- Strip size before border: 5 × 72 in (12.7 × 182.9 cm)
- Border depth: ¼ in (0.6 cm) on each side
- Motif repeat: 12 rows = 4.8 in (12.2 cm)
Materials
Mercerized DK cotton works best here. It shows the stitch definition, the puffs hold their shape, and it holds its shape when hung. The amounts below assume about 110 m per 50 g.
- Color A, plum: 900 g (1,980 m), for 4 strips
- Color B, cream: 700 g (1,540 m), for 3 strips
These quantities include a margin of about 10% for gauge differences and swatching.
Tools:
– 3.5 mm (US E-4) crochet hook
– Tapestry needle
– Stitch markers
– Rust-proof pins and blocking mats, or a long padded surface
– Measuring tape
– Curtain rod up to 1¼ in (3.2 cm) in diameter
Abbreviations (US Terms)
- ch – chain
- sl st – slip stitch
- sc – single crochet
- dc – double crochet
- sk – skip
- st(s) – stitch(es)
- tch – turning chain
- RS / WS – right side / wrong side
- sp – space
Puff: (Yarn over, insert hook in the indicated st or ch, yarn over, pull up a loop to about ½ in [1.3 cm]) 4 times (9 loops on hook). Yarn over, pull through all 9 loops, then ch 1 to close. The closing ch does not count. Each puff counts as 1 st.
Picot: Ch 3, sl st in the 3rd ch from the hook.
Counting rule: Every row has 25 positions. Each dc, sc, puff, and ch counts as 1 position, but picots do not. “Sk 3” means skip the next 3 positions of the row below. Work a dc “in next” into whatever sits in that position, whether it’s a stitch or a single chain.
Rail start: Ch 3 (counts as dc), ch 3, sk 3, dc in next st.
Rail end: Ch 3, sk 3, dc in top of tch.
The rails take 4 positions on each side. The 17 center positions between them are called c1–c17. The rail-start dc is c1 and the last dc before the rail end is c17.
Gauge and Checkpoints
Gauge: 20 dc and 10 rows = 4 in (10.2 cm). Single crochet in the border and tab: 5 sts and 8 rows = 1 in (2.5 cm).
Test one strip first by working Rows 1–12 (one full repeat), then measure gently without stretching.
- After 1 repeat (12 rows): 5 in (12.7 cm) wide × 4.8 in (12.2 cm) tall
- After 5 repeats (60 rows): 24 in (61.0 cm) tall
- After 10 repeats (120 rows): 48 in (121.9 cm) tall
- After 15 repeats (180 rows): 72 in (182.9 cm) tall
- After the border: 5½ × 72½ in (14.0 × 184.2 cm)
If the first repeat is wider than 5 in (12.7 cm), go down a hook size. If it’s narrower, go up one. If the width is right but the repeat is too tall, check whether your bar chains are loose. Keep each ch-7 about the same width as 7 dc.
Strip Pattern
Make 7 strips: 4 in Color A and 3 in Color B. All rows have 25 positions.
Foundation and Repeat 1
Row 1 (RS, mesh): Ch 27. Dc in the 7th ch from the hook. The 6 skipped chains count as the beginning dc and the ch-3 rail space, and this dc is c1. (Ch 1, sk 1 ch, dc in next ch) 8 times, ending at c17. Ch 3, sk 3 ch, dc in the last ch. Turn. (25 positions: 11 dc, 14 ch)
Row 2 (arches): Rail start. (Ch 3, sk 3, sc in next, ch 3, sk 3, dc in next) twice. Rail end. Turn. (25 positions)
The sc stitches fall at c5 and c13, and the dc at c9 and c17, which makes the lower V-lattice.
Row 3 (bar): Rail start. (Ch 7, sk 7, dc in next) twice. Rail end. Turn. (25 positions: dc at c1, c9, c17)
Row 4 (grape tip, leaf tips): Rail start. Ch 2, sk 2, dc in next ch (c4, the leaf tip). Ch 4, sk 4, puff in next dc (c9). Ch 4, sk 4, dc in next ch (c14, the leaf tip). Ch 2, sk 2, dc in next dc (c17). Rail end. Turn. (25 positions; 1 puff)
Row 5 (leaves widen): Rail start. Ch 1, sk 1, dc in next 3 (c3–c5). Ch 2, sk 2, puff in next (c8), dc in top of puff (c9), puff in next (c10). Ch 2, sk 2, dc in next 3 (c13–c15). Ch 1, sk 1, dc in next (c17). Rail end. Turn. (25 positions; 2 puffs)
Row 6 (widest row): Rail start. Dc in next 5 (c2–c6), puff in next (c7), dc in next (c8), puff in next (c9), dc in next (c10), puff in next (c11), dc in next 5 (c12–c16), dc in next (c17). Rail end. Turn. (25 positions; 3 puffs)
Row 7 (leaves narrow): Rail start. Ch 1, sk 1, dc in next 3 (c3–c5). Ch 2, sk 2, puff in next (c8), dc in next (c9), puff in next (c10). Ch 2, sk 2, dc in next 3 (c13–c15). Ch 1, sk 1, dc in next (c17). Rail end. Turn. (25 positions; 2 puffs)
Row 8 (leaf points, stem): Rail start. Ch 2, sk 2, dc in next (c4), picot. Ch 4, sk 4, dc in next (c9, the stem). Ch 4, sk 4, dc in next (c14), picot. Ch 2, sk 2, dc in next (c17). Rail end. Turn. (25 positions; 2 picots not counted)
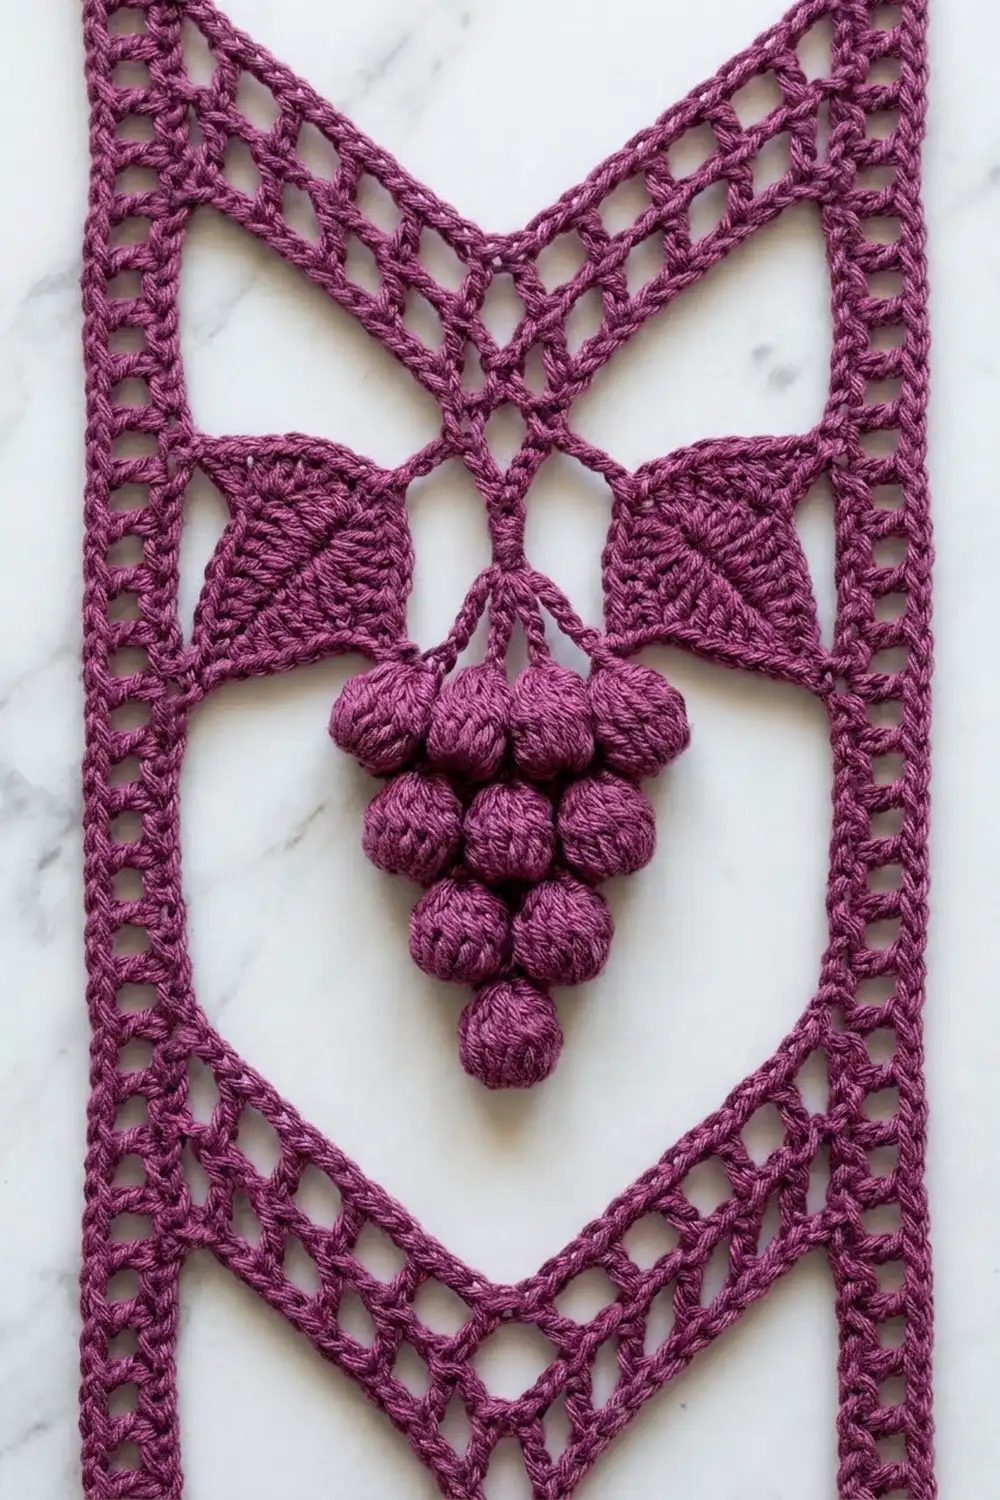
Each leaf now forms a solid diamond, 1-3-5-3-1 dc wide, with a picot at the upper tip. The grapes form a 1-2-3-2 cluster of 8 puffs, point down, with the stem dc rising from the center.
Rows 9–10 (stem bars): Work as Row 3. (25 positions each)
Row 11 (upper arches): Work as Row 2. (25 positions)
Row 12 (bar): Work as Row 3. (25 positions)
Checkpoint: The strip measures 5 in (12.7 cm) × 4.8 in (12.2 cm), with 8 puffs and 2 leaves.
Repeats 2–15
Row 13 (mesh): Rail start. (Ch 1, sk 1, dc in next) 8 times. Rail end. Turn. (25 positions)
Rows 14–24: Work as Rows 2–12.
Continue in this way, working Rows 13–24 as the repeat, until you’ve finished 15 repeats (Row 180). Don’t turn, and don’t fasten off. Go straight on to the border once all the strips are made.
Per-strip totals: 180 rows, 120 puffs, 30 leaves.
Make All Pieces
- Color A (plum): 4 strips
- Color B (cream): 3 strips
Layout, left to right, as seen from the room:
| A | B | A | B | A | B | A |
Check that every strip has exactly 15 repeats, so the grape clusters line up across the curtain when hung.
Joining: Hanging Tabs and Rod Layout
The strips are never sewn to each other. Each strip joins only to the rod, through one centered tab. The tabs are worked into Round 2 of the border, so finish the Border section below on each strip, then come back here.
Tab: With the RS facing and the top edge up, count the 25 sc of Round 2 between the top corner groups. Skip the first 7, then join yarn in the 8th sc.
Tab Row 1: Ch 1, sc in the same st and in each of the next 10 sts. Turn. (11 sc)
Tab Rows 2–32: Ch 1, sc in each st across. Turn. (11 sc)
Fasten off, leaving a 12 in (30.5 cm) tail. The tab measures 2.2 in (5.6 cm) wide by 4 in (10.2 cm) long, centered over the strip with 7 border sts free on each side.
Stitch-to-stitch closure: Fold the tab to the WS. Line up each of its 11 last-row sts with the matching Row 180 position on the WS, positions 8–18 of the 25, just under the border. Whipstitch one tab st to one strip position, 11 to 11. Don’t skip any or double up.
Tension: Sew firmly enough that the seam doesn’t gap, but loosely enough that the top edge stays flat and doesn’t pucker. The folded loop stands about 2 in (5.1 cm) tall, with a 4 in (10.2 cm) circumference.
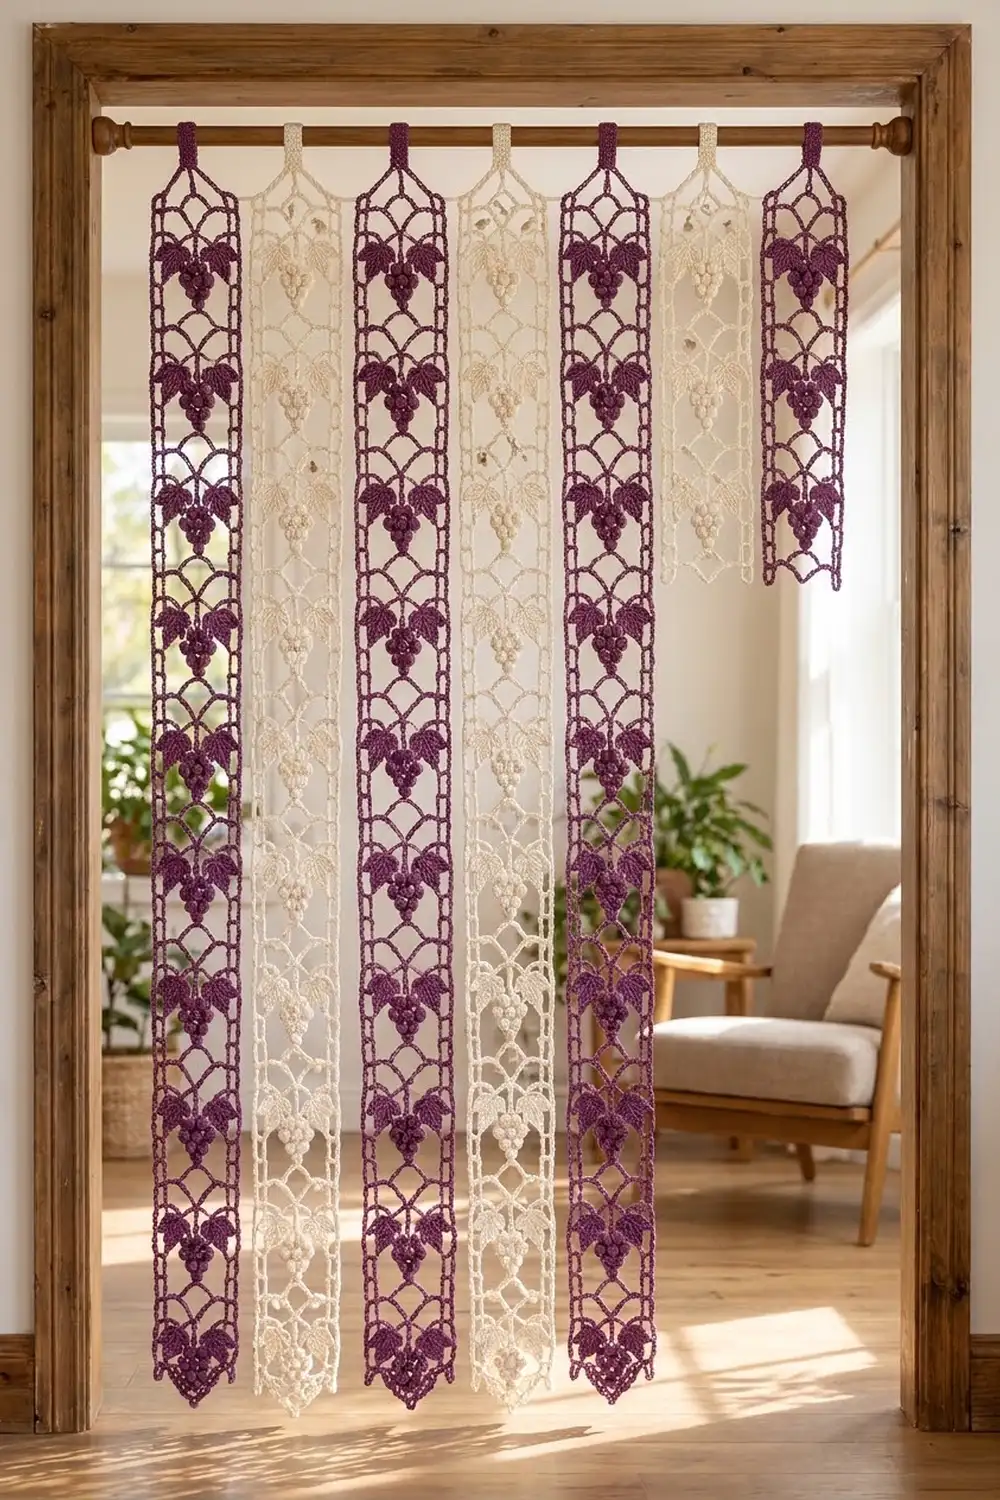
Size checkpoint: Slide all 7 strips onto the rod in A-B-A-B-A-B-A order and leave a ¾ in (1.9 cm) gap between them. That gives 7 × 5½ in = 38½ in (97.8 cm) of lace plus 6 × ¾ in = 4½ in (11.4 cm) of gaps, or 43 in (109.2 cm) in total. The total drop from the rod top is 74½ in (189.2 cm).
Border
Border gauge: 5 sc = 1 in (2.5 cm) along every edge. On the long sides, that works out to 2 sc per dc row (0.4 in / 1.0 cm).
Round 1: With the RS facing, ch 1. Work 3 sc in the first st of Row 180 (corner), then 1 sc in each of the next 23 positions (stitches and chains). Work 3 sc in the last st (corner).
Down the long side, work 2 sc in each of the 180 row ends (360 sc). Work 3 sc in the first foundation ch (corner), then 1 sc in each of the next 23 foundation positions, and 3 sc in the last ch (corner). Up the second long side, work 2 sc in each of the 180 row ends (360 sc). Join with a sl st to the first sc.
Count: 23 + 23 + 360 + 360 between corners, plus 4 × 3 corner sc = 778 sc.
Round 2: Ch 1. Sc in each sc around, working 3 sc in the center sc of each corner group. Join.
Count: 778 (1 in each existing st) + 8 (2 extra at each of 4 corners) = 786 sc.
Each side between the corner-center groups now has 25 sc across the top and bottom and 362 sc along each long side.
Fasten off and weave in the ends.
Why the math works: The strip body has 25 positions across 5 in (12.7 cm), which is 5 per inch. The border’s short edges keep that 1-per-position count, so they lie flat. Each 0.4 in (1.0 cm) dc row gets 2 sc, which also works out to 5 per inch, so the long sides won’t ruffle or draw in. Three sc at each corner turn it cleanly. The two rounds add ¼ in (0.6 cm) on every side, which brings the strip to 5½ × 72½ in (14.0 × 184.2 cm).
Final Blocking
- Soak each strip in cool water with a little wool wash for 15 minutes.
- Press out the water in a towel. Don’t wring.
- Lay the strip flat with the RS up. Work in sections if your surface is shorter than the strip.
- Pin the corners to 5½ in (14.0 cm) wide, then pin the long edges straight every 4 in (10.2 cm).
- Check the length: 72½ in (184.2 cm) from bottom border to top border.
- Pin open the arch points and the leaf picots, and roll each puff with your fingers so it rounds up.
- Pin the tab flat and leave the strip until completely dry.
- Hang all seven strips for 24 hours before you trim any yarn ends, so they can settle.
Final Quality-Control Checklist
- 7 strips: 4 plum, 3 cream
- Each strip has 180 rows and 15 complete motif repeats
- Every row has 25 positions
- Each motif has 8 puffs in a 1-2-3-2 cluster, point down
- Each motif has 2 diamond leaves with a picot at the upper tip
- Border Round 1 has 778 sc and Round 2 has 786 sc
- Each tab is 11 sc × 32 rows, centered with 7 sts free on each side
- Each strip is 5½ × 72½ in (14.0 × 184.2 cm) after blocking
- The grape clusters line up across all strips when hung
Troubleshooting
Strip slants or narrows: Check the rail start. The ch 3 that counts as dc must be followed by ch 3, and the last dc goes into the top of the tch.
Puffs flatten: Pull each loop up to ½ in (1.3 cm) and close firmly with ch 1.
Bars sag: Tighten your ch-7. It should be no longer than 7 dc.
Long border ruffles: You’ve likely worked 3 sc into some row ends. Keep strictly to 2 per row.
Long border pulls in: Make sure you placed 2 sc in every row end and didn’t fall back to 1.
Leaves look lopsided: Recount Rows 4–8 against the 1-3-5-3-1 shape.
Strips come out different lengths: Compare the repeat counts and re-block the long strips with less tension.
Care
Hand wash in cool water, press out the water in a towel, and dry flat, pinned to size. Steam lightly to refresh the puffs, and don’t hang the strips while wet.
Final Notes
The measurement chain is simple. Gauge sets 25 positions at 5 in (12.7 cm). One repeat is 4.8 in (12.2 cm), and 15 repeats give 72 in (182.9 cm). The border brings each strip to 5½ × 72½ in (14.0 × 184.2 cm). Seven strips with ¾ in (1.9 cm) gaps cover 43 in (109.2 cm). Check each stage before moving on, and the strips will hang straight and even.
Happy crocheting!