
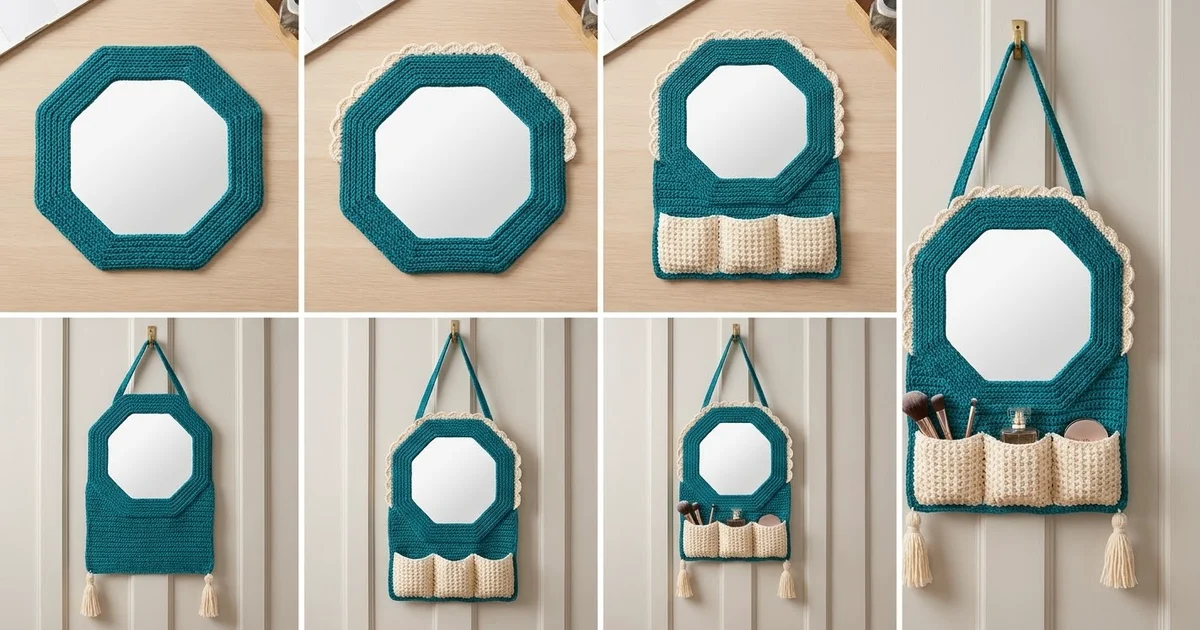
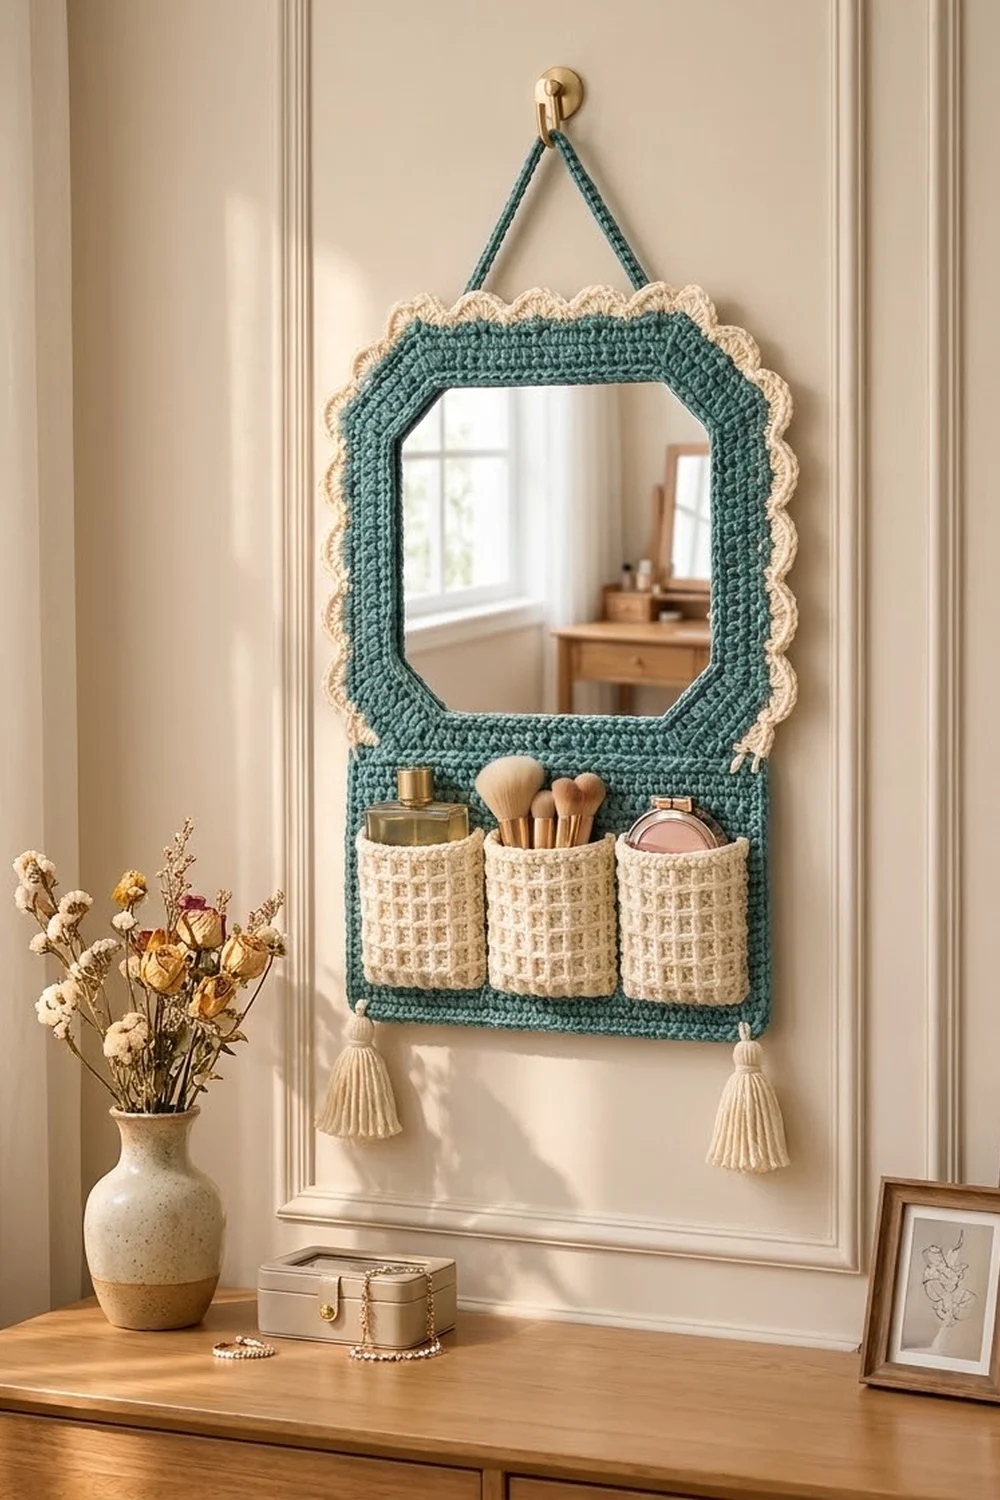
This hanging mirror organizer brings together a mirror, storage and a soft handmade look in one wall piece. A deep teal frame surrounds an octagonal mirror. A cream scalloped edge runs around the top and sides, and three waffle-textured pockets below hold brushes, lipsticks or a small perfume bottle.
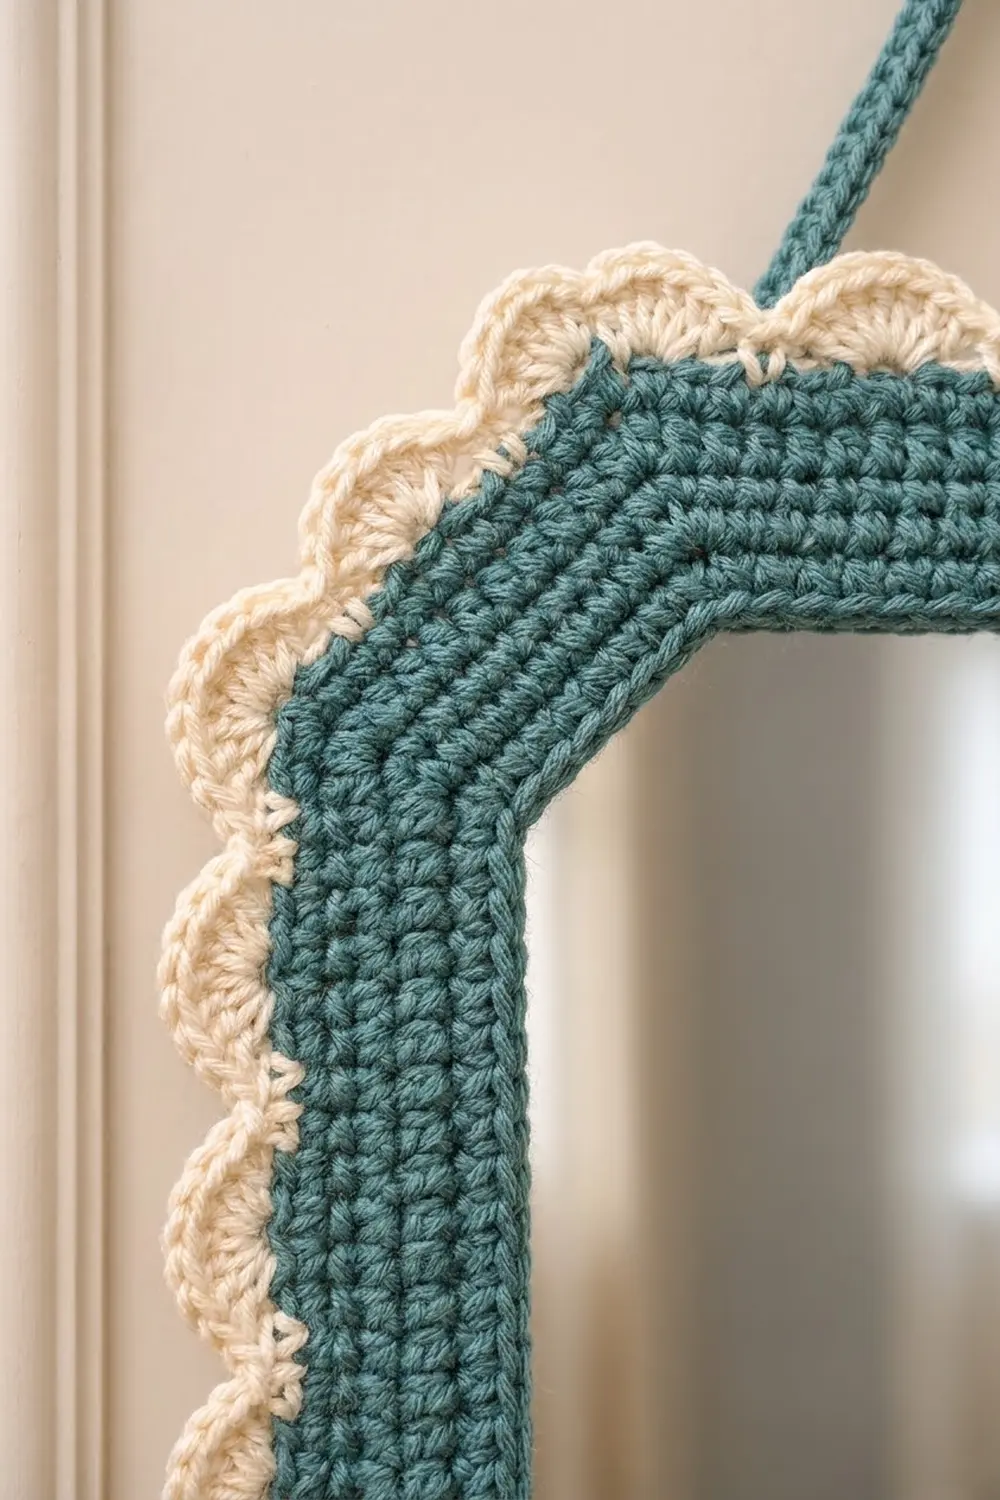
The colors are muted and calm: teal for the frame and body, cream for the scallops, pockets and tassels. The frame uses half double crochet worked in the third loop, which gives a ribbed, knit-like surface. The corner increases stack up into neat mitered lines.
The pattern uses US crochet terms. The finished organizer measures 12.5 in (31.8 cm) wide x 17.75 in (45.1 cm) tall, not counting the strap and tassels.
Construction is simple. You work the octagonal frame in rounds outward from a chain ring, then crochet the lower panel separately in rows. Next you make three pockets, add the scalloped border to the frame, and mount everything on a stiff felt backing with the mirror sandwiched behind the frame opening.
Finished Size and Construction
- Finished size: 12.5 x 17.75 in (31.8 x 45.1 cm)
- Skill level: Intermediate
- Terminology: US
- Yarn weight: Worsted (#4)
- Hook: 5.0 mm (H-8)
- Number of pieces: 1 frame, 1 panel, 3 pockets, 1 strap, 2 tassels
- Layout: frame overlaps the top of the panel by 2 in (5.1 cm); pockets sit in a row across the panel
- Frame size before border: 10.5 in (26.7 cm) across, with an opening of 6.5 in (16.5 cm)
- Border depth: 0.75 in (1.9 cm)
- Panel size: 12.5 x 8.5 in (31.8 x 21.6 cm) including the edging
- Pocket size: 3.5 in (8.9 cm) wide x 3.75 in (9.5 cm) tall
Materials
Use a smooth worsted cotton or cotton blend. Cotton holds its shape on the wall and shows the stitch texture clearly. Acrylic also works, but it stretches more under the weight of the pockets.
- Teal (Color A): 100 g / 180 m
- Cream (Color B): 60 g / 110 m
These quantities include a margin of about 20%.
Tools and extras:
– 5.0 mm (H-8) crochet hook
– 8 locking stitch markers
– Tapestry needle and scissors
– Acrylic (shatterproof) octagonal mirror, 8 in (20.3 cm) across, about 2 mm thick
– Stiff craft felt, at least 12.5 x 18 in (31.8 x 45.7 cm)
– Strong craft glue suitable for acrylic and felt
– A 4 in (10.2 cm) piece of cardboard for the tassels
– Wall hook
Abbreviations (US Terms)
- ch – chain
- sl st – slip stitch
- sc – single crochet
- hdc – half double crochet
- dc – double crochet
- FPdc – front post double crochet
- st(s) – stitch(es)
- RS / WS – right side / wrong side
- rep – repeat
Special stitch – hdc3L (hdc in third loop): Find the horizontal bar that sits just below the back loop of the hdc, on the back of the stitch. Work your hdc into that bar only. The top V of the stitch rolls forward and forms a knit-look ridge.
Gauge and Checkpoints
Gauge: 16 hdc and 12 rows (or rounds) = 4 in (10.2 cm) in hdc3L.
That works out to 4 sts per inch and 3 rows per inch, so each round adds about 1/3 in (0.8 cm) of depth.
Make the frame first and treat it as your gauge test. The mirror only works if the frame opening fits it.
Checkpoints:
– After Rnd 1: opening 6.5 in (16.5 cm) across, flat sides to flat sides
– After Rnd 3: outer edge 8.5 in (21.6 cm) across
– After Rnd 6: outer edge 10.5 in (26.7 cm) across
– Panel after Row 24: 12 x 8 in (30.5 x 20.3 cm)
– Each pocket: 3.5 x 3.75 in (8.9 x 9.5 cm)
If your frame is too big, go down half a hook size; if it is too small, go up half a size. The opening must stay at least 1 in (2.5 cm) smaller than the mirror so the frame overlaps the mirror by 0.5 in (1.3 cm) or more on every side.
Frame
The frame is worked in joined rounds without turning, with the RS always facing you. It has 8 sides: 4 long sides and 4 short diagonal sides. The rounds start at the bottom long side so the join ends up hidden where the frame overlaps the panel.
With Color A, ch 96 and join with a sl st to the first ch to form a ring, taking care not to twist it.
Place markers to divide the ring into sides, working around from the start: 19 ch (bottom), 5 ch (diagonal), 19 ch (side), 5 ch (diagonal), 19 ch (top), 5 ch (diagonal), 19 ch (side), 5 ch (diagonal). Check the total: 4 x 19 + 4 x 5 = 96.
Rnd 1: Ch 1 (does not count as a st). Working in the back bump of each ch: 2 hdc in the first ch of the side, hdc in each remaining ch of that side; rep from * on all 8 sides. Join with a sl st to the first hdc. (104 sts: long sides 20, diagonals 6)
Move each marker to the first of the 2 hdc you made at the start of each side. That stitch is the “first st” of the side in the next round.
Rnd 2: Ch 1. 2 hdc3L in the first st of the side, hdc3L in each remaining st of that side; rep from * around. Join. (112 sts: long sides 21, diagonals 7)
Rnd 3: Repeat Rnd 2. (120 sts: long sides 22, diagonals 8)
Rnd 4: Repeat Rnd 2. (128 sts: long sides 23, diagonals 9)
Rnd 5: Repeat Rnd 2. (136 sts: long sides 24, diagonals 10)
Rnd 6: Repeat Rnd 2. (144 sts: long sides 25, diagonals 11)
Fasten off and leave a 24 in (61 cm) tail for sewing.
Each round adds exactly 8 sts, one per side. Because the increases stack in the same spot every round, they form the visible mitered corner lines. The frame now measures 10.5 in (26.7 cm) across with a 2 in (5.1 cm) wide band.
Lower Panel
The panel is worked in turned rows of hdc3L.
With Color A, ch 50.
Row 1: Hdc in the 3rd ch from the hook and in each ch across; the skipped ch do not count. Turn. (48 sts)
Rows 2–24: Ch 1 (does not count), hdc3L in each st across. Turn. (48 sts)
Checkpoint: the panel should measure 12 x 8 in (30.5 x 20.3 cm).
Edging round: Do not turn. Ch 1 and work around the whole panel:
– 32 sc evenly down the side (4 sc for every 3 rows), then ch 2 for the corner
– 48 sc across the bottom, 1 in each foundation ch, then ch 2
– 32 sc up the other side, then ch 2
– 48 sc across the top, 1 in each st, then ch 2
Join to the first sc. (160 sc plus 4 corner ch-2 spaces)
In this round, the per-side counts (48 and 32) do not include the corner spaces. The ch-2 spaces are separate, so no corner is counted twice.
The finished panel measures 12.5 x 8.5 in (31.8 x 21.6 cm). Fasten off.
Pockets (Make 3)
The pockets use a simple waffle grid. Raised FPdc columns alternate with plain dc rows, which creates the square, quilted texture.
With Color B, ch 17.
Row 1 (WS): Dc in the 3rd ch from the hook and in each ch across. Turn. (15 sts)
Row 2 (RS): Ch 2 (does not count), dc in the first st, FPdc around the next st, dc in the next st; rep from * 6 more times. Turn. (15 sts: 8 dc, 7 FPdc)
Row 3 (WS): Ch 2, dc in each st across. Turn. (15 sts)
Rows 4, 6 and 8: Repeat Row 2. Each FPdc lines up above the post column from two rows earlier. (15 sts)
Rows 5 and 7: Repeat Row 3. (15 sts)
Row 9 (WS, rim): Ch 1, sc in each st across. (15 sc)
Fasten off and leave a 20 in (50.8 cm) tail. Each pocket should measure 3.5 x 3.75 in (8.9 x 9.5 cm).
Hanging Strap
With Color A, ch 61.
Row 1: Sc in the 2nd ch from the hook and in each ch across. Turn. (60 sts)
Row 2: Ch 1, sc in each st across. (60 sts)
Fasten off. The strap measures 15 in (38.1 cm) long and about 0.5 in (1.3 cm) wide.
Tassels (Make 2)
- Wrap Color B 30 times around the 4 in (10.2 cm) cardboard.
- Tie the wraps together at the top with a 10 in (25.4 cm) strand, then cut through the bottom loops.
- Wrap a second strand tightly around the bundle 0.75 in (1.9 cm) below the top and secure it.
- Trim the ends to a finished length of 3.5 in (8.9 cm).
Border
The scallop border runs along the frame’s two upper sides, two upper diagonals and top edge. It stops where the frame meets the panel. The bottom long side and the two lower diagonals stay plain because they are sewn over the panel.
Border gauge: 4 sc per inch. Each scallop takes up 6 sc, so it spans 1.5 in (3.8 cm).
Row 1: With the RS facing, join Color B in the first st of the right side, at its lower end. Work the row in this order:
| Section | Instruction | Count |
|---|---|---|
| Right side | 2 sc in first st, sc in each of the next 24 sts | 26 |
| Upper-right diagonal | 2 sc in first st, sc in each of the next 10 sts | 12 |
| Top | 2 sc in first st, sc in each of the next 24 sts | 26 |
| Upper-left diagonal | 2 sc in first st, sc in each of the next 10 sts | 12 |
| Left side | 2 sc in first st, sc in each of the next 23 sts, 2 sc in last st | 27 |
Turn. (103 sc)
Row 2 (scallops): Ch 1, sc in the first st, skip 2 sts, 7 dc in the next st, skip 2 sts, sc in the next st; rep from * 16 more times. (17 scallops; 136 dc + 18 sc = 154 sts)
Fasten off.
Why the math works: The frame path has 97 sts (25 + 11 + 25 + 11 + 25). Row 1 adds one stitch at each of the 4 corner lines, so the border lies flat as Rnd 7 would have. It also adds one stitch at each open end to help the ends flare, for 97 + 6 = 103. The scallop repeat uses 6 sts plus 1 to finish, and 6 x 17 + 1 = 103, so the row ends exactly on a sc with no partial scallop. The border is 0.75 in (1.9 cm) deep, which brings the frame plus border to 12 in (30.5 cm) across.
Assembly
- Backing: Lay the panel flat. Place the frame on top so its plain lower diagonals and bottom side overlap the panel’s top edge by 2 in (5.1 cm), centered with 1 in (2.5 cm) to spare on each side. Trace around this combined outline onto stiff felt, leaving out the scallops, and cut it out.
- Mirror: Glue the mirror onto the felt so it sits centered under where the frame opening will be. Let the glue dry fully.
- Frame to panel: Whipstitch the frame’s lower outer edge to the panel with Color A.
- Pockets: Pin the pockets with their bottoms 1 in (2.5 cm) above the panel’s lower edge. Place each pocket’s sides 3.25 in (8.3 cm) apart, which leaves 0.25 in (0.6 cm) of ease so the pocket bows outward. Use 0.875 in (2.2 cm) margins at each end and 0.5 in (1.3 cm) gaps between pockets. Check the total: 0.875 + 3.25 + 0.5 + 3.25 + 0.5 + 3.25 + 0.875 = 12.5 in. Sew down the sides and bottom; leave the rims open.
- Mounting: Lay the crochet body over the felt. Whipstitch the panel edging and the frame’s Rnd 6 (behind the scallops) to the felt all the way around.
- Strap: Sew each end to the back of the frame at the top of each side, where the side meets its upper diagonal.
- Tassels: Sew each tassel 0.75 in (1.9 cm) in from a bottom corner of the panel.
Final Blocking
- Block the frame, panel and pockets before assembly.
- Pin each piece to its checkpoint size on a blocking mat.
- Mist with water until damp. Do not soak.
- Shape the 17 scallops evenly with your fingers.
- Let everything dry completely, about 24 hours.
- After assembly, only hover steam over the yarn. Keep heat and steam away from the acrylic mirror.
Final Quality-Control Checklist
- Frame Rnd 6 has 144 sts, and the outer edge measures 10.5 in (26.7 cm)
- Corner miter lines are straight and match on all 8 sides
- Border has 17 even scallops that start and stop at the panel line
- Panel measures 12.5 x 8.5 in (31.8 x 21.6 cm)
- All three pockets are the same height, level and evenly spaced
- The mirror overlaps under the frame on every side, with no gaps
- Tassels hang at the same height
- The strap is centered and the organizer hangs straight
Troubleshooting
- Frame ripples: Your tension is loose. Go down a hook size, or check that you are not adding extra increases.
- Frame cups or curls: You missed an increase. Count each side against the stated numbers.
- Opening too large for the mirror: Restart with a smaller hook. Do not rely on stretch to hold the mirror.
- Scallops crowd together: Check that Row 1 has exactly 103 sc.
- Pockets sag: Sew them with tighter stitches, or add a strip of felt behind each one.
- Organizer tilts on the wall: Adjust the strap ends until both sides sit level.
Care
Spot clean only with a damp cloth and mild soap, then let it air dry flat. Do not machine wash or iron it, because the mirror and glued backing can’t take water or heat.
Final Notes
Here is the measurement chain from start to finish:
– The 96-ch ring gives a 6.5 in (16.5 cm) opening.
– Six rounds bring the frame to 10.5 in (26.7 cm) across.
– The 0.75 in (1.9 cm) scallop border makes the frame 12 in (30.5 cm) wide.
– The frame sits on a 12.5 x 8.5 in (31.8 x 21.6 cm) panel with a 2 in (5.1 cm) overlap.
– Altogether the organizer measures 12.5 x 17.75 in (31.8 x 45.1 cm).
If every checkpoint matches, the pockets, border and mirror will fit without adjustment.
Happy crocheting!