

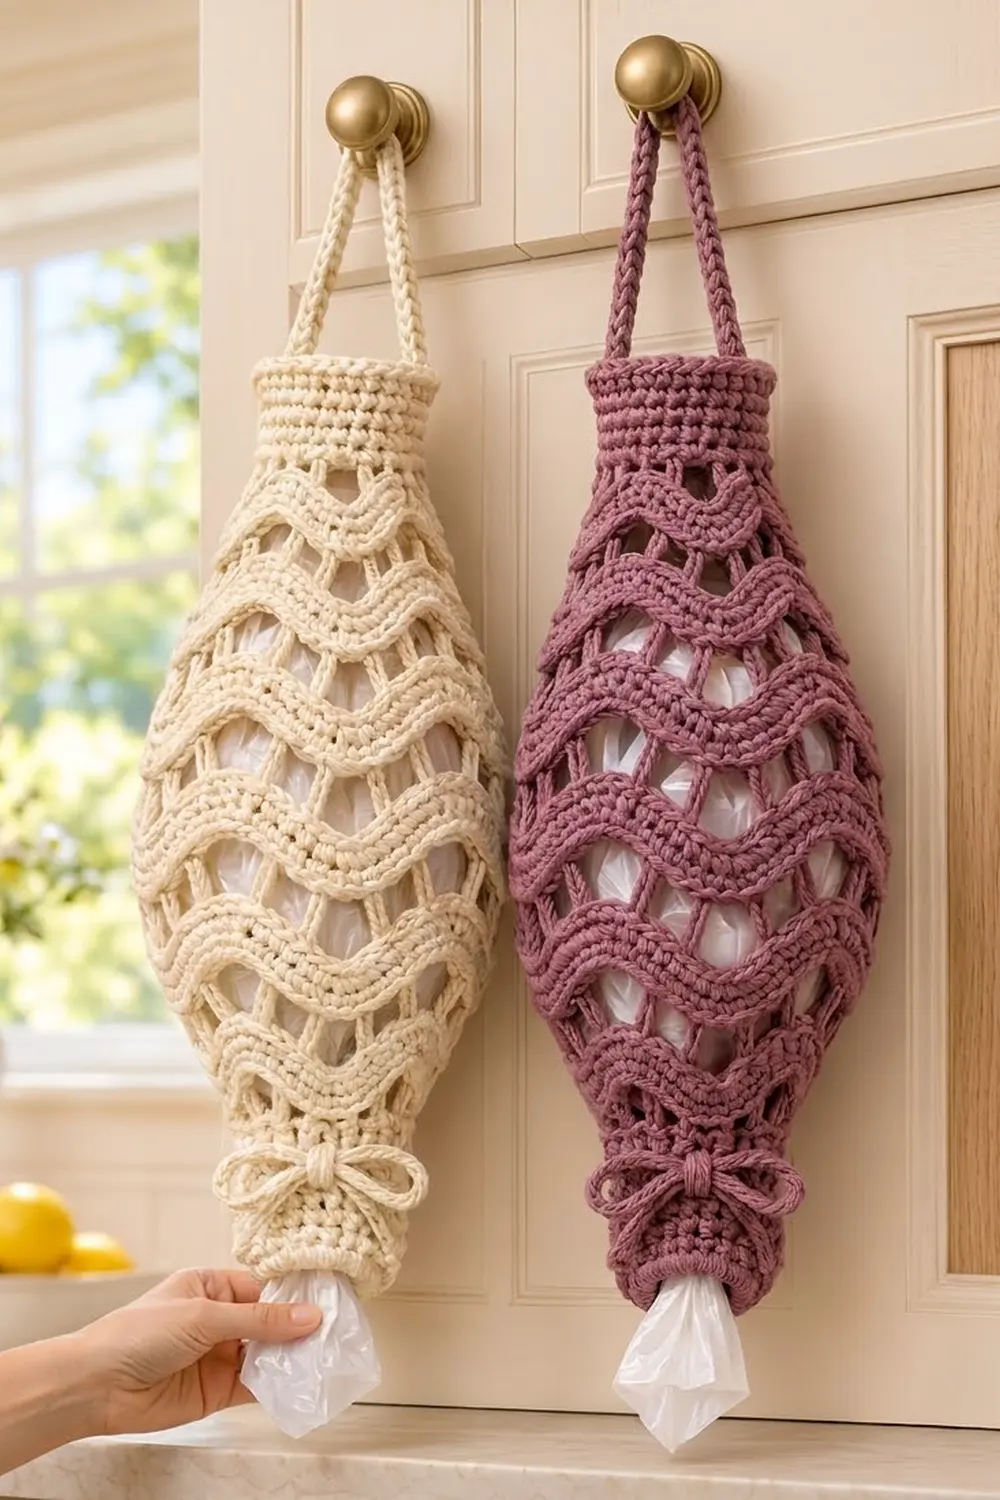
This grocery bag holder is a tall, teardrop-shaped tube that hangs from a cabinet knob and keeps a stash of plastic bags tidy. You push bags in at the top and pull them out one at a time from the small cinched opening at the bottom.
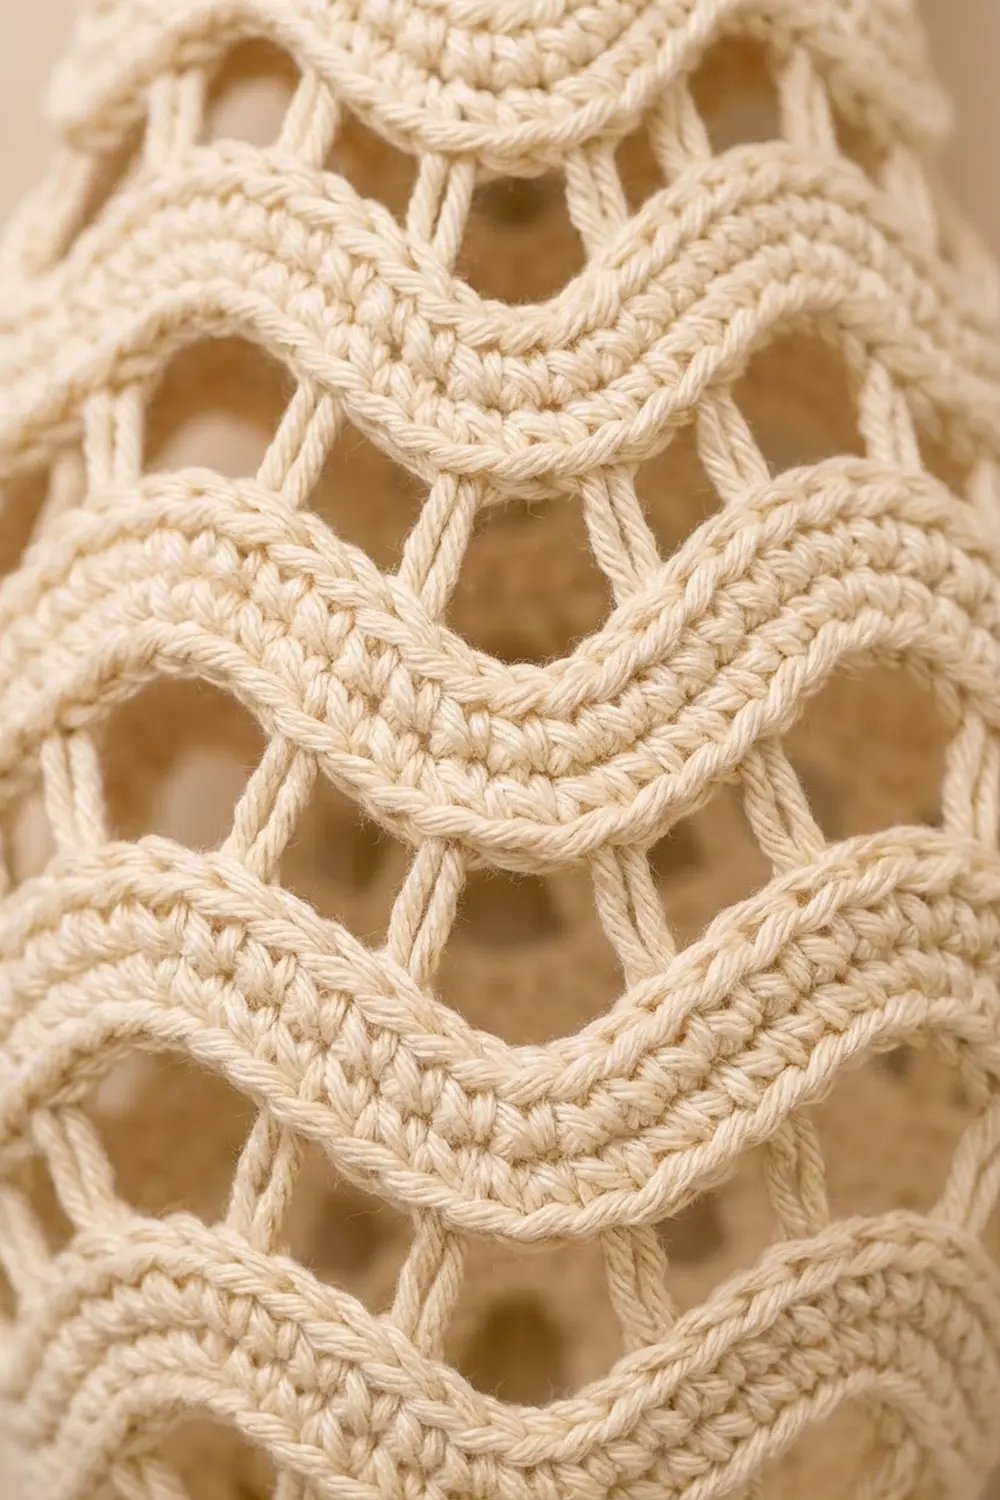
The look comes from solid wavy bands that alternate with open rounds of upright posts, so the bags show through the gaps. The sample is a warm cream cotton. A dusty plum version works just as well and uses exactly the same pattern. A narrow strap at the top and a crocheted tie bow above the bottom opening finish the piece.
The pattern uses US crochet terms. The finished holder measures about 18 in (45.7 cm) long without the strap. It is about 8.5 in (21.6 cm) wide at its widest point when lying flat, and the strap loop adds about 3.5 in (8.9 cm) above the rim.
The holder is one single piece, worked in joined rounds from the bottom up. You start with a small cuff that has an eyelet round for the tie. Next you increase to 60 stitches and work nine ripple-and-mesh bands. Then you level the top, decrease into a solid neck, edge both openings, and sew on the strap.
Finished Size and Construction
- Finished size: 18 in (45.7 cm) long, excluding strap; 8.5 in (21.6 cm) wide flat at widest point
- Skill level: Intermediate
- Terminology: US crochet terms
- Yarn weight: Worsted weight (#4) cotton or 3 mm cotton cord
- Hook: 5.0 mm (US H-8)
- Number of pieces: 1 body, plus 1 strap and 1 tie
- Layout: Single vertical tube, hung from the strap
- Piece size: Cuff 6 in (15.2 cm) around; body 15 in (38.1 cm) around at 60 stitches; neck 8 in (20.3 cm) around
- Size before border: 17.25 in (43.8 cm) long
- Border depth: 0.5 in (1.3 cm) at bottom, 0.25 in (0.6 cm) at top
Materials
Use a smooth, firm cotton or cotton blend. Cotton holds the wave shape and won’t stretch out under the weight of the bags. Acrylic is fine, but the mesh will droop more over time.
- Cream (main color): 150 g, about 230 m
- Alternative colorway, plum: 150 g, about 230 m, if you’d like a second holder
Tools:
- 5.0 mm (US H-8) crochet hook
- Locking stitch marker
- Tapestry needle
- Scissors
- Measuring tape
- Spray bottle and a rolled towel for blocking
The quantities include a margin of about 15% for your gauge swatch and small differences in tension.
Abbreviations (US Terms)
- ch – chain
- sl st – slip stitch
- sc – single crochet
- hdc – half double crochet
- dc – double crochet
- tr – treble crochet
- sp – space
- st(s) – stitch(es)
- sc2tog – single crochet 2 together
- rev sc – reverse single crochet (crab stitch)
Special stitches:
- sc3tog: (Insert hook in next st, yo, pull up a loop) 3 times, yo, pull through all 4 loops on hook.
- dc3tog: (Yo, insert hook in next st or sp as directed, yo, pull up a loop, yo, pull through 2 loops) 3 times, yo, pull through all 4 loops on hook.
Mesh counting rule: In every open round, each ch-2 or ch-3 sp counts as 2 stitches. Every pattern round therefore holds 60 stitches, which is 5 repeats of 12.
Gauge and Checkpoints
Gauge: 16 sc and 18 rounds = 4 in (10.2 cm) in joined rounds. One dc round measures about 0.5 in (1.3 cm) tall.
Work the cuff (Rounds 1–6) first and treat it as your test piece. It should measure 6 in (15.2 cm) around, so it lies 3 in (7.6 cm) wide when flattened. If it’s bigger, go down a hook size. If it’s smaller, go up a hook size. Check again before you continue.
Checkpoints, measured from the foundation edge:
- After Round 12: 3 in (7.6 cm) tall, 15 in (38.1 cm) around
- After Band 3: 6.75 in (17.1 cm)
- After Band 9: 14.25 in (36.2 cm)
- After the leveling round: 15.5 in (39.4 cm)
- After the neck: 17.25 in (43.8 cm)
- After the borders: 18 in (45.7 cm)
Each band adds about 1.25 in (3.2 cm). If you’re running long, work 8 bands instead of 9. If you’re running short, add a tenth band. Change bands only in the ch-2 sections, so the widest part stays centered.
Bottom Cuff and Base
Ch 24 and join with a sl st to the first ch to form a ring, taking care not to twist it.
Round 1: Ch 1 (does not count as a st here or in later rounds), sc in each ch around, join with sl st to first sc. (24 sc)
Rounds 2–4: Ch 1, sc in each st around, join. (24 sc)
Round 5 (eyelet round): Ch 4 (counts as dc + ch 1), sk next st, dc in next st, ch 1, sk next st 11 times, join with sl st to 3rd ch of beg ch-4. (12 dc and 12 ch-1 sps = 24 sts)
Round 6: Ch 1, sc in each dc and in each ch-1 sp around, join. (24 sc)
Round 7: Ch 1, sc in next st, 2 sc in next st 12 times, join. (36 sc)
Round 8: Ch 1, sc in each st around, join. (36 sc)
Round 9: Ch 1, sc in next 2 sts, 2 sc in next st 12 times, join. (48 sc)
Round 10: Ch 1, sc in each st around, join. (48 sc)
Round 11: Ch 1, sc in next 3 sts, 2 sc in next st 12 times, join. (60 sc)
Round 12: Ch 1, sc in each st around, join. (60 sc)
Spreading the increases out gives the base a gentle cone shape instead of a flat ledge. Mark the first st of each round from here on.
Ripple Lattice Body
Each band has 3 rounds: a dc ripple, an sc ripple, and an open mesh round. Within each 12-stitch repeat, the peak always sits on stitch 6 and the valley on stitch 12. The valley decrease reaches across into the first stitch of the next repeat, so the peaks stack straight above each other with no drift.
Band 1 only, Round A (dc ripple over solid): Ch 2 (does not count), sk the st at the base of the ch-2. Dc in next 4 sts, 3 dc in next st, dc in next 4 sts. Dc3tog over next 3 sts, dc in next 4 sts, 3 dc in next st, dc in next 4 sts 4 times. Dc3tog over the last 2 sts and the skipped first st, then join with sl st to first dc. (60 dc: 5 peaks, 5 valleys)
Round B (sc ripple): Ch 1, sk the st at the base. Sc in next 4 sts, 3 sc in next st, sc in next 4 sts. Sc3tog over next 3 sts, sc in next 4 sts, 3 sc in next st, sc in next 4 sts 4 times. Sc3tog over the last 2 sts and the skipped first st, then join to first sc. (60 sc)
Round C (open mesh, ch-2 version): Ch 5 (counts as dc + ch 2), sk next 2 sts, dc in next st, ch 2, sk next 2 sts 19 times, join with sl st to 3rd ch of beg ch-5. (20 dc and 20 ch-2 sps = 60 sts)
Round C (open mesh, ch-3 version): Work as above, but ch 6 at the start (counts as dc + ch 3) and ch 3 in each repeat. (20 dc and 20 ch-3 sps = 60 sts)
Bands 2–9, Round A (dc ripple over mesh): Ch 2 (does not count), sk the st at the base. 2 dc in next sp, dc in next dc, 4 dc in next sp, dc in next dc, 2 dc in next sp, dc in next dc. Dc3tog, working the first 2 legs in the next sp and the last leg in the next dc. Repeat 5 times. On the final repeat, work the last leg of dc3tog into the skipped first st. Join to first dc. (11 dc + 1 dc3tog per repeat = 60 sts)
The 4 dc in one sp make the peak. The dc3tog makes the valley.
Work the bands as follows:
- Bands 1–2: Rounds A, B, then C with ch-2
- Bands 3–7: Rounds A, B, then C with ch-3
- Bands 8–9: Rounds A, B, then C with ch-2
The stitch count never changes. The longer ch-3 spaces in the middle five bands simply open the mesh, which gives the holder its soft teardrop belly.
Top Leveling and Neck
Round 13 (dc ripple over mesh): Work as Bands 2–9, Round A. (60 sts)
Round 14 (sc ripple): Work as Round B. (60 sc)
Round 15 (leveling round): Ch 3 (counts as first dc), dc in next st, hdc in next 2 sts, sc in next 3 sts, hdc in next 2 sts, dc in next 2 sts, tr in next st. Dc in next 2 sts, hdc in next 2 sts, sc in next 3 sts, hdc in next 2 sts, dc in next 2 sts, tr in next st 4 times, join to top of beg ch-3. (60 sts)
Short stitches land on the peaks and the tallest stitch fills each valley, so the top edge comes out straight.
Round 16: Ch 1, sc in next st, sc2tog 20 times, join. (40 sc)
Rounds 17–18: Ch 1, sc in each st around, join. (40 sc)
Round 19: Ch 1, sc in next 3 sts, sc2tog 8 times, join. (32 sc)
Rounds 20–23: Ch 1, sc in each st around, join. (32 sc)
Fasten off. The neck should measure 8 in (20.3 cm) around and lie 4 in (10.2 cm) wide flat.
Strap and Tie
Strap: Ch 5. Starting in the 2nd ch from the hook, sc in each ch across. (4 sc)
Rows 2–36: Ch 1, turn, sc in each st across. (4 sc)
Fasten off and leave a 12 in (30.5 cm) tail. The strap measures 1 in (2.5 cm) wide and 8 in (20.3 cm) long. Make the strap now, but sew it on after the border.
Tie: Ch 100, about 20 in (50.8 cm). Sl st in the back bump of each ch, starting in the 2nd ch from the hook, to make a firm cord. Fasten off and weave in the ends.
Border
Border gauge matches body gauge: 4 sts per 1 in (2.5 cm). For counting, flatten the tube so the round start sits at one fold. Each flattened side then holds exactly half the stitches.
Bottom border:
Round 1: Join yarn at the base of the foundation ring. Ch 1, sc in the free loop of each foundation ch, join. (24 sc, 12 per side)
Round 2: Ch 1, rev sc in each st around, join. (24 rev sc, 12 per side)
Fasten off. Depth: 0.5 in (1.3 cm).
Top border:
Round 1: Join yarn in the first st of Round 23. Ch 1, rev sc in each st around, join. (32 rev sc, 16 per side)
Fasten off. Depth: 0.25 in (0.6 cm).
Why the math works: Each border round works exactly 1 stitch into each existing stitch, so the counts stay at 24 and 32. The edges can’t ruffle or pull in, and the openings stay at 6 in (15.2 cm) and 8 in (20.3 cm) around. Reverse sc is also firmer than plain sc, so the edge holds up to bags rubbing past it.
Attach the strap: Find st 2 and st 3 of Round 23. Lay one strap end flat on the inside of the neck, centered over those stitches, about 0.5 in (1.3 cm) below the rim. Whipstitch all four edges of the strap end in place. Sew the other end the same way over sts 18 and 19, which sit exactly 16 sts away on the opposite fold. Make sure the strap isn’t twisted.
Final Blocking
- Weave in all the ends along solid sc rounds, never across the mesh.
- Spray the holder evenly until it’s damp, not dripping.
- Roll a towel into a cylinder and slide it inside. Pad the middle with a second towel to fill out the teardrop shape.
- Ease each peak upward and each valley downward so the waves line up in clean vertical columns.
- Pat the mesh posts straight, keeping the 18 in (45.7 cm) length.
- Let it dry completely while lying on its side, turning it once.
- Thread the tie in and out through the 12 eyelets of Round 5, starting and ending at the front. Pull it until the opening is about 1.5 in (3.8 cm) across, then tie a bow.
Final Quality-Control Checklist
- Every pattern round holds 60 sts, counting each mesh sp as 2.
- All 5 peaks in each band sit directly above the peaks below.
- The open rounds have 20 posts each, evenly spaced.
- The neck holds 32 sts and measures 8 in (20.3 cm) around.
- The length is 18 in (45.7 cm) and the widest flat width is 8.5 in (21.6 cm).
- The strap ends sit on opposite folds and the strap is untwisted.
- The tie passes through all 12 eyelets and bows neatly at the front.
- All the ends are secure and hidden.
Troubleshooting
- The peaks are drifting sideways: You probably worked into the st at the base of the beginning chain. Skip it at the start and only use it for the final decrease.
- Your count is off after a mesh round: Make sure each sp got exactly 2, 4, or 2 dc, plus 2 legs of the dc3tog, as written.
- The waves look flat: Work the 3-into-1 peaks a little looser and the decreases a little firmer.
- The holder is too narrow at the middle: Work ch-4 instead of ch-3 in Bands 4–6. The sp still counts as 2 sts.
- The neck flares out: Go down one hook size for Rounds 16–23.
- The bottom opening is too loose: Pull the tie tighter, or work Round 2 of the bottom border with a smaller hook.
Care
Hand wash or machine wash cold on a gentle cycle, then reshape and dry flat. Cotton may shrink slightly, so block it again after washing if needed.
Final Notes
Everything follows one measurement chain. A 24-st cuff at 6 in (15.2 cm) around grows to 60 sts at 15 in (38.1 cm) around. Nine 1.25 in (3.2 cm) bands bring the body to 14.25 in (36.2 cm). The leveling round and neck finish at 17.25 in (43.8 cm), and the borders bring the holder to 18 in (45.7 cm). If each checkpoint matches, the finished holder will match too.
Happy crocheting!