
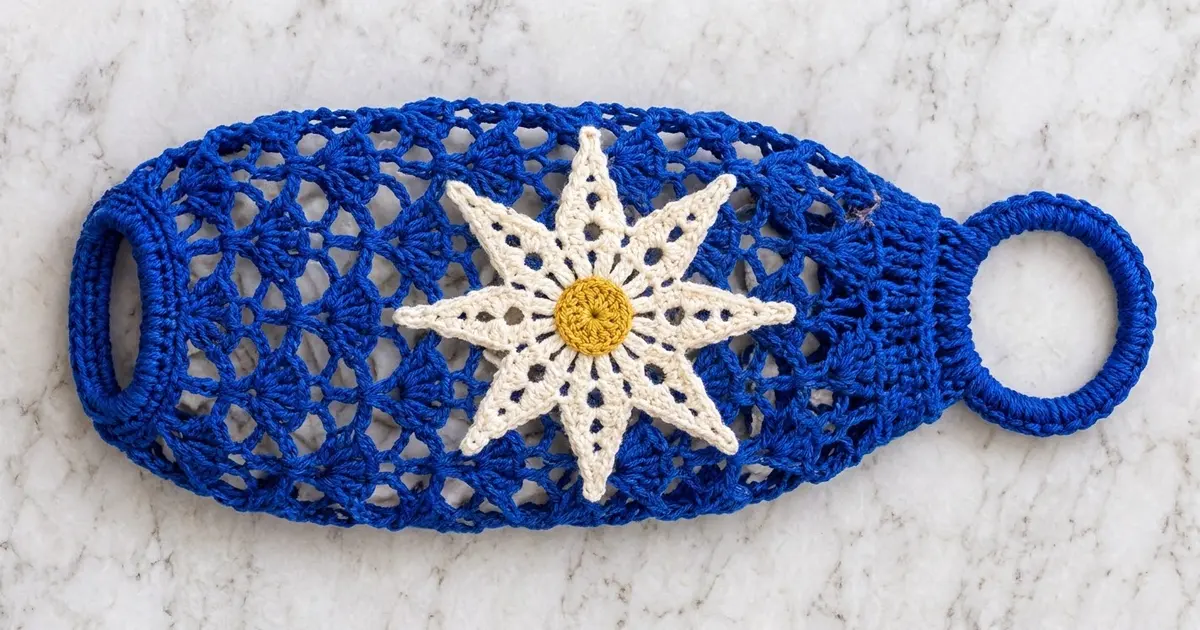
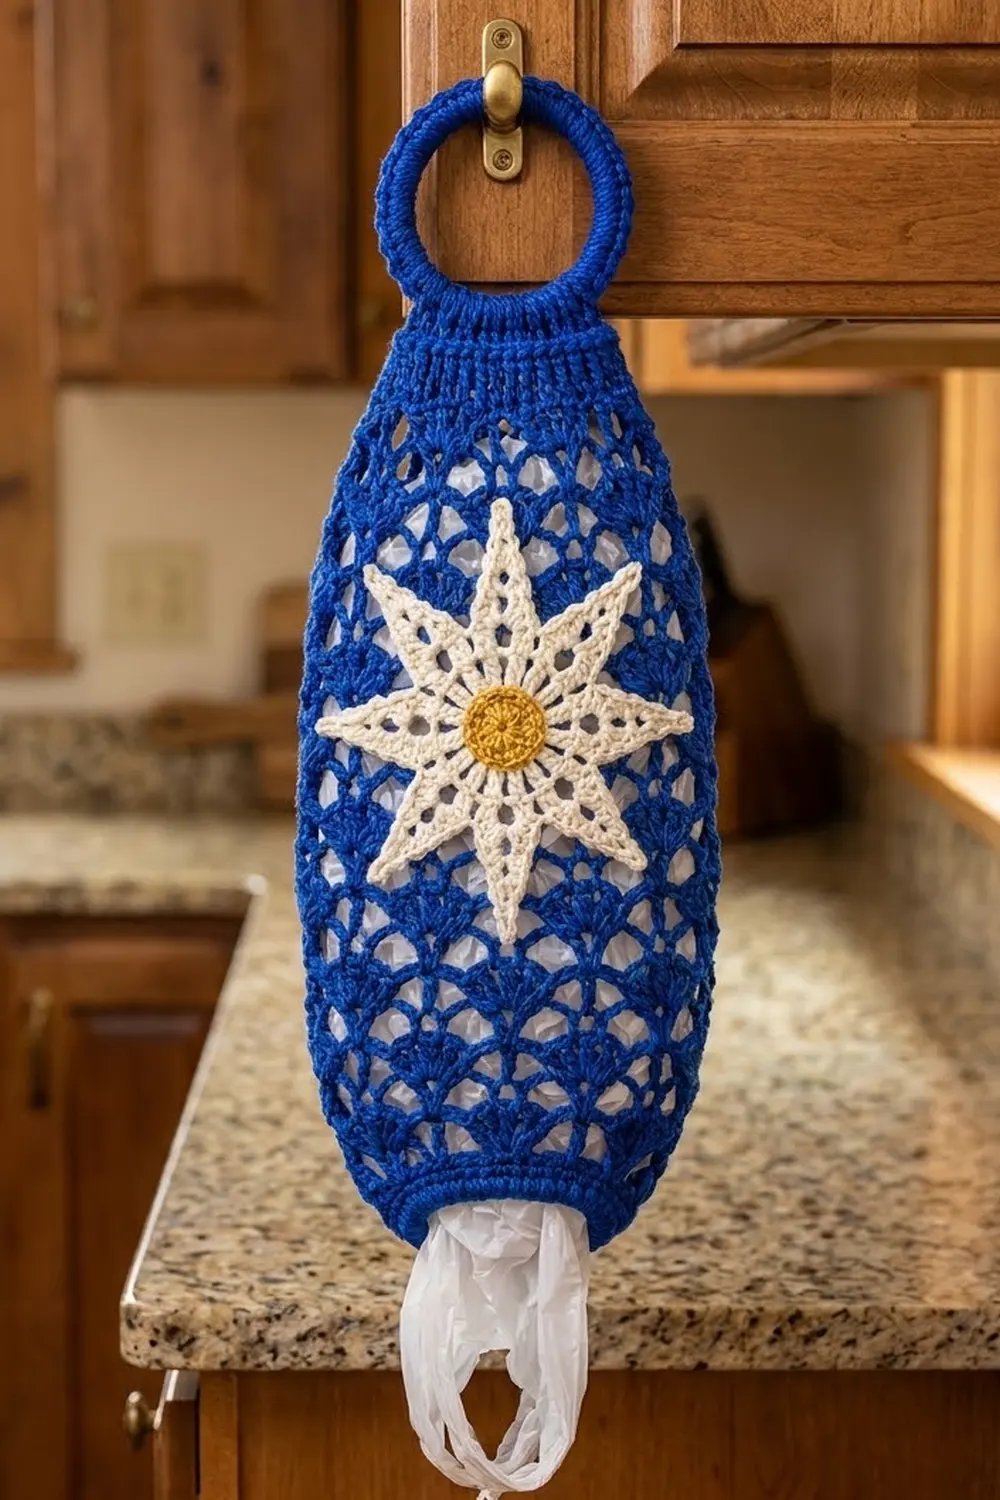
This is a festive way to store plastic bags. The Starlight Bag Holder is a slim lace tube in royal blue. You stuff bags in at the top and pull them out one at a time through the firm oval opening at the bottom. A covered ring at the top hangs it from a cabinet hook, a door knob or a pantry peg.
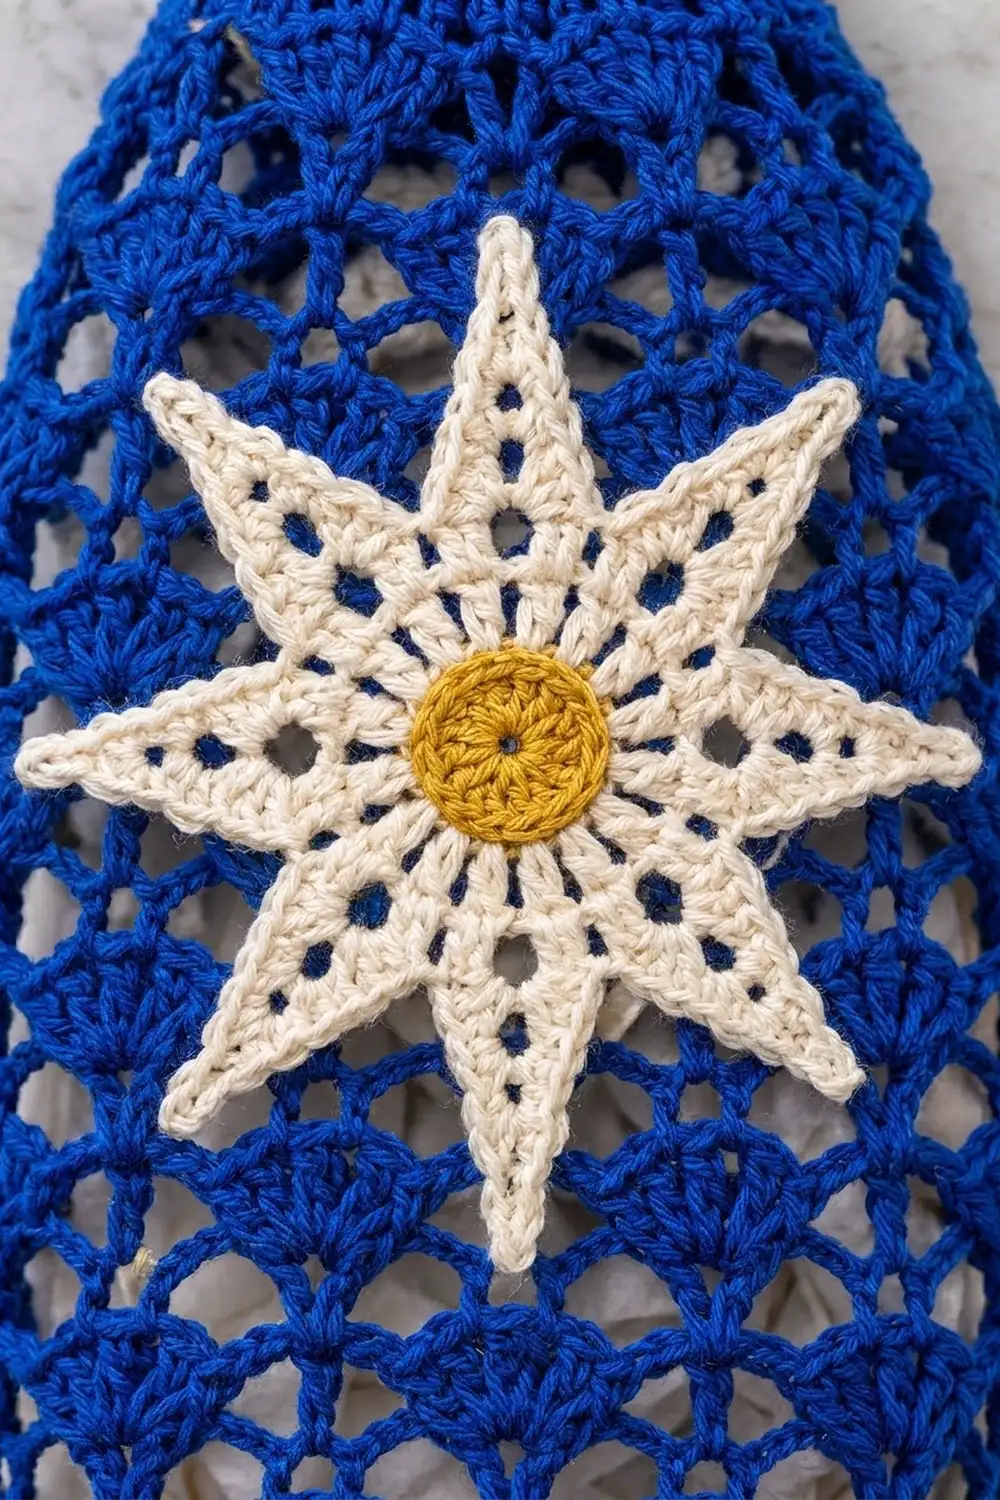
The body is worked in stacked fans of five double crochets. Single crochets and chain-2 arches link each round of fans to the next. A cream eight-point star with a small gold center is sewn to the front. It turns a kitchen tool into something you’d happily leave out for the holidays or all year.
This pattern uses US crochet terms. The finished holder measures 7.5 in (19.1 cm) wide laid flat. The body is 15.5 in (39.4 cm) tall, and the whole piece is about 18.25 in (46.4 cm) long including the ring.
You work the body in one piece from the bottom up. First comes the solid opening band, then 20 rounds of fans, then a narrowing ribbed neck. You cover a ring with single crochet and sew it to the back of the neck. Then you make the star and the center disc, stack them and sew them on.
Finished Size and Construction
- Finished size: 7.5 in (19.1 cm) wide flat × 18.25 in (46.4 cm) long including ring
- Skill level: Easy-Intermediate
- Terminology: US crochet terms
- Yarn weight: Worsted (#4), cotton or cotton blend
- Hook: 5.0 mm (H-8)
- Number of pieces: 1 finished holder, made from 4 parts (body, covered ring, star, center disc)
- Layout: One tube with the ring on top and the star centered on the front, about 5 in (12.7 cm) below the neck
- Body size before border: 7.5 in (19.1 cm) wide flat × 15 in (38.1 cm) tall
- Star size: 6.5 in (16.5 cm) from tip to opposite tip
- Border depth: one round of reverse single crochet at each opening, about 0.25 in (0.6 cm) each
Materials
Use a smooth, firm cotton. It holds the fan shapes well, doesn’t stretch out under the weight of the bags and survives washing. Acrylic also works, but the lace will drape more.
- Royal blue (body, ring cover): 100 g, about 190 m
- Cream (star): 20 g, about 38 m
- Gold/mustard (center disc): 5 g, about 10 m
Tools:
– 5.0 mm (H-8) crochet hook
– 3 in (7.6 cm) plastic or metal ring (a bangle-style craft ring)
– Tapestry needle
– 2 stitch markers
– Rust-proof pins
– Scissors
– Blocking mat or towel
All quantities include a margin of about 15% for your gauge swatch and tension differences.
Abbreviations (US Terms)
- ch – chain
- sl st – slip stitch
- sc – single crochet
- hdc – half double crochet
- dc – double crochet
- tr – treble crochet
- sc2tog – single crochet 2 together
- BLO – back loop only
- rev sc – reverse single crochet
- sp – space
- st(s) – stitch(es)
Special stitch – Fan: 5 dc worked into the same stitch. The 3rd dc is the center dc.
Reverse single crochet (rev sc): Work from left to right (right-handed). Insert the hook in the next stitch to the right, yarn over, pull up a loop, yarn over and pull through both loops.
Gauge and Checkpoints
- Solid sc gauge: 16 sc × 16 rounds = 4 in (10.2 cm)
- Fan gauge: 1 pattern repeat (sc to next sc) = 1.5 in (3.8 cm); 4 fan rounds = 2.5 in (6.4 cm)
Test first. Work Rnds 1–8 of the body as your swatch, then measure it flat. If it matches, keep going. You’ve lost nothing.
Checkpoints:
1. After Rnd 3: 40 sc. The band measures 10 in (25.4 cm) around, or 5 in (12.7 cm) flat.
2. After Rnd 4: 60 sc. The tube measures 7.5 in (19.1 cm) flat, and the band is 1 in (2.5 cm) tall.
3. After Rnd 24: the body is 13.5 in (34.3 cm) tall from the bottom edge.
4. After Rnd 30: the body is 15 in (38.1 cm) tall and the neck is 3.75 in (9.5 cm) flat.
Too big? Go down 0.5 mm in hook size. Too small? Go up 0.5 mm. Don’t change the stitch counts. The fan repeat needs exactly 60 stitches.
Body
Bottom Opening Band
Foundation: With royal blue, ch 40. Join with sl st to the first ch to form a ring, taking care not to twist the chain.
Rnd 1: Ch 1, sc in each ch around. Join with sl st to first sc. (40 sc)
Rnds 2–3: Ch 1, sc in each st around, join. (40 sc)
The band is now about 0.75 in (1.9 cm) tall and makes the firm oval opening.
Rnd 4 (increase): Ch 1, sc in next st, 2 sc in next st; repeat from * 20 times. Join. (60 sc)
Fan Body
Rnd 5 (fan set-up): Ch 1, sc in next st, ch 2, skip 2 sts, Fan in next st, ch 2, skip 2 sts; repeat from * 10 times. Join with sl st to first sc. (10 Fans, 10 sc, 20 ch-2 sps)
Each repeat uses exactly 6 stitches (1 + 2 + 1 + 2), and 10 repeats × 6 = 60.
Rnd 6 (pattern round): Sl st in each of next 2 ch and next 3 dc, which puts you in the center dc of the first Fan. Ch 1, sc in same st. Ch 2, Fan in next sc, ch 2, sc in center dc of next Fan; repeat from * 8 more times. Ch 2, Fan in next sc, ch 2, join with sl st to first sc. (10 Fans, 10 sc, 20 ch-2 sps)
Each new Fan sits on the sc between two Fans below, and each new sc sits in the center of a Fan below. This offset is what builds the scallop pattern you see on the finished body.
Rnds 7–24: Repeat Rnd 6. (10 Fans, 10 sc, 20 ch-2 sps in every round)
You now have 20 fan rounds, which measure 12.5 in (31.8 cm). Place a marker at the start of Rnd 24.
Neck
Rnd 25 (conversion): Ch 1, sc in same st as join. Skip ch-2 sp, sc in each of next 5 dc, skip ch-2 sp, sc in next sc; repeat from * 8 more times. Skip ch-2 sp, sc in each of next 5 dc, skip last ch-2 sp, join.
Count: 60 sts worked 1 per existing stitch (10 sc + 50 dc) + 0 extra = 60 sc.
Skipping the ch-2 spaces makes the top of the body curve in slightly. That gives the capsule shape.
Rnd 26: Ch 1, sc in next st, sc2tog; repeat from * 20 times. Join. (40 sc)
Rnd 27: Ch 1, sc in next 2 sts, sc2tog; repeat from * 10 times. Join. (30 sc)
Rnds 28–30: Ch 1, sc in BLO of each st around, join. (30 sc)
The BLO rounds make the ribbed neck band. Fasten off, leaving a 6 in (15.2 cm) tail to weave in.
Checkpoint: The body is 15 in (38.1 cm) tall and the neck is 3.75 in (9.5 cm) flat. Turn to the right side.
Covered Ring
With royal blue, make a slip knot on the hook. Hold the 3 in (7.6 cm) ring and work sc around it, inserting the hook through the center of the ring each time.
Rnd 1: Work 60 sc around the ring, pushing the stitches together as you go. Join with sl st to first sc. (60 sc)
If the ring still shows, add sc in multiples of 2 until it’s fully covered. Write down your final count. Fasten off, leaving a 16 in (40.6 cm) tail for sewing.
The covered ring measures about 3.5 in (8.9 cm) across.
Star Appliqué
With cream:
Rnd 1: Make a magic ring. Ch 3 (counts as dc), work 15 dc into the ring. Pull the ring closed and join to the top of the ch-3. (16 dc)
Rnd 2: Ch 4 (counts as dc + ch 1), dc in next st, ch 1; repeat from * 14 more times. Join to 3rd ch of ch-4. (16 dc, 16 ch-1 sps)
The ch-1 spaces form the ring of eyelets around the center. The disc is now about 2 in (5.1 cm) across.
Rnd 3 (points): Sl st in first ch-1 sp. Sc in this ch-1 sp, ch 9. Working back along the chain, starting in 2nd ch from hook: sc, hdc, hdc, dc, dc, tr, tr, tr (8 sts). Skip next dc, sc in next ch-1 sp, then move to the next ch-1 sp. Repeat from * 8 times total. Join to first sc. (8 points, 16 sc at the base)
Each point uses 2 ch-1 spaces, and 8 × 2 = 16, so the points come out evenly spaced. The trebles at the base make each point wide at the bottom, and the sc at the end makes the sharp tip.
Rnd 4 (edging): Sl st to the base of the first point. Work 8 sc up the chain side of the point, (sc, ch 2, sc) in the tip, work 8 sc down the stitch side, sl st between the 2 base sc. Repeat from * around and join. (8 × 18 sc = 144 sc, 8 ch-2 tips, 8 sl sts)
Fasten off, leaving a 20 in (50.8 cm) tail. The star measures 6.5 in (16.5 cm) from tip to tip. Each point is about 2.25 in (5.7 cm) long.
Center Disc
With gold:
Rnd 1: Make a magic ring and work 8 sc into it. Join. (8 sc)
Rnd 2: Ch 1, 2 sc in each st around. Join. (16 sc)
Fasten off, leaving a 10 in (25.4 cm) tail. The disc is 1.25 in (3.2 cm) across, which is enough to cover the magic ring and Rnd 1 of the star.
Assembly
- Stack the appliqué. Center the gold disc on the star. Whipstitch around its edge through the star’s Rnd 1 stitches only, so the eyelets in Rnd 2 stay open.
- Place the star. Flatten the body so the beginning-of-round seam is at the center back. Pin the star centered on the front, with its center about 5 in (12.7 cm) below the top of the neck. One point should point straight up and one straight down.
- Sew the star. Tack each point at its tip and halfway down, catching only the front layer of the body. Tack the base of the star between the points as well. Put your hand inside the tube while you sew so you don’t stitch the front to the back.
- Attach the ring. Flatten the neck so there are 15 sts in front and 15 in back. Overlap the bottom 10 sc of the covered ring by 0.75 in (1.9 cm) behind the center 10 sts of the back layer. Whipstitch along both rows, through the ring cover and the back neck stitches. Leave the front layer free so the top stays open for stuffing in bags.
Border
The border is one trim round at each opening. It firms the edges and covers the foundation chain.
Border gauge: 1 rev sc per stitch. It adds about 0.25 in (0.6 cm) of depth.
Top border: Join royal blue in any front-layer neck stitch. Work 1 rev sc in each of the 30 sts (15 sts per flat side) and join. (30 rev sc)
Where the ring is sewn on, work through the neck stitch only, not the ring.
Bottom border: Turn the holder upside down. Join royal blue in a free loop of the foundation chain. Work 1 rev sc in each of the 40 free loops (20 per flat side) and join. (40 rev sc)
Why the math works: Each opening already has the stitch count it needs, 30 at the top and 40 at the bottom. Working exactly 1 rev sc per stitch, with nothing added at the folds, keeps the edges from flaring or rippling. Rev sc is a little tighter than plain sc, so the bottom opening stays firm enough to hold bags back until you pull one out.
With both borders added, the body measures 15.5 in (39.4 cm).
Final Blocking
- Weave in all the ends now, before blocking.
- Soak the holder in cool water for 10 minutes, then press out the water in a towel. Don’t wring it.
- Slide a rolled towel or a 7.5 in (19.1 cm)-wide piece of cardboard wrapped in plastic into the tube.
- Pin the body to 7.5 in (19.1 cm) wide and 15.5 in (39.4 cm) tall. Open up each Fan with your fingers.
- Pin each star point flat, out to the full 6.5 in (16.5 cm) span.
- Let it dry completely. This usually takes 24 hours. Then remove the pins and the insert.
Final Quality-Control Checklist
- [ ] The bottom band has 40 sts and the opening lies as a smooth oval.
- [ ] Every fan round has 10 Fans, and they line up in an even offset pattern.
- [ ] The body is 7.5 in (19.1 cm) wide and 15.5 in (39.4 cm) tall.
- [ ] The neck has 30 sts with visible ribs.
- [ ] The ring is fully covered and sewn to the back layer only.
- [ ] The star has 8 points of equal length, and the gold disc is centered on it.
- [ ] The appliqué is sewn to the front layer only.
- [ ] All ends are woven in securely.
Troubleshooting
- The Fans spiral sideways: You joined to the wrong stitch. Always join to the first sc of the round, then count your slip stitches to the center dc carefully.
- The body ruffles: Your dc is looser than your sc. Go down one hook size for the fan rounds only.
- Bags fall out of the bottom: Work the bottom border tighter, or add a second round of sc before it.
- The star points curl: Your Rnd 4 edging is too tight. Re-work it with a larger hook, or block the star harder.
- The ring tilts forward: Sew a second row of stitches lower down on the overlap.
Care
Hand wash in cool water and lay flat to dry, reshaping the Fans and star points as you go. Don’t put it in the dryer, because the heat can warp a plastic ring.
Final Notes
The measurement chain works like this:
– The 40-st band is 5 in (12.7 cm) flat.
– It increases to 60 sts, or 7.5 in (19.1 cm) flat.
– Twenty fan rounds at 1.5 in (3.8 cm) per repeat add 12.5 in (31.8 cm) of height.
– The neck narrows to 30 sts, or 3.75 in (9.5 cm) flat.
– The rev sc borders bring the body to 15.5 in (39.4 cm).
– The 3.5 in (8.9 cm) covered ring overlaps the neck by 0.75 in (1.9 cm), so the finished holder is 18.25 in (46.4 cm) long.
If you match the gauge at the first checkpoint, every measurement after it follows. Happy crocheting!