
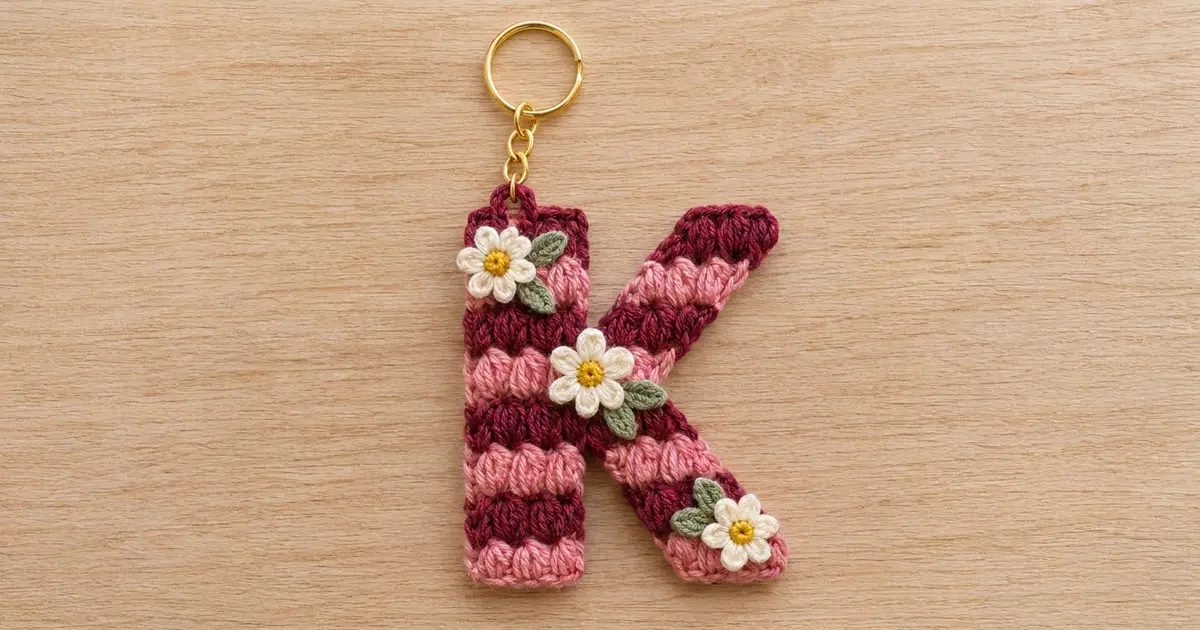
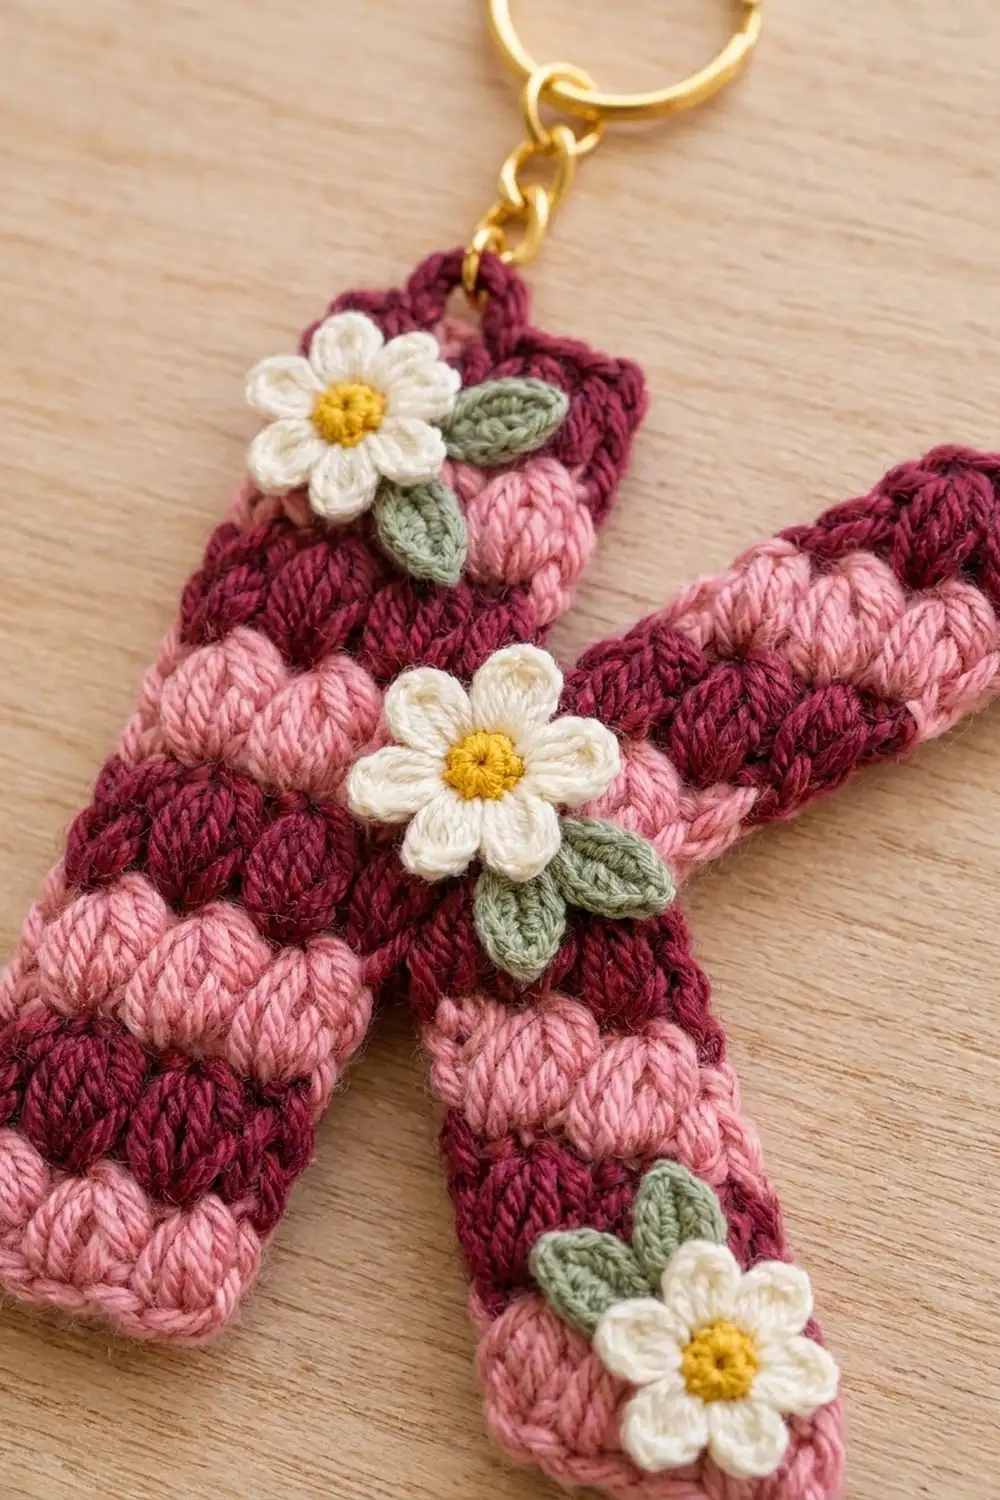
This little letter K is a bag charm with a lot of texture. Bands of puff stitches alternate between deep burgundy and soft rose pink, so the whole letter is striped from the foot of the stem to the tip of the arm. Three tiny cream daisies with golden centers and green leaves sit on top, and a gold split ring finishes it off.
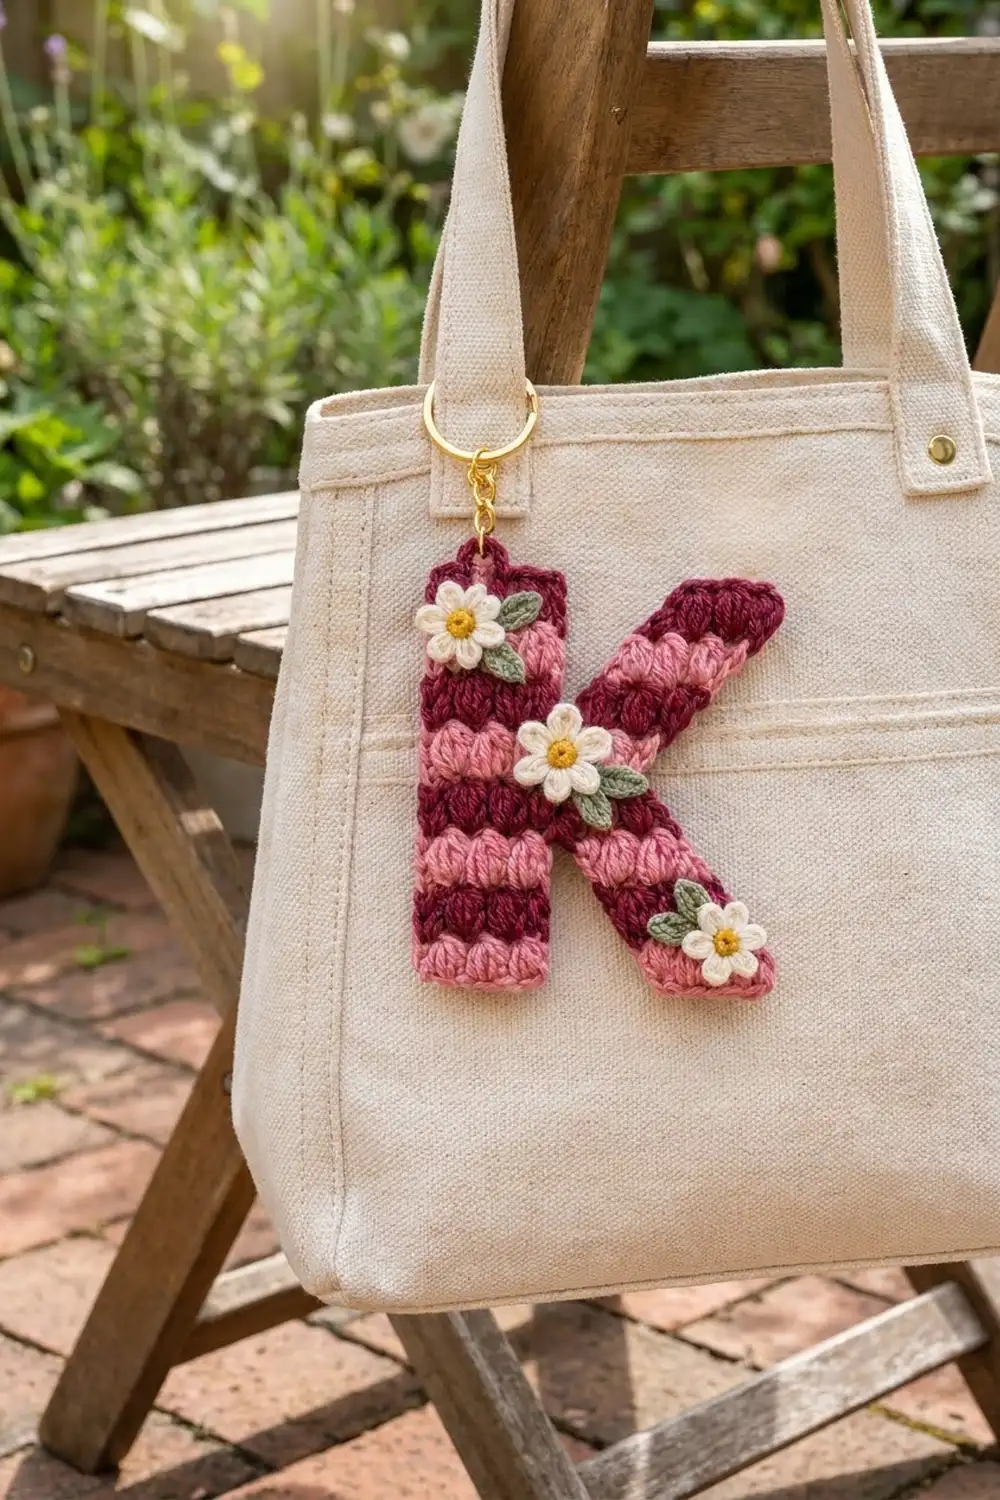
The style is cottage-cozy and a little vintage. It looks great clipped to a canvas tote, a backpack zipper or a set of keys, and it makes a thoughtful personalized gift.
The pattern uses US crochet terms. The finished letter measures 3.7 in (9.4 cm) wide by 4.3 in (10.9 cm) tall, not counting the keyring.
The letter is crocheted as one flat piece in rows from the bottom up. You work the stem and the leg as two short sections, join them in one row, work a few full-width rows, and then split into the stem and the arm. The leg and arm move over 1 stitch per row, which makes the diagonals. One edge round in matching colors tidies the outline. Then you sew on the flowers and add the hardware.
Finished Size and Construction
- Finished size: 3.7 in (9.4 cm) wide x 4.3 in (10.9 cm) tall
- Skill level: Advanced beginner
- Terminology: US
- Yarn weight: DK (3)
- Hook: 3.5 mm (E-4)
- Number of pieces: 1 letter, plus 3 flower appliqués and 6 leaves
- Layout: single letter K, worked flat in horizontal stripes
- Piece size before border: 3.4 in (8.6 cm) wide x 4.0 in (10.2 cm) tall
- Border depth: 0.15 in (0.4 cm) on every edge
- Stripes: 8 stripes, each 2 rows (1 sc row + 1 puff row), 0.5 in (1.3 cm) tall
Materials
Choose a smooth DK cotton or cotton blend. Cotton keeps the puffs crisp and stands up to life on a bag. Avoid fuzzy yarns, which blur the stripes.
- Color A, burgundy: 8 g, about 18 m
- Color B, rose pink: 8 g, about 18 m
- Color C, cream (petals): 2 g, about 5 m
- Color D, golden yellow (centers): 1 g, about 2 m
- Color E, sage green (leaves): 2 g, about 4 m
These quantities include a margin for swatching and the edge round.
Tools:
– 3.5 mm (E-4) hook
– Tapestry needle
– Gold split keyring, 1 in (2.5 cm) diameter, with a short chain and jump ring
– 2 pairs of flat-nose pliers
– Rust-proof pins and a blocking mat
– Scissors and stitch markers
Abbreviations (US Terms)
- ch – chain
- sl st – slip stitch
- sc – single crochet
- hdc – half double crochet
- dc – double crochet
- sc2tog – single crochet 2 together
- st(s) – stitch(es)
- RS / WS – right side / wrong side
Puff stitch (puff): (Yo, insert hook in st, yo, pull up a loop to about 0.25 in / 0.6 cm) 3 times; you have 7 loops on the hook. Yo and pull through all 7 loops, then ch 1 to lock. The locking ch-1 does not count as a stitch. On the next row, work into the top of the puff, not into the locking chain.
Color change: Work the last st of the row until 2 loops remain, drop the old color, and pull the new color through. Carry the unused color loosely up the stem’s outer edge. The edge round will cover it.
Gauge and Checkpoints
Pattern gauge: 5 sts = 1 in (2.5 cm) across, and 4 rows (2 stripes) = 1 in (2.5 cm) tall.
The stem is your test piece. Work Stem Rows 1–6 first, then measure before you start the leg.
- After Stem Row 6: 1.2 in (3.0 cm) wide x 1.5 in (3.8 cm) tall
- After Row 10: 2.2 in (5.6 cm) across Row 10, 2.5 in (6.4 cm) tall
- After Row 16: 3.4 in (8.6 cm) wide x 4.0 in (10.2 cm) tall
- After the edge round: 3.7 in (9.4 cm) x 4.3 in (10.9 cm)
A difference of 0.1 in (0.3 cm) is fine. If your stem measures 1.4 in (3.6 cm) wide, go down to a 3.25 mm hook. If it measures 1.0 in (2.5 cm), go up to a 3.75 mm hook. If only the height is off, adjust the puff loop height. Pull the loops up shorter if the stripes are too tall and longer if they are too short.
Pattern
In the sizing notes, stitch positions are counted from left to right as you look at the RS, with the stem in positions 1–6. Odd rows are WS sc rows. Even rows are RS puff rows. Stripe colors are as follows:
- Rows 1–2: B
- Rows 3–4: A
- Rows 5–6: B
- Rows 7–8: A
- Rows 9–10: B
- Rows 11–12: A
- Rows 13–14: B
- Rows 15–16: A
Part 1: Stem Base (Rows 1–6)
With B, ch 7.
Row 1 (WS): Sc in 2nd ch from hook and in each ch across, turn. (6 sts)
Row 2 (RS): Ch 1, sc in first st, puff in each of next 4 sts, sc in last st, turn. (6 sts: 2 sc, 4 puffs)
Row 3 (WS): Change to A. Ch 1, sc in each st across, turn. (6 sts)
Row 4 (RS): Repeat Row 2. (6 sts)
Rows 5–6: Change to B. Repeat Rows 3–4. (6 sts)
On the last st of Row 6, change to A, then pull up a long loop and set the stem aside. Row 6 ends at the stem’s outer (left) edge.
Part 2: Leg (Rows 1–6)
The leg is 5 sts wide and shifts 1 st toward the stem on every row. The leading edge faces the stem. The trailing edge is the outer edge.
With B, ch 6.
Row 1 (WS): Sc in 2nd ch from hook and in each ch across, turn. (5 sts) The end where this row began is the leading edge.
Row 2 (RS): Ch 1, sc2tog over first 2 sts, puff in each of next 2 sts, (puff, sc) in last st, turn. (5 sts: 1 sc2tog, 3 puffs, 1 sc)
Row 3 (WS): Change to A. Ch 1, 2 sc in first st, sc in each of next 2 sts, sc2tog over last 2 sts, turn. (5 sts)
Row 4 (RS): Repeat Row 2. (5 sts)
Row 5 (WS): Change to B. Repeat Row 3. (5 sts)
Row 6 (RS): Repeat Row 2. (5 sts) Fasten off and weave in the end.
The leg now sits in positions 8–12, leaning left. Lay it to the right of the stem with RS up, so there is a 1-st gap (position 7) between them.
Part 3: Joining Rows (Rows 7–10)
Row 7 (WS, A): Put the stem’s loop back on your hook. Ch 1, sc in each of the 6 stem sts. Then continue into the leg: 2 sc in the first leg st, sc in each of next 2 sts, sc2tog over last 2 sts, turn. That makes (6 sts) + (5 sts) = 11 sts. The first sc of the increase fills the gap at position 7.
Row 8 (RS, A): Ch 1, sc in first st, puff in each of next 9 sts, sc in last st, turn. (11 sts)
Row 9 (WS): Change to B. Ch 1, sc in each st across, turn. (11 sts)
Row 10 (RS, B): Repeat Row 8. (11 sts) Change to A on the last st.
Checkpoint: 2.2 in (5.6 cm) across Row 10 and 2.5 in (6.4 cm) tall.
Part 4: Upper Stem (Rows 11–16)
Row 11 (WS, A): Ch 1, sc in each of first 6 sts, turn. Leave the remaining 5 sts unworked. (6 sts)
Rows 12–16: Continue the stripe sequence on these 6 sts. Even rows match Row 2 and odd rows match Row 3. (6 sts) Fasten off after Row 16.
Part 5: Arm (Rows 11–16)
The arm shifts 1 st away from the stem on every row. Now the leading edge is the outer (right) edge.
Row 11 (WS): With WS facing, join A in the first unworked st of Row 10 next to the stem (position 7). Ch 1, sc2tog over first 2 sts, sc in each of next 2 sts, 2 sc in last st, turn. (5 sts, positions 8–12)
Row 12 (RS, A): Ch 1, (sc, puff) in first st, puff in each of next 2 sts, sc2tog over last 2 sts, turn. (5 sts: 1 sc, 3 puffs, 1 sc2tog)
Row 13 (WS): Change to B. Repeat Row 11 (without the join). (5 sts)
Row 14 (RS, B): Repeat Row 12. (5 sts)
Row 15 (WS): Change to A. Repeat Row 13. (5 sts)
Row 16 (RS, A): Repeat Row 12. (5 sts, positions 13–17) Fasten off.
Checkpoint: 3.4 in (8.6 cm) wide at the top and bottom, and 4.0 in (10.2 cm) tall. The top edge has 6 sts (stem), a gap, and then 5 sts (arm), for 17 positions in total.
Part 6: Daisies (make 3)
Center: With D, make a magic ring and work 5 sc into it. Pull the ring closed and sl st to the first sc. (5 sts, about 0.3 in / 0.8 cm) Fasten off.
Petals: Join C in any sc. *(Sl st, ch 2, 2 dc, ch 2, sl st) in same sc, move to next sc; repeat from * 4 more times. (5 petals) Fasten off. Each daisy is about 0.9 in (2.3 cm) across.
Part 7: Leaves (make 6)
With E, ch 5. Side 1: Sc in 2nd ch from hook, hdc in next ch, sc in next ch, sl st in last ch. Side 2: Working along the other side of the chain, sc in next ch, hdc in next ch, sc in next ch, sl st at the tip. (8 sts) Each leaf is about 0.6 in (1.5 cm) long. Leave a tail for sewing.
Border
Border gauge: Across the tops of rows, work 1 sc per st. Along vertical row ends, work 1 sc in each sc row end and 2 sc in each puff row end, which gives 3 sc per stripe. Along diagonal row ends, work 2 sc in every row end, which gives 4 sc per stripe.
Edge round (RS facing): Work each sc in the color of the stripe it borders. Carry the unused color inside the sts. The per-edge counts below include corners. At each corner st, work 3 sc. Start at the top-left corner of the stem and work down the left side.
- Stem left edge (rows 16 to 1, vertical): 8 stripes x 3 = 24 sc
- Stem bottom (6 foundation loops, 2 corners): 4 + 3 + 3 = 10 sc
- Stem inner edge (rows 1–6, vertical): 3 x 3 = 9 sc
- Leg inner diagonal (rows 6 to 1): 6 x 2 = 12 sc
- Leg foot (5 loops, 2 corners): 3 + 3 + 3 = 9 sc
- Outer right edge: rows 1–7 diagonal (7 x 2 = 14 sc) + rows 8–10 vertical (2 + 1 + 2 = 5 sc) + rows 11–16 diagonal (6 x 2 = 12 sc) = 31 sc
- Arm top (5 sts, 2 corners): 9 sc
- Arm inner diagonal (rows 16 to 11): 12 sc
- Stem inner edge (rows 11–16, vertical): 9 sc
- Stem top (6 sts, 2 corners): 10 sc
Subtotal: 135 sc. At each of the 2 deep notches (stem and leg, stem and arm), work an sc2tog over the last row end of one edge and the first row end of the next. Each sc2tog replaces 2 sc with 1, so the round has 135 − 2 = 133 sts. Sl st to the first sc and fasten off.
Why the math works: A vertical stripe is 0.5 in (1.3 cm) tall. At 6 border sc per inch, that is 3 sc. A diagonal stripe edge is about 0.64 in (1.6 cm) long because it also shifts 0.4 in (1.0 cm) sideways, so it needs about 4 sc. The 3-sc corners turn the square corners flat. The notch decreases stop the inner points from rippling.
Final Blocking
- Weave in all ends along the stripe of the matching color.
- Mist the letter lightly with water until it is just damp.
- Pin it RS up to 3.7 in (9.4 cm) x 4.3 in (10.9 cm).
- Line the stem up straight and check that both diagonals run evenly.
- Gently pinch each puff round with your fingers.
- Leave it to dry completely, then unpin.
- Sew on the daisies: one on stripes 6–7 of the stem, one where the arm meets the stem on stripes 4–5, and one on stripes 1–2 of the leg foot. Tuck 2 leaves behind each daisy and stitch them through the center only.
- Open the jump ring with pliers, pass it through the middle of the stem’s top border, and add the chain and split ring.
Final Quality-Control Checklist
- [ ] 8 stripes on the stem, with pink at the bottom and burgundy at the top
- [ ] Stem is 6 sts wide; arm and leg are 5 sts wide
- [ ] Leg foot is pink and arm tip is burgundy
- [ ] Edge round has 133 sts, and its colors match the stripes
- [ ] Letter measures 3.7 in (9.4 cm) x 4.3 in (10.9 cm)
- [ ] 3 daisies and 6 leaves are sewn securely
- [ ] Jump ring is closed with no gap
Troubleshooting
- The leg or arm curls: Your puffs are tighter than your sc. Pull the puff loops up a little longer, then block flat.
- The diagonal stair-steps: Make sure you increase and decrease on every row. Recount: every arm and leg row has 5 sts.
- There is a hole at the stem-leg join: Close it with a stitch of matching yarn when you weave in the ends.
- The edge round ruffles: Use 3 sc per stripe on the diagonals instead of 4.
- The edge round pulls in: Add 1 sc at the corners or work a looser round.
- The carried yarn shows: Keep the carry loose, then trap it under the border sc.
Care
Hand wash in cool water and lay flat to dry. Remove the metal hardware first if you want to keep it bright.
Final Notes
The measurement chain is short and easy to check. The stem base should be 1.2 in (3.0 cm) wide, Row 10 should be 2.2 in (5.6 cm) across, and the finished body should be 3.4 in (8.6 cm) x 4.0 in (10.2 cm). After the 0.15 in (0.4 cm) edge round, the letter measures 3.7 in (9.4 cm) x 4.3 in (10.9 cm). If each checkpoint matches, your K will lie flat, keep its shape, and show off its daisies.
To make other letters, use the same stitch logic: 6-st straight strokes, 5-st diagonal strokes shifting 1 st per row, and 2-row stripes.
Happy crocheting!