
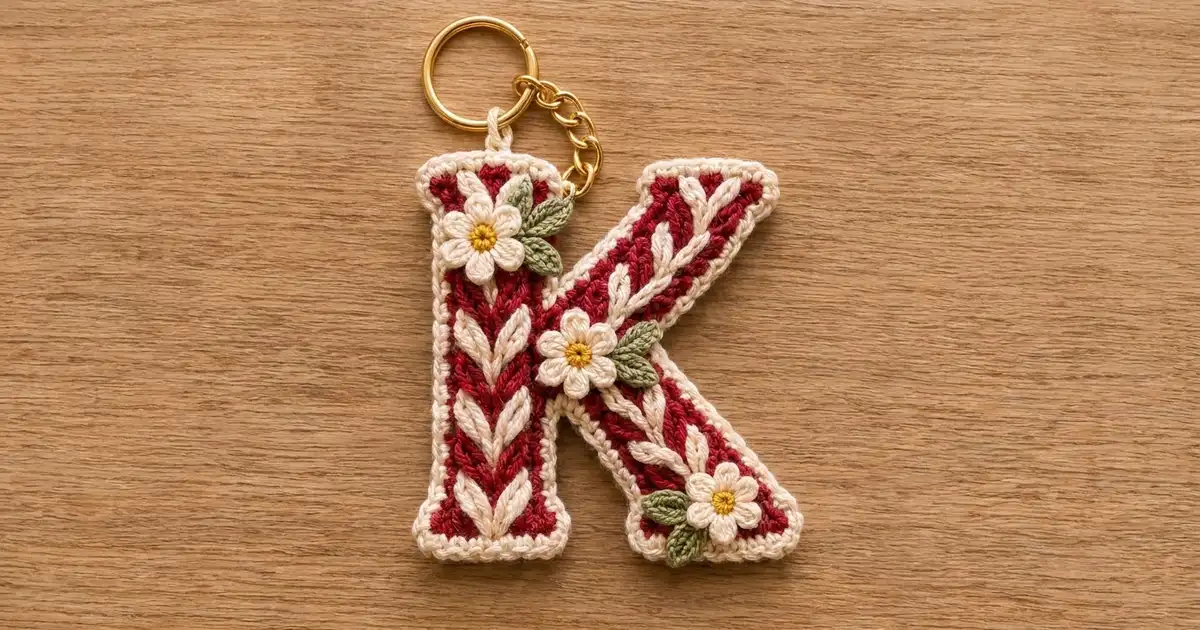
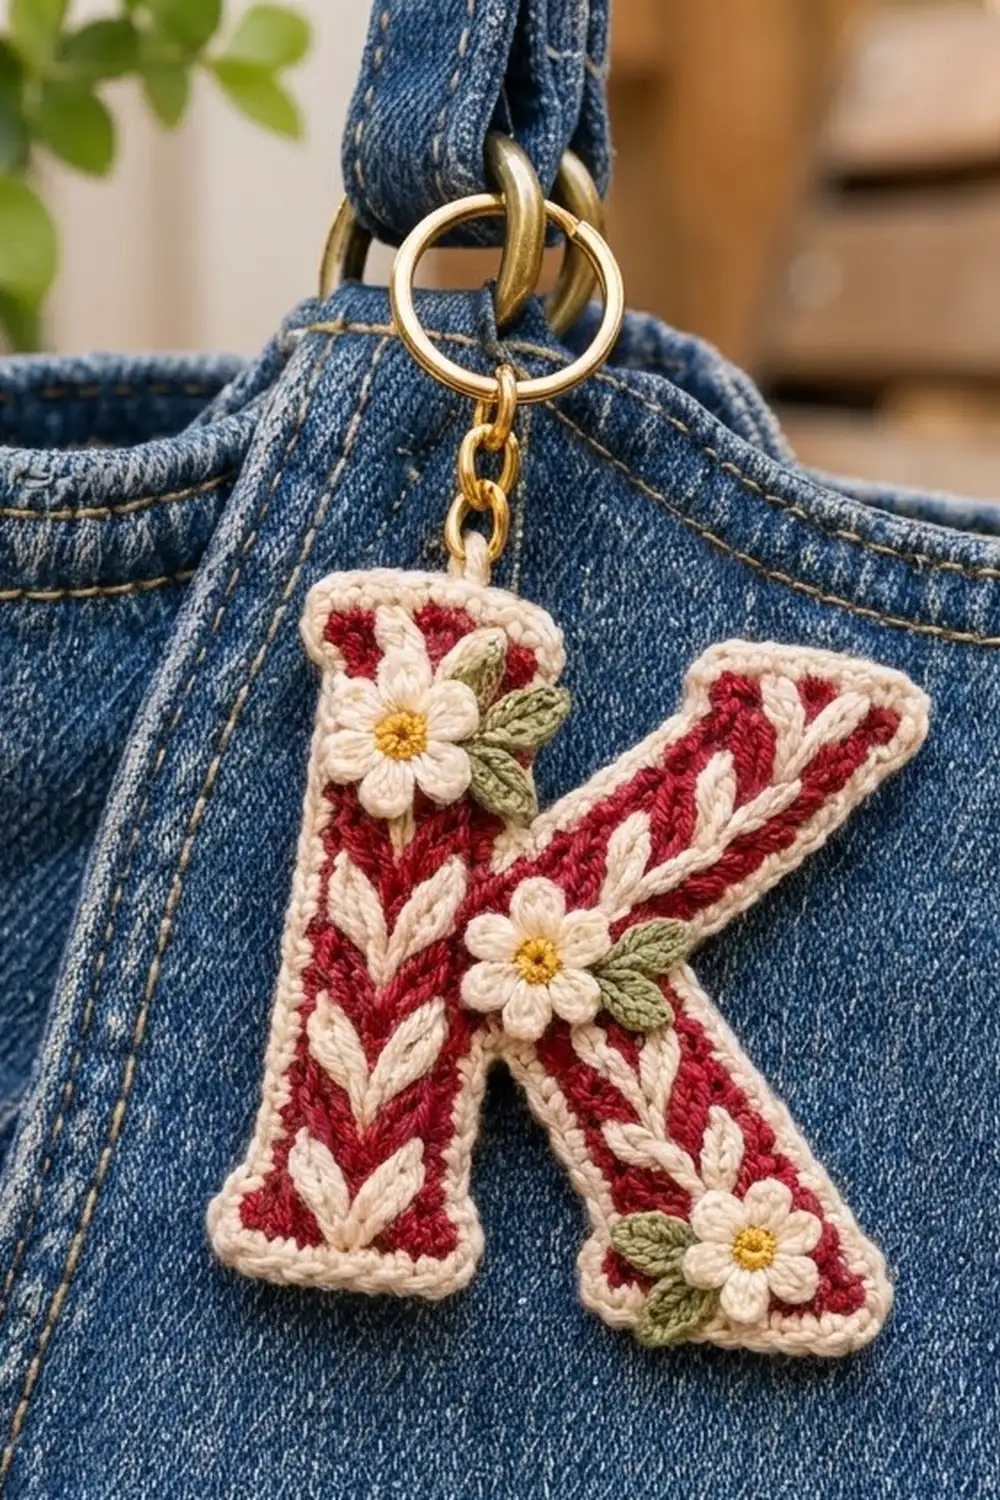
This little monogram keychain turns a single letter into a gift-worthy accessory. The letter K is worked in deep crimson single crochet. A raised cream wheat motif runs down every stroke, and a rope-textured cream border frames the whole shape.
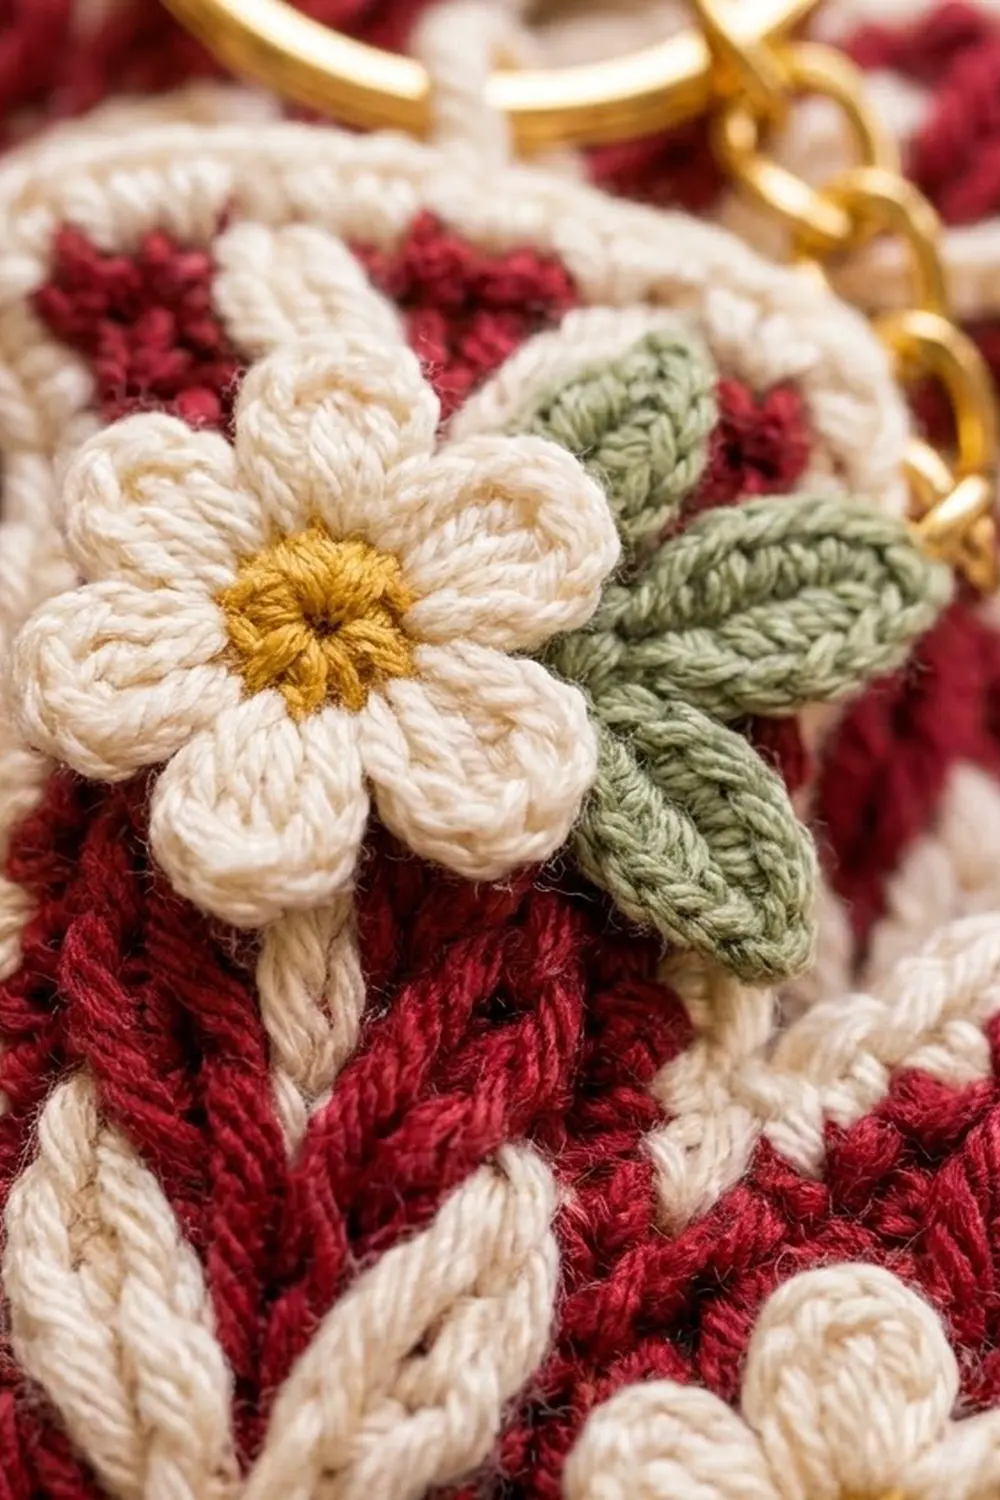
Three tiny cream daisies with golden centers and sage-green leaves add a cottage-garden finish. A cream loop at the top holds a gold split ring and chain, ready for a bag strap, zipper or key set. The look is classic and a little folk-inspired, with a firm, flat fabric that holds its shape.
This pattern uses US crochet terms. The finished letter measures 4 in (10.2 cm) tall and 3.5 in (8.9 cm) wide.
The construction is simple. You work the leg as a small slanted strip, then work the stem and join the leg to it in Row 8. The letter continues as one piece and splits again for the stem top and the arm. After that you embroider the wheat leaves, add a two-round border, attach the flowers and finish with the loop and ring.
Finished Size and Construction
- Finished size: 4 in (10.2 cm) tall x 3.5 in (8.9 cm) wide
- Skill level: Intermediate (shaping by rows, surface embroidery)
- Terminology: US
- Yarn weight: Sport (2), cotton or cotton blend
- Hook: 2.75 mm (C-2)
- Number of pieces: 1 letter body, plus 3 flowers and 6 leaves as appliqués
- Layout: Single letter; no joining of letter pieces
- Letter size before border: 3.5 in (8.9 cm) tall x 3 in (7.6 cm) wide
- Border depth: 0.25 in (0.6 cm) on every edge (2 rounds)
Materials
Choose a smooth, tightly plied cotton in sport weight, about 150 m per 50 g. Cotton gives crisp stitch definition and stands up to handling on a keychain.
- Color A, Crimson: 8 g / 24 m
- Color B, Cream: 6 g / 18 m
- Color C, Golden Yellow: 1 g / 3 m
- Color D, Sage Green: 2 g / 6 m
All quantities include about a 25% margin for swatching and tails.
Tools:
– 2.75 mm (C-2) crochet hook
– Blunt tapestry needle
– 1 in (2.5 cm) gold split key ring with a short chain
– Rust-proof pins and a foam blocking mat
– Small scissors
– Stitch markers (2)
Abbreviations (US Terms)
- ch – chain
- sl st – slip stitch
- sc – single crochet
- hdc – half double crochet
- dc – double crochet
- sc2tog – single crochet 2 together
- inc – 2 sc in the same stitch
- rev sc – reverse single crochet (crab stitch)
- st(s) – stitch(es)
- RS – right side
Special stitch – Reverse single crochet (rev sc): Working from left to right (right-handed), insert the hook into the next stitch to the right, yarn over, pull up a loop, yarn over and draw through both loops. This creates the twisted, rope-like edge.
Special stitch – Shift row: Inc in the first stitch on one edge and sc2tog over the last 2 stitches on the opposite edge. The count stays the same, but the strip moves one stitch sideways and creates the diagonal.
Gauge and Checkpoints
Gauge: 6 sc and 6 rows = 1 in (2.5 cm) in Color A.
This square gauge is essential. Every row end on the edge gets exactly 1 border stitch, and that only lies flat if stitches and rows are the same size.
Test by working the leg (Rows 1–7) first. It is your swatch.
- Checkpoint 1, leg: 7 sts wide = 1.17 in (3.0 cm); 7 rows tall = 1.17 in (3.0 cm)
- Checkpoint 2, after Row 8: stem edge to leg edge, 13 sts = 2.17 in (5.5 cm)
- Checkpoint 3, after Row 17: height = 2.83 in (7.2 cm)
- Checkpoint 4, before border: 3.5 in (8.9 cm) x 3 in (7.6 cm)
- Checkpoint 5, after border: 4 in (10.2 cm) x 3.5 in (8.9 cm)
If your leg is too big, go down to a 2.5 mm hook. If it is too small, go up to a 3.0 mm hook. Re-test before continuing.
Pattern
Ch 1 at the start of each row does not count as a stitch. All rows are worked in sc unless noted.
Part 1: The Leg (Color A)
Row 1: Ch 8, sc in 2nd ch from hook and in each ch across. Turn. (7 sts)
From here on, the “inner edge” of the leg is the edge that will face the stem.
Row 2 (shift): Ch 1, inc in first st at the inner edge, sc in next 4 sts, sc2tog. Turn. (7 sts)
Row 3: Ch 1, sc in each st. Turn. (7 sts)
Row 4 (shift): Repeat Row 2, inc at the inner edge. (7 sts)
Row 5: Repeat Row 3. (7 sts)
Row 6 (shift): Repeat Row 2. (7 sts)
Row 7: Repeat Row 3. (7 sts)
Fasten off and leave a 6 in (15.2 cm) tail. The leg is now a parallelogram that leans toward the stem by 3 stitches. Check it against Checkpoint 1.
Part 2: The Stem and Junction (Color A)
Row 1: Ch 9, sc in 2nd ch from hook and across. Turn. (8 sts, bottom serif)
Row 2: Ch 1, sc in each st. Turn. (8 sts)
Row 3: Ch 1, sc2tog, sc in next 4 sts, sc2tog. Turn. (6 sts)
Rows 4–7: Ch 1, sc in each st. Turn. (6 sts)
Lay the leg to the right of the stem, with its leaning inner edge toward the stem and its Row 7 level with stem Row 7. The feet should sit 3 sts (0.5 in / 1.3 cm) apart at the bottom.
Row 8 (joining row): Ch 1, sc in each of 6 stem sts, then continue straight into the leg and sc in each of its 7 sts. Turn. (13 sts)
No chain bridge is needed. The 1-stitch gap closes as you work, giving you a solid row 2.17 in (5.5 cm) wide.
The left edge, the stem side, stays straight from here on. All shaping happens at the right-hand end of each row.
Row 9: Sc across. (13 sts)
Row 10: Sc across, ending with sc2tog at the right edge. (12 sts)
Row 11: Sc across. (12 sts)
Row 12: Sc across, sc2tog at the right edge. (11 sts)
Row 13: Sc across. (11 sts)
Row 14: Sc across, sc2tog at the right edge. (10 sts)
This is the deepest point of the V-notch between the arm and the leg.
Row 15: Sc across, inc in the last st at the right edge. (11 sts)
Row 16: Sc across, inc at the right edge. (12 sts)
Row 17: Sc across, inc at the right edge. (13 sts)
Measure Checkpoint 3: 2.83 in (7.2 cm) tall.
Part 3: Top of the Stem (Color A)
Work over the first 6 sts of Row 17, at the stem side only.
Rows 18–19: Ch 1, sc in 6 sts. Turn. (6 sts)
Row 20: Ch 1, inc, sc in next 4 sts, inc. Turn. (8 sts, top serif)
Row 21: Ch 1, sc in each st. (8 sts)
Fasten off.
Part 4: The Arm (Color A)
With the RS facing, join Color A in the 7th st of Row 17. This is the stitch right after the stem top.
Row 18: Ch 1, sc2tog over sts 7–8, sc in sts 9–12, inc in st 13. Turn. (7 sts)
Starting with sc2tog shifts the arm one stitch away from the stem and leaves a narrow notch.
Rows 19–21 (shift): Each row, sc2tog at the stem-side edge and inc at the outer edge, with sc in the 4 sts between. (7 sts each row)
Fasten off. The arm’s outer tip now reaches the full width of 3 in (7.6 cm). Weave in all Color A tails, then check Checkpoint 4: 3.5 in (8.9 cm) x 3 in (7.6 cm).
Part 5: Wheat Motif (Color B, embroidered)
Thread about 30 in (76.2 cm) of Color B and work detached chain stitches (lazy daisy). Each leaf is a loop about 2 rows long, 0.33 in (0.8 cm), anchored at its tip with a tiny tack. Work leaves in pairs, angling them outward from a center line so each pair forms a V.
- Stem: The center line runs between sts 3 and 4 of the 6-st stem. Start the pairs at Rows 1, 4, 7, 10, 13, 16 and 19, with the tips pointing up. (7 pairs)
- Arm: Run the center line diagonally from the stem’s right edge at Row 12 to the middle of arm Row 21. Space 4 pairs about 0.5 in (1.3 cm) apart, with the tips pointing toward the arm’s tip.
- Leg: Run the center line from the junction at Row 9 to the middle of leg Row 1. Space 4 pairs about 0.5 in (1.3 cm) apart, with the tips pointing toward the foot.
Keep the stitches plump but not tight, so the red fabric stays flat. Run the tails under the stitches on the wrong side.
Part 6: Flowers (make 3)
With Color C: Make a magic ring and work 5 sc into it. Pull it closed, sl st to the first sc and fasten off. (5 sts)
With Color B: Join in any sc. (Ch 2, 2 dc, ch 2, sl st) all in the same st, then sl st into the next st. Repeat from * to * 5 times. (5 petals)
Fasten off and leave an 8 in (20.3 cm) tail. Each flower measures about 0.75 in (1.9 cm) across.
Part 7: Leaves (make 6)
With Color D: Ch 5. Starting in the 2nd ch from hook, work sc, hdc, hdc, sl st. (4 sts)
Fasten off and leave a 6 in (15.2 cm) tail. Each leaf measures about 0.5 in (1.3 cm) long.
Border
The border uses Color B. Its gauge matches the body: 6 sts per 1 in (2.5 cm) along the edge. Because the stitch and row gauges are equal, 1 sc in each row end lies exactly as flat as 1 sc in each stitch.
Round 1 (sc): Join Color B at the top-left corner of the stem. Work counterclockwise in the order listed below.
Corner stitches are the first and last stitches of each foundation or top row. Each corner gets 3 sc, and those corners are included in the horizontal edge totals.
| Edge | Count |
|---|---|
| Stem left side (21 row ends) | 21 |
| Stem bottom (3 sc corner + 6 sc + 3 sc corner) | 12 |
| Stem right edge, Rows 1–7 | 7 |
| Leg inner edge, Rows 7–1 | 7 |
| Leg bottom (3 + 5 + 3) | 11 |
| Right side, leg Row 1 up to arm Row 21 (21 row ends) | 21 |
| Arm top (3 + 5 + 3) | 11 |
| Arm inner edge, Rows 21–18 | 4 |
| Stem right edge, Rows 18–21 | 4 |
| Stem top (3 + 6 + 3) | 12 |
At each of the 3 inner corners, work sc2tog across the two row ends that meet there:
– the bottom notch at Row 7, between the stem and the leg
– the V-notch at Rows 14–15
– the top notch at Row 18, between the arm and the stem
Sl st to the first sc.
Round 1 total: 94 sts worked 1 per existing stitch or row end (64 row ends + 30 stitches), plus 16 corner extras (8 outer corners x 2), minus 3 for the sc2togs: 94 + 16 − 3 = 107 sts.
Round 2 (rev sc): Ch 1, rev sc in each st around. Sl st to the first st and fasten off.
This is a trim round: 107 sts worked 1 per existing stitch + 0 added = 107 sts.
Why the math works: The square gauge means row ends need no extra stitches. Three sc in each outer corner turns the corner without cupping, and sc2tog at each inner corner removes the fullness that would otherwise bunch up in the notches. The rev sc round adds height and texture but no width at the corners. Together the 2 rounds add 0.25 in (0.6 cm) per side, which brings the letter from 3.5 x 3 in (8.9 x 7.6 cm) to 4 x 3.5 in (10.2 x 8.9 cm).
Loop and Hardware
Join Color B at the center of the stem’s top edge, between the 6th and 7th sts of the Round 1 stem-top section.
Ch 10, sl st in the same st. Work 14 sc into the ch-10 space, then sl st at the base. The loop is about 0.75 in (1.9 cm) long.
Fasten off, weave in the end and thread the loop onto the gold chain or split ring.
Attaching the Flowers
Sew 2 leaves behind each flower so they peek out on one side. Then sew the flowers on:
- one at the upper left of the stem (Rows 17–20)
- one at the junction where the arm and leg meet the stem (Rows 11–13)
- one on the leg just above the foot (Rows 2–4)
Stitch through the yellow centers and the petal bases only, so the petals stay lifted.
Final Blocking
- Lightly mist the letter with water. Keep it away from the flowers.
- Pin the letter face up to 4 in (10.2 cm) tall x 3.5 in (8.9 cm) wide.
- Pin each serif and foot so the bottom edges sit level.
- Pin the arm and leg tips so the V-notch opens cleanly.
- Let it dry completely, about 2–3 hours.
- Unpin it and fluff the flower petals with your fingertips.
Final Quality-Control Checklist
- Letter measures 4 in (10.2 cm) x 3.5 in (8.9 cm)
- Round 1 has 107 sts, and Round 2 has 107 rev sc
- The stem has 7 wheat pairs, and the arm and leg have 4 pairs each
- All three notches are crisp, with no puckering
- Flowers and leaves are firmly attached
- The loop is secure, and the ring opens and closes freely
- All tails are woven in on the wrong side
Troubleshooting
- Border ruffles: Your row gauge is shorter than your stitch gauge. Skip 1 row end in every 8 on the long sides.
- Border pulls in: Your rows are taller than your stitches. Add 1 sc in every 8th row end.
- Leg leans the wrong way: The inc was worked at the outer edge. Rip back and inc at the inner edge.
- Notches bunch up: Make sure you worked sc2tog at all 3 inner corners.
- Wheat leaves pucker the fabric: Redo them with looser loops.
- Flowers flop: Add a tack stitch under 2 opposite petals.
Care
Hand wash in cool water with mild soap, press out the water in a towel, and dry flat. Do not machine wash or iron the flowers.
Final Notes
The measurement chain is simple:
1. A 6 x 6 gauge gives a 7-st leg of 1.17 in (3.0 cm).
2. The joining row measures 2.17 in (5.5 cm).
3. The full body measures 3.5 x 3 in (8.9 x 7.6 cm).
4. The 107-stitch, two-round border adds 0.25 in (0.6 cm) per side.
5. The finished letter measures 4 x 3.5 in (10.2 x 8.9 cm).
Check each step and your K will come out crisp, flat and ready to clip on.
Happy crocheting!