
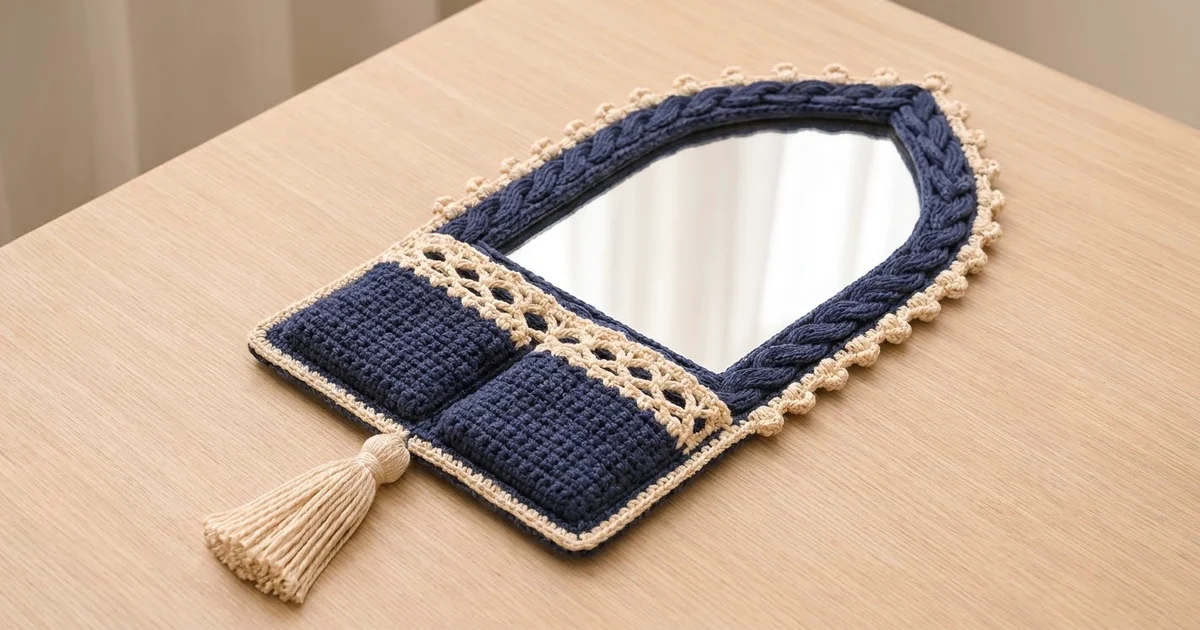
The Moonlit Arch is a crocheted cover for a pointed-arch mirror. It turns a plain mirror into a soft wall piece. A deep navy braided cable band runs all the way around the glass. A cream bobble edging traces the outline, and a pocket panel with a cream lattice band sits across the bottom.
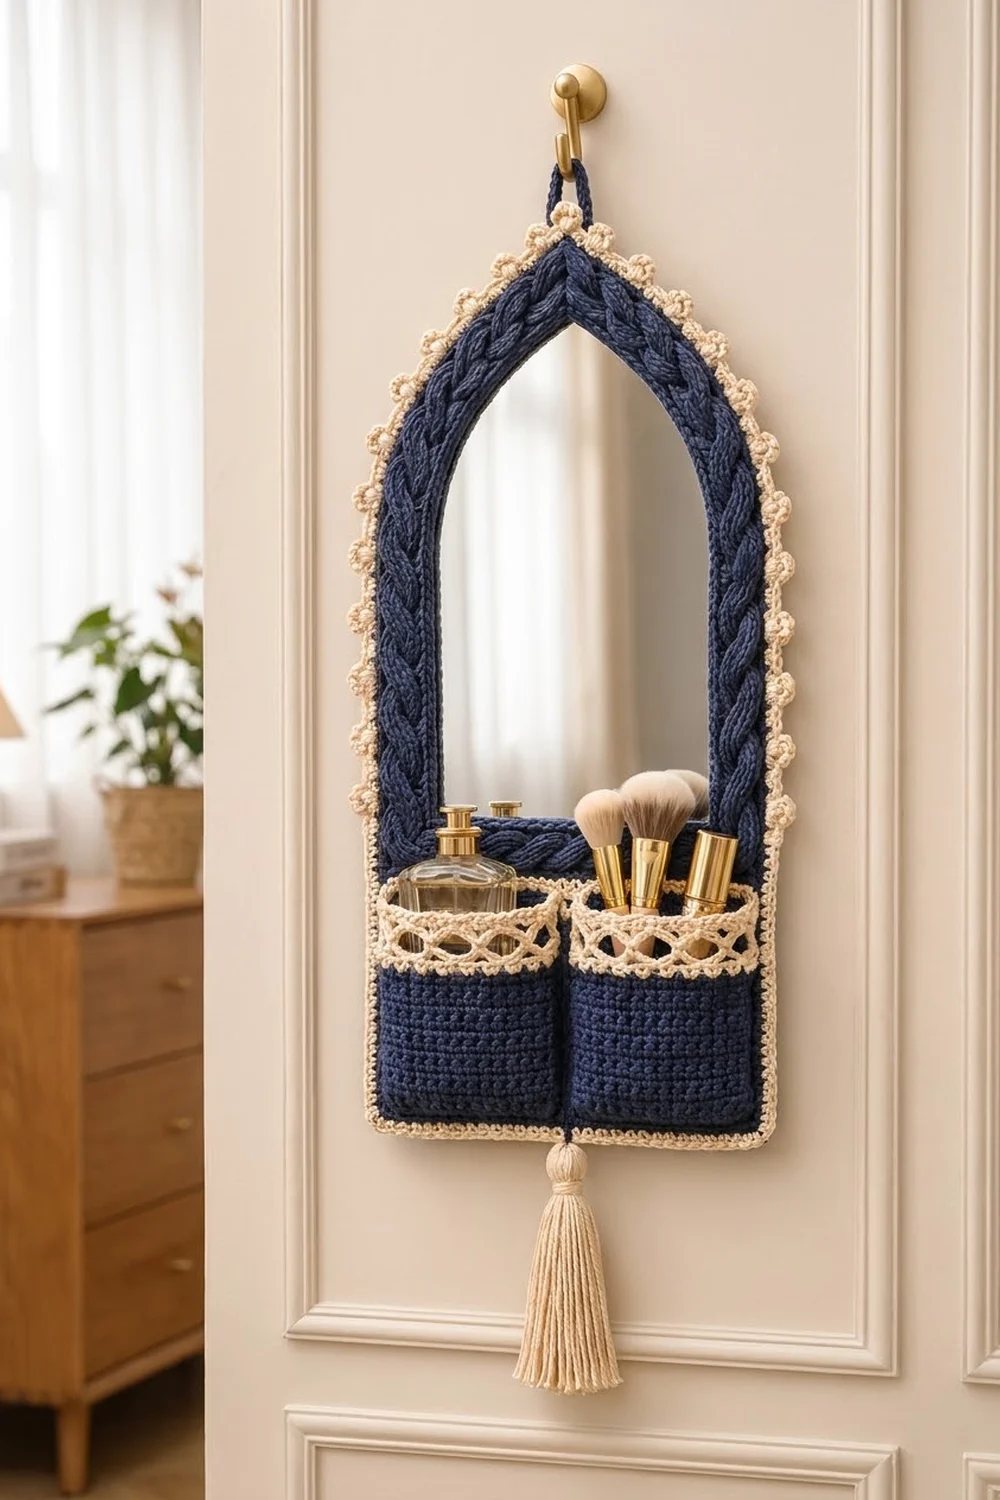
The palette is two colors: navy for the frame, back panel and pocket body, and cream for the bobbles, the lattice, the pocket edging and the tassel. The style is classic and a little vintage. It works well by a vanity or in an entryway, where the two pockets can hold brushes, a small perfume bottle or keys.
This pattern uses US crochet terms. The bordered frame measures 13.5 x 20.4 in (34.3 x 51.8 cm). Add a 3 in (7.6 cm) hanging loop at the top and a 6 in (15.2 cm) tassel at the bottom.
Construction is simple to follow. First you crochet a flat navy back panel in the arch shape. Then you work a long braided cable strip and pin it around the front edge of the panel. One navy border round joins both layers, and you slide the mirror in before closing the bottom edge. Two cream rounds add the bobble edging. Last, you sew on the pocket panel, then add the loop and the tassel.
Finished Size and Construction
- Finished size: 13.5 x 20.4 in (34.3 x 51.8 cm), not counting the loop and tassel
- Skill level: Intermediate (front post cables, bobbles, simple shaping)
- Terminology: US
- Yarn weight: Worsted (#4), cotton or cotton blend
- Hook: 5.0 mm (US H-8)
- Number of pieces: One finished item, built from a back panel, a cable strip, a pocket panel, a loop and a tassel
- Layout: Single framed arch; the pocket panel covers the lower 6.75 in (17.1 cm)
- Back panel size: 12 x 18.9 in (30.5 x 48.0 cm)
- Size before border: 12 x 18.9 in (30.5 x 48.0 cm)
- Border depth: 0.75 in (1.9 cm) per side
- Mirror: pointed-arch mirror up to 10 x 17 in (25.4 x 43.2 cm). A lightweight acrylic mirror is best for wall hanging.
Materials
Pick a smooth, mercerized or combed cotton worsted. Cotton shows the cable texture clearly and holds its shape on the wall. Avoid fuzzy or very stretchy yarns, because the frame has to grip the mirror.
- Navy: 300 g, about 540 m (590 yd)
- Cream: 60 g, about 110 m (120 yd)
These quantities include a margin of roughly 15 percent for your swatch and for small differences in tension.
Tools:
- 5.0 mm (US H-8) crochet hook
- Tapestry needle
- Stitch markers (at least 6)
- Rust-proof pins and a blocking mat
- Piece of stiff card, 6 in (15.2 cm) tall, for the tassel
- Arched mirror, up to 10 x 17 in (25.4 x 43.2 cm)
- Scissors and measuring tape
Abbreviations (US Terms)
- ch – chain
- sl st – slip stitch
- sc – single crochet
- dc – double crochet
- sc2tog – single crochet 2 together
- FPdc – front post double crochet
- FPtr – front post treble crochet
- sk – skip
- sp – space
- st(s) – stitch(es)
- yo – yarn over
- RS / WS – right side / wrong side
Special stitch – Bobble (bo): [Yo, insert hook in st, yo and pull up a loop, yo and draw through 2 loops] 5 times in the same st, yo and draw through all 6 loops on hook, ch 1 to lock. Push the bobble to the RS.
Post stitch note: In the cable strip, Row 2’s FPdc go around the sc of Row 1. From Row 4 on, every FPdc and FPtr goes around the post stitch two rows below. Always skip the sc behind each post stitch you make.
Gauge and Checkpoints
Main gauge: 16 sc and 18 rows = 4 in (10.2 cm) in sc rows.
Cable gauge: the 13-st strip is 2.25 in (5.7 cm) wide, and one 4-row repeat (Rows 4–7) is 1 in (2.5 cm) long.
Test with one piece first. Make the first 20 rows of the back panel, then measure. The panel should be 12 in (30.5 cm) wide and 4.4 in (11.2 cm) tall.
Checkpoints:
- Back panel after Row 54: 12 x 12 in (30.5 x 30.5 cm).
- Back panel finished: 12 x 18.9 in (30.5 x 48.0 cm); the point is 6.9 in (17.5 cm) tall.
- Cable strip: 2.25 in (5.7 cm) wide, 49 in (124.5 cm) long.
- Pocket panel before edging: 12.25 x 6.25 in (31.1 x 15.9 cm).
- Frame after border Round 2: 12.5 in (31.8 cm) wide.
If your piece is too big, go down 0.5 mm in hook size. If it is too small, go up 0.5 mm. Do not change the stitch counts. Every border count depends on 4 sc per inch.
Part 1: Back Panel (Navy)
Work in rows of sc. Ch 1 at the start of each row does not count as a stitch.
Row 1: Ch 49, sc in 2nd ch from hook and in each ch across, turn. (48 sc)
Rows 2–54: Ch 1, sc in each st across, turn. (48 sc)
Checkpoint: 12 x 12 in (30.5 x 30.5 cm).
Now shape the pointed arch. Decrease slowly at first and then faster. This gives the curved gothic outline.
Row 55 (dec): Ch 1, sc2tog, sc in each st to last 2 sts, sc2tog, turn. (46 sc)
Row 56: Ch 1, sc in each st across, turn. (46 sc)
Rows 57–70: Repeat Rows 55–56 seven more times. (32 sc after Row 70)
Rows 71–84: Repeat Row 55 every row. (4 sc after Row 84)
Row 85: Ch 1, sc2tog twice. (2 sc) Fasten off.
The panel has 85 rows. The 31 shaped rows (55–85) form the point. Each slanted edge has 31 row ends.
Part 2: Braided Cable Strip (Navy)
Row 1 (WS): Ch 14, sc in 2nd ch from hook and in each ch across, turn. (13 sc)
Row 2 (RS): Ch 1, sc in first 2 sts, FPdc around each of next 9 sts, sc in last 2 sts, turn. (13 sts)
Row 3 and all WS rows: Ch 1, sc in each st across, turn. (13 sc)
Row 4 (RS, front cross): Ch 1, sc in first 2 sts, sk next 3 post sts, FPtr around next 3 post sts, working in front of sts just made, FPtr around the 3 skipped post sts, FPdc around next 3 post sts, sc in last 2 sts, turn. (13 sts)
Row 5: As Row 3. (13 sc)
Row 6 (RS, back cross): Ch 1, sc in first 2 sts, FPdc around next 3 post sts, sk next 3 post sts, FPtr around next 3 post sts, working behind sts just made, FPtr around the 3 skipped post sts, sc in last 2 sts, turn. (13 sts)
Row 7: As Row 3. (13 sc)
Repeat Rows 4–7 until the strip measures 49 in (124.5 cm). This takes about 48 repeats and ends after Row 195. Before you fasten off, lay the strip around the panel edge to check the length. Fasten off and leave a 12 in (30.5 cm) tail.
The strip forms a three-strand braid. Each 3-stitch strand crosses over and under its neighbor in turn. The 2 sc at each edge give flat seam stitches.
Part 3: Pocket Panel (Navy and Cream)
Row 1: With navy, ch 50, sc in 2nd ch from hook and in each ch across, turn. (49 sc)
Rows 2–20: Ch 1, sc in each st across, turn. (49 sc) Checkpoint: 4.4 in (11.2 cm) tall. Change to cream on the last yo of Row 20.
Row 21 (RS): Ch 1, sc in each st across, turn. (49 sc)
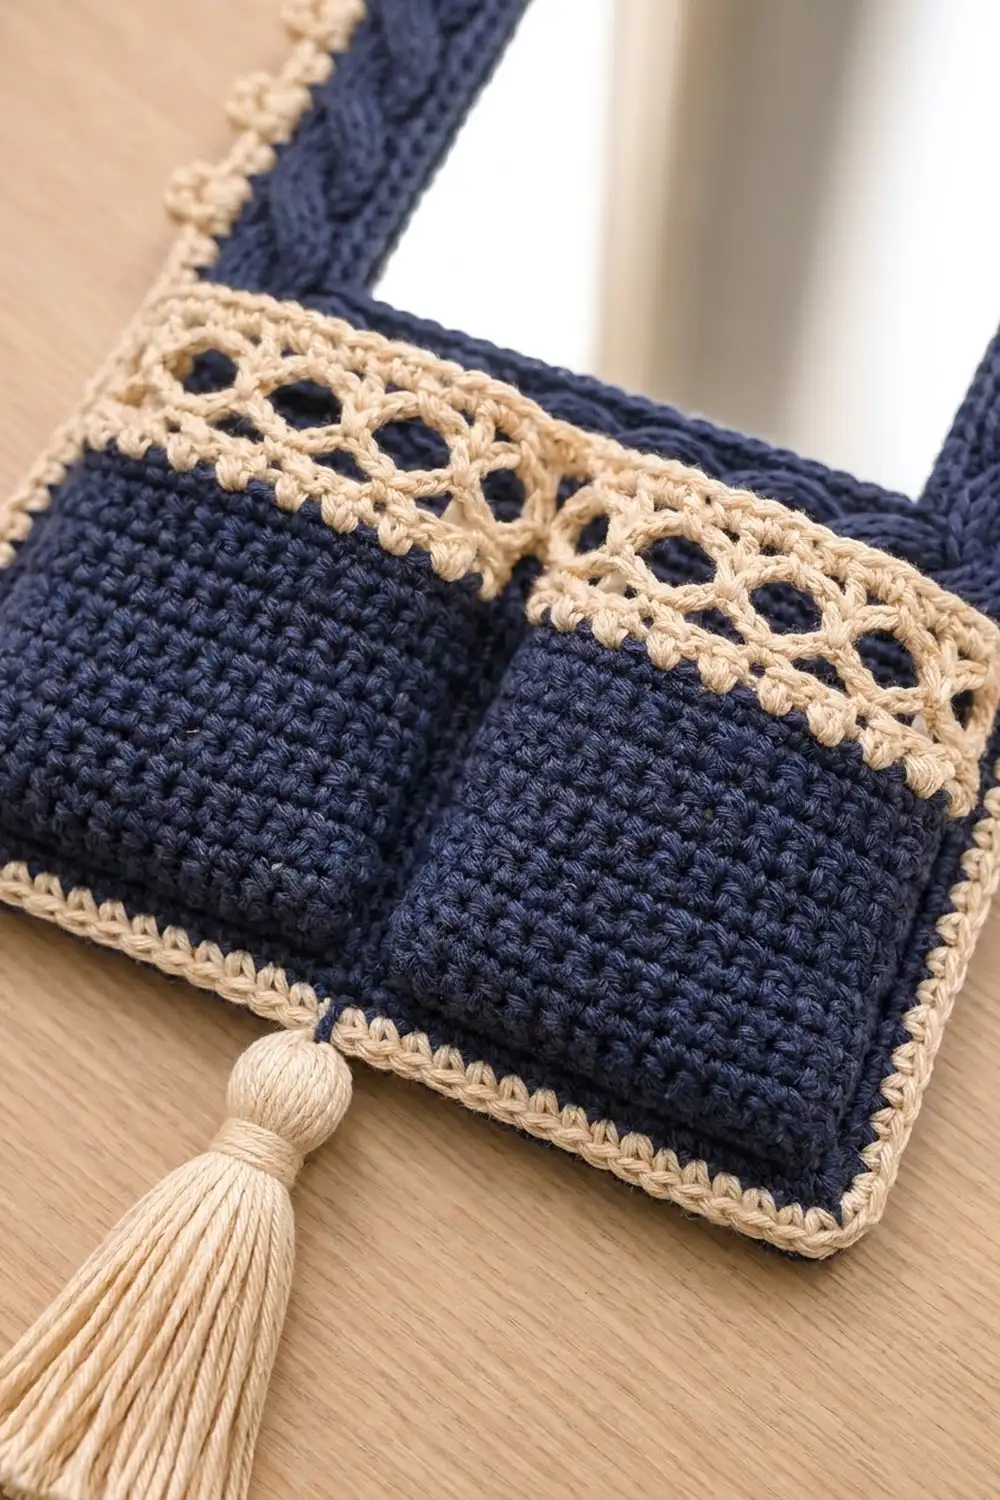
Row 22: Ch 1, sc in first st, [ch 5, sk 3 sts, sc in next st] 12 times, turn. (13 sc and 12 ch-5 sps)
Row 23: Ch 5 (counts as dc + ch 2), sc in first ch-5 sp, [ch 5, sc in next ch-5 sp] 11 times, ch 2, dc in last sc, turn. (12 sc, 11 ch-5 sps, 2 end ch-2 sps)
Row 24: Ch 1, sc in first dc, [ch 5, sc in next ch-5 sp] 11 times, ch 5, sc in 3rd ch of turning ch, turn. (13 sc and 12 ch-5 sps)
Row 25: Ch 1, sc in first sc, [3 sc in next ch-5 sp, sc in next sc] 12 times, turn. (1 + 12 x 4 = 49 sc)
Row 26: Ch 1, sc in each st across. (49 sc) Do not fasten off.
The lattice band (Rows 21–26) is 1.75 in (4.4 cm) tall. The panel now measures 12.25 x 6.25 in (31.1 x 15.9 cm).
Edging round (cream): Ch 1, 3 sc in first st, sc in next 47 sts, 3 sc in last st; work 25 sc evenly down the side; 3 sc in first foundation ch, sc in next 47 ch, 3 sc in last ch; work 25 sc evenly up the side; sl st to first sc. (156 sc: 4 corners x 3 + 47 x 2 + 25 x 2) Fasten off.
Pocket panel with edging: 12.75 x 6.75 in (32.4 x 17.1 cm).
Part 4: Assemble the Frame Layers
- Lightly steam the cable strip flat. Steam the back panel flat as well.
- Lay the back panel RS up. Place the strip RS up on top so its outer edge lines up with the panel edge.
- Start at the bottom center. Pin along the bottom, up each side and along each slanted edge to the tip.
- At each bottom corner, fold the strip at 45 degrees for a mitered turn. At the tip, fold it to match the point. Tack each fold on the back of the strip.
- Ease the inner edge of the strip around the gentle curves of the arch, and steam the curves.
- Whipstitch the two strip ends together at the bottom center. The pocket panel will cover this seam.
The inner edge of the strip stays free. It overlaps the mirror by about 1.25 in (3.2 cm) and leaves an opening about 7.5 in (19.1 cm) wide.
Border
Border gauge: 4 sc per inch along every edge, the same as the main gauge. Work Round 1 through both layers, inserting the hook through the strip edge and the panel edge together.
Round 1 (navy, joining): With RS facing, join navy at the bottom-right corner. Ch 1, 3 sc in the corner st. Work 48 sc up the right side (sc in each row end, skipping every 9th row end). Work 37 sc along the right slant (sc in each row end, with 2 sc in every 5th row end: 31 + 6 = 37). Sc in first tip st, ch 2, sc in second tip st. Work 37 sc along the left slant and 48 sc down the left side, the same way. Work 3 sc in the bottom-left corner st.
Insert the mirror now. Slide it between the strip and the back panel, centered.
Working across the bottom through both layers, sc in next 46 sts. Sl st to first sc. Fasten off.
Round 1 counts, with corners counted separately:
- Bottom: 46 sc between two 3-sc corners (48 base sts)
- Each straight side: 48 sc
- Each slant: 37 sc
- Tip: 2 sc + ch-2 sp
- Total: 6 + 46 + 96 + 74 + 2 = 224 sc, plus the ch-2 sp
Round 2 (cream): Join cream in the center sc of the bottom-right corner. Ch 1, 3 sc in the same st. Sc in each sc around, working 3 sc in the center sc of the bottom-left corner and 3 sc in the tip ch-2 sp. Sl st to first sc.
Count: 224 sc worked 1-per-stitch + 4 extra at the corners + 3 in the tip sp = 231 sc. The frame is now 12.5 in (31.8 cm) wide.
Round 3 (cream, bobbles): Sl st in the next sc, which is the corner center. *Bo in this st, sc in next 2 sts; repeat from * 77 times in total. Sl st to top of first bo. (77 bo + 154 sc = 231 sts) Fasten off.
Why the math works: In Round 2, the corner center to the tip center is 90 sts on each side. The bottom, from corner center to corner center, is 51 sts. All three numbers divide by 3. So with a 3-st repeat, a bobble lands exactly on both bottom corners and on the tip. The bobbles are spaced 0.75 in (1.9 cm) apart. Round 1 follows 4 sc per inch: 48 sc on each 12 in (30.5 cm) side, and 37 sc on each slant of about 9.25 in (23.5 cm). The edge stays flat with no ruffling or cupping.
Pocket Panel, Loop and Tassel
- Place the pocket panel RS up over the lower frame, with its bottom edge level with the frame’s bottom edge. It covers the bottom bobbles.
- Using navy, whipstitch the pocket sides to Round 2 just inside the side bobbles. The pocket is 12.75 in (32.4 cm) wide on a 12.5 in (31.8 cm) frame. That extra 0.25 in (0.6 cm) of ease gives the pockets some depth.
- Whipstitch the bottom edge.
- Backstitch a vertical line at the exact center, from the bottom edge up to the top of Row 20. This makes two pockets.
- Loop: Join navy behind the tip bobble. Ch 18, then sl st in the same st. Work 24 sc into the loop and sl st to close. The loop is about 3 in (7.6 cm).
- Tassel: Wrap cream 40 times around the 6 in (15.2 cm) card. Tie at the top, cut the bottom loops, and wrap the neck 0.5 in (1.3 cm) below the tie. Sew it to the bottom center of the pocket panel.
Final Blocking
- Lay the frame face down on a towel.
- Steam the back panel lightly. Keep the iron off the fabric.
- Turn it face up. Pin the bobble points so they are evenly spaced and pointing outward.
- Steam the cable band and the pocket panel gently, and pat them flat by hand.
- Let everything dry fully before you hang it, and check the size: 13.5 x 20.4 in (34.3 x 51.8 cm).
Final Quality-Control Checklist
- Back panel: 12 x 18.9 in (30.5 x 48.0 cm), with smooth slanted edges
- Braid crosses alternate evenly all around, and the miters lie flat
- Mirror is centered and does not shift
- Round 1 has 224 sc plus the tip sp; Round 2 has 231 sc
- 77 bobbles, with one on each bottom corner and one on the tip
- Pocket divider is vertical and centered
- Loop is secure, and the tassel hangs straight
Troubleshooting
- Cable strip is too wide: keep the post stitches snug, or use a hook 0.5 mm smaller for the strip only.
- Border ruffles: you added stitches. Recount Round 1 against the 48/37/46 counts.
- Border cups inward: your tension is tight. Loosen up, or use a hook 0.5 mm larger for the border only.
- Bobbles miss a corner: Round 2 is not 231. Fix the tip and corner increases.
- Mirror slides: add a few tacking stitches through both layers, just inside Round 1.
- Pockets gape: take in the side seams slightly.
Care
Wipe the mirror with a dry cloth only. To clean the crochet, remove the mirror, hand wash in cool water, and dry flat.
Final Notes
The measurement chain is short. If your gauge is 16 sc to 4 in (10.2 cm), you will get a 12 x 18.9 in (30.5 x 48.0 cm) back panel. Add a 49 in (124.5 cm) braid and a 231-st border, and the frame finishes at 13.5 x 20.4 in (34.3 x 51.8 cm). Check each stage before moving on, and the finished frame will hang square.
Happy crocheting!