
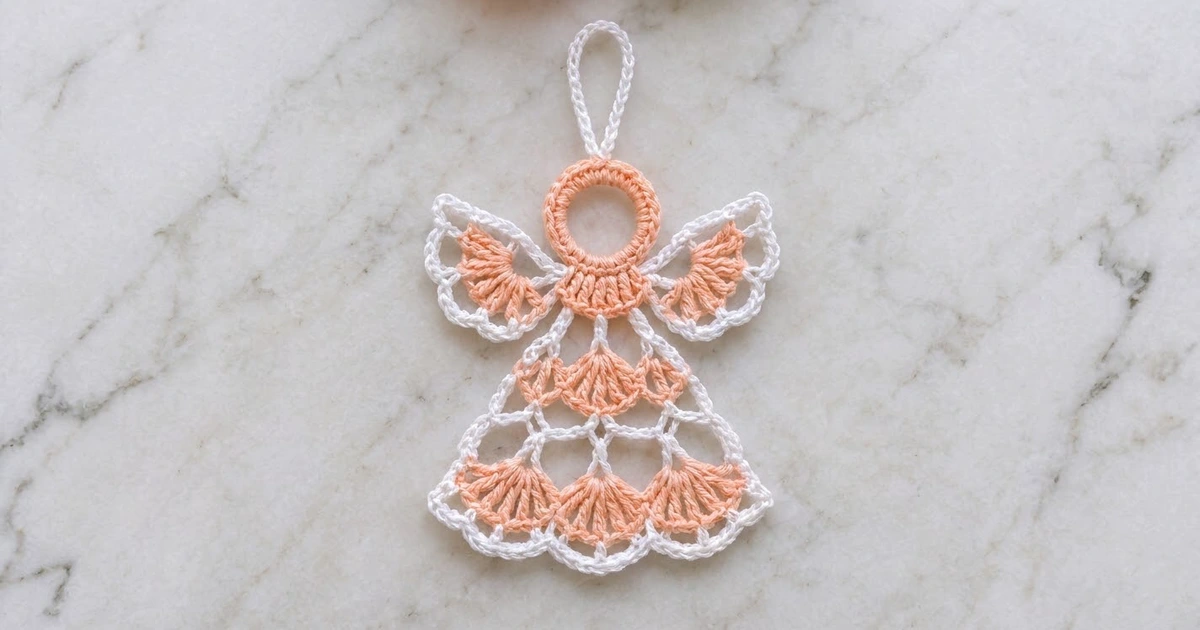
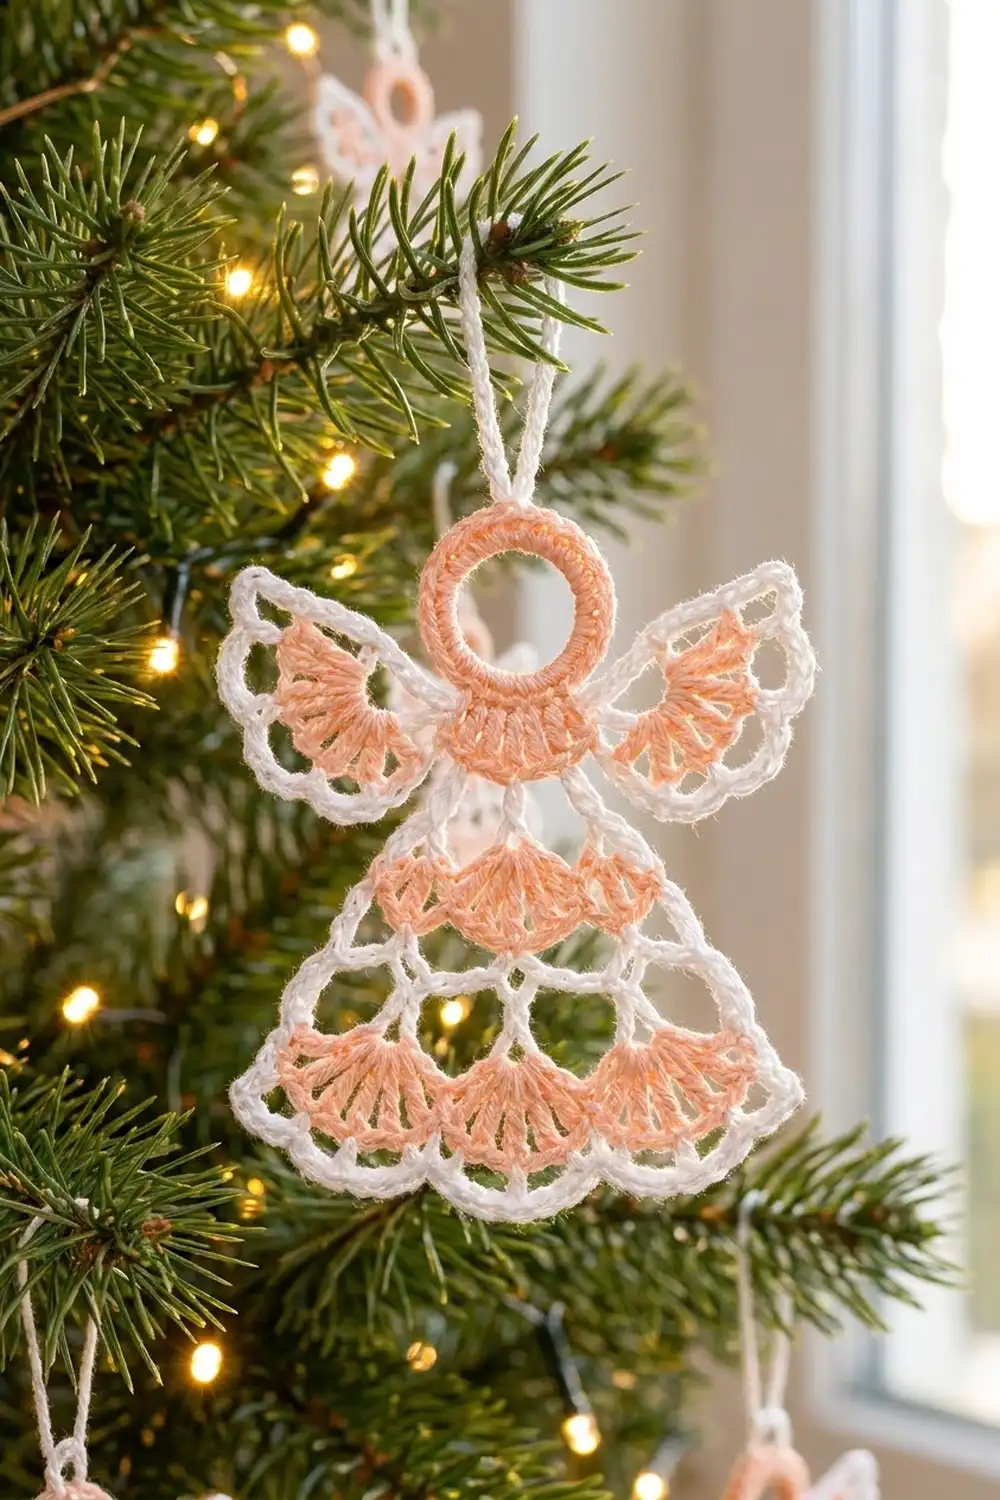
This little angel is light, lacy and quick to make. It has an open ring head, fan-shaped wings and a bell skirt with tiers of shell fans, and it looks lovely hanging on a tree, from a gift bow or in a window.
The palette is soft peach and crisp white. All the solid fan stitches are in peach, and all the lace mesh, outlines and the scalloped hem are in white. Because of that contrast, the fans read clearly even from across the room.
The pattern uses US crochet terms. The finished angel is about 4 in (10.2 cm) wide at the wings and 4.5 in (11.4 cm) tall from the top of the head to the hem. The hanging loop adds about 1.5 in (3.8 cm), so the total drop is about 6 in (15.2 cm).
You work the angel in one piece. You start with the head ring, then work the yoke and skirt downward in turning rows. Next you add the wings to the sides of the head, then the white border around the skirt, and finally the hanging loop.
Finished Size and Construction
- Finished size: 4 in (10.2 cm) wide x 4.5 in (11.4 cm) tall, plus a 1.5 in (3.8 cm) loop
- Skill level: Easy-intermediate (shells, chain loops, color changes)
- Terminology: US
- Yarn weight: Sport / #2 fine mercerized cotton
- Hook: 2.5 mm
- Number of pieces: 1 (wings and loop are worked directly onto the head)
- Layout: One vertical angel shape: head on top, yoke and skirt below, wings at the shoulders
- Piece size: Same as the finished size
- Hem width before border: 3.5 in (8.9 cm)
- Border depth: about 1/4 in (0.6 cm) at the hem and 1/8 in (0.3 cm) at each side, so the hem ends up 3.75 in (9.5 cm) wide
Materials
Mercerized cotton is the best choice here. It holds the fan shapes crisply, keeps the stitches clear, and takes blocking or light starch well. Avoid fuzzy or very stretchy yarns, because the lace will lose its definition.
- Peach: 5 g, about 15 m
- White: 6 g, about 18 m
- 2.5 mm crochet hook
- Tapestry needle
- Scissors
- Rustproof pins and a blocking mat or foam board
- Optional: fabric stiffener or spray starch
These quantities include a margin for swatching and weaving in ends.
Abbreviations (US Terms)
- ch – chain
- sl st – slip stitch
- sc – single crochet
- dc – double crochet
- sk – skip
- st(s) – stitch(es)
- sp – space
- RS / WS – right side / wrong side
Shell: the stated number of dc worked all into the same ch-loop, so they fan out into a semicircle.
Gauge and Checkpoints
The angel works as its own gauge swatch. Make the head first and measure it before going on.
- Head (after Rnd 2): 1.1 in (2.8 cm) across
- Yoke (after Row 2): 1.75 in (4.4 cm) wide and 0.6 in (1.5 cm) deep below the head
- Skirt Row 2 (first fan tier): 2.4 in (6.1 cm) wide
- Skirt Row 5 (hem fans): 3.5 in (8.9 cm) wide; skirt 2.6 in (6.6 cm) long from the yoke
- Each wing: reaches about 1.25 in (3.2 cm) out from the head
- Finished: 4 in (10.2 cm) x 4.5 in (11.4 cm)
If your head ring is larger than 1.1 in (2.8 cm), go down 0.25 mm in hook size. If it is smaller, go up 0.25 mm. A difference of 1/8 in (0.3 cm) is fine and will block out. Don’t change any stitch counts, because the lace depends on them.
Head
Use peach.
Ring: Ch 12 and sl st into the first ch to form a ring.
Rnd 1: Ch 1, then work 24 sc into the ring. Sl st to the first sc. (24 sc)
Rnd 2: Ch 1, then sc in each sc around. Sl st to the first sc. (24 sc)
Do not fasten off. Number the Rnd 2 stitches 1 to 24, starting with the first sc of the round and going in your working direction. Here is where everything attaches:
- Yoke: sts 1–7, which become the bottom of the head
- Hanging loop: st 16, directly opposite the center of the yoke
- Right wing: sts 9–12
- Left wing: sts 20–23
Before going on, check that the head measures 1.1 in (2.8 cm).
Yoke
Continue in peach, working back and forth in rows.
Row 1 (RS): Ch 3 (counts as dc) in st 1. Work 2 dc in each of sts 2–6, then 1 dc in st 7. Turn. (12 dc: 1 + 10 + 1)
Row 2 (WS): Ch 3 (counts as dc), then dc in the next st, 2 dc in the next st, dc in the next st, 2 dc in the next st, dc in each of the next 2 sts, 2 dc in the next st, dc in the next st, 2 dc in the next st, and dc in each of the last 2 sts. Fasten off. (16 dc: 12 stitches worked 1-per-stitch + 4 increases)
The increases fall on the 3rd, 5th, 8th and 10th stitches, so they mirror each other across the center. This keeps the yoke fan symmetrical.
Checkpoint: the yoke should be 1.75 in (4.4 cm) wide.
Skirt
Every row is a turning row. Each time you change color, fasten off the old color and join the new one in the last stitch you made, so the yarn is already at the edge where the next row starts.
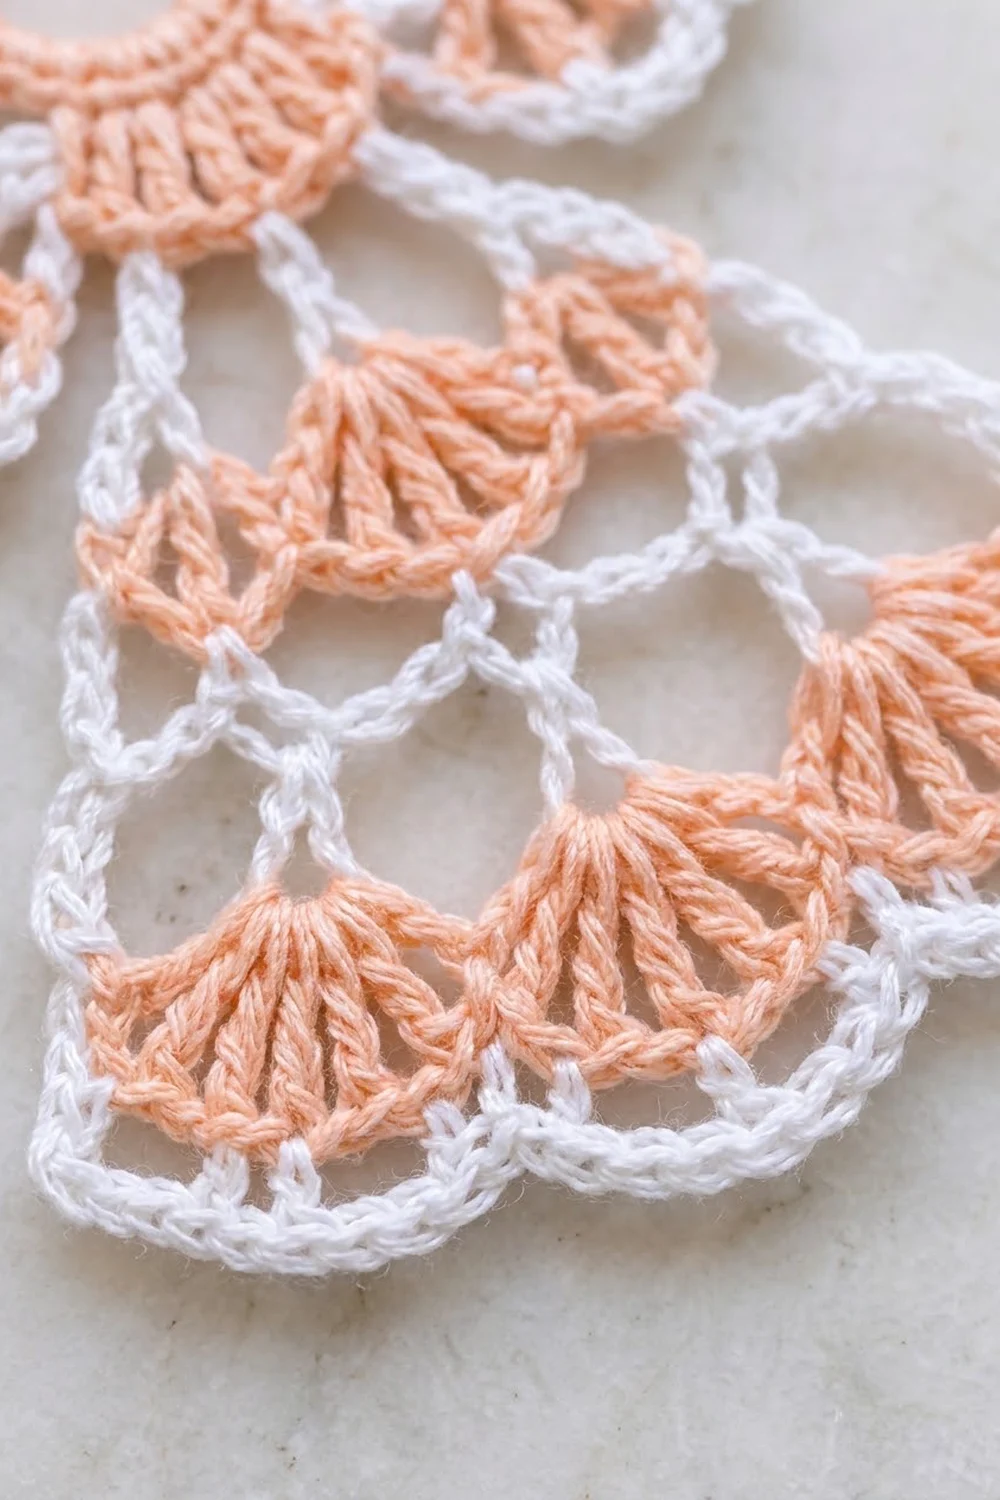
Row 1 (RS, white): Join white in the first dc of yoke Row 2 and ch 1. Sc in the same st, then [ch 5, sk 2 sts, sc in the next st] 5 times. Fasten off. (6 sc, 5 ch-5 loops)
These sc land on yoke sts 1, 4, 7, 10, 13 and 16, so the last sc sits exactly on the last dc.
Row 2 (WS, peach): Turn. Join peach in the last sc made, ch 1, and sc in the same sc. Then work:
- 7 dc in the next loop, sc in the next loop
- 7 dc in the next loop, sc in the next loop
- 7 dc in the next loop, sc in the last sc
Fasten off. (3 shells of 7 dc + 4 sc = 25 sts)
This makes the upper tier of 3 small fans. Checkpoint: 2.4 in (6.1 cm) wide.
Row 3 (RS, white): Turn. Join white in the last sc made, ch 1, and sc in the same sc. Then work this 3 times: ch 4, sc in the 4th (center) dc of the next shell, ch 4, sc in the next sc. Do not fasten off. (7 sc, 6 ch-4 loops)
Row 4 (WS, white): Turn, ch 1, and sc in the first sc. Then work this 3 times: ch 8, sk the next ch-4 loop, the next sc and the next ch-4 loop, then sc in the next sc. Fasten off. (4 sc, 3 ch-8 loops)
Each ch-8 loop spans two of the Row 3 loops. This forms the white diamond openings between the fan tiers.
Row 5 (RS, peach): Turn. Join peach in the last sc made, ch 1, and sc in the same sc. Then work [11 dc in the next ch-8 loop, sc in the next sc] 3 times. Fasten off. (3 shells of 11 dc + 4 sc = 37 sts)
This makes the hem tier of 3 larger fans. Checkpoint: the skirt should be 3.5 in (8.9 cm) wide at the hem and 2.6 in (6.6 cm) long from the yoke.
Wings
You work both wings directly into the head ring. Each wing is a peach fan with two white rows around it.
Right Wing
Base (peach): Join peach with a sl st in head st 9. Ch 5, sk st 10, and sl st in st 11.
Row 1 (peach): Turn. Work 9 dc into the ch-5 loop, then sl st in st 9. Fasten off. (9 dc)
The first dc sits next to st 11.
Row 2 (white): Join white in the first dc and ch 1. Sc in the same dc, then [ch 3, sk 1 dc, sc in the next dc] 4 times. (5 sc on dc 1, 3, 5, 7 and 9; 4 ch-3 sps)
Row 3 (white): Turn, ch 1, and sc in the first sc. Then work [ch 5, sc in the next sc] 4 times. Sl st in head st 12 to anchor the wing, and fasten off. (5 sc, 4 ch-5 loops)
Left Wing
Work the left wing as a mirror image of the right one:
- Base: join peach in st 23, ch 5, sk st 22, sl st in st 21.
- Rows 1–3: work them exactly as for the right wing.
- Anchor: finish Row 3 with a sl st in st 20.
The anchor points are symmetrical around the center line through sts 4 and 16. St 9 mirrors st 23, st 11 mirrors st 21, and st 12 mirrors st 20.
Checkpoint: each wing should reach about 1.25 in (3.2 cm) out from the head.
Border
Border gauge: about 6 sc per 1 in (2.5 cm) along the side edges. The hem edging follows the curve of the fans rather than a straight line.
Hold the angel with the RS facing and turn it so the hem is at the top. Join white at the end of skirt Row 1 on the right-hand edge.
Side 1: Work 2 sc in the end of each of skirt Rows 1–4. (8 sc)
Corner: Work 3 sc in the corner sc of Row 5.
Hem: Work the fan edging below for the first fan, then 1 sc in the next sc. Repeat for the second fan. Edge the third fan, and then work 3 sc in the corner sc.
Fan edging (worked over each fan): Ch 2, sk the 1st dc, and sc in the 2nd dc. Work [ch 3, sk 1 dc, sc in the next dc] 4 times; this places sc on dc 4, 6, 8 and 10. Ch 2 and sk the 11th dc. Each fan gets 5 sc, 4 ch-3 sps and 2 ch-2 sps.
Side 2: Work 2 sc in the end of each of skirt Rows 4–1. (8 sc)
Sl st into the end of yoke Row 2 and fasten off.
Border totals:
- Each side: 8 sc
- Hem: 23 sc (3 corner + 15 on the fans + 1 between fans + 1 between fans + 3 corner), 12 ch-3 sps and 6 ch-2 sps
- Whole border: 39 sc in all
Why the math works: each fan has 11 dc, an odd number. Skipping the first and last dc and then every other dc leaves exactly 5 evenly spaced sc on each fan, so every fan gets a matching scallop. Working 2 sc per row-end matches the height of each skirt row, so the side edges lie flat without puckering or flaring.
Hanging loop: Join white in head st 16, ch 20, and sl st in the same st. Fasten off. The loop should hang about 1.5 in (3.8 cm).
Final Blocking
- Weave in all ends along stitches of the same color, so they hide in the fans or the mesh.
- Wet the angel in cool water, then press it in a towel until it is just damp.
- Pin the angel flat with the RS up. Pin the hem to 3.75 in (9.5 cm) wide and the full height to 4.5 in (11.4 cm).
- Pin the wing tips so the total width is 4 in (10.2 cm), and make sure both wings sit at the same height.
- Put a pin in the center of each ch-3 hem scallop and each ch-5 wing loop.
- Push a round object, such as a pencil, through the head ring so it stays open.
- If you like, spray with starch or stiffener. Let it dry completely before unpinning.
Final Quality-Control Checklist
- The head ring is round and open, about 1.1 in (2.8 cm) across
- The yoke has 16 dc and is symmetrical
- The upper skirt tier has 3 fans of 7 dc each
- The hem tier has 3 fans of 11 dc each
- Three white diamonds sit between the two tiers
- Each wing has 9 dc, 4 ch-3 sps and 4 ch-5 loops
- The border has 8 sc per side, and each fan has a 5-sc scallop
- Both wings sit at matching heights
- The hanging loop is centered over the yoke
- All ends are woven in, and none show through the lace
Troubleshooting
- The skirt cups or ripples: your ch-loops are too tight or too loose. Loosen or tighten your chains, or try a hook 0.25 mm larger or smaller for the white rows only.
- The fans look crowded: make sure each shell goes into the loop itself, not into individual chain stitches.
- The wings are lopsided: check the anchor stitches (st 12 on the right and st 20 on the left), then block them evenly.
- The head ring closes up: you may have worked too many sc in Rnd 1. Count to 24, and block it around a pencil.
- The side edges flare: work 1 sc instead of 2 in the end of Row 4 on both sides, so the edge stays symmetrical.
Care
Hand wash in cool water and lay flat to dry, reshaping it while damp. Starch it again if it softens after washing.
Final Notes
The measurements build on each other in order:
- Head: 1.1 in (2.8 cm)
- Yoke: 1.75 in (4.4 cm) wide
- First fan tier: 2.4 in (6.1 cm) wide
- Hem fans: 3.5 in (8.9 cm) wide
- Border: brings the hem to 3.75 in (9.5 cm)
- Wings: bring the total width to 4 in (10.2 cm)
- Height: 4.5 in (11.4 cm), plus the 1.5 in (3.8 cm) loop
If the angel matches each of these checkpoints as you go, the finished piece will match too. Make one in peach, then try other colors for a whole choir on the tree.
Happy crocheting!