

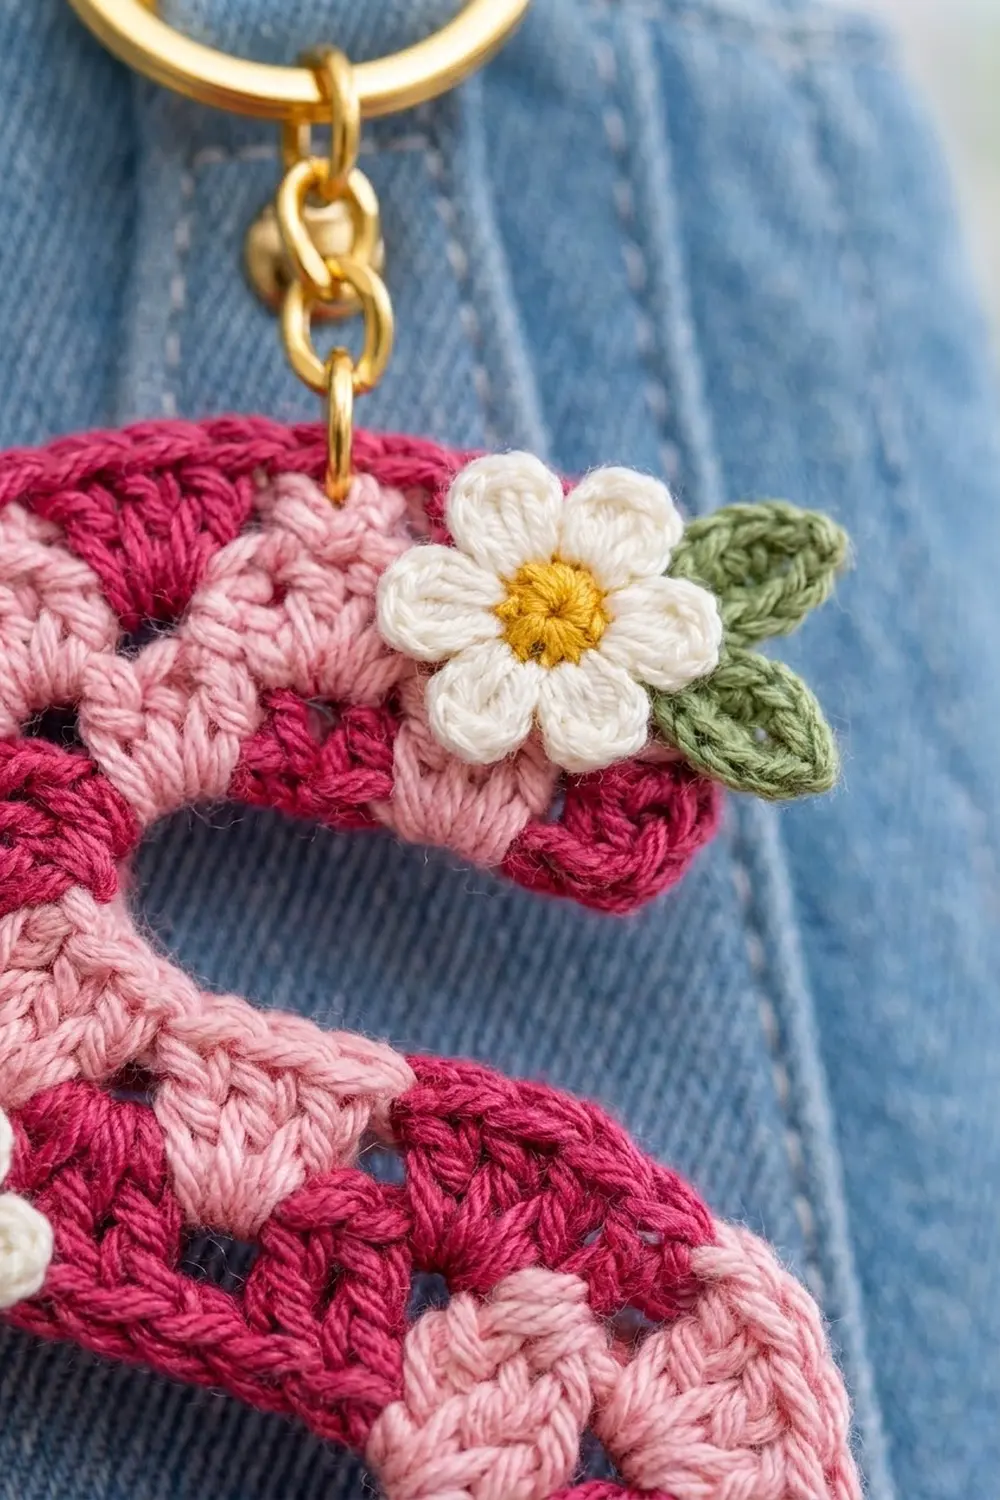
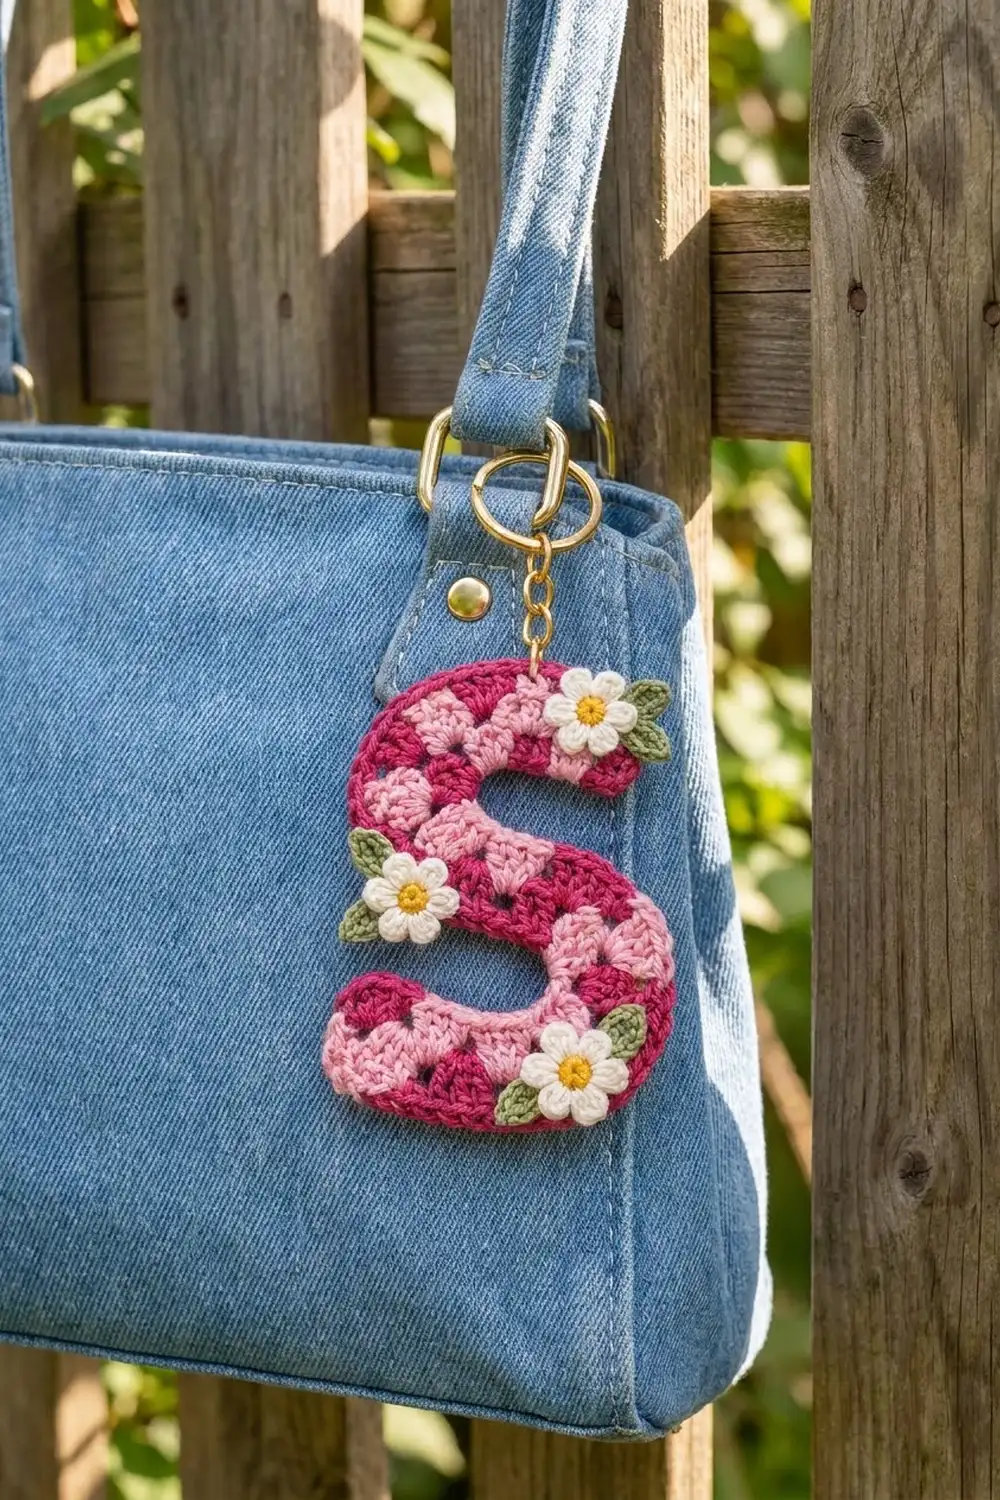
This letter S keychain is a bright little accessory with a checkerboard of granny clusters. Raspberry pink and light pink clusters alternate along a curved band, a solid raspberry border frames the letter, and three tiny white daisies with yellow centers and green leaves add a spring-garden finish.
The style is classic granny-square texture worked as one narrow strip, so the letter has the small open gaps you know from a granny square. The pattern uses US crochet terms throughout.
The finished letter measures 5.5 in (14.0 cm) tall and 4 in (10.2 cm) wide, and the band is 1.5 in (3.8 cm) wide. That is big enough to read clearly on a bag strap and small enough to stay light.
The letter is crocheted in one piece. You work a foundation chain that becomes the centerline of the S. Clusters go along both sides of that chain in one round, and the spacing between them shapes the curves. Then two border rounds tighten the inner curves and ease the outer curves. The daisies and leaves are made separately and sewn on, and a split ring finishes the keychain.
Finished Size and Construction
- Finished size: 5.5 in (14.0 cm) tall x 4 in (10.2 cm) wide
- Skill level: Intermediate (color changes, shaped spacing)
- Terminology: US crochet terms
- Yarn weight: DK (#3) cotton
- Hook: 3.5 mm (E-4)
- Number of pieces: 1 letter body, plus 3 daisies and 6 leaves as appliqués
- Layout: a single S-shaped band, not joined to anything else
- Band width after Round 1: 1 in (2.5 cm)
- Size before border: 5 in (12.7 cm) tall x 3.5 in (8.9 cm) wide
- Border depth: 0.25 in (0.6 cm) on every edge (2 rounds)
Materials
Choose a smooth, mercerized or combed cotton in DK weight. Cotton holds the letter shape, shows the cluster texture clearly, and survives being handled on a keyring. Avoid fuzzy yarns, because the gaps between clusters would fill in.
- Color A, raspberry pink: 10 g, about 23 m
- Color B, light pink: 5 g, about 12 m
- Color C, white (petals): 3 g, about 7 m
- Color D, yellow (flower centers): 1 g, about 2 m
- Color E, sage green (leaves): 2 g, about 5 m
All quantities include a safety margin of about 20%, so you will have yarn left over.
Tools:
- 3.5 mm (E-4) crochet hook
- Tapestry needle
- Gold split keyring, 1 in (2.5 cm) across, with a short chain about 1 in (2.5 cm) long
- One 8 mm gold jump ring and two pairs of flat pliers
- Rust-proof pins and a foam blocking mat
- Optional: fabric stiffener or a starch spray
- Scissors and stitch markers
Abbreviations (US Terms)
- ch – chain
- sl st – slip stitch
- sc – single crochet
- hdc – half double crochet
- dc – double crochet
- sc2tog – single crochet 2 together
- sk – skip
- sp – space
- st(s) – stitch(es)
- cl – cluster
Special stitch – Cluster (cl): Work 3 dc into the same chain. At the beginning of Round 1, ch 3 counts as the first dc, so the first cluster is ch 3 plus 2 dc.
Color change: Work the last dc of a cluster until 2 loops remain on the hook. Drop the old color, yarn over with the new color, and pull through. Lay the unused color along the foundation chain and work the next stitches over it so it stays hidden inside the dc bases.
Gauge and Checkpoints
Gauge matters here because the clusters set the size of the letter.
- Chain gauge: 11 ch = 2 in (5.1 cm), worked loosely.
- Cluster gauge: from the start of one cluster to the start of the fourth (9 ch of foundation) = about 1.6 in (4.1 cm).
- Dc height: about 0.45 in (1.1 cm).
Test first: Ch 14 and work Round 1 along one side only (5 clusters with ch-1 between). If 9 ch measures more than 1.6 in (4.1 cm), go down to a 3.25 mm hook. If it measures less, go up to a 3.75 mm hook. If your chains are tight, use a hook one size larger for the foundation chain only.
Checkpoints:
- After the foundation chain: the 52 ch measure about 9.5 in (24.1 cm).
- After Round 1: the band is 1 in (2.5 cm) wide, and the letter pins out to 5 in (12.7 cm) x 3.5 in (8.9 cm).
- After Round 3: the band is 1.5 in (3.8 cm) wide, and the letter is 5.5 in (14.0 cm) x 4 in (10.2 cm).
Gap Map
Each side of the foundation chain holds 17 clusters with 16 gaps between them. Numbering the gaps in working order, both sides follow the same map. This works because the S has rotational symmetry: the outer edge of the top curve and the outer edge of the bottom curve fall on opposite sides of the chain, but in the same place in the working sequence.
- Gaps 1–2: ch 1 (straight end)
- Gaps 3–7: ch 2 (outer edge of a curve, which spreads)
- Gaps 8–9: ch 1 (straight middle)
- Gaps 10–14: no chain (inner edge of a curve, where clusters sit snug)
- Gaps 15–16: ch 1 (straight end)
Letter Body
With A, ch 52.
Round 1 (clusters):
Side 1: Ch 3 counts as the first dc. Work 2 dc in the 4th ch from the hook (first cl, A). Changing color before each new cluster, so that colors alternate A, B, A, B:
- [ch 1, sk 2 ch, cl in next ch] 2 times (gaps 1–2, cl 2–3)
- [ch 2, sk 2 ch, cl in next ch] 5 times (gaps 3–7, cl 4–8)
- [ch 1, sk 2 ch, cl in next ch] 2 times (gaps 8–9, cl 9–10)
- [sk 2 ch, cl in next ch] 5 times (gaps 10–14, cl 11–15)
- [ch 1, sk 2 ch, cl in next ch] 2 times (gaps 15–16, cl 16–17)
The last cluster lands in the last ch, which is the first ch you made. Side 1 has 17 clusters: odd numbers in A and even numbers in B. Cluster 17 is A.
Bottom cap: Ch 2, change to B, and work a cl in the same last ch. This is cluster 1 of Side 2.
Side 2: Rotate the work and keep going along the free loops on the other side of the foundation chain. Repeat the same five bracketed steps as Side 1, still alternating colors. On this side, odd clusters are B and even clusters are A. Cluster 17 is B and lands in the same ch as the first cluster of Side 1.
Top cap: Ch 2, then join with a sl st to the top of the beginning ch-3.
Count: 34 clusters (102 dc): 17 per side, 17 in A and 17 in B, plus 2 cap ch-2 sps. Every cluster sits opposite a cluster of the other color, which creates the checkerboard. Fasten off B, then leave A attached or fasten it off.
Round 2 (trim round, A): Join A in the top-cap ch-2 sp, ch 1, and work 5 sc in the same sp.
Side 1:
- sc in each of the 3 sts of cl 1, sc in ch-1 sp, 3 sc across cl 2, sc in ch-1 sp, 3 sc across cl 3 (11 sc)
- [3 sc in ch-2 sp, sc in each of 3 dc of next cl] 5 times (30 sc)
- sc in ch-1 sp, 3 sc across cl 9, sc in ch-1 sp (5 sc)
- sc in each dc across cl 10–15, with nothing worked between clusters (18 sc)
- sc in ch-1 sp, 3 sc across cl 16, sc in ch-1 sp, 3 sc across cl 17 (8 sc)
Side 1 total: 51 sc worked 1 per dc + 21 sc worked into gaps = 72 sc.
Bottom cap: 5 sc in the ch-2 sp.
Side 2: Work exactly as for Side 1 (72 sc). Join with a sl st to the first sc.
Count: 72 + 72 + 5 + 5 = 154 sc.
Round 3 (shaping round, A): Ch 1.
Top cap: sc in the first sc, 2 sc in each of the next 3 sc, sc in the next sc (8 sc).
Side 1:
- sc in the next 11 sc
- [sc in next sc, 2 sc in next sc, sc in next sc, sc in next 3 sc] 5 times (35 sc). This puts an increase at the center of each outer-curve gap.
- sc in the next 5 sc
- sc in the next 2 sc, sc2tog, [sc in next sc, sc2tog] 4 times, sc in the next 2 sc (13 sc). Each sc2tog joins the last sc of one cluster to the first sc of the next, which pulls the inner curve in.
- sc in the next 8 sc
Side 1 total: 72 sc worked from 72 sts. There are 5 increases and 5 decreases, so the side gains nothing.
Bottom cap: Work as for the top cap (8 sc).
Side 2: Work as for Side 1 (72 sc). Join with a sl st to the first sc and fasten off.
Count: 72 + 72 + 8 + 8 = 160 sc.
Why the Border Math Works
Each side starts the border with 72 sc. That is 17 clusters x 3 sc (51), plus the gap stitches: 6 straight gaps x 1 sc and 5 outer gaps x 3 sc (21). The 5 inner gaps get 0 sc. In Round 3 the 5 outer increases and 5 inner decreases cancel, so each side stays at 72 while its curve deepens. Only the caps grow, from 5 to 8, to round the ends. The border adds 0.25 in (0.6 cm) on every edge, which takes the letter from 5 in x 3.5 in (12.7 cm x 8.9 cm) to 5.5 in x 4 in (14.0 cm x 10.2 cm).
Daisies (make 3)
Round 1: With D, make a magic ring and work 6 sc in the ring. Join to the first sc with C and fasten off D (6 sc).
Round 2: With C, work [sl st, ch 2, 2 dc, ch 2, sl st] in each sc around (6 petals). Fasten off and leave a 10 in (25.4 cm) tail for sewing.
Each daisy measures about 1 in (2.5 cm) across.
Leaves (make 6)
With E, ch 6.
- Side 1: Starting in the 2nd ch from the hook, work sl st, sc, hdc, sc, sl st (5 sts).
- Side 2: Ch 1 at the tip, rotate, and work sl st, sc, hdc, sc, sl st in the free loops (5 sts).
Sl st to the tip and fasten off, leaving a tail. Each leaf is about 0.5 in (1.3 cm) long.
Final Blocking
- On paper, draw the outline of an S that is 5.5 in (14.0 cm) tall and 4 in (10.2 cm) wide, with a 1.5 in (3.8 cm) band. Place the paper under clear plastic on your blocking mat.
- Mist the letter lightly with water.
- Pin both end caps first, then the outer edge of each curve, then the inner edges.
- Check that the band is 1.5 in (3.8 cm) wide all the way around.
- For a firm keychain, brush fabric stiffener onto the back, or spray starch on both sides.
- Let the letter dry completely, ideally overnight, before you remove the pins.
- Block the daisies flat with each petal pinned open.
Assembly
- Sew 2 leaves behind each daisy so the tips peek out in a V.
- Place one daisy near the top-right end, one on the left edge where the top curve meets the middle, and one on the lower right of the bottom curve.
- Sew each daisy through its yellow center and petal bases using small, hidden stitches. Weave in all tails.
- Open the jump ring and pass it through 2 loops of the Round 3 border on the top edge, above cluster 2 of Side 1. Close it securely and attach the keyring chain.
Final Quality-Control Checklist
- Round 1 has 34 clusters and the colors form a checkerboard
- Round 2 has 154 sc and Round 3 has 160 sc
- The letter measures 5.5 in (14.0 cm) x 4 in (10.2 cm)
- The band is 1.5 in (3.8 cm) wide throughout
- No carried strands show between clusters
- Inner curves lie flat, with no ripples on the outer curves
- The daisies are secure and the jump ring is fully closed
Troubleshooting
- The outer curve ruffles: You may have worked the ch-2 too loosely. Try working ch 1 with an extra sc in Round 2 instead.
- The inner curve buckles: Make sure no chains sit between clusters 10–15, and check that every sc2tog is in Round 3.
- The carried yarn shows: Keep the strand tight against the foundation chain and work the dc around it snugly.
- The letter is too long: Your foundation chain is loose. Re-chain with a hook one size smaller.
- The letter is limp: Apply stiffener again and let it dry flat.
Care
Spot clean with cool water and mild soap, then press the letter flat and let it air dry. If you used stiffener, apply it again after washing.
Final Notes
The measurement chain works like this. Chain gauge sets a 9.5 in (24.1 cm) foundation chain. Round 1 builds a 1 in (2.5 cm) band shaped into a 5 in x 3.5 in (12.7 cm x 8.9 cm) letter. Rounds 2 and 3 add 0.25 in (0.6 cm) per edge for a 5.5 in x 4 in (14.0 cm x 10.2 cm) finish. If you check each of these numbers as you go, your letter S will match the size every time.
Happy crocheting!