

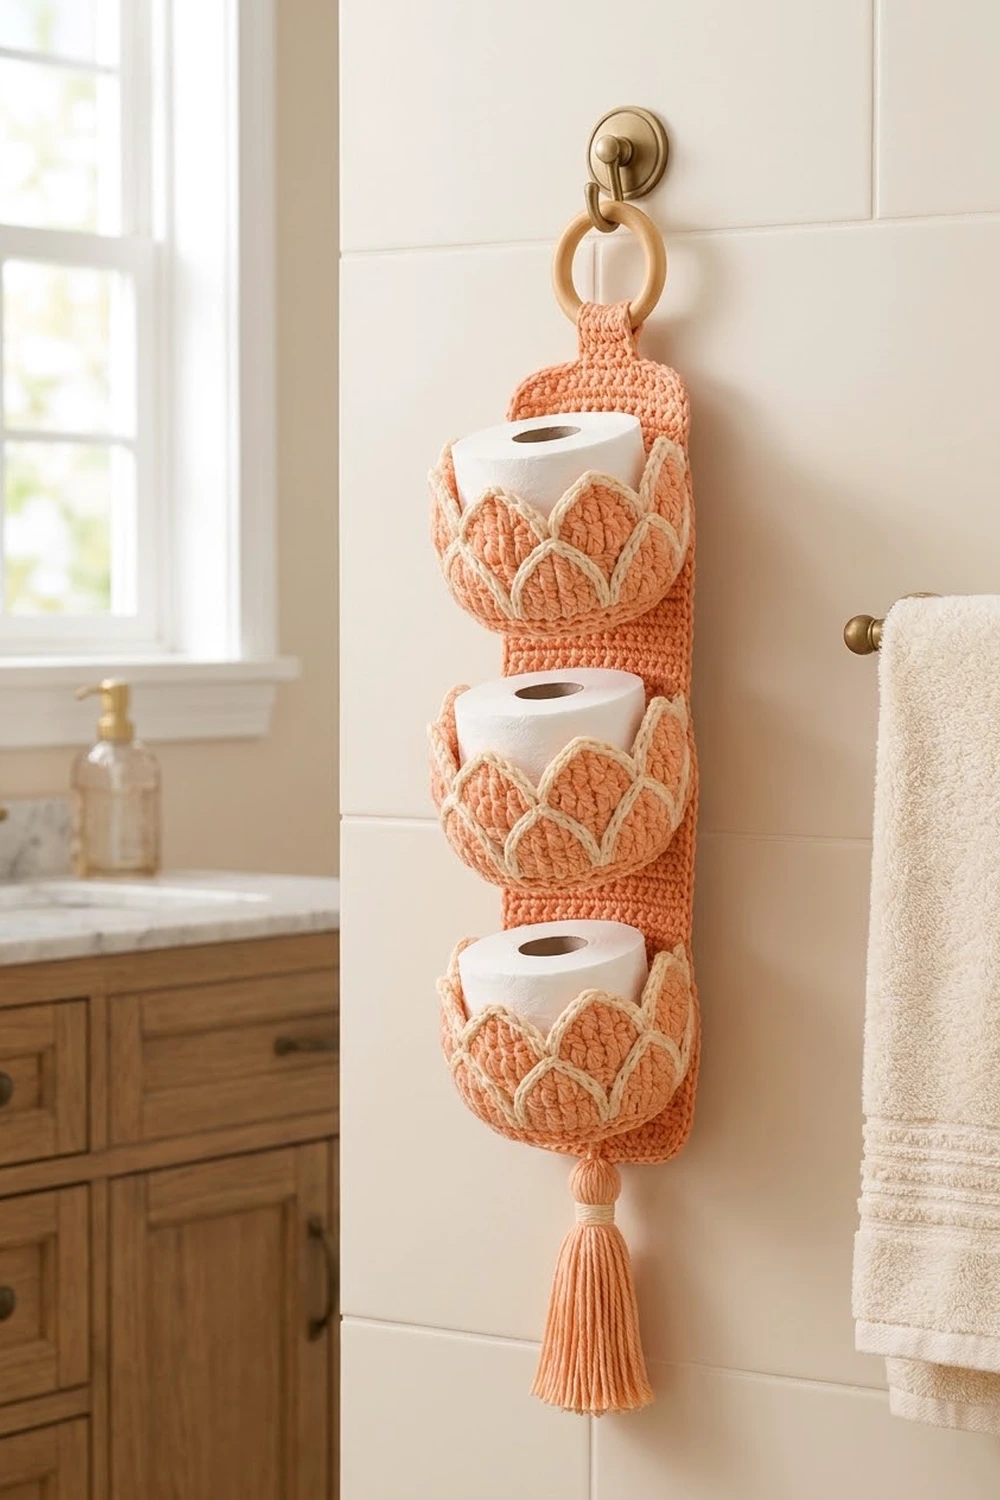
This hanging holder stores three spare toilet paper rolls in three lotus-shaped baskets. The baskets are stacked on a long peach panel that hangs from a wooden ring, and a soft tassel finishes the bottom.
The palette is warm peach with cream accents. Each basket has a knit-look wall and eight pointed petals outlined in cream. A second tier of cream arches sits below the petals, so every basket looks like a lotus opening.
This pattern uses US crochet terms. The finished panel measures 5.5 in x 19 in (14.0 cm x 48.3 cm). With the ring and tassel, the full holder hangs about 28 in (71.1 cm) long.
You’ll crochet three oval-based baskets, one backing panel with a border and hanging tab, and one tassel. Then you sew the baskets to the panel stitch to stitch.
Finished Size and Construction
- Finished panel size: 5.5 in x 19 in (14.0 cm x 48.3 cm)
- Skill level: Intermediate
- Terminology: US
- Yarn weight: Worsted (#4) cotton
- Hook: 4.5 mm (US 7)
- Number of pieces: 3 baskets, 1 backing panel, 1 tassel, 1 wooden ring
- Layout: One vertical column of 3 baskets
- Basket size: 6.25 in (15.9 cm) long x 4.5 in (11.4 cm) deep x 3.75 in (9.5 cm) tall
- Panel size before border: 4.5 in x 18 in (11.4 cm x 45.7 cm)
- Border depth: 0.5 in (1.3 cm) on each side
Materials
Use a worsted-weight cotton or cotton blend. Cotton holds the basket shape well and stands up to bathroom humidity.
- Peach (MC): 400 g / 680 m
- Cream (CC): 50 g / 85 m
The quantities include a margin of about 15–20%.
Tools:
– 4.5 mm (US 7) crochet hook
– Wooden ring, 2.5 in (6.4 cm) outer diameter
– Stitch markers
– Tapestry needle
– Scissors
– Stiff card, 5 in (12.7 cm) tall, for the tassel
– Rust-proof pins and a blocking mat
Abbreviations (US Terms)
- ch – chain
- sl st – slip stitch
- sc – single crochet
- inc – 2 sc in the same stitch
- sc2tog – single crochet 2 together
- sc3tog – single crochet 3 together
- BLO – back loop only
- st(s) – stitch(es)
- Rnd – round
- MC / CC – main color (peach) / contrast color (cream)
Special stitch – Waistcoat stitch (wst): Insert your hook between the two vertical legs of the sc below, under the top V, not through the top loops. Yarn over, pull up a loop, yarn over and pull through both loops. This makes a knit-look V column.
Surface slip stitch: Hold the yarn behind the fabric. Insert your hook from the front into the gap you need, pull up a loop, and pull it through the loop already on your hook.
Gauge and Checkpoints
Gauge: 16 sc and 18 rows = 4 in (10.2 cm). Waistcoat stitch should match this width.
Make one complete basket before anything else. It is your gauge test.
Checkpoints:
– Base after Rnd 10: 6.25 in x 4.5 in (15.9 cm x 11.4 cm)
– Wall after Rnd 22: 2.75 in (7.0 cm) tall
– Petals: about 1 in (2.5 cm) tall
– Whole basket: 3.75 in (9.5 cm) tall
If your base is too big, go down 0.5 mm. If it’s too small or cups upward, go up 0.5 mm. Waistcoat stitch tends to tighten, so keep your loops relaxed on the wall.
Basket (Make 3)
Oval Base
Use MC. Work in joined rounds. Start each round with ch 1, which does not count as a stitch, and join with a sl st to the first sc.
Ch 9.
Rnd 1: 3 sc in 2nd ch from hook, sc in next 6 ch, 3 sc in last ch. Working along the opposite side of the chain, sc in next 6 ch. Join. (18) Each round now has two curved end sections and two 6-st sides.
Rnd 2: Ch 1, inc in each of first 3 sts, sc 6, inc in each of next 3 sts, sc 6. Join. (24)
Rnd 3: Ch 1, [(sc 1, inc) x 3, sc 6] twice. Join. (30)
Rnd 4: Ch 1, [(sc 2, inc) x 3, sc 6] twice. Join. (36)
Rnd 5: Ch 1, [(sc 3, inc) x 3, sc 6] twice. Join. (42)
Rnd 6: Ch 1, [(sc 4, inc) x 3, sc 6] twice. Join. (48)
Rnd 7: Ch 1, [(sc 5, inc) x 3, sc 6] twice. Join. (54)
Rnd 8: Ch 1, [(sc 6, inc) x 3, sc 6] twice. Join. (60)
Rnd 9: Ch 1, [(sc 7, inc) x 3, sc 6] twice. Join. (66)
Rnd 10: Ch 1, [(sc 8, inc) x 3, sc 6] twice. Join. (72)
Rnd 10 breaks down as end 30 + side 6 + end 30 + side 6 = 72 sts.
Checkpoint: the base measures 6.25 in x 4.5 in (15.9 cm x 11.4 cm) and lies flat.
Wall
Rnd 11: Ch 1, sc in BLO of each st. Join. (72) This turns the wall upward and leaves a ridge you will use when joining.
Rnds 12–22: Ch 1, wst in each st. Join. (72) Fasten off.
Checkpoint: the wall is 2.75 in (7.0 cm) tall from the Rnd 11 ridge.
Mark the back: Count from the joining seam of Rnd 22. Sts 31–36 make one straight side. The 18 sts from st 25 to st 42 are the back of the basket. Place a marker in st 25 and another in st 42.
Pointed Petals (8 per basket)
The petals are worked in rows over 9 sts each. Join MC in st 25.
Petal:
– Row 1 (RS): Ch 1, sc in next 9 sts, turn. (9)
– Row 2: Ch 1, sc2tog, sc 5, sc2tog, turn. (7)
– Row 3: Ch 1, sc2tog, sc 3, sc2tog, turn. (5)
– Row 4: Ch 1, sc2tog, sc 1, sc2tog, turn. (3)
– Row 5: Ch 1, sc3tog. (1) Do not turn.
Sl st down the side edge, one sl st into each row-end of Rows 4, 3, 2 and 1, to get back to the wall.
Repeat the petal 7 more times, starting each new Row 1 in the next unworked wall st. That makes 8 petals x 9 sts = 72 sts. Petals 1 and 2 cover the 18 back sts, and Petal 8 ends at st 24. Fasten off.
Cream Petal Outline
Join CC with a sl st in the valley between Petal 8 and Petal 1. Ch 1.
Sc in the row-ends of Rows 2, 3, 4 and 5 going up the petal (4 sc). Work (sc, ch 2, sc) in the tip st. Sc in the row-ends of Rows 5, 4, 3 and 2 going down (4 sc). Sc2tog over the Row 1 row-end of this petal and the Row 1 row-end of the next petal. Repeat from * to * 8 times. Join and fasten off.
Count: 11 sc per petal x 8 = 88 sc plus 8 ch-2 tips.
Cream Lower Arches
These arches make the second tier of petals. Number the wall columns 1–9 under each petal. Columns 1–9 under Petal 1 are sts 25–33, and so on around.
With CC, work surface sl sts on the outside of the wall, one sl st per round. Start in column 5 under Petal 1, at Rnd 14.
Going up toward the valley:
| Rnd | 14 | 15 | 16 | 17 | 18 | 19 | 20 | 21 |
|---|---|---|---|---|---|---|---|---|
| Column | 5 | 6 | 7 | 8 | 8 | 9 | 9 | Gap (peak) |
The gap is the space between column 9 of this petal and column 1 of the next.
Coming down under the next petal:
| Rnd | 20 | 19 | 18 | 17 | 16 | 15 |
|---|---|---|---|---|---|---|
| Column | 1 | 1 | 2 | 2 | 3 | 4 |
That is 14 sl sts per arch. The next arch starts at column 5, Rnd 14, of that petal. Work 8 arches, for 112 surface sl sts in total. Each peak sits directly below a cream valley, which creates the offset lotus layers. Fasten off and weave in all ends.
Backing Panel
Use MC.
Ch 19.
Row 1: Sc in 2nd ch from hook and in each ch across, turn. (18)
Rows 2–81: Ch 1, sc in each st, turn. (18)
Do not fasten off.
Checkpoint: 4.5 in x 18 in (11.4 cm x 45.7 cm).
Make All Pieces
Peach (MC):
– 3 basket bodies (base, wall, petals)
– 1 backing panel with border and tab
– 1 tassel
Cream (CC):
– 3 petal outlines (88 sc each)
– 3 sets of lower arches (112 sl sts each)
Layout grid (top to bottom):
        [ wooden ring ]
           [  tab  ]
   [ ======= Basket 1 ======= ]
   [ ======= Basket 2 ======= ]
   [ ======= Basket 3 ======= ]
           [ tassel ]
Border
Work the border right after Row 81, in MC. In the counts below, side counts are the sc between corners. The corner ch-2 spaces are counted separately.
Border gauge: 16 sc = 4 in (10.2 cm), the same as the panel.
Rnd 1:
– Ch 1. Sc in each of the 18 sts across the top, then ch 2 for the corner.
– Down the side, work 72 sc into the row-ends. That’s 8 sc in every 9 rows: work 1 sc in each of 8 row-ends, then skip 1. Ch 2.
– Work 18 sc across the foundation chain. Ch 2.
– Work 72 sc up the second side. Ch 2.
– Join.
Per side: 18 / 72 / 18 / 72 = 180 sc plus 4 corner ch-2 spaces.
Rnd 2:
– Sl st into the corner space, ch 1.
– Sc in each sc along each side.
– Work (sc, ch 2, sc) in each corner space.
– Join.
Per side: 20 / 74 / 20 / 74 = 188 sc plus 4 ch-2 spaces.
Why the math works:
– Sc rows are shorter than sc stitches are wide (18 rows vs 16 sts per 4 in). Placing 8 sc over 9 rows matches the row gauge to the stitch gauge: 81 rows x 8/9 = 72 sc, and 72 sc ÷ 4 sts per in = 18 in (45.7 cm). That is exactly the panel length.
– Rnd 2 adds 1 sc to each end of every side. With the corners, each round adds about 0.25 in (0.6 cm) per edge.
– 20 sc ÷ 4 = 5 in, plus the corners, gives 5.5 in (14.0 cm) of width.
– 74 sc ÷ 4 = 18.5 in, plus the corners, gives 19 in (48.3 cm) of length.
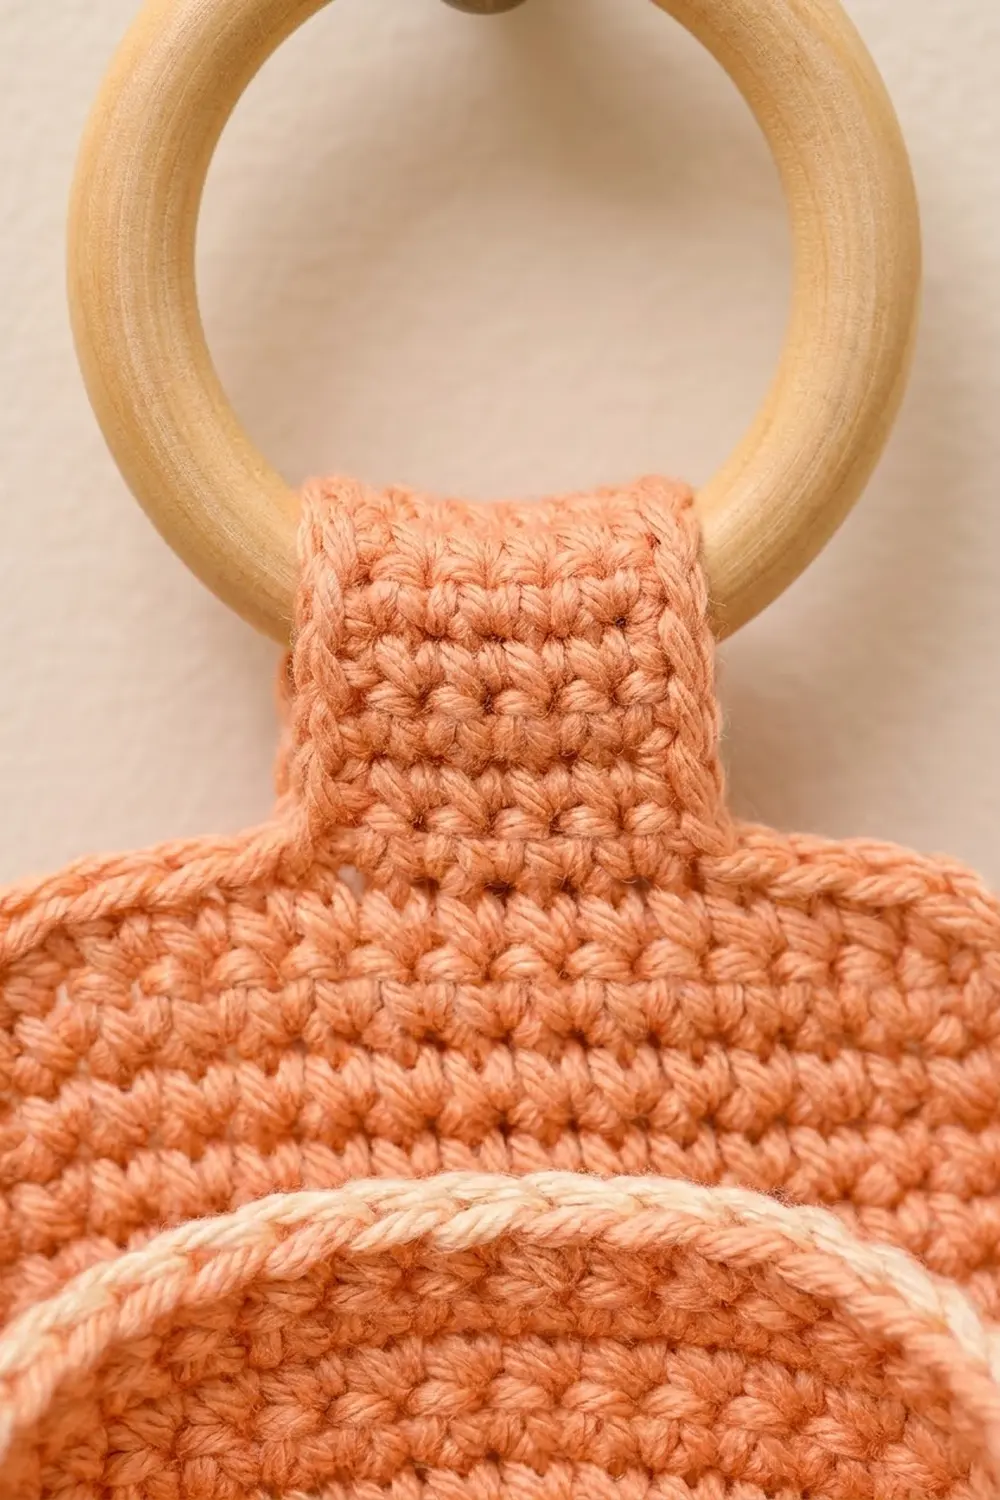
Hanging Tab
The top edge has 20 sts. Skip the first 7, join MC in the next st, and work over the center 6 sts (7 + 6 + 7 = 20).
Rows 1–14: Ch 1, sc 6, turn. (6)
The tab is about 1.5 in (3.8 cm) wide and 3 in (7.6 cm) long. Pass it through the wooden ring, fold it to the back, and whipstitch Row 14 to the base of the tab.
Joining
Sew the baskets on with MC and a tapestry needle, using whipstitch.
Placement: Measure from the top edge of the panel, not counting the tab.
– The petal tips of Basket 1 sit 1 in (2.5 cm) below the top.
– The tips of Basket 2 sit 7 in (17.8 cm) below the top.
– The tips of Basket 3 sit 13 in (33.0 cm) below the top.
The baskets are 6 in (15.2 cm) apart. Basket 3’s base ends at 16.75 in (42.5 cm), which leaves 2.25 in (5.7 cm) of panel below it.
Stitch-to-stitch logic:
1. Find the 18 marked back sts on the Rnd 11 ridge. Sew them to 18 sts of one panel row, one ridge stitch to one panel stitch, across the inner 18-st width of the panel. The basket’s long side faces outward.
2. Sew the two outer columns of the back section (st 25 and st 42) straight up the panel through Rnds 11–22, one stitch per wall round.
3. Tack the base of Petals 1 and 2 to the panel at Rnd 22. Leave the petal tips free.
Tension: Pull each stitch snug but not tight. Your stitches should disappear into the fabric without puckering the panel.
Checkpoint: the panel still measures 5.5 in (14.0 cm) wide, and each basket stands out about 4.5 in (11.4 cm) from the panel.
Tassel
- Wrap MC 30 times around the 5 in (12.7 cm) card.
- Tie the top with a 12 in (30.5 cm) strand and cut the bottom loops.
- Wrap a neck 0.5 in (1.3 cm) below the top.
- Use the tie strand to sew the tassel to the 2 center sts of the bottom border.
- Trim the ends evenly.
Final Blocking
- Lightly mist the panel and pin it to 5.5 in x 19 in (14.0 cm x 48.3 cm).
- Stuff each basket with a toilet roll or a rolled towel to set the oval.
- Mist the petals and shape each tip to a point, curving it slightly outward.
- Press the cream arches flat with your fingers.
- Let everything dry fully, about 24 hours.
- Steam the tassel and comb it straight.
Final Quality-Control Checklist
- [ ] Each base is 6.25 in x 4.5 in (15.9 cm x 11.4 cm).
- [ ] Each wall has 72 sts and is 2.75 in (7.0 cm) tall.
- [ ] Each basket has 8 petals of 9 sts each.
- [ ] Each cream outline has 88 sc and 8 tips.
- [ ] Each set of arches has 112 sl sts, with every peak under a valley.
- [ ] Border Rnd 2 counts 20/74/20/74.
- [ ] The tab is centered and the ring is secure.
- [ ] The baskets are 6 in (15.2 cm) apart and level.
- [ ] All ends are woven in.
Troubleshooting
- The oval base ruffles: Your hook is too large, or you’ve placed extra increases. Recount against the bracket repeats.
- The base cups upward: Go up one hook size and keep the end increases evenly spaced.
- The ends of the oval look pointed: Stagger the increases on alternate rounds, working (inc, sc …) instead of (sc …, inc).
- The wall leans outward: Waistcoat stitch is worked too loosely. Tighten your tension or go down 0.5 mm.
- The petals are uneven: Check that every petal starts with exactly 9 sts.
- The arches drift: Recount the columns under each petal before every arch.
- The panel side ripples: Use 8 sc per 9 rows exactly.
- The baskets sag: Add a second line of tacking along Rnd 22.
Care
Hand wash in cool water, press out the water in a towel, and dry flat with the baskets stuffed into shape. Don’t wring or tumble dry.
Final Notes
The measurements build on each other:
1. Gauge of 16 sc = 4 in (10.2 cm)
2. Base of 72 sts at 6.25 in x 4.5 in (15.9 cm x 11.4 cm)
3. Wall of 2.75 in (7.0 cm), then petals of 1 in (2.5 cm), for a basket 3.75 in (9.5 cm) tall
4. Panel of 18 sts x 81 rows at 4.5 in x 18 in (11.4 cm x 45.7 cm)
5. Two border rounds, giving 5.5 in x 19 in (14.0 cm x 48.3 cm)
Check each step before moving on, and the three lotus baskets will line up neatly.
Happy crocheting!