

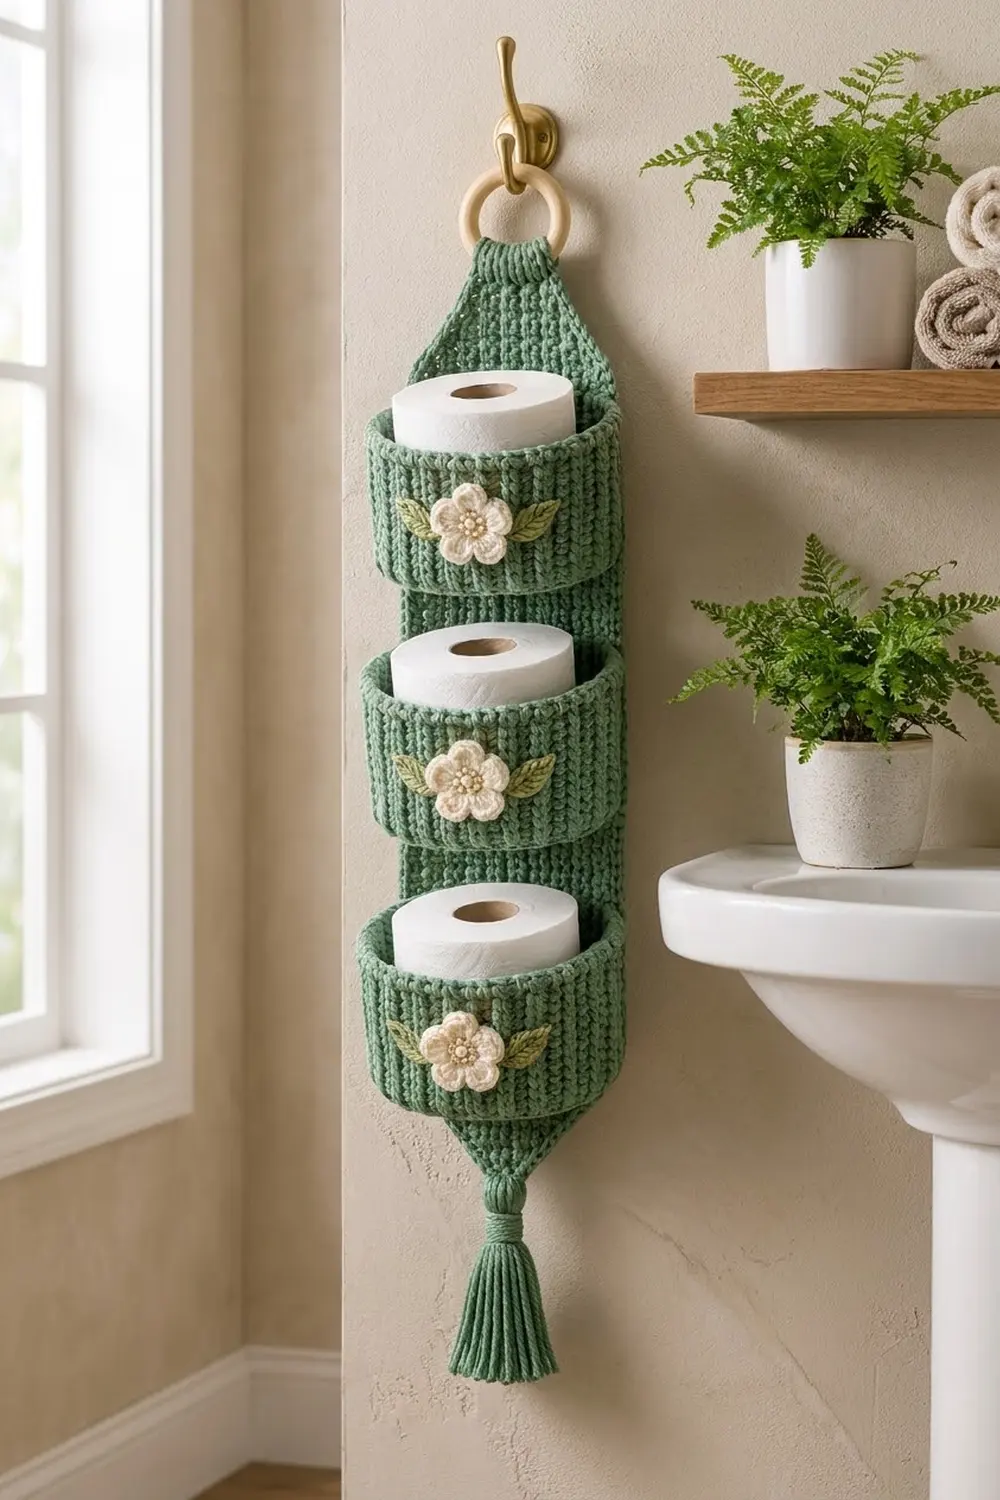
The Sage Bloom holder is a slim wall organizer with three oval baskets on a long backing strip. Each basket holds one standard roll of toilet paper. The strip hangs from a natural wooden ring at the top and ends in a soft tassel at the bottom.
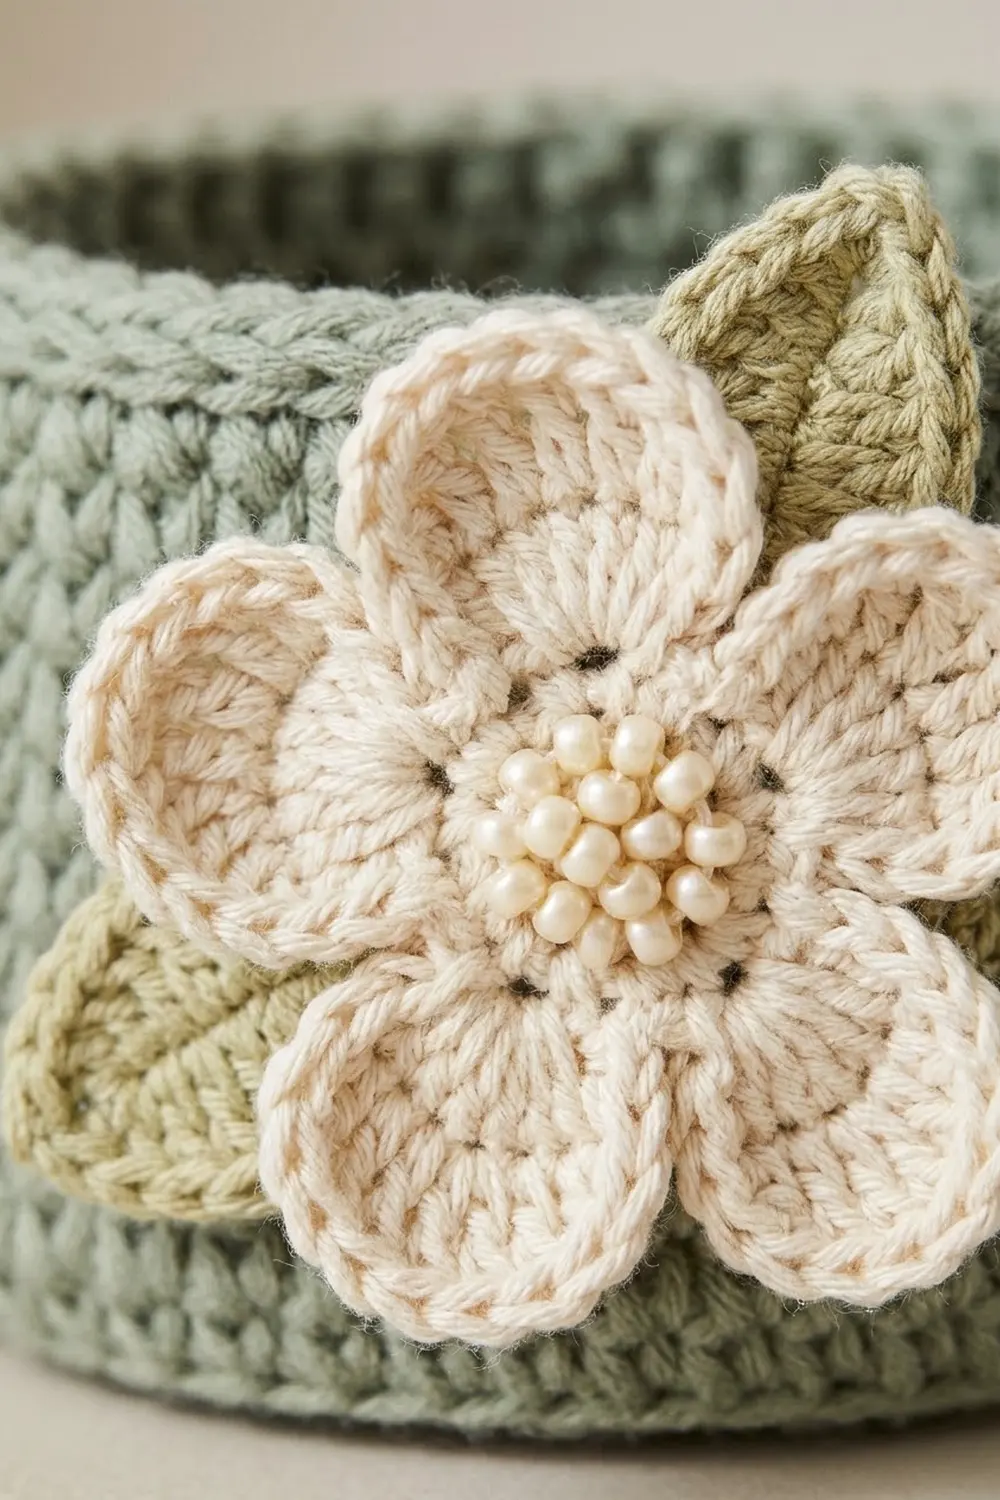
The color palette is calm and spa-like. The body is medium sage green, and each basket has a cream five-petal flower with a pearl-bead center and two light olive-sage leaves. The basket walls use waistcoat stitch, which looks like knitting and gives the baskets firm vertical ribs.
This pattern uses US crochet terms. The finished holder is about 7.8 in (19.8 cm) wide at the backing strip and about 32 in (81.3 cm) long from the top of the ring to the tip of the tassel. Each basket measures about 9 x 5 in (22.9 x 12.7 cm) at the base and 3.5 in (8.9 cm) tall.
How it’s made: you work three oval bases in rounds and raise the walls straight up from each one. Next you crochet the backing strip in rows from the bottom point upward, ending in a narrow tab. Then you sew the baskets to the strip, add a two-round border, wrap the tab around the ring and finish with flowers and a tassel.
Finished Size and Construction
- Finished size: 7.8 in (19.8 cm) wide x about 32 in (81.3 cm) long including ring and tassel
- Skill level: Intermediate
- Terminology: US crochet terms
- Yarn weight: Worsted (#4)
- Hook: 4.5 mm (US 7)
- Number of pieces: 3 baskets, 1 backing strip, 3 flowers, 6 leaves, 1 tassel, 1 wooden ring
- Layout: 3 baskets stacked vertically on one strip
- Basket size: 9 x 5 in (22.9 x 12.7 cm) base, 3.5 in (8.9 cm) tall
- Strip size before border: 7 in (17.8 cm) wide, 25.1 in (63.8 cm) from the bottom point to the start of the tab
- Border depth: 0.4 in (1.0 cm) per edge
Materials
Use a smooth worsted yarn with good stitch definition. Cotton or a cotton blend gives the stiffest baskets. Acrylic is lighter and easier to wash. The quantities below assume about 180 m per 100 g.
- Sage green (main color): 550 g, about 990 m
- Cream (flowers): 10 g, about 18 m
- Light olive-sage (leaves): 10 g, about 18 m
All quantities include a margin of about 15% for gauge swatches and sewing.
Tools:
– 4.5 mm (US 7) crochet hook
– 1 wooden ring, 2.75 in (7.0 cm) across
– 21 pearl beads, 4 mm (7 per flower), plus a beading needle and cream thread
– Tapestry needle
– Locking stitch markers (at least 10)
– A 5 in (12.7 cm) piece of cardboard for the tassel
– Scissors and a measuring tape
Abbreviations (US Terms)
- ch: chain
- sl st: slip stitch
- sc: single crochet
- hdc: half double crochet
- dc: double crochet
- inc: 2 sc in the same stitch
- sc2tog: single crochet 2 together
- BLO: back loop only
- rev sc: reverse single crochet (crab stitch)
- st(s): stitch(es)
Waistcoat stitch (ws): Insert your hook through the center of the V of the next stitch, between its two front legs and under the horizontal bars. Yarn over and pull up a loop, then yarn over and pull through both loops. Rounds of ws stack into vertical V-columns that look like knitting.
Gauge and Checkpoints
Gauge: 16 sc and 18 rows = 4 in (10.2 cm). Waistcoat stitch is worked to the same gauge.
Make one basket before you start the backing strip, and measure it at each stage:
- After Rnd 1: the oval is about 4.5 in (11.4 cm) long
- After Rnd 6: about 6.75 x 3 in (17.1 x 7.6 cm)
- After Rnd 11: 9 x 5 in (22.9 x 12.7 cm)
- Wall complete: 3.5 in (8.9 cm) tall
If your base comes out more than 0.25 in (0.6 cm) too big, switch to a hook 0.5 mm smaller. If it’s too small, go up 0.5 mm. If the base curls up like a bowl, your tension is too tight. If it ruffles, your tension is too loose. Waistcoat stitch pulls in more than sc does, so keep your loops relaxed on the walls.
Basket (Make 3)
Oval Base
Join each round with a sl st to the first sc. Ch 1 at the start of each round; it does not count as a stitch.
Foundation: With sage green, ch 17.
Rnd 1: Work 2 sc in the 2nd ch from the hook, sc in the next 14 ch, then 3 sc in the last ch. Working along the opposite side of the foundation, sc in the next 14 ch, then sc in the same ch as the first 2 sc. (34 sc)
Each end of the oval now has 3 stitches, and each side has 14.
Rnd 2: 2 sc in each of the first 2 sts, sc in the next 14, 2 sc in each of the next 3, sc in the next 14, 2 sc in the last st. (40 sc)
Rnd 3: [inc, sc 1] 2 times, sc 14, [inc, sc 1] 3 times, sc 14, [inc, sc 1] once. (46 sc)
Rnd 4: [inc, sc 2] 2 times, sc 14, [inc, sc 2] 3 times, sc 14, [inc, sc 2] once. (52 sc)
Rnd 5: [inc, sc 3] 2 times, sc 14, [inc, sc 3] 3 times, sc 14, [inc, sc 3] once. (58 sc)
Rnd 6: [inc, sc 4] 2 times, sc 14, [inc, sc 4] 3 times, sc 14, [inc, sc 4] once. (64 sc)
Rnd 7: [inc, sc 5] 2 times, sc 14, [inc, sc 5] 3 times, sc 14, [inc, sc 5] once. (70 sc)
Rnd 8: [inc, sc 6] 2 times, sc 14, [inc, sc 6] 3 times, sc 14, [inc, sc 6] once. (76 sc)
Rnd 9: [inc, sc 7] 2 times, sc 14, [inc, sc 7] 3 times, sc 14, [inc, sc 7] once. (82 sc)
Rnd 10: [inc, sc 8] 2 times, sc 14, [inc, sc 8] 3 times, sc 14, [inc, sc 8] once. (88 sc)
Rnd 11: [inc, sc 9] 2 times, sc 14, [inc, sc 9] 3 times, sc 14, [inc, sc 9] once. (94 sc)
Every round adds exactly 6 stitches, 3 at each end. The 14-stitch sides never grow. At Rnd 11 the stitches break down as: 22 at the start, side A (sts 23–36), 33 at the far end, side B (sts 70–83), and 11 at the finish. Each end holds 22 + 11 = 33 stitches, so 33 + 14 + 33 + 14 = 94.
Place one marker on st 23 and one on st 36 to mark side A, which becomes the back. Side B is the front.
Walls
Rnd 12: Sc in the BLO of each st around. (94 sc) This round makes a crisp turning ridge at the bottom edge.
Rnds 13–25: Ws in each st around. (94 ws in each round)
Rnds 26–27: Sc in each st around. (94 sc) These two rounds make the smooth rim.
Fasten off and leave a 24 in (61.0 cm) tail for sewing. Each wall is 16 rounds high, which gives 3.5 in (8.9 cm).
Backing Strip
Ch 1 and turn at the start of every row; the ch 1 does not count as a stitch.
Row 1: Ch 3. Sc in the 2nd ch from the hook and in the next ch. (2 sc)
Row 2: 2 sc in each st. (4 sc)
Rows 3–14: 2 sc in the first st, sc across to the last st, 2 sc in the last st. Each row has 2 times its row number in stitches: Row 3 has 6 sc, and Row 14 has 28 sc.
Checkpoint: The point is 7 in (17.8 cm) wide and about 3.1 in (7.9 cm) tall.
Rows 15–104: Sc across. (28 sc in each row) As you work, place markers at the side edge of Rows 30, 46, 55, 71, 80 and 96. You’ll use these for basket placement.
Checkpoint: After Row 104 the strip measures 23.1 in (58.7 cm) from the tip.
Rows 105–113: Sc2tog, sc across to the last 2 sts, sc2tog. Each row has 2 fewer stitches than the row before: Row 105 has 26 sc, and Row 113 has 10 sc. These rows form the shoulders.
Rows 114–127: Sc across. (10 sc in each row) This is the tab, 3.1 in (7.9 cm) long.
Fasten off.
Flower (Make 3)
Rnd 1: With cream, make a magic ring and work 10 sc into it. Join. (10 sc)
Rnd 2: [(Hdc, 3 dc, hdc) in the next st, sl st in the next st] 5 times. (5 petals)
Fasten off and leave a tail. The flower is about 2 in (5.1 cm) across. Sew 7 pearl beads in a tight cluster at the center.
Leaf (Make 6)
With light olive-sage, ch 7.
Working into the 2nd ch from the hook: sl st, sc, hdc, dc, hdc, then work (sc, ch 2, sc) in the last ch. Rotate and work along the other side of the chain: hdc, dc, hdc, sc, sl st.
Fasten off. Each leaf is about 1.5 in (3.8 cm) long.
Make All Pieces
| Piece | Qty | Color |
|---|---|---|
| Basket | 3 | Sage green |
| Backing strip | 1 | Sage green |
| Tassel | 1 | Sage green |
| Flower | 3 | Cream |
| Leaf | 6 | Light olive-sage |
Layout (front view, top to bottom):
          (  ring  )
          [  tab   ]   Rows 114–127
         / shoulders \  Rows 105–113
        | Basket 3   |  Rows 80–96
        |   gap      |  Rows 72–79
        | Basket 2   |  Rows 55–71
        |   gap      |  Rows 47–54
        | Basket 1   |  Rows 30–46
        |            |  Rows 15–29
         \  point   /   Rows 1–14
            tassel
Before joining, sew one flower to the center of side B on each basket, centered at the height of Rnd 19. Tuck one leaf behind the flower on each side, angled slightly upward.
Joining
Use sage green and a whipstitch, sewing through both layers.
- Lay the strip right side up. Find stitches 8–21 on Row 30; this is the center 14 stitches, with 7 stitches left free on each side.
- Place Basket 1 with side A (the back) against the strip. The front loops left unworked by the BLO round sit at the bottom edge. Sew the 14 front loops of side A to stitches 8–21 of Row 30, one loop to one stitch.
- Sew the 14 rim stitches of side A (Rnd 27, sts 23–36) to stitches 8–21 of Row 46, again one to one.
- Whipstitch up both short vertical edges where side A meets the strip, from Row 30 to Row 46.
- Repeat for Basket 2 at Rows 55 and 71, and for Basket 3 at Rows 80 and 96.
Because the base and the strip match 14 to 14, nothing gets gathered or stretched. Keep your sewing firm but flat: pull each stitch snug, then ease it back until the strip lies smooth.
Checkpoint: The strip should still measure 7 in (17.8 cm) wide with no puckers, and each gap between baskets should be 2 in (5.1 cm).
Border
Border gauge is the same as the main gauge: 4 sc per inch along the edges. Fold the baskets toward the center while you work so the edges stay free.
Rnd 1 (sc): Join sage green at the top-right corner of the tab and work around the whole strip as follows:
- Tab top: 3 sc in the first st, sc 8, 3 sc in the last st. (14 sc, corners included)
- Left side, top to bottom: 12 sc along the tab, 12 sc along the shoulder, 80 sc along Rows 104–15, and 18 sc along the point. (122 sc)
- Tip: 3 sc in each of the 2 foundation ch. (6 sc)
- Right side, bottom to top: 18 + 80 + 12 + 12. (122 sc)
- Join with a sl st. Total: 264 sc.
Rnd 2 (rev sc): Ch 1, then rev sc in each st around. (264 rev sc) Join and fasten off.
Why the math works: The strip has 4 stitches per inch across but 4.5 rows per inch vertically. Working 8 sc for every 9 rows (90 rows → 80 sc) keeps the edges flat. The two angled edges come from their measured lengths: the point is 4.5 in (11.4 cm) long × 4 = 18 sc, and each shoulder is 3 in (7.6 cm) long × 4 = 12 sc.
Checkpoint: The width with the border is 7.8 in (19.8 cm).
To finish the top, fold the tab to the back through the ring and sew its last row across the back of Row 113.
Tassel: Wrap sage green 40 times around the 5 in (12.7 cm) card. Tie the loops at the top with a 10 in (25.4 cm) strand, then cut the loops at the bottom. Wrap the neck 0.75 in (1.9 cm) below the top and trim the tassel to 4.5 in (11.4 cm). Sew it to the tip of the strip.
Final Blocking
- Lightly mist the whole holder with water, or steam acrylic yarn from 1 in (2.5 cm) away without touching it.
- Pin the strip flat to 7.8 in (19.8 cm) wide.
- Stuff each basket with a rolled towel or a spare roll of paper so the ovals hold their shape.
- Pinch along each turning ridge to sharpen it.
- Smooth the flower petals and leaves with your fingers.
- Let everything dry completely, about 24 hours, before hanging.
Final Quality-Control Checklist
- Each base has 94 sc, and each wall is 16 rounds high.
- The bases measure 9 x 5 in (22.9 x 12.7 cm).
- The strip has 28 stitches through Rows 14–104.
- The baskets are centered and level, with 2 in (5.1 cm) gaps.
- The border has 264 stitches in each round and lies flat.
- The tab is secure around the ring.
- The beads, leaves and tassel are all firmly attached.
Troubleshooting
- Base cups upward: Your tension is too tight, or you missed an increase. Recount the round against the given total.
- Walls flare outward: Your waistcoat stitch is too loose. Go down 0.5 mm for the wall rounds.
- Strip edges wave: You have too many border stitches. Keep to 8 sc per 9 rows.
- Baskets sag forward: Add a second line of stitching through the middle of side A.
- Rolls too tight a fit: Add one more base round, following the same pattern: [inc, sc 10]. This adds 6 stitches.
Care
Hand wash in cool water and lay flat to dry with the baskets stuffed. Remove the wooden ring before washing.
Final Notes
The measurement chain is simple: the gauge sets a 9 x 5 in (22.9 x 12.7 cm) base and 3.5 in (8.9 cm) walls. The 14-stitch back of each basket matches the center 14 stitches of a 28-stitch, 7 in (17.8 cm) strip. The 264-stitch border brings the width to 7.8 in (19.8 cm). Check each link in the chain as you go, and the holder will hang straight and true.
Happy crocheting!