

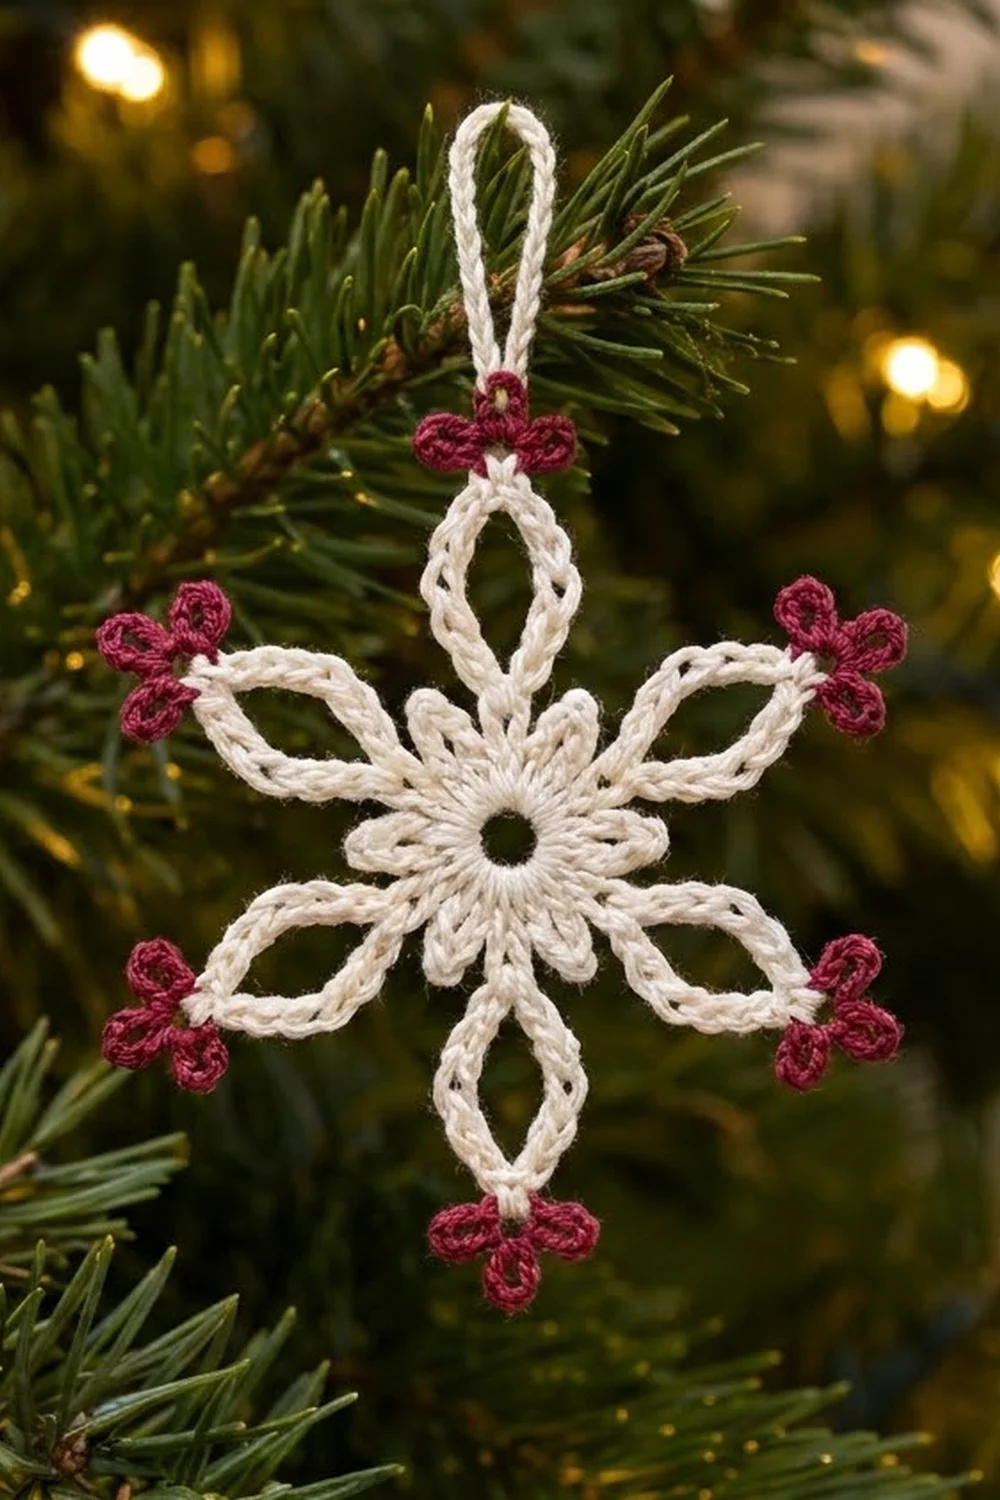
The Berry Frost Snowflake is a light, lacy ornament with six long open arms and a little cranberry clover at each tip. The cream body looks like frost on a window, and the red tips give it a classic Christmas berry accent that stands out against green branches.
The design has a quiet, Scandinavian-inspired style. A small open ring sits in the center, framed by a dense round of stitches with tiny star points. Six pointed oval arms radiate out from that center, each one made of two strands that open in the middle and close again at the tip.
This pattern uses US crochet terms. The finished snowflake is 5.25 in (13.3 cm) from tip to tip, and the hanging loop adds about 1.25 in (3.2 cm).
It is worked as one single piece. You make the center in rounds and chain the arms as part of Round 3. Round 4 covers the arm strands with single crochet, and the red clover tips are added last as the edging. A short cream hanging loop finishes it.
Finished Size and Construction
- Finished size: 5.25 in (13.3 cm) tip to tip, after blocking
- Skill level: Easy-intermediate (you need to be comfortable with chain counts and working around chains)
- Terminology: US crochet terms
- Yarn weight: Fingering-weight (Super Fine, #1) mercerized cotton
- Hook: 2.25 mm (US B-1)
- Number of pieces: 1
- Layout: Single six-armed motif with a hanging loop
- Center size (after Round 3): 1.25 in (3.2 cm) across
- Size before edging: 4.75 in (12.1 cm) tip to tip
- Edging depth: 0.25 in (0.6 cm) at each tip
Materials
Yarn: Use a smooth, tightly plied mercerized cotton in fingering weight. Cotton holds starch well and keeps the arms crisp. Avoid fuzzy or very stretchy acrylics, which let the open ovals collapse.
- Cream (main color): 8 g / 34 m (37 yd)
- Cranberry red (accent): 3 g / 12 m (13 yd)
These amounts include a safety margin of about 30%, so one small ball of each color is plenty. A full ball will make several snowflakes.
Tools:
- 2.25 mm (US B-1) crochet hook
- Tapestry needle
- Scissors
- Rust-proof pins and a foam blocking board
- Fabric stiffener, or a starch solution of 1 part white glue to 1 part water
- Ruler or tape measure
Abbreviations (US Terms)
- ch – chain
- sl st – slip stitch
- sc – single crochet
- dc – double crochet
- sp – space
- st(s) – stitch(es)
- MR – magic ring
- rep – repeat
Special stitches:
- Arm: Ch 12, ch 4 more, sl st in the 4th ch from hook to form the tip ring, then ch 12. This gives one arm with two 12-ch strands and a 4-ch tip ring.
- Lobe: Ch 5, sl st in the top of the sc just made. This forms a closed, rounded loop.
Gauge and Checkpoints
Gauge matters more for an open-armed snowflake than you might expect. If the chains are loose, the arms droop. If they are tight, the ovals won’t open.
Chain gauge: 8 ch = 1 in (2.5 cm), measured relaxed and not stretched.
Test the center first by working Rounds 1 and 2, then measure:
- After Round 1: Center opening about 0.4 in (1.0 cm) across
- After Round 2: 1 in (2.5 cm) across
- After Round 3, excluding arms: 1.25 in (3.2 cm) across, measured between star points
- Each arm, unblocked: about 1.75 in (4.4 cm) from the Round 3 edge to the end of the tip ring
- After Round 4: 4.75 in (12.1 cm) tip to tip, with arms about 0.5 in (1.3 cm) wide at their widest after blocking
- After Round 5: 5.25 in (13.3 cm) tip to tip
If the piece is too big: Go down to a 2.0 mm hook, or chain more firmly.
If the piece is too small: Go up to a 2.5 mm hook. Don’t add chains to the arms, because that changes the stitch counts in Round 4.
Pattern: Center and Arms
Work with cream. Don’t turn between rounds.
Round 1: Make a MR. Ch 1, then work 12 sc into the ring. Sl st to the first sc. Pull the tail until the center hole is about 0.4 in (1.0 cm). (12 sc)
Round 2: Ch 3 (counts as dc), dc in the same st. Work 2 dc in each of the remaining 11 sts. Sl st to the top of the beginning ch-3. (24 dc)
Round 3 (arms and star points): Ch 1. Then repeat the following 6 times in total:
- Sc in the next dc.
- (Sc, Arm, sc) in the next dc.
- Sc in the next dc.
- (Sc, ch 3, sc) in the next dc. This makes a star point.
The first sc goes in the same st as the join. Sl st to the first sc.
Count: 36 sc, 6 arms and 6 ch-3 star points. Each repeat uses 4 dc from Round 2, and 6 × 4 = 24 dc, which matches Round 2 exactly.
The arms and star points alternate around the center. Each arm comes out between a pair of sc that share one stitch, which is why the oval narrows to a single point at the center.
Lay the piece flat. Each arm’s two 12-ch strands should lie side by side with the tip ring at the end. That is correct; the ovals open up in Round 4 and during blocking.
Checkpoint: The center measures 1.25 in (3.2 cm) between star points, and each arm extends about 1.75 in (4.4 cm).
Pattern: Arm Covering
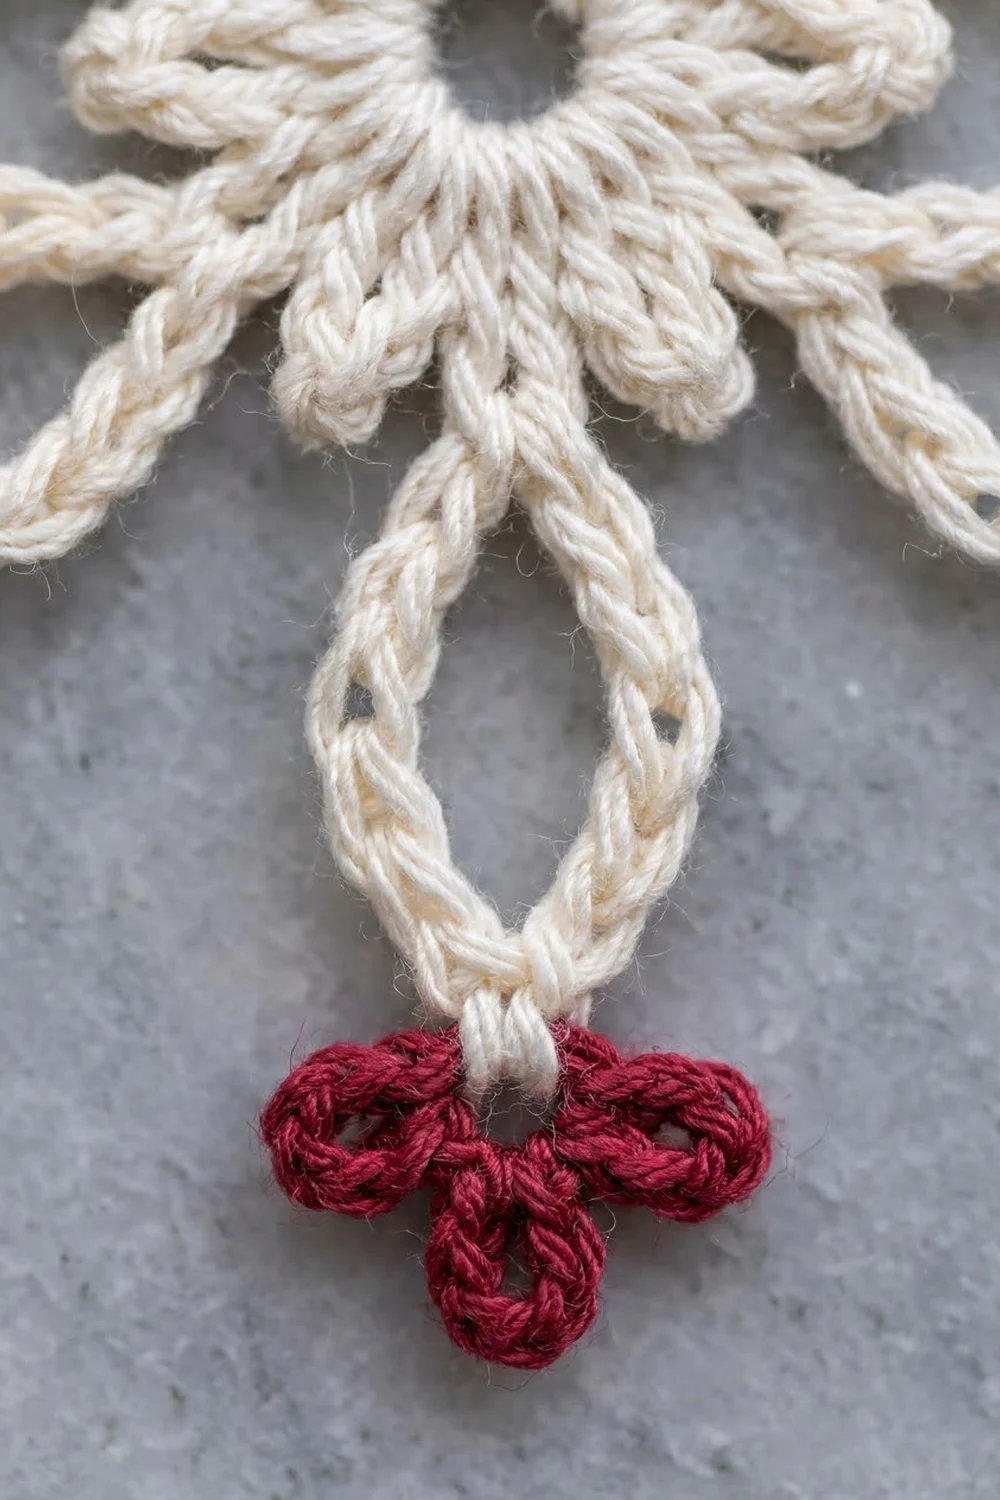
Still in cream. This round turns each thin chain into the thick, braided-looking strand you see in the photo, and it pushes the two strands apart into a pointed oval.
Round 4: Sl st in the next sc, which is the first sc of the first arm pair. Then repeat the following 6 times in total:
- Strand 1: Work 14 sc around the first 12-ch strand of the arm, working outward toward the tip. Insert the hook into the open space of the arm, not into the chains themselves.
- Tip knot: Sl st into the sl st that closed the tip ring. This makes the small cream knot just below the red tip. Don’t work into the ring itself, because it stays empty for the red edging.
- Strand 2: Work 14 sc around the second 12-ch strand, working back toward the center.
- Travel: Sl st in each of the next 3 sc, sl st in the ch-3 star point sp, then sl st in each of the next 3 sc. You now sit at the first sc of the next arm pair.
On the last repeat, work only 2 sl st after the star point, then join with a sl st to the first sl st of the round. Fasten off and weave in the ends.
Count per arm: 28 sc and 8 sl st (1 tip knot plus 7 travel sl st).
Round total: 168 sc and 48 sl st. The 48 sl st count the beginning sl st as part of the last arm’s travel.
Why 14 sc over 12 ch: The two extra stitches on each strand make it curve outward slightly. That curve is what opens the oval into a pointed eye shape instead of a straight line.
Checkpoint: 4.75 in (12.1 cm) tip to tip when gently flattened.
Edging: Cranberry Clover Tips
This round is the edging, worked separately at each of the 6 arm tips.
Edging gauge: Each lobe is about 0.25 in (0.6 cm) across, and a finished clover is about 0.6 in (1.5 cm) wide. The clover adds 0.25 in (0.6 cm) beyond each tip ring.
Round 5 (worked at each tip): Join red with a sl st in an empty tip ring. Ch 1, then work into the tip ring as follows:
- Sc in the ring, Lobe.
- Sc in the ring, Lobe.
- Sc in the ring, Lobe.
- Sc in the ring.
Sl st to the first sc and fasten off, leaving a 4 in (10.2 cm) tail.
Turn the clover so the middle lobe points straight out from the arm and the other two point to the sides.
Count per tip: 4 sc and 3 lobes.
Count for the round: 24 sc and 18 lobes across 6 tips.
Why the math works: The tip ring has 4 chains, so it holds 4 sc without bunching or gapping. The 3 lobes sit between those 4 sc, so each lobe has a firm sc anchor on both sides. The cream tip knot from Round 4 sits right below the ring and gives the clover a neat base.
Repeat Round 5 on all 6 tips. To keep the ends tidy, weave each red tail back through its own clover only, so no red shows on the cream strands.
Hanging Loop
Choose the arm you want at the top. Join cream with a sl st in the base of the middle red lobe, working around the tip-ring sc. Ch 16 and sl st in the same spot. The loop is 1.25 in (3.2 cm) long. Fasten off, then weave the end back down through the cream tip knot.
Final Blocking
- Soak the snowflake in fabric stiffener or the glue-and-water mix until it is fully saturated.
- Squeeze out the excess gently. Don’t wring it.
- Pin the center ring flat first, with one pin through the center hole.
- Pin the 6 tips in a circle 5.25 in (13.3 cm) across, spaced evenly. A circle drawn on paper under clear plastic wrap makes this easy.
- Pin the middle of each arm open, with one pin inside the oval on each side, so the arm is 0.5 in (1.3 cm) wide at its widest.
- Pin the 3 lobes of each clover into rounded shapes, using a pin or toothpick in each loop.
- Pin each star point outward from the center between the arms.
- Pin the hanging loop straight up and slightly open.
- Let it dry completely, usually 12 to 24 hours, before you unpin it.
Final Quality-Control Checklist
- The center hole is small and round, about 0.4 in (1.0 cm) across.
- There are 6 star points and 6 arms, alternating evenly.
- Each arm has 14 sc on each strand and a cream tip knot.
- All 6 ovals are open and the same width.
- Each clover has exactly 3 red lobes, all about the same size.
- No red tails show on the cream strands.
- It measures 5.25 in (13.3 cm) tip to tip.
- It is stiff enough to hold its shape when hung.
Troubleshooting
Arms twist or spiral: You twisted the chain while making the Arm. Check that the chain lies flat before you close the tip ring.
Ovals won’t open: Make sure you used 14 sc per strand rather than 12. Then reblock with pins placed inside the oval.
Center cups upward: Round 2 is too tight. Go up a hook size for Round 2 only.
Center ruffles: Your MR is too loose, or Round 1 has too many stitches. Recount for 12 sc.
Clover lobes are uneven: Count exactly 5 ch for every lobe, and tug each lobe gently into shape before you block.
Snowflake droops on the tree: Use more stiffener and let it dry fully flat.
Care
Spot clean gently with a damp cloth. If you need to wash it, hand wash in cool water, then re-stiffen and block it again. Store it flat between sheets of tissue paper.
Final Notes
Here is the full measurement chain:
- The 0.4 in (1.0 cm) magic ring grows to 1 in (2.5 cm) after Round 2.
- The star-point round brings the center to 1.25 in (3.2 cm).
- The chained arms reach out about 1.75 in (4.4 cm) each.
- The covering round firms the snowflake up at 4.75 in (12.1 cm).
- The cranberry clovers bring it to 5.25 in (13.3 cm) tip to tip.
If you check the size at each stage, you’ll end up with a crisp, even snowflake every time. It’s a quick project, so you can easily make a whole set for the tree or for gift toppers.
Happy crocheting!