
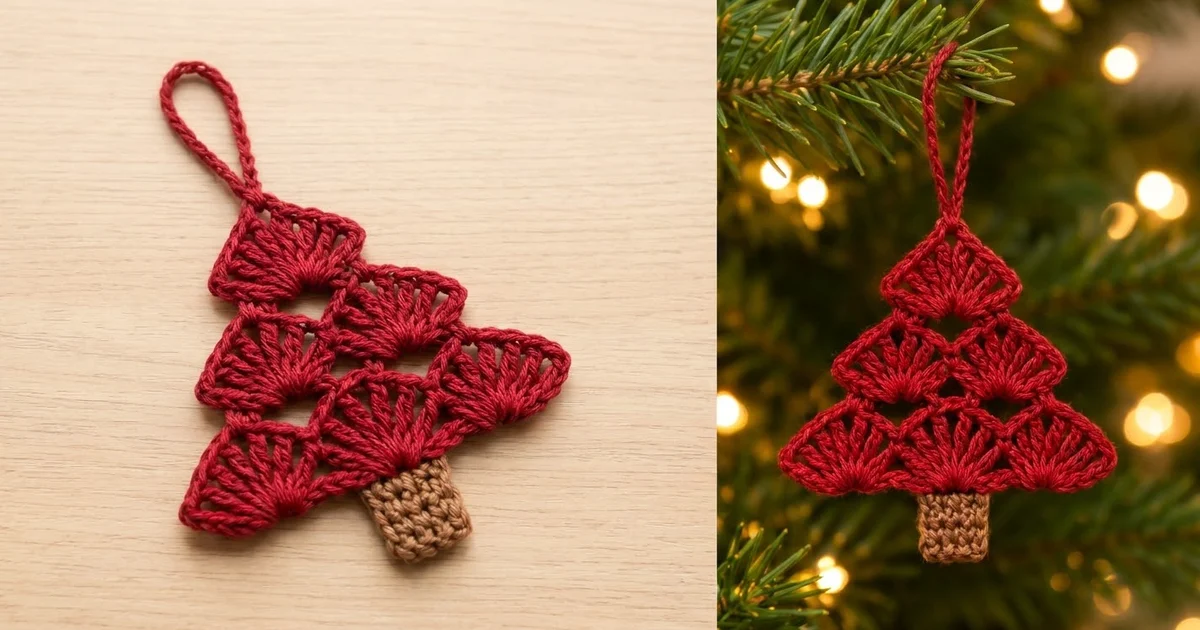
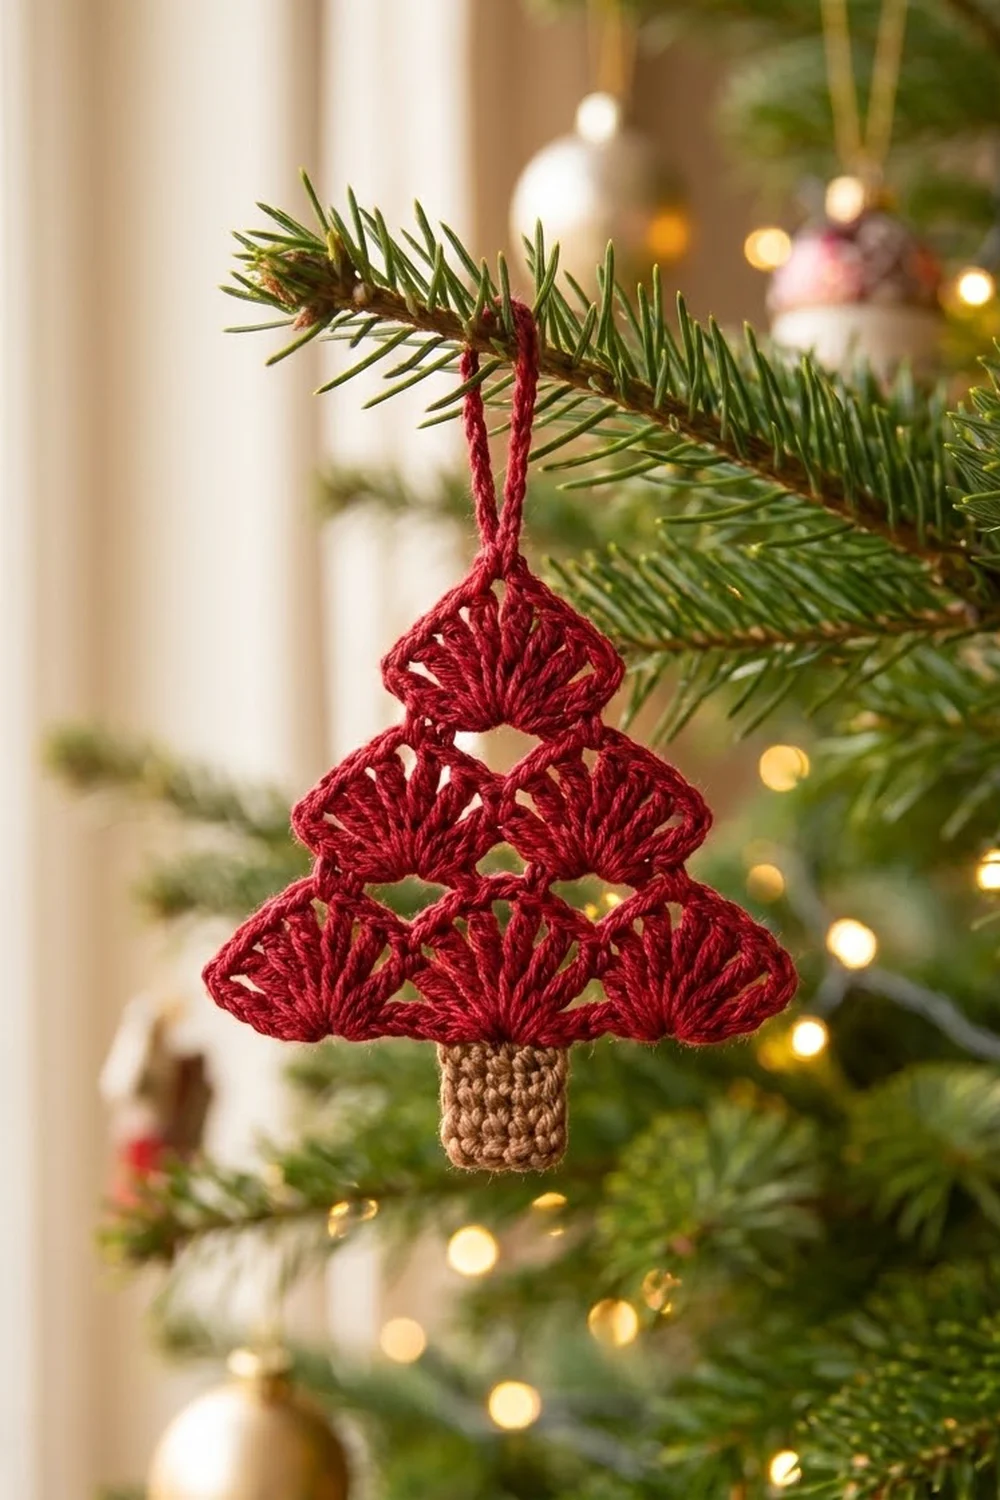
This little tree ornament is built entirely from fan shells. Three tiers of scalloped fans stack into a classic pine silhouette, and a small tan trunk sits underneath. It’s quick to make, uses very little yarn and looks cheerful on a real tree, a gift package or a wreath.
The colors are traditional: a deep cranberry red for the branches and a soft light brown for the trunk. Small open holes between the tiers keep the ornament light and lacy, and a single crochet outline gives the scallops a crisp, finished edge.
This pattern uses US crochet terms. The finished ornament measures 3.9 in (9.9 cm) wide by 3.4 in (8.6 cm) tall. With the hanging loop it is about 5.4 in (13.7 cm) tall.
The ornament is worked flat in one piece. You start with a red mesh foundation row and then work three tiers of shells in turned rows, each tier with one shell fewer. Next you add the trunk in brown off the bottom of the foundation chain. Finally, one red edging round outlines the tree and forms the hanging loop.
Finished Size and Construction
- Finished size: 3.9 in (9.9 cm) wide × 3.4 in (8.6 cm) tall, not counting the loop
- With loop: about 5.4 in (13.7 cm) tall
- Skill level: Easy
- Terminology: US
- Yarn weight: Worsted (#4), cotton or cotton blend
- Hook: 4.0 mm (G-6)
- Number of pieces: 1
- Layout: a single triangular tree made of 3 shell tiers (3, 2 and 1 shells), with a trunk centered below
- Red tree before edging: 3.5 in (8.9 cm) wide × 2.0 in (5.1 cm) tall
- Trunk: 1.25 in (3.2 cm) wide × 1.2 in (3.0 cm) tall
- Border depth: 0.2 in (0.5 cm), one round of single crochet
Materials
Choose a smooth, mercerized or matte cotton in worsted weight. Cotton holds the fan shapes crisply and blocks flat. Acrylic also works, but the shells will be a little softer and puffier.
- Red (cranberry): 8 g, about 14 m
- Light brown (tan): 2 g, about 4 m
These amounts include a small margin for your gauge swatch and weaving in ends.
Tools:
– 4.0 mm (G-6) crochet hook
– Tapestry needle
– 1 removable stitch marker
– Scissors
– Rust-proof pins and a foam blocking mat
– Spray bottle with water
Abbreviations (US Terms)
- ch – chain
- sl st – slip stitch
- sc – single crochet
- dc – double crochet
- sk – skip
- sp – space
- st(s) – stitch(es)
- RS – right side
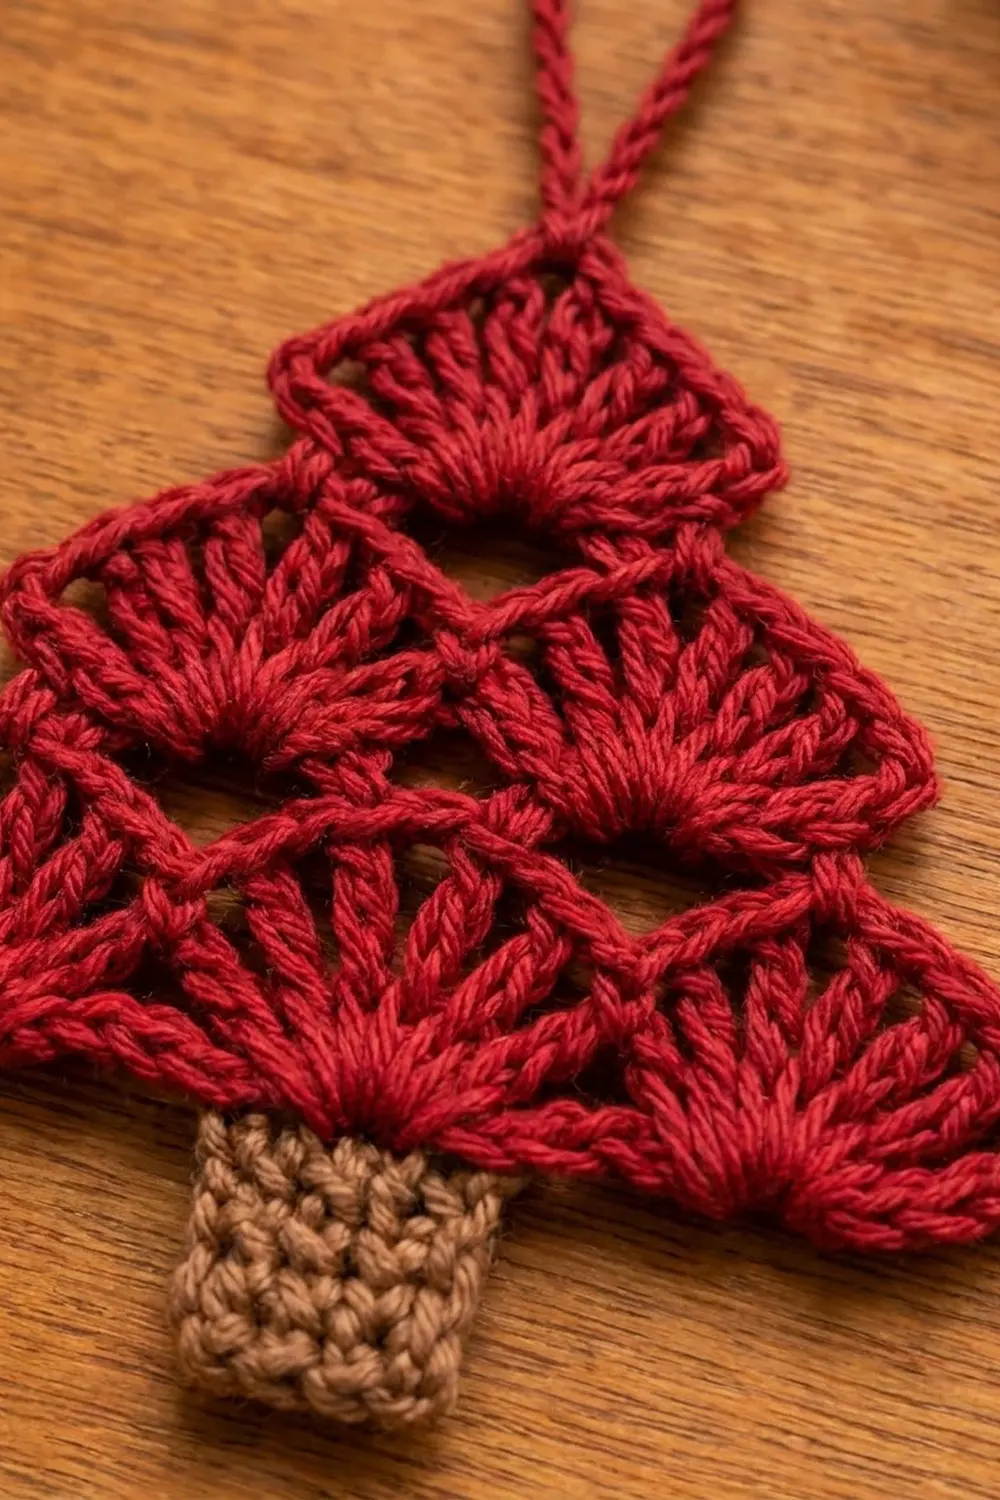
Special stitch: Shell. Work 9 dc into the same stitch. The center dc of a shell is its 5th dc. The 4 dc on each side of the center are its “outer” or “inner” dc, depending on where they sit on the finished tree.
Gauge and Checkpoints
Gauge: 16 sc and 20 rows = 4 in (10.2 cm) in single crochet.
Gauge is not critical for an ornament, but it controls the final size and how flat the shells lie. Crochet a small sc swatch first, or simply make one tree as your test piece and check it against these points:
- After Row 1: 3.25 in (8.3 cm) wide
- After Row 2: 3.5 in (8.9 cm) wide and about 0.8 in (2.0 cm) tall
- After Row 3: about 1.4 in (3.6 cm) tall
- After Row 4: 2.0 in (5.1 cm) tall at the tip
- Trunk: 1.25 in (3.2 cm) wide × 1.2 in (3.0 cm) tall
- After edging: 3.9 in (9.9 cm) wide × 3.4 in (8.6 cm) tall
If your tree is too big or the shells ruffle, go down to a 3.5 mm hook. If it’s too small or the shells cup, go up to a 4.5 mm hook. Change hooks before you get past Row 2, because Row 2 sets the width of the whole tree.
Tree Body
Use red throughout this section.
Row 1 (mesh foundation): Ch 14. Sc in the 2nd ch from hook, *ch 2, sk 1 ch, sc in next ch; repeat from * 5 more times. Count: 7 sc and 6 ch-2 sps, worked across 13 foundation chains.
This open row makes the row of small loops that the shells sit on. Number the 13 foundation chains that hold Row 1 stitches as 1 to 13. The trunk will later sit on chains 5–9, the middle 5.
Row 2 (bottom tier, 3 shells): Ch 1, turn. Sc in first sc, *sk ch-2 sp, Shell in next sc, sk ch-2 sp, sc in next sc; repeat from * 2 more times. Count: 4 sc + 27 dc = 31 sts (3 shells).
From one end to the other, the shells are Shell A, Shell B and Shell C. Each fan rises from a single sc, so its spokes radiate upward like a half-circle.
Row 3 (middle tier, 2 shells): Turn. Sk first sc, sl st in each of next 5 dc, so you finish in the center dc of Shell C. Ch 1, sc in the same dc. Ch 3, sk next 4 dc, Shell in next sc. Ch 3, sk next 4 dc, sc in next dc (the center dc of the next shell). Repeat from * to * once more. Count: 3 sc + 18 dc + 4 ch-3 sps (2 shells).
The new shells are Shell D (between C and B) and Shell E (between B and A). They sit in the valleys of the bottom tier. The ch-3 spaces make the open holes and the stepped notches at the sides.
Row 4 (top tier, 1 shell): Turn. Sk first sc, sl st in each of next 3 ch, then sl st in each of next 5 dc, so you finish in the center dc of Shell E. Ch 1, sc in the same dc. Ch 3, sk next 4 dc and next ch-3 sp, Shell in next sc (the sc on Shell B’s center). Ch 3, sk next ch-3 sp and next 4 dc, sc in next dc (the center dc of Shell D). Count: 2 sc + 9 dc + 2 ch-3 sps (1 shell, Shell F).
Do not fasten off. Take the hook out and put the stitch marker in the live loop.
Trunk
Use light brown.
Row 1: Turn the tree upside down and work into the free loops on the opposite side of the foundation chain. Join brown in chain 5, ch 1, sc in the same chain and in chains 6, 7, 8 and 9. Count: 5 sc.
Rows 2–6: Ch 1, turn, sc in each sc across. Count: 5 sc per row.
Fasten off, leaving a 6 in (15.2 cm) tail. The trunk should measure 1.25 in (3.2 cm) wide × 1.2 in (3.0 cm) tall. Weave in the ends now, before the edging covers the junction.
Border (Edging Round and Hanging Loop)
Border gauge: 1 sc into each dc top, sc or slip stitch, and 3 sc into each ch-3 space. That works out to about 4 sc per 1 in (2.5 cm) along the scallops.
Wherever Row 3 or Row 4 slip stitches sit on top of the edge stitches, work under both loops of each slip stitch. The count stays the same.
Put the live red loop back on your hook. You are at the last sc of Row 4, on the center of Shell D.
Edging round: Do not turn. Ch 1.
- Side 1, lower part (13 sc): Sc in the same sc, then sc in each of the next 4 dc of Shell D. Work 3 sc in the Row 3 ch-3 sp, sc in the Row 3 sc on Shell C’s center, then sc in each of the next 4 sl sts over Shell C’s outer dc.
- Corner 1 (3 sc): 2 sc in the last sc of Row 2, then 1 sc in the side of the Row 1 end sc.
- Bottom (8 sc): Sc in each of the 4 free foundation chains. Skip the 5 trunk chains, carrying the yarn snugly behind the trunk. Sc in each of the remaining 4 free foundation chains.
- Corner 2 (3 sc): 1 sc in the side of the Row 1 end sc, then 2 sc in the first sc of Row 2.
- Side 2 (20 sc): Sc in each of the 4 outer dc of Shell A, then sc in the Row 3 sc on Shell A’s center. Sc in each of the 3 sl sts on the Row 3 ch-3, then in each of the 4 sl sts over Shell E’s outer dc. Sc in the Row 4 sc on Shell E’s center, work 3 sc in the Row 4 ch-3 sp, then sc in each of the next 4 dc of Shell F.
- Tip and loop: In the center dc of Shell F, work (sc, ch 18, sc).
- Side 1, upper part (7 sc): Sc in each of the next 4 dc of Shell F, then 3 sc in the Row 4 ch-3 sp.
Join with a sl st to the first sc. Fasten off and weave in the ends.
Round total: 20 + 20 sc on the sides, 8 sc on the bottom, 3 + 3 sc at the corners and 2 sc at the tip, for 56 sc plus the ch-18 loop.
Why the math works:
- The sides match. Each side follows the same path: 4 dc, 1 sc and 3 ch for each of the two lower tiers (8 sts per tier), plus 4 dc on the top shell. That gives 8 + 8 + 4 = 20 per side, so both sides are mirror images.
- The bottom balances. It uses all 13 foundation chains: 8 under the edging and 5 under the trunk.
- The size adds up. The edging adds 0.2 in (0.5 cm) to each side, so the width grows from 3.5 in (8.9 cm) to 3.9 in (9.9 cm). The height is 0.2 in (0.5 cm) of edging at the tip, plus 2.0 in (5.1 cm) of tree, plus 1.2 in (3.0 cm) of trunk, for 3.4 in (8.6 cm).
Final Blocking
- Lightly spray the ornament with water until it is damp, not soaked.
- Lay it RS up on the blocking mat.
- Pin the bottom edge straight, so it measures 3.9 in (9.9 cm) from corner to corner.
- Pin the tip so the tree is 3.4 in (8.6 cm) tall from the tip edging to the bottom of the trunk.
- Ease each shell into a smooth half-circle and push the open holes into neat teardrop shapes.
- Pin the trunk square at 1.25 in (3.2 cm) wide, centered under the tree.
- Straighten the hanging loop and let it lie flat.
- Leave it to dry completely, which usually takes 2–4 hours.
- Unpin it and check the measurements again.
Final Quality-Control Checklist
- The bottom tier has 3 shells, the middle tier 2 and the top tier 1.
- Every shell has 9 dc spokes fanning from one point.
- The tiers leave small open holes between them.
- Both sides have 20 edging sc and show the same stepped notches.
- The trunk is 5 sc wide, 6 rows tall and centered under chains 5–9.
- The bottom edge lies straight with no gap at the trunk.
- The hanging loop is centered on the tip shell and doesn’t twist.
- Finished size is about 3.9 × 3.4 in (9.9 × 8.6 cm).
- All ends are woven in securely and are invisible from the RS.
Troubleshooting
The shells ruffle or wave. Your dc stitches are too loose. Go down a hook size, or make the shells 8 dc instead of 9 and keep the center as the 4th or 5th dc.
The shells cup or curl forward. Your tension is too tight. Go up a hook size and block firmly.
Row 3 doesn’t line up over the valleys. Recount the slip stitches. Each Row 3 shell must go into the sc between two lower shells, and each Row 3 sc must land on a lower shell’s center dc.
The tree leans to one side. One side probably has an extra edging stitch. Count each side: both should have 20 sc.
There’s a hole beside the trunk. Pull the carried edging yarn snug behind the trunk, or tack the gap closed with the brown tail.
The loop twists. Before working the second sc, check that the ch-18 isn’t twisted. Spray-block it straight.
Care
Hand wash in cool water with mild soap, press out the water in a towel, and dry flat, reshaping the shells. Store flat or hanging so the fans stay crisp.
Final Notes
The measurement chain is simple:
- Row 1 sets a 3.25 in (8.3 cm) foundation.
- Row 2 flares it to 3.5 in (8.9 cm).
- Three tiers bring the tree to 2.0 in (5.1 cm) tall.
- The trunk adds 1.2 in (3.0 cm).
- The edging adds 0.2 in (0.5 cm) all around, for a final 3.9 × 3.4 in (9.9 × 8.6 cm) ornament with a 2 in (5.1 cm) loop on top.
If your checkpoints match at each stage, the finished tree will too. Make one in classic red, then try forest green with a gold edging for a whole set of tree trimmings.
Happy crocheting!