

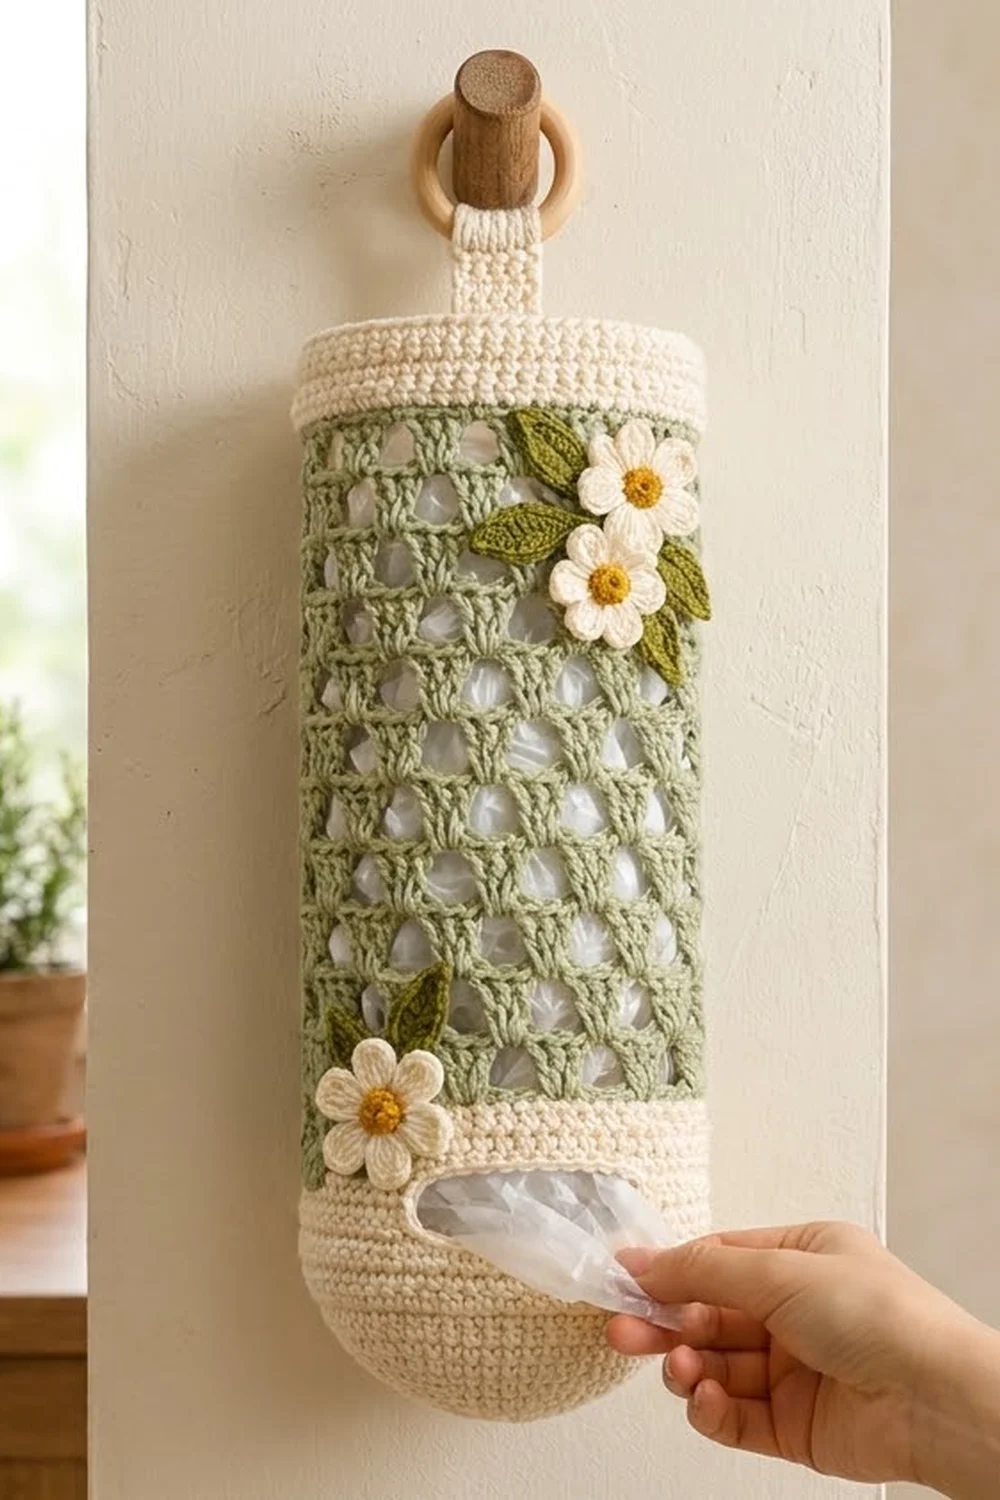
This holder keeps grocery bags off the counter. You stuff bags in through the top and pull them out one at a time through the slot near the bottom. The body is a soft sage-green lattice of small fans. Cream bands at the top and bottom firm it up, and a little bunch of daisies adds a cottage-garden look.
The palette is sage green, cream, golden yellow and olive green, with a natural wooden ring for hanging. For a second colorway, swap the sage for lavender and keep everything else the same.
The pattern uses US crochet terms. The finished holder measures about 6.75 in (17.1 cm) wide when flat, which is 13.5 in (34.3 cm) around. The body is about 15.5 in (39.4 cm) long, or about 18.5 in (47.0 cm) including the tab and ring.
Construction is simple. You crochet a flat lattice panel, a top band, a bottom band with a slot, a round base, a tab, three daisies and five leaves. You then sew the bands to the panel, seam the whole strip into a tube, sew on the base, crochet a short border around the top and the slot, and add the flowers.
Finished Size and Construction
- Finished size: 6.75 in (17.1 cm) wide flat, 13.5 in (34.3 cm) around, body 15.5 in (39.4 cm) long; 18.5 in (47.0 cm) including the ring
- Skill level: Easy-intermediate
- Terminology: US
- Yarn weight: Worsted (#4) cotton or cotton blend
- Hooks: 5.0 mm (H-8) for the body; 4.0 mm (G-6) for the flowers and leaves
- Number of pieces: 1 holder made from 6 structural pieces (panel, top band, bottom band, base disc, tab, ring) plus 8 decorations
- Layout: Stacked vertically: top band, lattice panel, bottom band, base disc
- Panel size: 13.75 in × 10.5 in (34.9 × 26.7 cm) flat, before seaming
- Top band before border: 1.35 in (3.4 cm) deep
- Border depth: 0.45 in (1.1 cm), so the finished top band is 1.8 in (4.6 cm)
Materials
Use a smooth, firm cotton. It holds its shape under the weight of the bags and washes well. Acrylic works too but stretches more.
- Sage green (lattice panel): 70 g / 120 m
- Cream (bands, base, tab, petals): 60 g / 105 m
- Golden yellow (flower centers): 5 g / 9 m
- Olive green (leaves): 10 g / 17 m
These quantities include a margin of about 15%.
Tools:
– 5.0 mm (H-8) and 4.0 mm (G-6) hooks
– 1 wooden ring, 2 in (5.1 cm) across
– Tapestry needle
– Stitch markers
– Rust-proof pins
– Tape measure
– Spray bottle and blocking mat
Abbreviations (US Terms)
- ch – chain
- sl st – slip stitch
- sc – single crochet
- hdc – half double crochet
- dc – double crochet
- st(s) – stitch(es)
- sp – space
- sk – skip
- rep – repeat
- RS / WS – right side / wrong side
Special stitch – Fan: Work 3 dc into the same stitch.
Half fan: Ch 3 (counts as dc) and work 1 dc into the same stitch, giving 2 sts. At the end of a row, a half fan is 2 dc worked into the top of the turning chain.
Gauge and Checkpoints
Make and measure a swatch before starting the panel. Every later stitch count depends on the gauge.
- Sc gauge (5.0 mm hook): 16 sts × 18 rows = 4 in (10.2 cm)
- Lattice gauge: 1 repeat of 6 sts = 1.5 in (3.8 cm) wide; 4 fan rows = 2 in (5.1 cm) tall
Checkpoints:
1. Panel Row 1 (55 sc) should measure 13.75 in (34.9 cm).
2. The panel after Row 22 should measure 10.5 in (26.7 cm) tall.
3. The top band should be 1.35 in (3.4 cm) deep.
4. The bottom band should be 3.1 in (7.9 cm) deep.
5. The base disc should be 4.25 in (10.8 cm) across.
If your piece is too big, go down half a hook size. If it is too small, go up half a size. Do not change any stitch counts. The bands, panel and base are all built on the same 55/54-stitch number, so they only fit together if the counts stay as written.
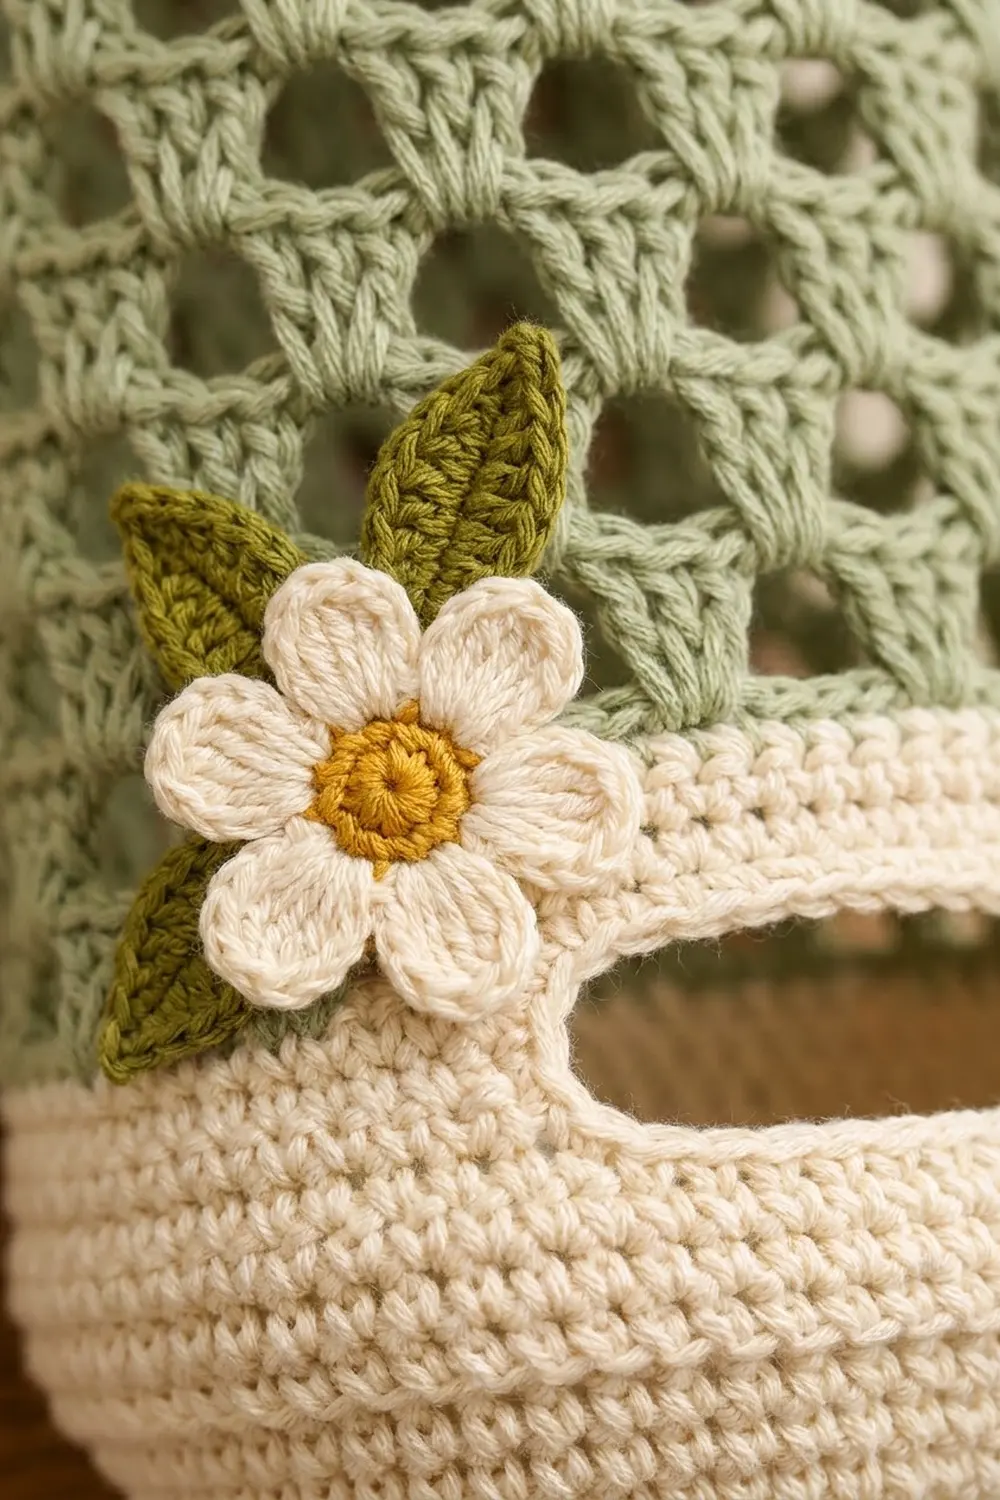
Lattice Panel (Sage Green, 5.0 mm Hook)
The panel is worked flat in rows. Each row’s stitch count includes the ch-1 spaces, counted as 1 st each.
Foundation: Ch 56.
Row 1 (RS): Sc in 2nd ch from hook and in each ch across. Turn. (55 sts)
Row 2 (fan row A):
– Ch 3 (counts as dc).
– Ch 1, sk 2 sts, fan in next st, ch 1, sk 2 sts, dc in next st. Rep from * 8 more times (9 repeats total).
– Turn. (55 sts: 1 + 9 × 6 = 9 fans, 10 single dc, 18 ch-1 sps)*
Row 3 (fan row B):
– Half fan in first dc.
– Ch 1, dc in center dc of next fan, ch 1, fan in next single dc. Rep from * 7 more times (8 repeats).
– Ch 1, dc in center dc of last fan, ch 1, half fan in top of turning ch.
– Turn. (55 sts: 2 + 8 × 6 + 5)*
The fans in Row 3 sit on the single dc of Row 2. Because the fans alternate position from row to row, the gaps between them form the triangular holes.
Row 4:
– Ch 3 (counts as dc).
– Ch 1, fan in next single dc, ch 1, dc in center dc of next fan. Rep from * 8 more times (9 repeats). In the last repeat, the final dc goes into the top of the turning ch of the half fan.
– Turn. (55 sts)*
Rows 5–21: Rep Rows 3 and 4, ending with a Row 3. That gives 20 fan rows in total (Rows 2–21). (55 sts per row)
Row 22: Ch 1, sc in each dc and in each ch-1 sp across. (55 sc) Fasten off.
Checkpoint: The panel should measure 13.75 in × 10.5 in (34.9 × 26.7 cm). Block it now, before assembly (see Final Blocking).
Top Band (Cream, 5.0 mm Hook)
Foundation: Ch 56.
Row 1: Sc in 2nd ch from hook and in each ch across. Turn. (55 sc)
Rows 2–6: Ch 1, sc in each st across. Turn. (55 sc)
Fasten off, leaving a 24 in (61.0 cm) tail for sewing.
Checkpoint: 13.75 in × 1.35 in (34.9 × 3.4 cm).
Bottom Band with Slot (Cream, 5.0 mm Hook)
Foundation: Ch 56.
Row 1: Sc in 2nd ch from hook and in each ch across. Turn. (55 sc)
Rows 2–5: Ch 1, sc in each st across. Turn. (55 sc)
Rows 6–9, left section:
– Row 6: Ch 1, sc in the first 21 sts, turn. Leave the remaining 34 sts unworked. (21 sc)
– Rows 7–9: Ch 1, sc 21. (21 sc)
– Do not fasten off. Set this yarn aside.
Rows 6–9, right section:
– Skip the 13 sts after the left section. With a new strand, join into the 35th st of Row 5 and work Row 6: ch 1, sc in sts 35–55. (21 sc)
– Rows 7–9: Ch 1, sc 21. (21 sc)
– Fasten off.
Row 10: Pick up the left-section yarn. Ch 1, sc 21 across the left section, ch 13, then sc 21 across the right section. Turn. (21 + 13 + 21 = 55 sts)
Row 11: Ch 1, sc in each sc and in each of the 13 ch. Turn. (55 sc)
Rows 12–14: Ch 1, sc across. Turn. (55 sc)
Fasten off, leaving a long tail.
The slot is 13 sts × 4 rows, about 3.25 in × 0.9 in (8.3 × 2.3 cm). It is centered on st 28, so it ends up exactly opposite the side seam.
Checkpoint: 13.75 in × 3.1 in (34.9 × 7.9 cm).
Base Disc (Cream, 5.0 mm Hook)
Work in continuous spiral rounds and mark the first st of each round.
- Rnd 1: 6 sc in a magic ring. (6)
- Rnd 2: 2 sc in each st. (12)
- Rnd 3: Sc 1, 2 sc in next around. (18)
- Rnd 4: Sc 2, 2 sc in next around. (24)
- Rnd 5: Sc 3, 2 sc in next around. (30)
- Rnd 6: Sc 4, 2 sc in next around. (36)
- Rnd 7: Sc 5, 2 sc in next around. (42)
- Rnd 8: Sc 6, 2 sc in next around. (48)
- Rnd 9: Sc 7, 2 sc in next around. (54)
Sl st to the next st and fasten off with a long tail.
Checkpoint: About 4.25 in (10.8 cm) across.
Hanging Tab (Cream, 5.0 mm Hook)
Foundation: Ch 8.
Row 1: Sc in 2nd ch from hook and across. (7 sc)
Rows 2–18: Ch 1, sc 7. (7 sc)
Fasten off. The tab measures 1.75 in × 4 in (4.4 × 10.2 cm).
Daisies (Make 3, 4.0 mm Hook)
Rnd 1 (golden yellow): 10 sc in a magic ring, sl st to the first sc. (10 sc) Fasten off.
Rnd 2 (cream): Join in any sc.
– In the next sc work (ch 2, 2 dc). In the following sc work (2 dc, ch 2, sl st). Rep from * 4 more times.
– (5 petals, each made of 4 dc over 2 sts)
Fasten off. Each daisy is about 1.5 in (3.8 cm) across.
Leaves (Make 5, Olive Green, 4.0 mm Hook)
Foundation: Ch 9.
First side: Sl st in 2nd ch from hook, then work 1 st in each remaining ch: sc, hdc, dc, dc, hdc, sc, sl st. (8 sts)
Tip and second side:
– Ch 1 for the tip.
– Rotate and work along the other side of the foundation chain: sl st, sc, hdc, dc, dc, hdc, sc, sl st. (8 sts)
– Sl st into the tip ch.
Fasten off. Each leaf is about 1.75 in × 0.75 in (4.4 × 1.9 cm). If you like, embroider a straight center vein with olive yarn.
Make All Pieces
| Color | Pieces |
|---|---|
| Sage green | 1 lattice panel |
| Cream | 1 top band, 1 bottom band, 1 base disc, 1 tab, petals for 3 daisies |
| Golden yellow | 3 daisy centers |
| Olive green | 5 leaves |
Layout (back seam hidden, front view):
        [ wooden ring 2 in / 5.1 cm ]
        [ tab, 7 sts wide          ]
[ top band + border   1.8 in / 4.6 cm  ]
[ lattice panel      10.5 in / 26.7 cm ]  <- 2 daisies + 3 leaves, upper right
[ bottom band + slot  3.1 in / 7.9 cm  ]  <- 1 daisy + 2 leaves, lower left
[ base disc, 54 sts, 4.25 in / 10.8 cm ]
Joining
Method: Whipstitch through the back loops, using cream yarn.
- Top band to panel. With RS facing, place the band’s Row 6 edge against the panel’s Row 22. Sew stitch to stitch: 55 band sts to 55 panel sts, one whipstitch per stitch.
- Bottom band to panel. Sew the bottom band’s Row 1 to the panel’s Row 1 in the same way, 55 to 55.
- Side seam. Fold the long strip RS out. Mattress-stitch the row ends together from the top band down to the bottom band. This seam takes in half a stitch from each edge, so the circumference becomes 54 sts: 13.5 in (34.3 cm).
- Base. Pin the 54 sts of the disc’s Rnd 9 to the 54 sts of the bottom band’s Row 14. Sew 1 to 1. Because the disc is a little smaller than the tube, the bottom curves into a gentle cup.
Tension: Pull each stitch only until the edges meet. Over-tightening puckers the lattice and shortens the tube.
Size checkpoint: Flattened, the tube should measure 6.75 in (17.1 cm) wide and about 15.25 in (38.7 cm) tall before the border.
Border
The border uses the same gauge as the bands: 4 sc = 1 in (2.5 cm).
Top rim
- Rnd 1: With RS facing, join cream at the side seam. Ch 1, then sc in each st of the band’s foundation edge. The two half-stitches at the seam are worked together as 1 st. Sl st to the first sc. (54 sc)
- Rnd 2: Ch 1, sc in each st around, sl st to join. (54 sc) Fasten off.
Why the math works: The tube has 54 sts after seaming, which is 9 lattice repeats × 6 sts. One stitch per stitch keeps the rim flat at 13.5 in (34.3 cm) around.
Slot edging
With RS facing, join cream at the lower right corner of the slot. Work 1 round, then sl st to join and fasten off.
| Side | Worked into | Sc |
|---|---|---|
| Bottom edge | Row 5 sts | 13 |
| Left side | Row ends of Rows 6–9 | 4 |
| Top edge | Row 10 chain | 13 |
| Right side | Row ends of Rows 6–9 | 4 |
| Total | 34 sc |
Each count matches the slot’s own size (13 sts wide, 4 rows tall), and each corner stitch is counted only once. The finished opening is about 3 in × 0.75 in (7.6 × 1.9 cm).
Tab and flowers
- Tab: Fold the tab around the ring so it is doubled, 2 in (5.1 cm) long. Sew the two ends to the inside back of the top band, overlapping it by 0.75 in (1.9 cm). This leaves 1.25 in (3.2 cm) of tab showing.
- Upper right: Sew two daisies, overlapping slightly, with three leaves tucked behind them.
- Lower left: Sew one daisy just above the slot’s left end, with two leaves.
Final Blocking
- Before assembly, mist the lattice panel and pin it out flat to 13.75 in × 10.5 in (34.9 × 26.7 cm). Open every hole evenly.
- Pin the bands to 13.75 in (34.9 cm) long.
- Let all pieces dry completely.
- After assembly, stuff the tube with a rolled towel, about 4.3 in (10.9 cm) across.
- Mist the tube lightly, smooth the rim and slot, and shape the base into a round cup.
- Lightly steam the daisies and leaves flat, keeping the iron off the yarn.
- Dry upright, then remove the towel.
Final Quality-Control Checklist
- Every panel row has 55 sts, with 9 full fans on the A rows.
- Both bands have 55 sts per row, and the slot is 13 sts wide.
- The base disc has 54 sts in Rnd 9.
- Each rim round has 54 sc, and the slot edging has 34 sc.
- The side seam runs straight down the back, with the slot centered on the front.
- The tab is secure and the ring hangs level.
- All yarn ends are woven in at least 2 in (5.1 cm).
Troubleshooting
- The panel is narrower than the bands. Your chains are too tight. Loosen the ch-1 spaces or go up a hook size for the panel only.
- The lattice is leaning. Make sure every fan sits exactly on a single dc from the row below.
- The slot gapes or sags. Work the slot edging firmly, or add a second round of sl sts.
- The base flares out. Your disc has more than 54 sts. Recount Rnd 9.
- The rim ruffles. You worked more than 1 sc per stitch. Rip back and work exactly 54.
Care
Hand wash in cool water and lay flat to dry, shaping the tube over a towel. Do not tumble dry, because it can shrink the cotton and distort the lattice.
Final Notes
The measurement chain is:
- Width: 55 sts = 13.75 in (34.9 cm) flat. The side seam brings this to 54 sts = 13.5 in (34.3 cm) around, which matches the 54-st base and the 54-st rim.
- Length: 1.8 in (4.6 cm) top + 10.5 in (26.7 cm) lattice + 3.1 in (7.9 cm) bottom, plus the curve of the base, gives about 15.5 in (39.4 cm) for the body.
Check your gauge first, count at every checkpoint, and the pieces will fit together the first time.
Happy crocheting!