
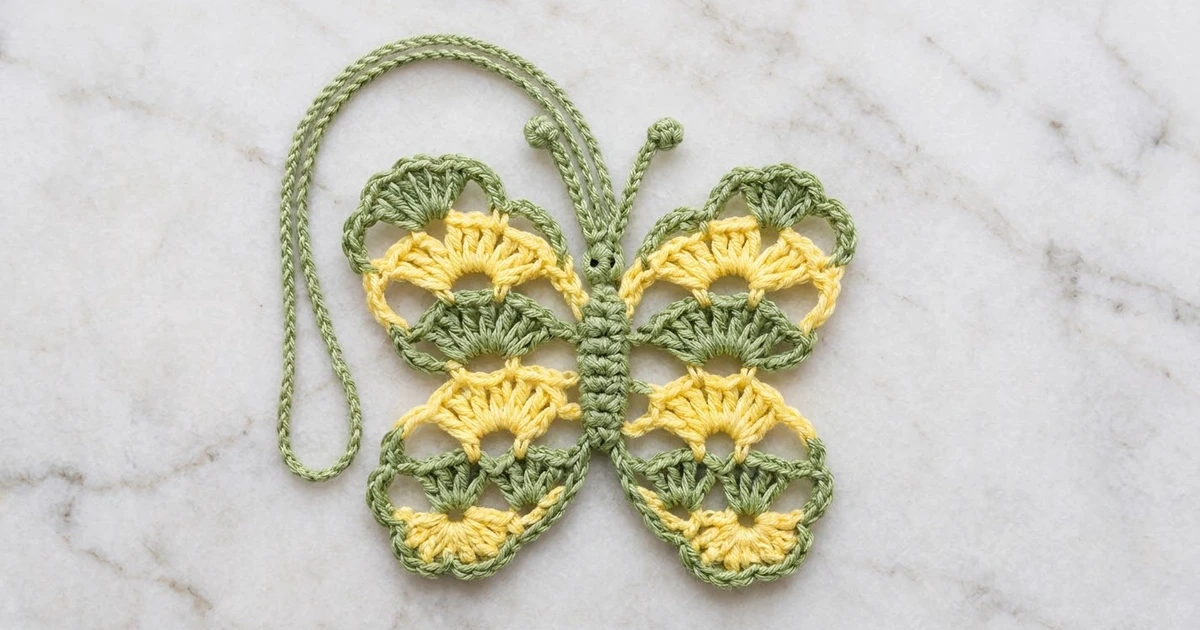
This lacy butterfly ornament is made with sage green and soft lemon yellow cotton. Each wing is built from open fan stitches stacked in bands, and a clean green outline frames every wing. The ridged body, knobbed antennae and long hanging loop make it ready for a tree, a window or a gift tag.
The colors alternate from band to band. The upper wings run green, yellow, then a green top scallop. The lower wings run yellow, green, yellow. Small open gaps between the bands give the butterfly a light, lace-like look.
This pattern uses US crochet terms. The finished butterfly measures about 5.6 in (14.2 cm) wide and 4.6 in (11.7 cm) tall, not counting the antennae and loop.
Here is the construction. You crochet the body first as a short strip of back-loop rows. Then you work each wing directly off the body’s side edge in short rows, slip-stitching into the body as you go, so nothing is sewn. Each wing gets a single-crochet outline. Last, you add the antennae and the hanging loop.
Finished Size and Construction
- Finished size: 5.6 in (14.2 cm) wide × 4.6 in (11.7 cm) tall
- Antennae: about 1 in (2.5 cm) above the head
- Hanging loop: about 3 in (7.6 cm) drop
- Skill level: Intermediate
- Terminology: US
- Yarn weight: Sport (#2) cotton
- Hook: 3.0 mm (US C/2 or D/3)
- Number of pieces: 1. The wings are worked onto the body, so there is no sewing.
- Layout: body in the center, with 1 upper wing and 1 lower wing on each side
- Body size: 0.5 in (1.3 cm) × 2.7 in (6.9 cm)
- Each upper wing before outline: about 2.4 in (6.1 cm) wide × 2.0 in (5.1 cm) tall
- Outline (border) depth: 1 row of sc, about 0.15 in (0.4 cm)
Materials
Yarn: Use a smooth mercerized or combed cotton in sport weight. Cotton holds the fans crisp and blocks flat. Avoid fuzzy yarns, because they fill in the open gaps.
- Color A, sage green: 12 g (about 37 m)
- Color B, lemon yellow: 6 g (about 19 m)
These amounts include a safety margin for swatching and weaving in ends.
Tools:
- 3.0 mm crochet hook
- Tapestry needle
- Scissors
- Stitch marker (1 or 2)
- Rust-proof pins and a foam blocking mat
- Spray bottle with water
- Optional: liquid fabric stiffener
Abbreviations (US Terms)
- ch – chain
- sl st – slip stitch
- sc – single crochet
- dc – double crochet
- BLO – back loop only
- sk – skip
- sp – space
- st(s) – stitch(es)
Fan: Work the stated number of dc (5, 7 or 9) into the same stitch.
Bobble (4-dc cluster): [Yarn over, insert hook in st, yarn over, pull up a loop, yarn over, pull through 2 loops] 4 times in the same st. Then yarn over and pull through all 5 loops on the hook.
Gauge and Checkpoints
Gauge: 22 sc × 24 rows = 4 in (10.2 cm) in sc. Gauge matters less for an ornament, but it controls how open the fans look.
Test with the body first. It is small, quick, and tells you everything you need to know.
Checkpoints:
- Body after Row 16: 0.5 in (1.3 cm) wide × 2.7 in (6.9 cm) long.
- Upper wing Row A: about 2.4 in (6.1 cm) from the body edge to the tip.
- Upper wing after Row E: about 2.0 in (5.1 cm) tall, measured at the outer edge.
- Whole butterfly after outlines: 5.6 in (14.2 cm) × 4.6 in (11.7 cm).
If your work is too big: go down to a 2.75 mm hook, or tighten your dc so the fans stay rounded.
If it is too small: go up to a 3.25 mm hook. Check that your foundation chains aren’t tight, because a tight chain pulls the fans into cups.
Body
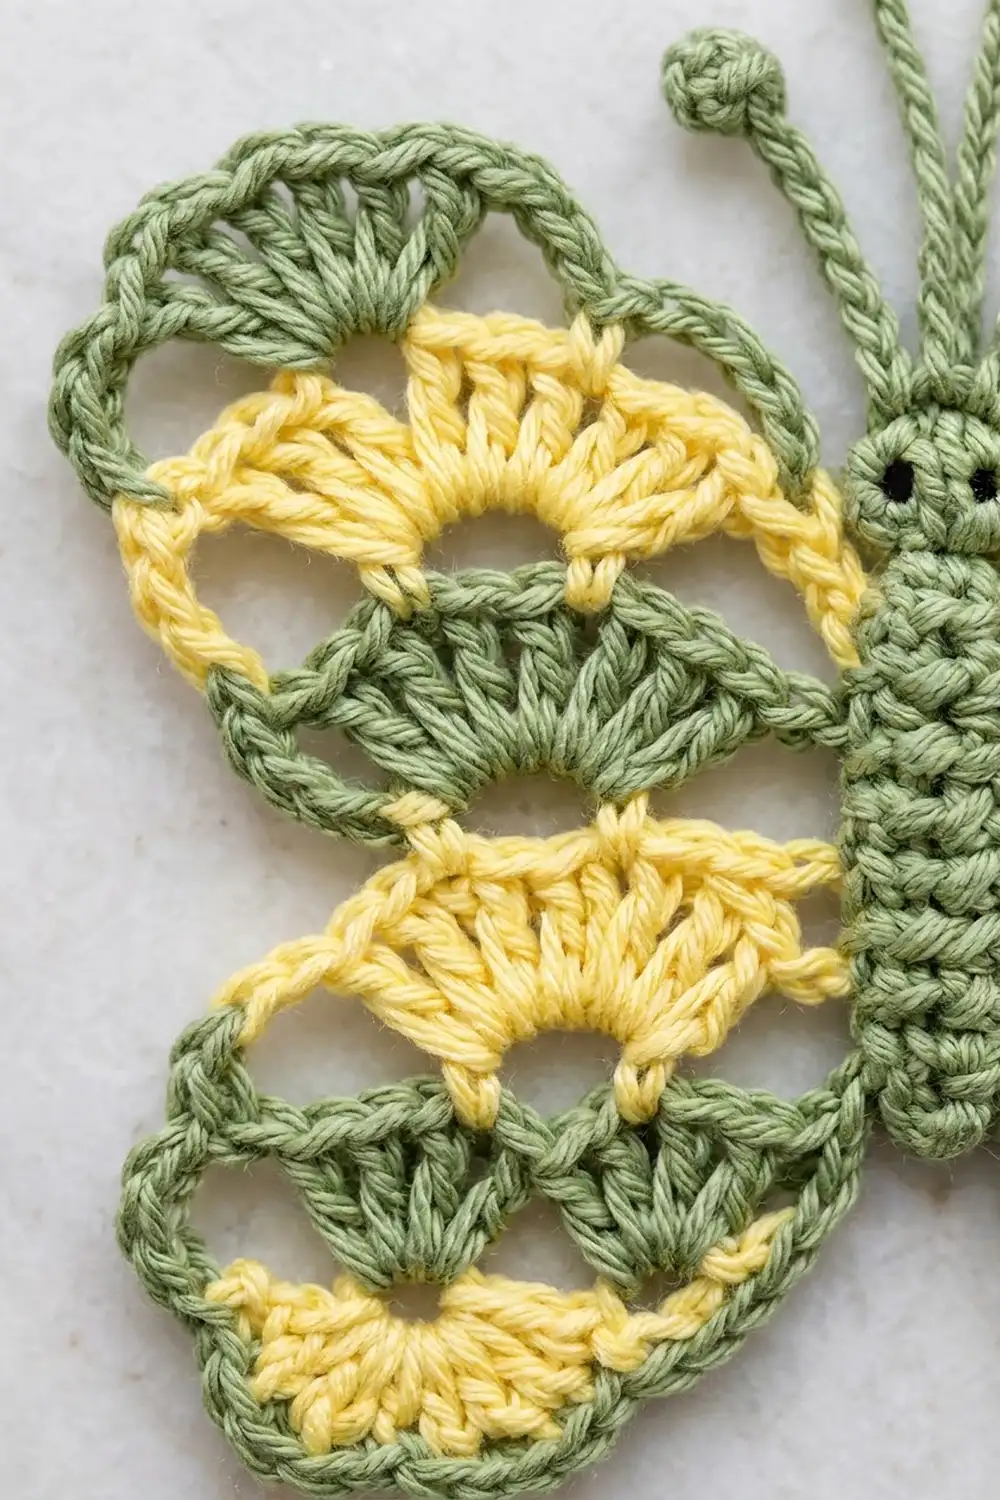
Use Color A (green). The body is worked in BLO rows, which creates the horizontal ridges.
Foundation: Ch 4.
Row 1: Sc in the 2nd ch from the hook and in each ch across. (3 sc)
Rows 2–16: Ch 1, turn. Sc in BLO of each st across. (3 sc)
Don’t fasten off yet. Pull up a long loop, take the hook out, and place a marker in the loop.
Rows 15 and 16 are the head. Rows 1 and 2 are the tail tip.
Checkpoint: 0.5 in (1.3 cm) × 2.7 in (6.9 cm).
Fasten off with a 6 in (15.2 cm) tail and weave it in. Hold the body with Row 16 at the top, and keep this orientation for all the wings. Each row-end along a side edge is an anchor point for the wings.
Upper Wing (make 2: right side, then left side)
The wing is worked in 5 short rows. Each row starts or ends with a sl st into a body row-end, which connects the wing to the body as you go.
Row A (Color A): Join green with a sl st into the side of body Row 9. Ch 14 outward, away from the body. Turn so the fans will stand up, toward the head.
– Sc in the 2nd ch from the hook. This sc is the tip.
– Sk 2 ch, 5 dc in the next ch, sk 2 ch, sc in the next ch. Repeat from * once more.
– Sl st into the side of body Row 10.
(2 fans, 3 sc = 13 sts)
Row B (Color A):
– Sl st into the side of body Row 11.
– Ch 3 (counts as dc), then ch 3.
– Sc in the center (3rd) dc of the fan nearest the body.
– Ch 3, dc in the middle sc.
– Ch 3, sc in the center dc of the next fan.
– Ch 3, dc in the tip sc.
(3 dc, 2 sc, 4 ch-3 sps)
Fasten off green.
Row C (Color B): Join yellow with a sl st in the tip dc.
– Ch 1, sc in the same st.
– 7 dc in the next sc.
– Sc in the next dc.
– 7 dc in the next sc.
– Sc in the top of the beginning ch-3.
– Sl st into the side of body Row 12.
(2 fans, 3 sc = 17 sts)
You skip the ch-3 spaces in this row. They become the open gaps under the yellow fans.
Row D (Color B):
– Sl st into the side of body Row 13.
– Ch 3 (counts as dc), then ch 3.
– Sc in the 4th dc of the fan nearest the body.
– Ch 3, dc in the middle sc.
– Ch 3, sc in the 4th dc of the next fan.
– Ch 3, dc in the tip sc.
(3 dc, 2 sc, 4 ch-3 sps)
Fasten off yellow.
Row E (Color A), top scallop: Join green with a sl st in the tip dc.
– Ch 1, sc in the same st.
– 9 dc in the next sc.
– Sc in the next dc.
– 9 dc in the next sc.
– Sc in the top of the beginning ch-3.
– Sl st into the side of body Row 14.
(2 fans, 3 sc = 21 sts)
Don’t fasten off. The green outline starts here (see Border).
Checkpoint: about 2.4 in (6.1 cm) wide × 2.0 in (5.1 cm) tall.
Repeat on the other side of the body, joining at that side’s Row 9. The rows mirror on their own because you start from the opposite edge.
Lower Wing (make 2: right side, then left side)
Turn the butterfly upside down so the tail (Row 1) points up. The fans then stand toward the tail. The lower wings use smaller fans, so they come out a little shorter than the upper wings.
Row A (Color B): Join yellow with a sl st into the side of body Row 8. Ch 14.
– Sc in the 2nd ch from the hook.
– Sk 2 ch, 5 dc in the next ch, sk 2 ch, sc in the next ch. Repeat from * once more.
– Sl st into the side of body Row 7.
(2 fans, 3 sc = 13 sts)
Row B (Color B): Sl st into the side of body Row 6. Then work as for Upper Wing Row B. (3 dc, 2 sc, 4 ch-3 sps)
Fasten off yellow.
Row C (Color A): Join green in the tip dc. Work as for Upper Wing Row C, using 7-dc fans. End with a sl st into body Row 5. (17 sts)
Row D (Color A): Sl st into body Row 4. Work as for Upper Wing Row D. (3 dc, 2 sc, 4 ch-3 sps)
Fasten off green.
Row E (Color B): Join yellow in the tip dc.
– Ch 1, sc in the same st.
– 7 dc in the next sc.
– Sc in the next dc.
– 7 dc in the next sc.
– Sc in the top of the beginning ch-3.
– Sl st into body Row 3.
(2 fans, 3 sc = 17 sts)
Fasten off yellow.
Repeat on the other side of the body.
Border: Wing Outlines
Border gauge: 5.5 sc per inch (2.2 sc per cm), the same as the body gauge. Along the outer edge, each dc-height row-end is about 0.4 in (1.0 cm) tall, which fits 2 sc without ruffling. Each tip corner gets 3 sc in one stitch so the outline turns smoothly.
Upper Wing Outline (Color A, continuing from Row E)
Ch 1, turn, then work these sections:
- Top edge: Sc in each of the 21 sts of Row E, working 3 sc into the last (tip) sc. That is 21 sts worked 1-per-stitch plus 2 extra at the corner. (21 + 2 = 23 sc)
- Outer side: Work 2 sc into the row-end of each of Rows D, C and B. (6 sc)
- Lower tip: 3 sc in the tip sc of Row A. (3 sc)
- Underside: Sc in the free loop of each of the 12 remaining foundation chains, working back toward the body. (12 sc)
- Sl st into the side of body Row 9.
Total: 23 + 6 + 3 + 12 = 44 sc. Fasten off.
Lower Wing Outline (Color A)
Join green with a sl st into body Row 3, next to the end of Row E. Ch 1, then work these sections:
- Edge of Row E: Sc in each of the 17 sts, with 3 sc in the tip sc. (17 + 2 = 19 sc)
- Outer side: 2 sc in the row-end of each of Rows D, C and B. (6 sc)
- Tip of Row A: 3 sc in the tip sc. (3 sc)
- Underside: Sc in each of the 12 remaining foundation chains. (12 sc)
- Sl st into body Row 8.
Total: 19 + 6 + 3 + 12 = 40 sc. Fasten off.
Why the math works: The top and bottom edges are worked 1 sc per existing stitch. That keeps them exactly as wide as the fans below: 21 sts for the upper wings and 17 for the lower wings. The underside uses the 12 free chains, because the 13th chain already holds the tip sc. Corner increases are added only at the 2 tips, and nowhere else. The underside outlines of the upper and lower wings sit side by side and form the green line between them.
Checkpoint: 5.6 in (14.2 cm) wide × 4.6 in (11.7 cm) tall.
Antennae and Hanging Loop
Antenna (make 2):
1. Join green with a sl st in the first sc of body Row 16.
2. Ch 9.
3. Work a bobble in the 4th ch from the hook.
4. Sl st in each of the remaining 5 ch.
5. Sl st into the same body st. Fasten off.
Repeat in the last sc of Row 16. Each antenna is about 1 in (2.5 cm) long, with a round knob at the end.
Eyes: Push a blunt needle between the 1st and 2nd sts, and between the 2nd and 3rd sts, of Row 15. This opens 2 small eyelets.
Hanging loop:
1. Join green with a sl st in the center sc of Row 16.
2. Ch 35, then sl st in the same st.
3. Sl st in each of the 35 ch around the loop for a firm cord.
4. Sl st into the center st again. Fasten off.
The loop drops about 3 in (7.6 cm).
Weave in all the ends along the outlines and the body, where they won’t show through the lace.
Final Blocking
- Spray the butterfly evenly until it is damp but not dripping.
- Lay it right side up on the blocking mat, with the body straight.
- Pin the body ends first, keeping the length at 2.7 in (6.9 cm).
- Pin each wing tip so the total width is 5.6 in (14.2 cm).
- Pin the top scallops and bottom edges so the total height is 4.6 in (11.7 cm).
- Open each fan with your fingertips, and pin the open gaps between bands if they close up.
- Lay the antennae straight and leave the loop unpinned.
- Optional: brush on a thin coat of fabric stiffener.
- Let it dry completely, at least 12 hours, before unpinning.
Final Quality-Control Checklist
- [ ] Body is 3 sc wide and 16 rows long, with visible ridges
- [ ] Upper wings: green, yellow, green bands; Row E has 21 sts
- [ ] Lower wings: yellow, green, yellow bands; Row E has 17 sts
- [ ] Upper outlines have 44 sc and lower outlines have 40 sc
- [ ] All 4 wings are anchored into the correct body rows
- [ ] Both antennae have firm bobble knobs
- [ ] The loop is secure at the head center
- [ ] Size is 5.6 in (14.2 cm) × 4.6 in (11.7 cm)
- [ ] All ends are hidden and trimmed
Troubleshooting
Fans curl into cups: The foundation chain is too tight. Redo Row A with a larger hook for the chain only.
Outline ruffles along the outer side: Use 2 sc per row-end, not 3, and check that you’re working into the row-ends rather than around the chains.
Wings tilt toward the body: You may have sl stitched into the wrong body rows. Count the row-ends from the tail before each row.
Gaps fill in: Your yarn is too fuzzy or your tension too tight. Block more firmly.
Left and right wings don’t match: Count the sts in each Row E before starting the outline.
Care
Hand wash in cool water with mild soap, press out the water in a towel, and re-block flat to dry. Store flat or hang it by the loop.
Final Notes
The measurement chain is short and easy to check:
- Gauge: 22 sc = 4 in (10.2 cm).
- Body: 0.5 in (1.3 cm) × 2.7 in (6.9 cm).
- Each upper wing before the outline: 2.4 in (6.1 cm) × 2.0 in (5.1 cm).
- The outline adds 0.15 in (0.4 cm).
- Finished butterfly: 5.6 in (14.2 cm) × 4.6 in (11.7 cm).
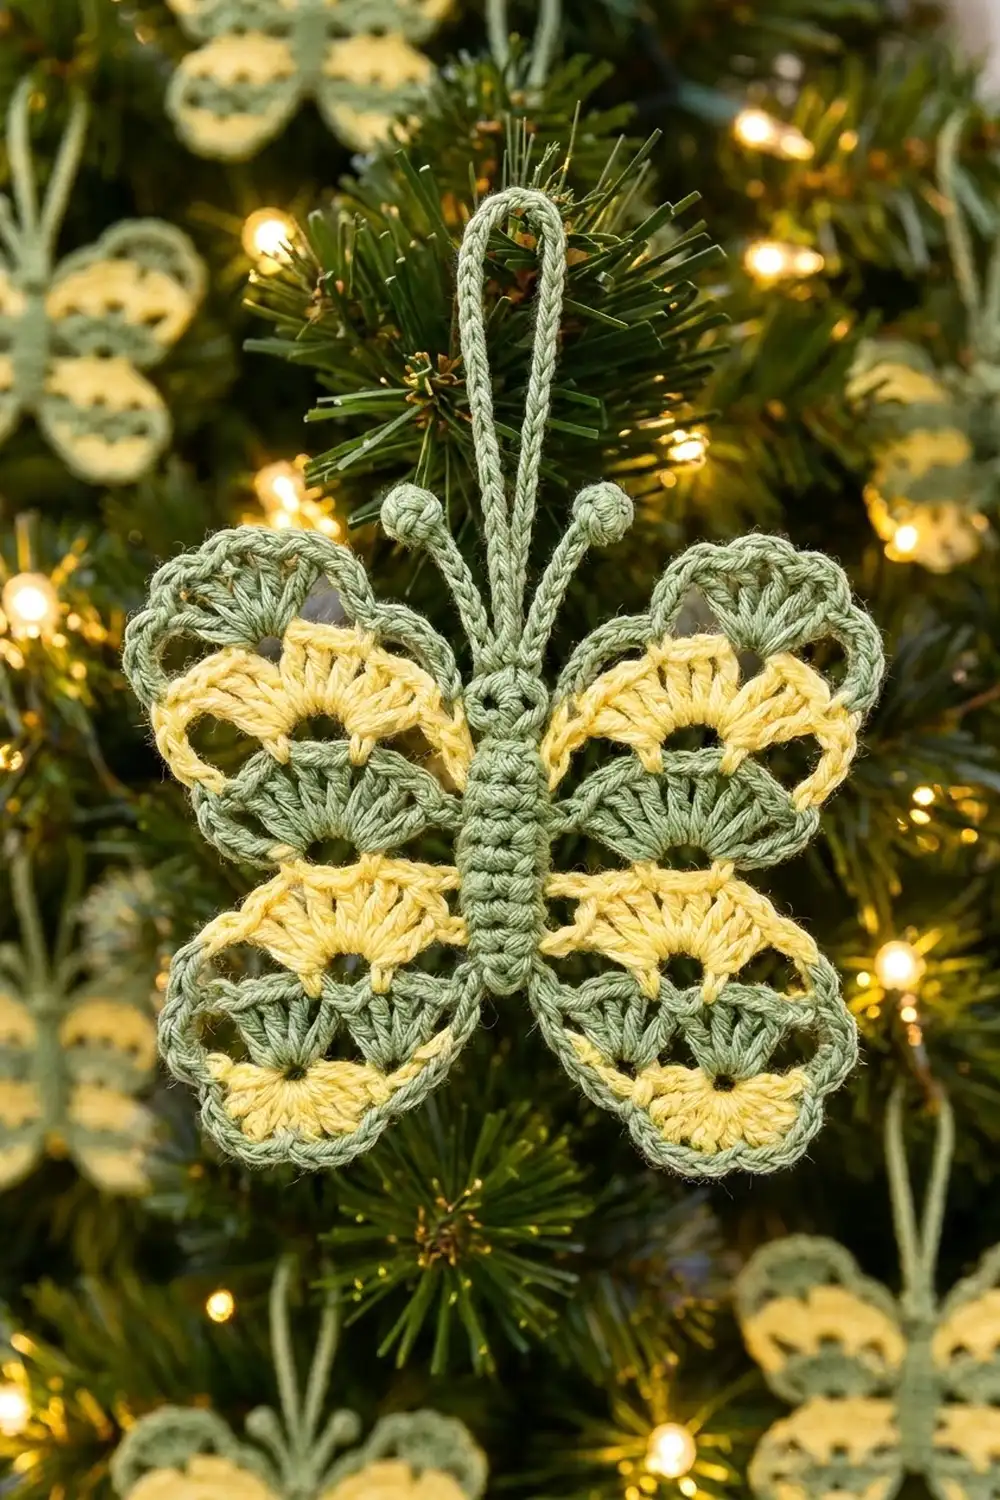
If each checkpoint matches, the finished butterfly will too. Make one in the photo colors, then try other color pairs for a whole flock of ornaments.
Happy crocheting!