

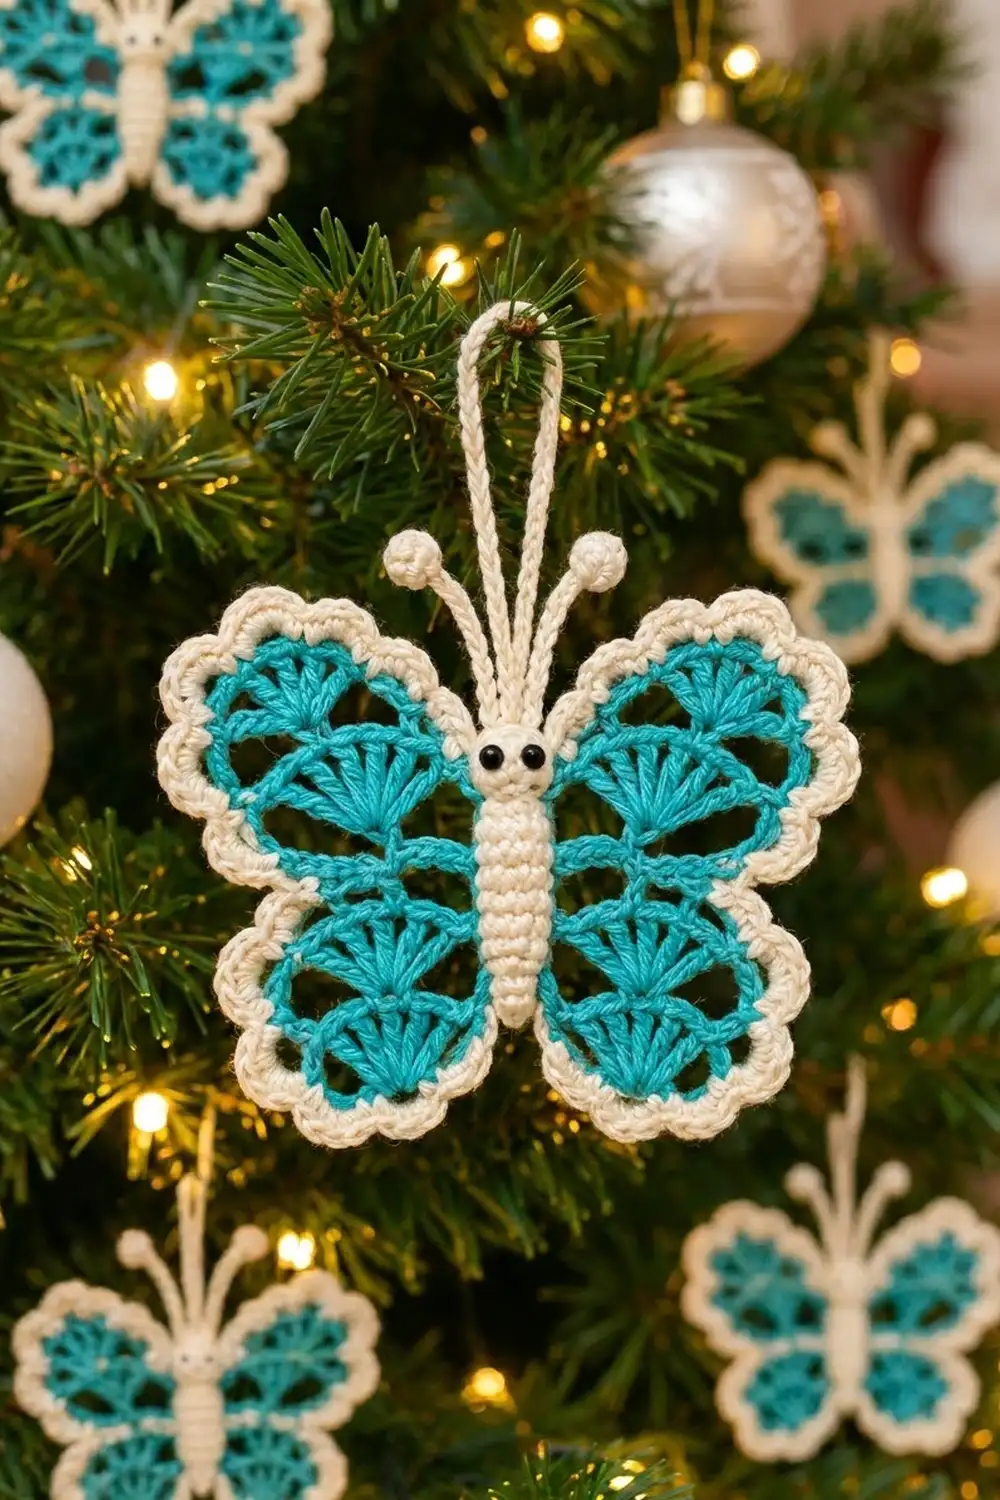
This butterfly ornament has open turquoise wings filled with tiers of fan stitches, a soft cream scalloped edge, and a little cream body with a round head, two knobbed antennae, and a hanging loop. It looks delicate, but it is built from short, simple rows.
The palette is just turquoise and cream, plus a few stitches of black for the eyes. The style is lacy and airy without being fussy. Hang it on a tree, a window, or a gift bag, or just leave it on a shelf.
This pattern uses US crochet terms. The finished butterfly is about 5 in (12.7 cm) wide and 4.3 in (10.9 cm) tall, not counting the antennae and loop.
Construction overview: you crochet four turquoise wing lobes as small fans worked in rows. You whip stitch each upper lobe to a lower lobe to make two wing halves. Each wing half gets a two-round cream border. Then you make a cream body, two antennae, and a slip-stitch hanging loop, and sew everything together with the body covering the center.
Finished Size and Construction
- Finished size: about 5 in (12.7 cm) wide x 4.3 in (10.9 cm) tall
- Skill level: Intermediate
- Terminology: US crochet terms
- Yarn weight: Sport weight (#2) cotton
- Hook: 3.0 mm (US C/2 or D/3)
- Number of pieces: 8 (4 wing lobes, 1 body, 2 antennae, 1 hanging loop)
- Layout: 2 wing halves (upper lobe + lower lobe each), placed either side of a central body
- Piece size: upper lobe 2.1 in (5.3 cm) radius; lower lobe 1.65 in (4.2 cm) radius
- Size before border: about 4.4 in (11.2 cm) wide x 3.7 in (9.4 cm) tall
- Border depth: about 0.3 in (0.8 cm)
Materials
Pick a smooth mercerized or combed cotton in sport weight. Cotton holds the scallops crisp and keeps the fans flat after blocking. If you use acrylic, the lace will look softer and less defined.
- Turquoise (Color A): 10 g / about 30 m, for the wing lobes
- Cream (Color B): 8 g / about 24 m, for the border, body, antennae, and loop
- Black embroidery floss: about 0.5 m, for the eyes
These quantities include a margin. One butterfly uses a little less than this.
Tools
- 3.0 mm crochet hook
- Tapestry needle
- Scissors
- Stitch markers (2)
- A small pinch of fiberfill (optional, for the head)
- Blocking mat, rustproof pins, and a spray bottle
- Ruler or tape measure
Abbreviations (US Terms)
- ch – chain
- sl st – slip stitch
- sc – single crochet
- dc – double crochet
- sc2tog – single crochet 2 together
- BLO – back loop only
- MR – magic ring
- st(s) – stitch(es)
- sp – space
- rep – repeat
Special stitch – Bobble: [Yarn over, insert hook in stated st, yarn over and pull up a loop, yarn over and pull through 2 loops] 5 times, all in the same st (6 loops on hook). Yarn over and pull through all 6 loops.
Gauge and Checkpoints
Gauge: 22 dc and 10 dc rows = 4 in (10.2 cm) with a 3.0 mm hook. For a small piece like this, the best gauge swatch is one upper lobe, so make that first and measure it.
Measure every lobe from the starting point (the tip where Row 1 begins) straight out to the center of the outer edge.
- After Row 1: 0.4 in (1.0 cm)
- After Row 4: 1.45 in (3.7 cm)
- After Row 6 (upper lobe): 2.1 in (5.3 cm)
- After Row 5 (lower lobe): 1.65 in (4.2 cm)
- Body: 2.75 in (7.0 cm) long
If your upper lobe comes out bigger than 2.1 in (5.3 cm), go down to a 2.75 mm hook. If it comes out smaller than 2 in (5.1 cm), go up to a 3.25 mm hook. If the lobe cups or ruffles but is the right size, block it before you change anything. Fans relax a lot when damp.
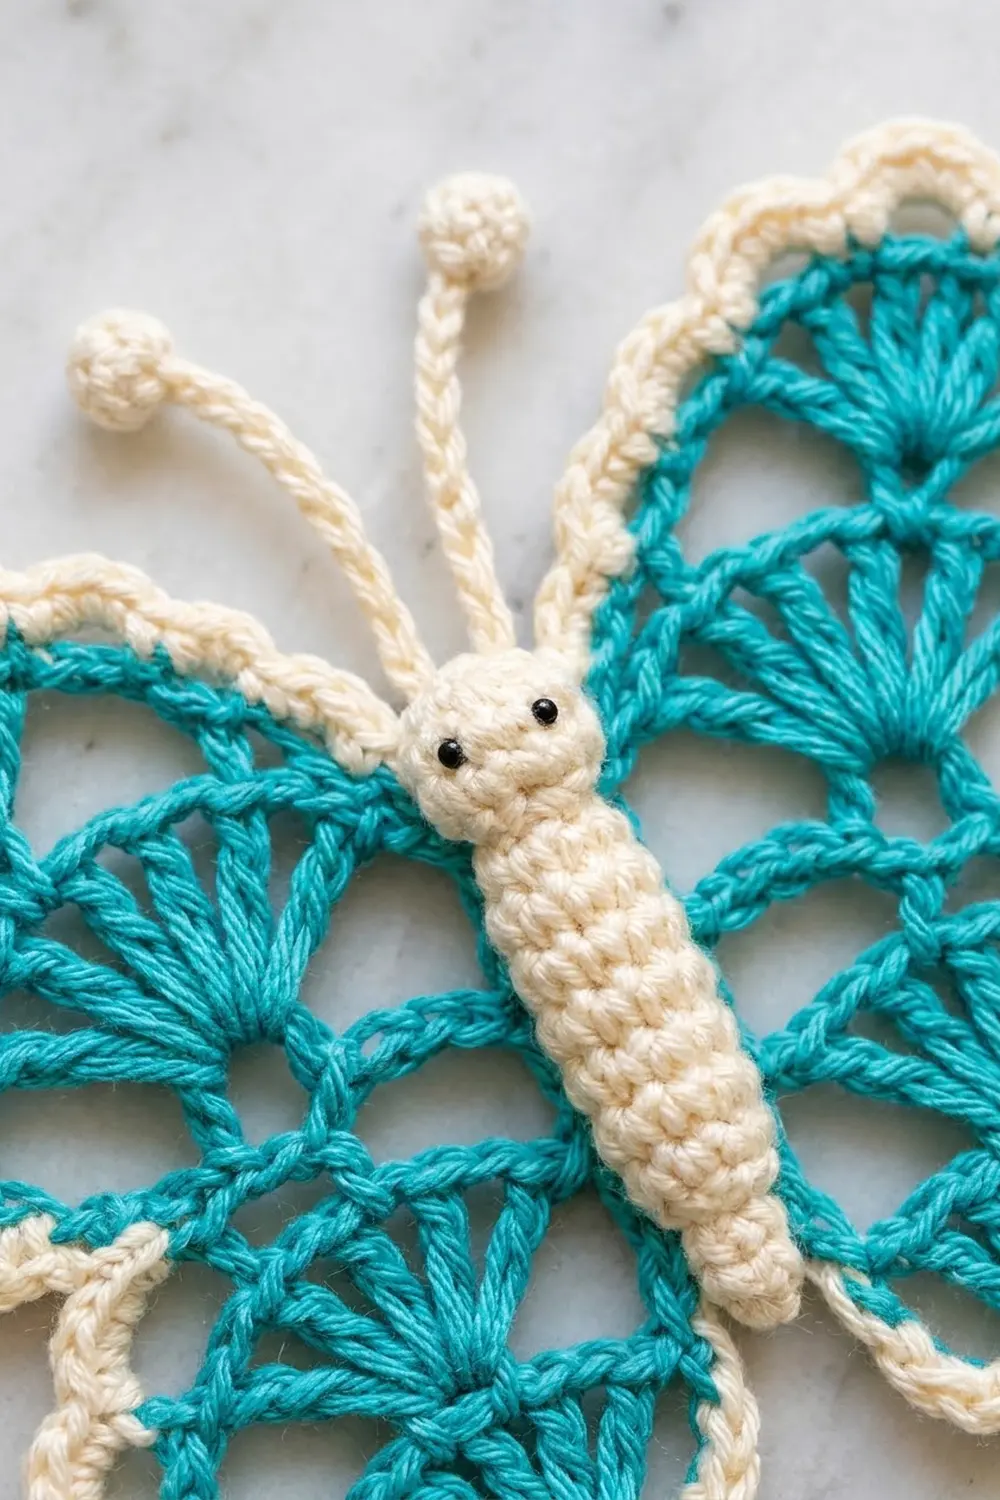
Upper Wing Lobe (Make 2)
With Color A, ch 4.
Row 1: 6 dc in 4th ch from hook (the skipped ch-3 counts as the first dc). Turn. (7 dc)
Row 2: Ch 5 (counts as dc + ch 2), dc in next dc, ch 2, dc in next dc; rep from * across. Turn. (7 dc, 6 ch-2 sps)*
Row 3: Ch 1, sc in first dc, ch 4, skip next dc, sc in next dc; rep from * across. Turn. (4 sc, 3 ch-4 arches)*
Row 4 (first fan row): Ch 3 (counts as dc), 7 dc in next ch-4 arch, dc in next sc; rep from * 2 more times. Turn. (25 dc: 3 fans of 7 dc, with a single dc before, between, and after them)*
Row 5: Ch 1, sc in first dc, ch 4, skip 3 dc, sc in next dc; rep from * across. Turn. (7 sc, 6 ch-4 arches)*
The sc stitches land in dc 1, 5, 9, 13, 17, 21, and 25. That puts one sc in the center dc of each fan and one in each single dc between fans, so the arches sit evenly.
Row 6 (outer fan row): Ch 3 (counts as dc), 5 dc in next ch-4 arch, dc in next sc; rep from * 5 more times. (37 dc: 6 fans of 5 dc, with single dc before, between, and after them)*
Fasten off, leaving a 6 in (15.2 cm) tail. Check that the lobe measures 2.1 in (5.3 cm) from the tip to the center of Row 6.
Lower Wing Lobe (Make 2)
With Color A, ch 4.
Rows 1–4: Work exactly as Rows 1–4 of the Upper Wing Lobe. (25 dc at end of Row 4)
Row 5: Ch 1, sc in each dc across. (25 sc)
Fasten off, leaving a 12 in (30.5 cm) tail for joining. The lower lobe should measure 1.65 in (4.2 cm) from the tip.
Because Rows 1–4 are the same on both lobes, their row-end edges line up one-to-one when you join them.
Body (Make 1)
With Color B.
Rnd 1: 6 sc in MR. (6 sc)
Rnd 2: 2 sc in each st around. (12 sc)
Rnd 3: Sc in each st around. (12 sc)
Add a small pinch of fiberfill to the head if you like.
Rnd 4: Sc2tog 6 times. (6 sc)
Rnds 5–14: Sc in BLO of each st around. (6 sc per round, 10 rounds)
Working in BLO gives the body its ridged, segmented look.
Rnd 15: Sc2tog 3 times. (3 sc)
Fasten off, leaving a 12 in (30.5 cm) tail. Flatten the body slightly with your fingers. It should be about 2.75 in (7.0 cm) long and 0.6 in (1.5 cm) wide.
Eyes: With black floss, work a small French knot on each side of the head on Rnd 3, about 0.2 in (0.5 cm) apart.
Antennae (Make 2)
With Color B, ch 12.
Bobble in 4th ch from hook, ch 1 to lock the bobble. Sl st in each of the remaining 8 ch. Fasten off, leaving a 6 in (15.2 cm) tail.
Each antenna is about 1.25 in (3.2 cm) long with a round knob at the tip.
Hanging Loop (Make 1)
With Color B, ch 36.
Sl st in 2nd ch from hook and in each ch across. (35 sl st) Fasten off, leaving a 6 in (15.2 cm) tail.
The cord is about 5.5 in (14.0 cm) long. Folded in half, it makes a loop about 2.75 in (7.0 cm) tall.
Make All Pieces
- Color A (turquoise): 2 upper lobes, 2 lower lobes
- Color B (cream): 1 body, 2 antennae, 1 hanging loop, plus the border on both wing halves
- Black floss: 2 French-knot eyes
Layout, seen from the front:
            loop
     antenna  |  antenna
  [UPPER L] [BODY] [UPPER R]
  [LOWER L] [BODY] [LOWER R]
The tips (Row 1) of all four lobes point toward the body. The left wing half is a mirror of the right. The lace looks the same on both sides, so just flip one wing half over to make the mirror image.
Joining the Wing Lobes
Lay one upper lobe and one lower lobe side by side with their tips touching. The lower edge of the upper lobe should run along the upper edge of the lower lobe.
Using the lower lobe’s long tail, whip stitch the two row-end edges together. Start at the tips and go out through Rows 1–4 only. Work 2 stitches over each dc row end (Rows 1, 2, and 4) and 1 stitch over the sc row end (Row 3), so there are 7 whip stitches in total. Rows 1–4 are the same on both lobes, so every stitch matches a stitch on the opposite side.
Stop at the end of Row 4. Upper Rows 5–6 and lower Row 5 stay free, which forms the small notch between the wings.
Keep the tension snug but not tight. If you pull too hard, the seam will pucker and the lobes will tilt toward each other. Repeat to make the second wing half.
Size checkpoint: each joined wing half should be about 2.1 in (5.3 cm) wide and 3.7 in (9.4 cm) tall, measured from the top of the upper lobe to the bottom of the lower lobe.
Border
Border gauge: 1 sc per dc or sc along the edges, 2 sc per dc row end, and 1 sc per sc row end. Work the border separately around each wing half, with the right side facing.
Rnd 1 (sc foundation): Join Color B with sc in the first dc of upper Row 6, at the end nearest the body. Work around the wing half in this order:
- Upper lobe arc: 1 sc in each dc of Row 6. (37 sc, including the joining sc)
- Upper notch edge: 2 sc over Row 6 end, 1 sc over Row 5 end. (3 sc)
- Notch point: 1 sc into the end of the seam. (1 sc)
- Lower notch edge: 1 sc over lower Row 5 end. (1 sc)
- Lower lobe arc: 1 sc in each sc of Row 5. (25 sc)
- Lower body edge: 1 sc over Row 5 end, 2 sc over Row 4, 1 sc over Row 3, 2 sc over Row 2, 2 sc over Row 1. (8 sc)
- Upper body edge: 2 sc over Row 1, 2 sc over Row 2, 1 sc over Row 3, 2 sc over Row 4, 1 sc over Row 5, 2 sc over Row 6. (10 sc)
Sl st to first sc. (37 + 3 + 1 + 1 + 25 + 8 + 10 = 85 sc)
Rnd 2 (scallops): Ch 1. Work the sections in the same order:
- Upper arc (37 sts): Sc in first st, skip 1 st, 5 dc in next st, skip 1 st, sc in next st; rep from * 8 more times. (9 scallops, 10 sc)*
- Notch (3 + 1 + 1 = 5 sts): Sc in each st. (5 sc)
- Lower arc (25 sts): Sc in first st, skip 1, 5 dc in next, skip 1, sc in next; rep from * 5 more times. (6 scallops, 7 sc)*
- Body edges (8 + 10 = 18 sts): Sc in each st. (18 sc)
Sl st to first sc. Fasten off and weave in the ends. (15 scallops; 40 sc)
Why the math works: each scallop repeat uses 4 stitches. An arc needs a multiple of 4 plus 1 so that it starts and ends with an sc. The upper arc has 37 sc, which is 1 + (4 x 9), so it takes 9 scallops. The lower arc has 25 sc, which is 1 + (4 x 6), so it takes 6 scallops. The notch and body edges use 5 + 18 = 23 stitches. In total, 37 + 25 + 23 = 85 stitches are used, which matches Rnd 1 exactly. The notch and body edges stay flat. The body hides the body edges, and the notch stays a crisp dip between the wings.
Size checkpoint: the border adds about 0.3 in (0.8 cm) all around. Each bordered wing half is now about 2.4 in (6.1 cm) wide and 4.3 in (10.9 cm) tall.
Assembly
Place the two wing halves with their body edges facing each other, leaving a 0.2 in (0.5 cm) gap. Lay the body over the gap, with the head level with the top of the upper lobes. Using the body tail, sew the body to the border sc along each body edge, working through the back of the body only.
Sew one antenna to each side of the top of the head so the two spread into a V. Fold the hanging loop in half and sew both ends to the back of the head. Weave in all ends.
The butterfly should now be about 5 in (12.7 cm) wide: 2.4 in + 0.2 in + 2.4 in (6.1 cm + 0.5 cm + 6.1 cm).
Final Blocking
- Spray the butterfly evenly with water until it is damp all the way through but not dripping.
- Lay it right side up on the blocking mat.
- Pin the body straight down the center.
- Pin the tip of each scallop, working outward from the body and spacing the wings evenly.
- Open each fan so that its ribs spread evenly, without gaps bunching on one side.
- Check the width, 5 in (12.7 cm), and the height, 4.3 in (10.9 cm), with a ruler.
- Shape the antennae into a gentle V and lay the loop straight.
- Let it dry completely before you unpin it.
Final Quality-Control Checklist
- Upper lobes have 6 fans on the outer row and 37 dc
- Lower lobes have 25 sc on the outer row
- Seams cover Rows 1–4 only, with an open notch left above
- Each wing half has 85 sc in Rnd 1 and 15 scallops in Rnd 2
- The body is centered and covers the wing gap completely
- Both antennae are the same length, and their knobs are firm
- Eyes are level and the loop is secure
- Finished size is about 5 in x 4.3 in (12.7 cm x 10.9 cm)
Troubleshooting
- Fans ruffle: block firmly first. If they still ruffle, go down one hook size.
- Fans look sparse or have gaps: check that the arches are ch 4, not ch 5.
- Scallop count is off: recount Rnd 1 section by section. Each arc must be a multiple of 4 plus 1.
- Seam puckers: loosen the whip stitches, or redo the seam using 1 stitch per row end.
- Body twists: flatten it while damp and pin it straight to dry.
- Bobble collapses: make sure you work the ch 1 after it, and pull it tight.
Care
Hand wash in cool water with mild soap, then press out the water in a towel. Reshape and dry flat. Do not tumble dry.
Final Notes
Measure in this order. Upper lobe: 2.1 in (5.3 cm). Lower lobe: 1.65 in (4.2 cm). Joined wing half: 3.7 in (9.4 cm) tall. Wingspan before the border: 4.4 in (11.2 cm). With the border, each wing half is 2.4 in (6.1 cm) wide. Finished butterfly: 5 in x 4.3 in (12.7 cm x 10.9 cm). If each checkpoint matches, the next one will too. Make one for every branch, or tie one onto a gift bag.
Happy crocheting!