
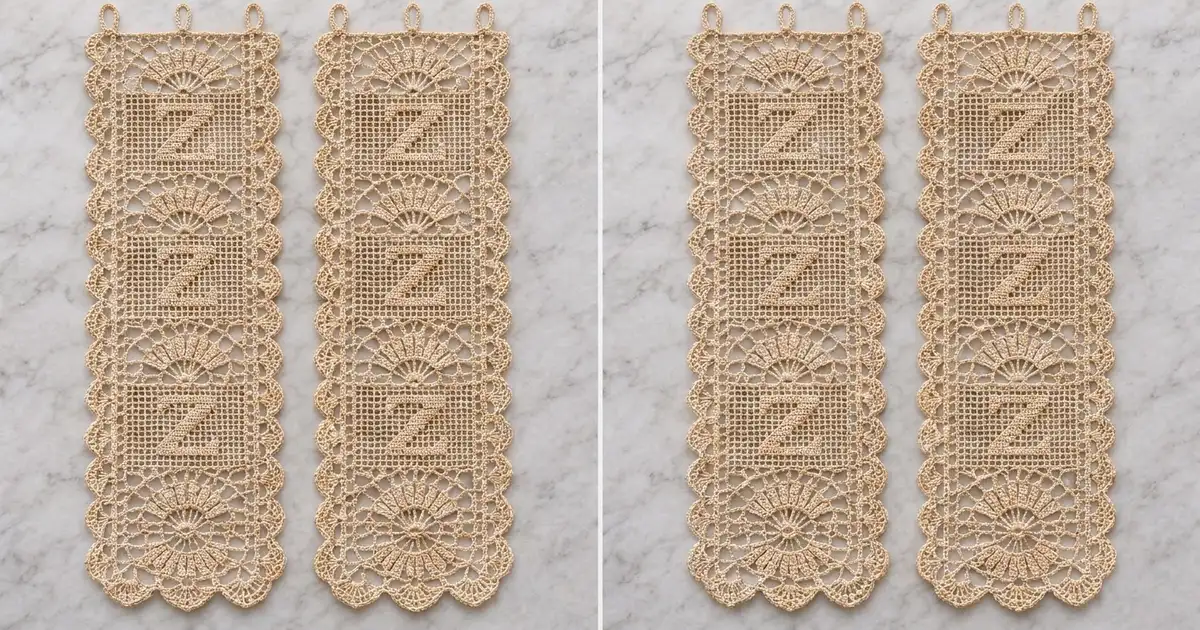
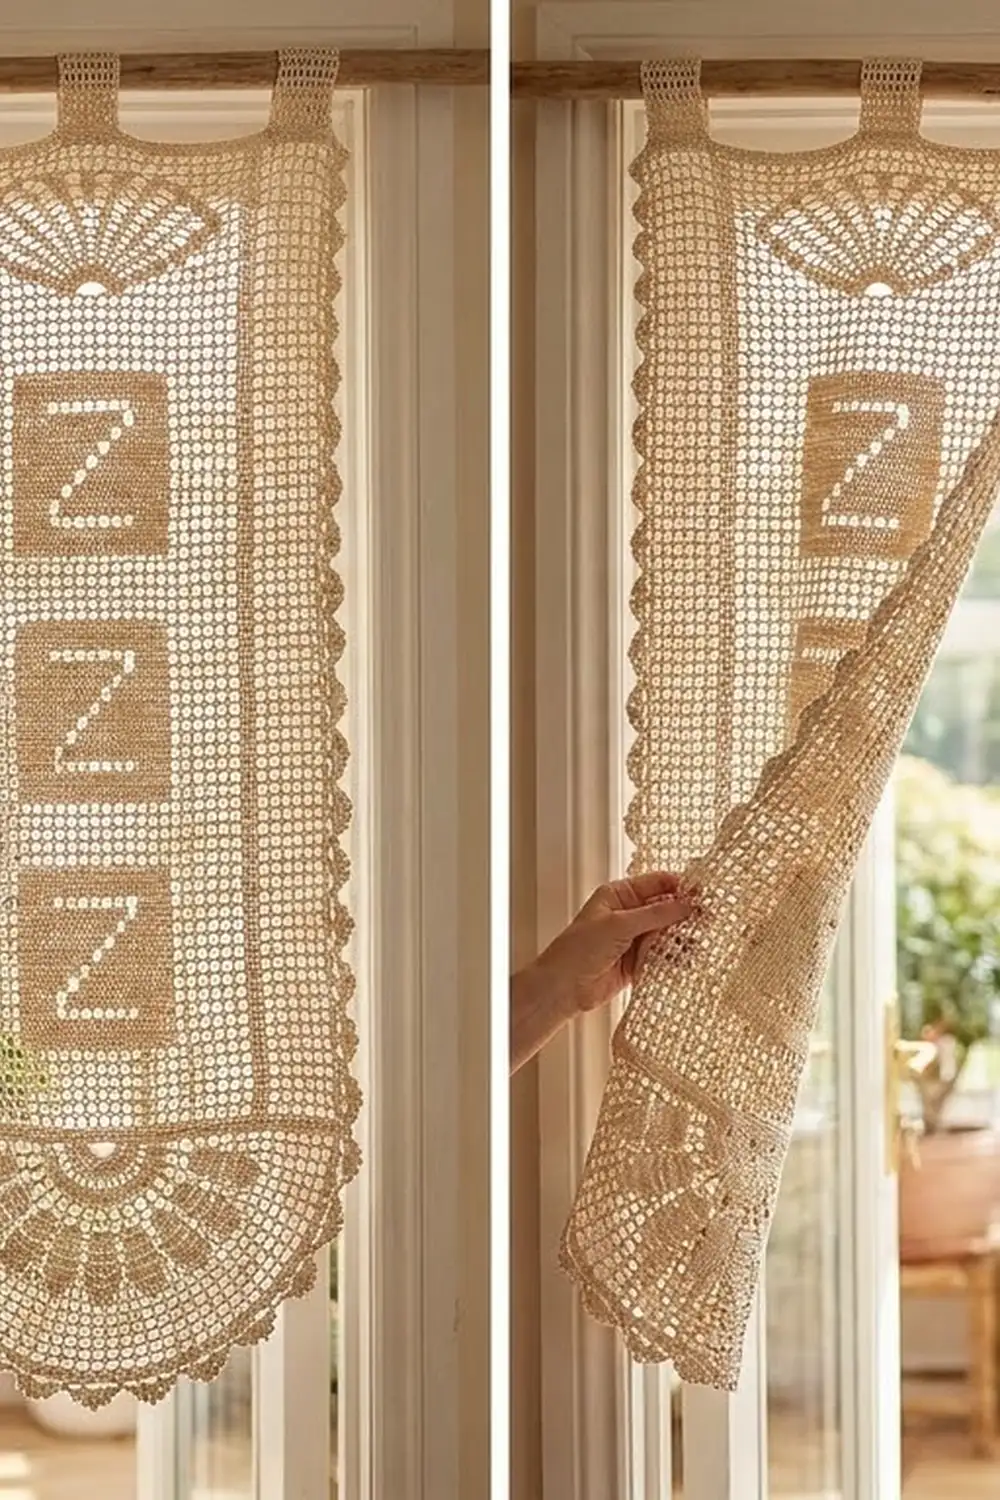
The Zephyr Fan panels are a pair of lacy filet curtains in warm natural cotton. Each panel has three boxed “Z” monograms in solid filet blocks. Openwork fan bands sit between them, and a large sunburst fan anchors the bottom.
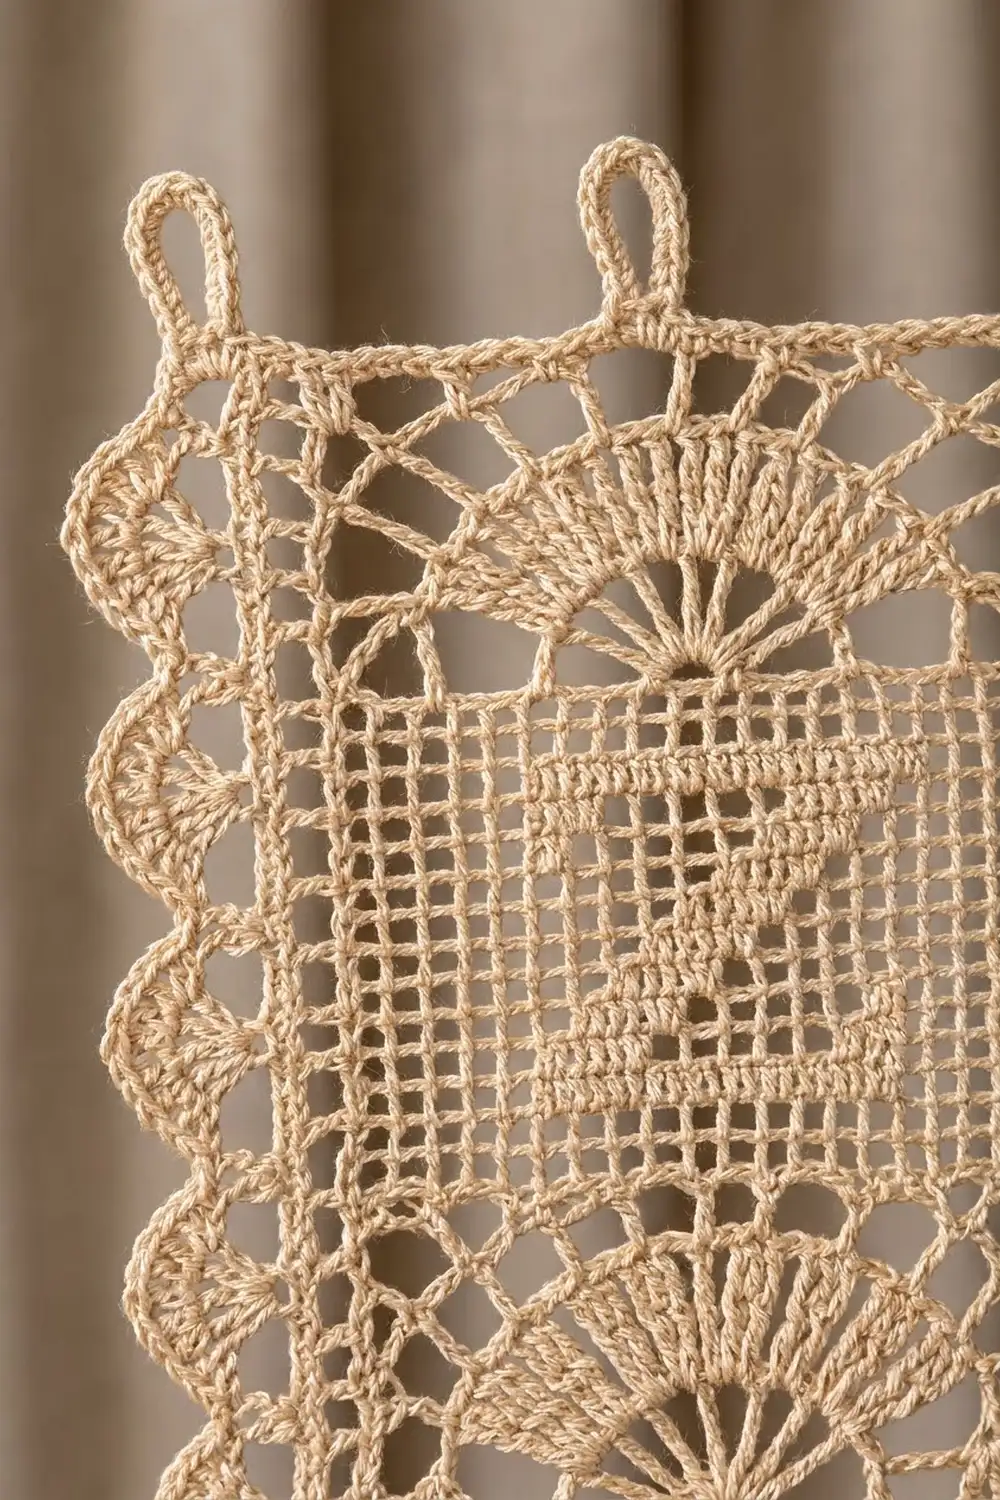
Shell scallops with tiny picots edge both long sides and the bottom. Small loop tabs along the top slide straight onto a curtain rod, so the panels hang in a doorway, alcove, or tall window without any sewing to fabric.
This pattern uses US crochet terms. Each finished panel measures 14 in (35.6 cm) wide by 34.6 in (87.9 cm) long, plus tabs that rise 1.5 in (3.8 cm) above the top edge.
You work each panel bottom-up in rows as one piece: a foundation row, the big fan, then three Z sections that alternate with fan bands. Then you add a three-row scalloped border around the sides and bottom, plus four tabs on top. Make two panels.
Finished Size and Construction
- Finished panel size: 14 in x 34.6 in (35.6 cm x 87.9 cm), not including tabs
- Skill level: Intermediate (filet charting, counting)
- Terminology: US
- Yarn weight: DK / light (3) cotton
- Hook: 3.5 mm (US E-4)
- Number of pieces: 2 identical panels, each worked in one piece
- Layout: Panels hang side by side; they are not joined
- Panel size before border: 12 in x 33.6 in (30.5 cm x 85.3 cm)
- Border depth: 1 in (2.5 cm) on each long side and on the bottom
- Mesh width: 30 filet squares (91 stitches) across
Materials
Choose a smooth, tightly plied mercerized or matte cotton in DK weight. Crisp cotton holds filet blocks sharply and keeps the scallops from drooping. Avoid fuzzy or very stretchy fibers, because long panels sag under their own weight.
- Natural beige/ecru: 350 g, about 875 m (957 yd), enough for both panels (roughly 175 g / 437 m per panel)
These quantities include a margin of about 15% for gauge swatches and tension differences.
Tools:
- 3.5 mm (US E-4) crochet hook
- Tapestry needle
- Stitch markers (at least 6)
- Rustproof pins and a blocking board or foam mats
- Spray bottle
- Measuring tape
Abbreviations (US Terms)
- ch – chain
- sl st – slip stitch
- sc – single crochet
- dc – double crochet
- sk – skip
- sp(s) – space(s)
- st(s) – stitch(es)
- RS / WS – right side / wrong side
Special terms:
- Mesh (open square): dc in the next dc, ch 2, sk 2 (sts or chains). On a mesh row, every square is 3 sts wide, and posts sit on sts 1, 4, 7 … 91.
- Block (filled square): dc in the next dc, then dc in each of the next 2 sts or 2 dc in the ch-2 sp.
- Shell: 7 dc in the same st.
- Picot: ch 3, sl st in the top of the last sc made.
- Spoke: a single dc that forms one rib of a fan.
The turning ch 5 counts as dc + ch 2. A turning ch 3 counts as 1 dc.
Gauge and Checkpoints
Gauge: 10 mesh squares (30 sts) and 10 mesh rows = 4 in (10.2 cm). One mesh square measures 0.4 in (1.0 cm). Every row in this pattern, including the fan rows, averages 0.4 in (1.0 cm) tall.
Before you start, work a 12-square by 12-row mesh swatch and block it. If 10 squares measure more than 4 in (10.2 cm), go down to a 3.25 mm hook. If they measure less, go up to a 3.75 mm hook.
Checkpoints (blocked, height measured from the foundation edge):
- Row 1: 12 in (30.5 cm) wide
- After Row 9 (big fan): 3.6 in (9.1 cm)
- After Row 28 (Z section 1): 11.2 in (28.4 cm)
- After Row 34: 13.6 in (34.5 cm)
- After Row 53: 21.2 in (53.8 cm)
- After Row 59: 23.6 in (59.9 cm)
- After Row 78: 31.2 in (79.2 cm)
- After Row 84 (top edge): 33.6 in (85.3 cm)
If you are more than 0.5 in (1.3 cm) off at any checkpoint, adjust your hook before going on. Make the first panel completely and check it before you start the second.
Panel Body
Stitch positions (st 1 to st 91) are counted from the start of each row. In every row except the bar rows, the side frame is 3 mesh squares at each end, using posts on sts 1, 4, 7, 10 and sts 82, 85, 88, 91. Work the frame at the start of each row as: ch 5, dc in st 4, ch 2, dc in st 7, ch 2, dc in st 10. Work it at the end as: dc in st 82, [ch 2, sk 2, dc in next] 3 times, with the last dc in the 3rd ch of the turning ch. Between the frames, the central zone is sts 11–81 (71 sts).
Row 1 (Foundation, RS): Ch 93, dc in 4th ch from hook and in each ch across. Turn. (91 sts)
Big Fan (Rows 2–9)
Row 2 (Fan Row 1): Frame to st 10. [Ch 5, sk 5, sc in next] 5 times (sc on sts 16, 22, 28, 34, 40), ch 5, sk 5. In st 46, work (dc, ch 2, dc, ch 2, dc); this is the hub. [Ch 5, sk 5, sc in next] 5 times (sts 52–76), ch 5, sk 5, dc in st 82, then frame. Turn. (6 arches per side; 3 spokes)
Row 3 (Fan Row 2): Frame. On each side of the fan, ch 5, sc in the first arch, then [ch 5, sc in next arch] 4 times. Ch 2, then work an edge spoke (dc) in the arch next to the hub. [Ch 2, dc in next spoke] 3 times, ch 2, edge spoke in the next arch. Mirror the arches: ch 2, sc in next arch, [ch 5, sc in next arch] 4 times, ch 5, dc in post. Then frame. Turn. (5 arches per side; 5 spokes)
Fan rule: In every fan row, the arch closest to the fan on each side takes an edge spoke. Each side therefore loses 1 arch, and the fan gains 2 spokes.
Row 4 (Fan Row 3): Work as Row 3 with 4 arches per side. Inside the fan, work ch 2 between spokes. (7 spokes)
Row 5 (Fan Row 4): Work as Row 3 with 3 arches per side. Change to ch 3 between spokes. (9 spokes)
Row 6 (Fan Row 5): Work as Row 3 with 2 arches per side and ch 3 between spokes. (11 spokes, 10 ch-3 sps)
Row 7: Frame, ch 5, sc in first arch, ch 2, edge spoke in next arch. [Ch 3, dc in next spoke] 11 times, ch 3, edge spoke in next arch. Ch 2, sc in next arch, ch 5, dc in post, then frame. Turn. (1 arch per side; 13 spokes, 12 ch-3 sps)
Row 8: Frame, ch 5, edge spoke in the arch. [Ch 3, dc in next spoke] 13 times, ch 3, edge spoke in the other arch, ch 5, dc in post, then frame. Turn. (15 spokes, 14 ch-3 sps, 2 ch-5 gaps)
Row 9 (Bar row): Ch 3, then work 2 dc in each frame ch-2 sp and dc in each frame post. Central zone: 7 dc in the ch-5 gap, then dc in each spoke and 3 dc in each ch-3 sp, then 7 dc in the last gap. Finish the frame the same way. Turn.
The count works out to 10 + 7 + 15 + 42 + 7 + 10 = 91 sts.
Z Section (19 rows)
The Z sits in a box. Squares 1–3 and 28–30 are open frame. Squares 4 and 27 are blocks every row, which makes the box rails. Squares 5–26 form the 22-square field: 5 open margin squares, then the 12-square letter area (squares 10–21), then 5 open margin squares.
Letter positions below are counted 1–12 from the left as seen on the RS. On RS rows, read them right to left; on WS rows, read them left to right. Every row stays at 31 posts and 91 sts.
- Rows 1–2: Field all open.
- Rows 3–4 (bottom bar): Letter squares 1–12 are blocks.
- Rows 5–14 (diagonal): In diagonal row n (n = 1 to 10), letter squares n to n+2 are blocks. Row 5 fills squares 1–3, and Row 14 fills squares 10–12.
- Rows 15–16 (top bar): Letter squares 1–12 are blocks.
- Rows 17–18: Field all open.
- Row 19 (box top): Bar row, 3 sts per square, 91 sts.
This gives a Z 4.8 in (12.2 cm) wide and 5.6 in (14.2 cm) tall. The whole section measures 7.6 in (19.3 cm).
Fan Band (6 rows)
Rows 1–5: Work exactly as Big Fan Rows 2–6. The fan ends with 11 spokes and 2 arches per side.
Row 6 (Bar row): In the central zone, work 5 dc in each of the 4 arches (20), dc in each of the 4 sc (4), and 3 dc in each ch-2 gap (6). Then dc in each of the 11 spokes (11) and 3 dc in each of the 10 ch-3 sps (30).
The central zone totals 20 + 4 + 6 + 11 + 30 = 71. With the frames, the row is 10 + 71 + 10 = 91 sts. The band measures 2.4 in (6.1 cm).
Panel Sequence
- Row 1: Foundation
- Rows 2–9: Big Fan
- Rows 10–28: Z Section 1
- Rows 29–34: Fan Band
- Rows 35–53: Z Section 2
- Rows 54–59: Fan Band
- Rows 60–78: Z Section 3
- Rows 79–84: Fan Band (Row 84 is the top edge)
Do not fasten off at the end of Row 84; leave the loop on a marker for the border. That makes 84 rows at 0.4 in, or 33.6 in (85.3 cm) total.
Make All Pieces
Make 2 panels, A and B, in natural beige/ecru, with about 175 g (437 m) each. Both panels are identical, and the Z reads correctly on each one.
+-----------+   +-----------+
|  tabs x4  |   |  tabs x4  |
|   Fan     |   |   Fan     |
|    Z      |   |    Z      |
|   Fan     |   |   Fan     |
|    Z      |   |    Z      |
|   Fan     |   |   Fan     |
|    Z      |   |    Z      |
| Big Fan   |   | Big Fan   |
+-----------+   +-----------+
   Panel A         Panel B
Joining
The panels are not joined to each other. Each one hangs on its own from its four tabs, so you can pull either side open. If you want a single fixed curtain instead, space the panels 0 to 2 in (0 to 5.1 cm) apart on the rod rather than sewing them together. Sewing would distort the scalloped edges.
Border
Border gauge: 3 sc per dc row-end. Along the bottom, 1 sc goes in each foundation stitch. Each shell scallop covers 6 sts, about 0.8 in (2.0 cm).
Row 1 (RS): With the loop from Row 84, ch 1. Working down the first long side, work 3 sc in each of the 84 row-ends (252 sc), then ch 2 for the corner.
Across the bottom, sc in the base of each of the 91 dc and add 4 extra sc, 1 each at sts 18, 37, 55, and 74. That gives 91 + 4 = 95 sc. Ch 2 for the corner.
Up the second side, work 3 sc in each row-end (252 sc). Turn. The corner ch-2 sps are separate from the side counts.
Row 2 (Shells, WS): Ch 1.
- Second side: sc in the 1st sc, then [sk 2, shell in next, sk 2, sc in next] 42 times. The last sc lands in the corner sp, since 1 + 6 x 42 = 253 = 252 sts + 1 corner sp.
- Bottom: [sk 2, shell in next, sk 2, sc in next] 16 times. The last sc goes in the second corner sp, since 6 x 16 = 96 = 95 sts + 1 corner sp.
- First side: [sk 2, shell in next, sk 2, sc in next] 42 times, ending in the last sc, since 6 x 42 = 252.
Turn. (100 shells)
Row 3 (Picot edge, RS): Ch 1. Over each shell, work sc in each of the first 3 dc, then sc in the 4th dc and make a picot, then sc in each of the last 3 dc. Sl st in each sc between shells. Fasten off. (100 picots)
Why the math works: Each side has 84 rows x 3 = 252 sts. That divides by the 6-st repeat into exactly 42 shells, with the corner sps supplying the anchoring sc. The bottom count of 95 plus 1 corner sp gives 96 = 16 x 6. Border depth is 1 in (2.5 cm), so each panel finishes 12 + 1 + 1 = 14 in (35.6 cm) wide and 33.6 + 1 = 34.6 in (87.9 cm) long.
Hanging Tabs (make 4)
With the RS facing, join yarn to Row 84 and make tabs over sts 1–5, 30–34, 58–62, and 87–91. That leaves gaps of 24, 23, and 24 sts, and 4 x 5 + 71 = 91.
For each tab: ch 1, sc in 5 sts, then turn. Repeat until 16 sc rows measure 3 in (7.6 cm), about 0.7 in (1.8 cm) wide. Fold the strip to the WS and whipstitch the end along the base. This makes a 1.5 in (3.8 cm) loop that fits a rod up to 1 in (2.5 cm) thick.
Final Blocking
- Weave in all ends along the dc posts, not across the open mesh.
- Soak the panel in cool water for 15 minutes, then press the water out in a towel. Do not wring it.
- Pin it to 14 in x 34.6 in (35.6 cm x 87.9 cm), starting with the four corners.
- Pin the frame posts in straight vertical lines and the bar rows in straight horizontal lines.
- Pin each fan spoke so it radiates evenly, and pin the tip of every scallop at its picot.
- Let it dry completely, which takes 12 to 24 hours.
- Block panel B to exactly match panel A.
Final Quality-Control Checklist
- Every mesh row has 31 posts and every bar row has 91 sts.
- Each Z reads correctly from the RS, with 3-block-wide diagonals.
- Box rails (squares 4 and 27) are continuous through each Z section.
- Each fan has 11 spokes (15 on the big fan).
- Each side has 42 shells and the bottom has 16.
- The 4 tabs are evenly spaced and the same length.
- Both panels measure 14 in x 34.6 in (35.6 cm x 87.9 cm).
Troubleshooting
- Squares lean or turn into rectangles: Your ch-2 is too tight. Loosen the chains or go up 0.25 mm on the hook for chains only.
- Fan puckers: The ch-3 sps are too short. Try ch 4 in Rows 5–8 and keep the same bar-row counts.
- Bar row count is off: Recount the central zone, which should be 71 sts. A missing gap dc is the usual cause.
- Z appears mirrored: You read the chart in the wrong direction on RS rows. Rip back to Row 3 of the section.
- Side border ruffles: Your row-ends are too tall. Keep 3 sc per row-end but use a smaller hook for Border Row 1.
- Panel droops after hanging: Re-block it and let it dry flat. Avoid heavy rods that stretch the tabs.
Care
Hand wash in cool water with mild soap, roll in a towel, and dry flat, pinned to shape. Press lightly with a warm iron through a cloth if needed.
Final Notes
The measurement chain runs like this. Squares of 0.4 in (1.0 cm) build a 30-square, 12 in (30.5 cm) body. 84 rows bring it to 33.6 in (85.3 cm). A 1 in (2.5 cm) scalloped border finishes each panel at 14 in x 34.6 in (35.6 cm x 87.9 cm), and four 1.5 in (3.8 cm) tabs hang it on the rod. Check your gauge first, count every bar row, and both panels will match.
Happy crocheting!