
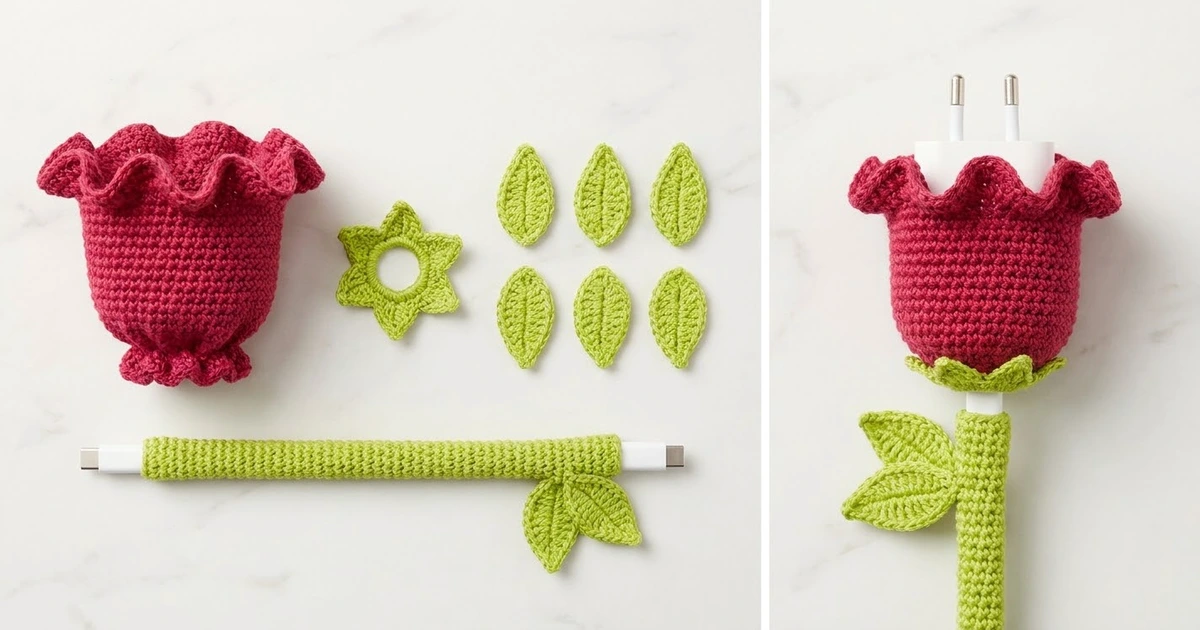
This little set turns a plain white wall charger and cable into a flower on a vine. A raspberry-red bell slips over the charger, a lime-green calyx of pointed sepals finishes its base, and a matching green tube wraps the cable, with small leaves stitched along it.
The design has two colors, raspberry red and bright lime green, and works well on a desk or bedside table. The fabric is tight single crochet, so it holds its shape around the charger and doesn’t sag. The ruffle at the top is the only lacy part.
This pattern uses US crochet terms. The finished sleeve measures 6.4 in (16.3 cm) around, 3.2 in (8.1 cm) wide flattened, and about 4.1 in (10.4 cm) tall including the ruffle. The cord cover is made to fit your cable. The sample is 36 in (91.4 cm) long.
Construction is simple. You work the sleeve from the bottom up in joined rounds: a small ring, a flat base, a straight body, and then a three-round ruffle. Next you make the calyx and sew it to the base, make six leaves, and crochet a long strip that you seam around the cable with slip stitches.
Finished Size and Construction
- Sleeve size: 6.4 in (16.3 cm) around, 3.2 in (8.1 cm) wide when flattened, about 4.1 in (10.4 cm) tall
- Fits: compact wall chargers with a body perimeter of 5.5–6.5 in (14.0–16.5 cm)
- Skill level: Easy
- Terminology: US
- Yarn weight: DK / light (3), cotton
- Hook: 3.5 mm (E-4)
- Number of pieces: 9 (1 sleeve, 1 calyx, 6 leaves, 1 cord cover)
- Layout: the sleeve and calyx are sewn together; the leaves are sewn to the cord cover; the cord unit stays separate so the cable can still be unplugged
- Sleeve body height: 2.8 in (7.1 cm)
- Size before ruffle: 6.4 in (16.3 cm) around × about 3.3 in (8.4 cm) tall
- Ruffle depth: 0.8 in (2.0 cm)
Materials
Use a smooth mercerized or combed cotton in DK weight. Cotton holds the scallops crisply and doesn’t pill on a desk. Avoid fuzzy yarns, because they hide the leaf veins and the ruffle edge.
- Raspberry red: 20 g, about 45 m (49 yd), for the sleeve
- Lime green: 25 g, about 55 m (60 yd), for the calyx, leaves, and cord cover
These amounts include a margin of about 20%. If your cable is longer than 1 m (39.4 in), add 5 g of green for every extra 12 in (30.5 cm) of cord.
Tools:
– 3.5 mm (E-4) crochet hook
– 4.0 mm (G-6) hook for the long foundation chain (optional)
– Tapestry needle
– 4 locking stitch markers
– Scissors
– Measuring tape
– Your wall charger and USB-C cable, for fitting
Abbreviations (US Terms)
- ch – chain
- sl st – slip stitch
- sc – single crochet
- hdc – half double crochet
- dc – double crochet
- sk – skip
- st(s) – stitch(es)
- rnd(s) – round(s)
- sp – space
Scallop: 7 dc worked into the same stitch.
Tip picot: (sc, ch 2, sl st) worked into the same chain, which gives each leaf a sharp point.
Gauge and Checkpoints
Gauge: 20 sc and 20 rnds = 4 in (10.2 cm), or 5 sts and 5 rnds per 1 in (2.5 cm).
Make the sleeve first. It acts as your gauge swatch, and it’s the only piece that has to fit something exactly.
Checkpoints:
– After Rnd 4, the base lies flat at about 2.0 in (5.1 cm) across.
– After Rnd 10, the straight body is 1.2 in (3.0 cm) tall.
– After Rnd 18, the body is 2.8 in (7.1 cm) tall and 3.2 in (8.1 cm) wide when flattened.
– Before you add the ruffle, slide the charger in. It should go in with light resistance and the prongs should clear the top edge.
Too big: go down to a 3.25 mm hook. If it’s still too big, work Rnd 4 as sc in next 5 sts, 2 sc in next st 4 times (28 sts), and use the ruffle note in the Ruffle Border section.
Too small: go up to a 3.75 mm hook. Don’t add stitches, because the ruffle repeat depends on a 32-stitch body.
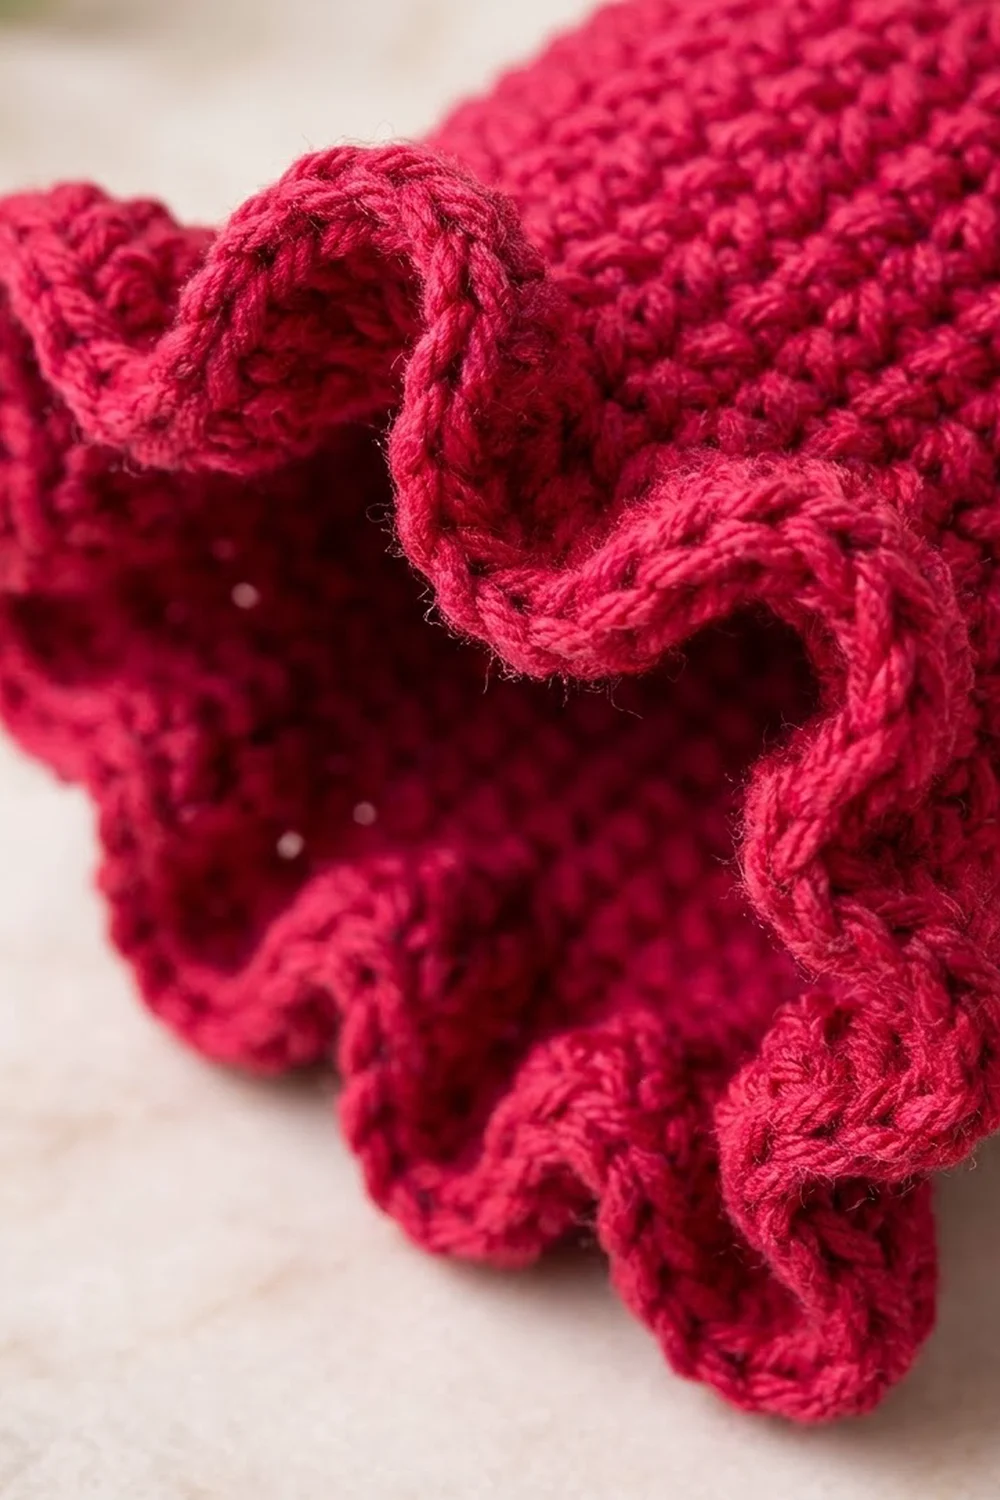
Sleeve (Raspberry Red)
Work in joined rounds. Start each rnd with ch 1 (this doesn’t count as a st) and end each rnd with a sl st into the first sc. Mark the first st of every round.
Base
Rnd 1: Ch 8 and sl st into the first ch to form a ring. This is the cable opening, 1.6 in (4.1 cm) around. (8 ch)
Rnd 2: Ch 1, 2 sc in each ch around, join. (16 sts)
Rnd 3: Ch 1, sc in next st, 2 sc in next st; rep from * 8 times total, join. (24 sts)
Rnd 4: Ch 1, sc in next 2 sts, 2 sc in next st; rep from * 8 times total, join. (32 sts)
Check: the base is about 2.0 in (5.1 cm) across.
Body
Rnds 5–18: Ch 1, sc in each st around, join. (32 sts in each rnd)
These 14 rnds give a straight body of 2.8 in (7.1 cm). The base naturally cups as the body rises. Don’t fasten off. Go straight on to the ruffle.
Calyx (Lime Green)
Rnd 1: Ch 12 and sl st into the first ch to form a ring. (12 ch)
Rnd 2: Ch 1, sc in each ch around, join. (12 sts)
Rnd 3 (sepals): Ch 6. Starting in the 2nd ch from the hook, work sl st, sc, hdc, dc, dc in the next 5 ch. Sk the next sc, sl st in the following sc; rep from * 6 times total. The last sl st lands in the joining st. (6 sepals)
Each sepal is about 1 in (2.5 cm) long and narrows to a point. Fasten off and leave a 12 in (30.5 cm) tail.
Leaves (Lime Green, Make 6)
Ch 9. Work into the back bumps of the chain. The 8 usable chains are numbered 1–8, starting from the hook.
Side 1: Starting in the 2nd ch from the hook (ch 1), work sl st, sc, hdc, dc, dc, hdc, sc in chs 1–7. (7 sts)
Base: 3 sc in ch 8. (3 sts)
Side 2: Rotate the work and continue along the other side of the chain. Work sc, hdc, dc, dc, hdc, sc in chs 7–2. (6 sts)
Tip: Work the tip picot in ch 1. (2 sts plus the ch-2 sp)
Total: 18 sts plus 1 ch-2 tip. The leaf is 1.75 in (4.4 cm) long and 0.9 in (2.3 cm) wide, and the foundation chain forms the center vein. Fasten off and leave an 8 in (20.3 cm) tail at the rounded base.
Cord Cover (Lime Green)
Measure the cable between the two connector housings, then subtract 3 in (7.6 cm) so 1.5 in (3.8 cm) stays bare at each end and still bends. For a 1 m cable, this covered length is 36 in (91.4 cm).
Multiply the covered length in inches by 5, then add 1 for the foundation chain: 36 × 5 + 1 = 181.
Foundation: Ch 181. If your chains are tighter than your sc, make the chain with the 4.0 mm hook.
Row 1: Sc in the 2nd ch from the hook and in each ch across. (180 sts)
Rows 2–4: Ch 1, turn, sc in each st across. (180 sts in each row)
The strip is now 0.8 in (2.0 cm) wide and 36 in (91.4 cm) long. Don’t fasten off. You’ll seam it in the Joining section.
Make All Pieces
| Piece | Color | Quantity |
|---|---|---|
| Sleeve | Raspberry | 1 |
| Calyx | Lime green | 1 |
| Leaf | Lime green | 6 |
| Cord cover | Lime green | 1 |
Placement map, read from the charger down:
[ Ruffle top ]
[ Sleeve body ]
[ Calyx: 6 sepals ]   <- sewn to sleeve
  (cable opening)
[ Cord ]--L1 at 4 in (10.2 cm)
[ Cord ]--L2 at 9 in (22.9 cm)
[ Cord ]--L3 at 14 in (35.6 cm)
[ Cord ]--L4 at 19 in (48.3 cm)
[ Cord ]--L5 at 24 in (61.0 cm)
[ Cord ]--L6 at 29 in (73.7 cm)
Leaves alternate left and right along the cord.
Joining
Calyx to sleeve: Turn the sleeve right side out. Slide the calyx over the base so that Rnd 2 of the calyx sits on Rnd 3 of the sleeve, with the sepals pointing down toward the cable opening. Rnd 3 has 24 sts and the calyx has 12 sc, so whipstitch each calyx sc to every 2nd sleeve st (12 × 2 = 24). Keep the stitches snug but not puckered. The cable opening stays clear.
Cord seam: Lay the cable along the strip. Fold the strip lengthwise around the cable so the Row 4 edge meets the free loops of the foundation chain. Working with the loop still on your hook, sl st through 1 Row 4 st and the matching foundation loop together, all the way along. That’s 180 sl sts for 180 stitch pairs, so the seam can’t twist or end up short. Tighten each sl st just enough to close the seam. If the stitches are too tight, the cord will curl. Turn the seam to the back of the cord.
Size checkpoint: The covered cord measures 36 in (91.4 cm), and each end has 1.5 in (3.8 cm) of bare cable.
Leaves to cord: Use the base tail to sew each leaf to 2 sts next to the seam, following the placement map. Tack the leaf down at its base only, so the tip stays free.
Ruffle Border
The ruffle is worked directly on the last body round of the sleeve.
Ruffle gauge: The scallop round is about 0.45 in (1.1 cm) tall. All three rounds together add 0.8 in (2.0 cm).
Rnd 19 (increase): Ch 1, sc in next 3 sts, 2 sc in next st; rep from * 8 times total, join. (40 sts)
Flattened, each side of the sleeve has 20 sts.
Rnd 20 (scallops): Ch 1, sc in next st, sk 1 st, scallop in next st, sk 1 st; rep from * 10 times total, join. (80 sts: 10 sc + 70 dc)
That makes 10 scallops, 5 on each flattened side.
Rnd 21 (trim): Ch 1, sc in each st, working 2 sc in the 4th dc of each scallop, join. This round is 80 sts worked 1 per st, plus 10 extra sts, for 90 sts. Fasten off and weave in the end.
Why the math works: Each scallop repeat uses 4 sts. Rnd 19 brings the 32 body sts up to 40, and 40 ÷ 4 = 10 even repeats with nothing left over. Each repeat makes 8 sts (10 × 8 = 80). The 10 extra sts in Rnd 21 round off the scallop points, which is what gives the edge its ruffle.
If you resized the sleeve to 28 sts, work Rnd 19 as sc in next 6 sts, 2 sc in next st 4 times (32 sts), for 8 scallops.
Final Blocking
- Weave in all ends except the tails you need for sewing.
- Spritz the sleeve lightly with water and pull it over the charger, or over a similar-sized box covered in plastic wrap.
- Pinch each scallop into a rounded wave and stand the ruffle slightly outward.
- Pin the leaves flat with the tips pointed and let them dry.
- Shape the sepals so they curve downward, then let the calyx dry on the sleeve.
- Lay the cord in loose curves and let it dry flat for a few hours.
Final Quality-Control Checklist
- The sleeve has 32 sts per body rnd, 40 in Rnd 19, 80 in Rnd 20, and 90 in Rnd 21.
- The body is 2.8 in (7.1 cm) tall, and the whole sleeve is about 4.1 in (10.4 cm) tall.
- There are 10 even scallops.
- The calyx has 6 sepals sewn evenly around Rnd 3.
- The USB-C plug passes through the cable opening.
- There are 6 leaves, each 18 sts plus a pointed tip.
- The cord seam is straight and turned to the back, with 180 sl sts.
- The cable bends freely at both ends.
Troubleshooting
The base ruffles instead of lying flat: Your tension is loose on the increase rounds. Use a 3.25 mm hook for Rnds 1–4 only.
The sleeve slides off the charger: Remove Rnd 18, or close the cable opening slightly with a few stitches.
The scallops look flat: Make sure Rnd 21 has the extra 2 sc at each scallop center.
The cord twists: You probably skipped or doubled a seam stitch. Count in sections of 20 and use markers.
The cord is too short: Foundation chains often tighten up. Make the chain again with the larger hook.
A leaf curls: Steam it lightly and pin it flat. Work Side 2 at the same tension as Side 1.
Care
Remove the cozy from the charger before cleaning it. Hand wash in cool water, press out the water in a towel, and reshape it while damp. Never use the charger while the cozy is wet.
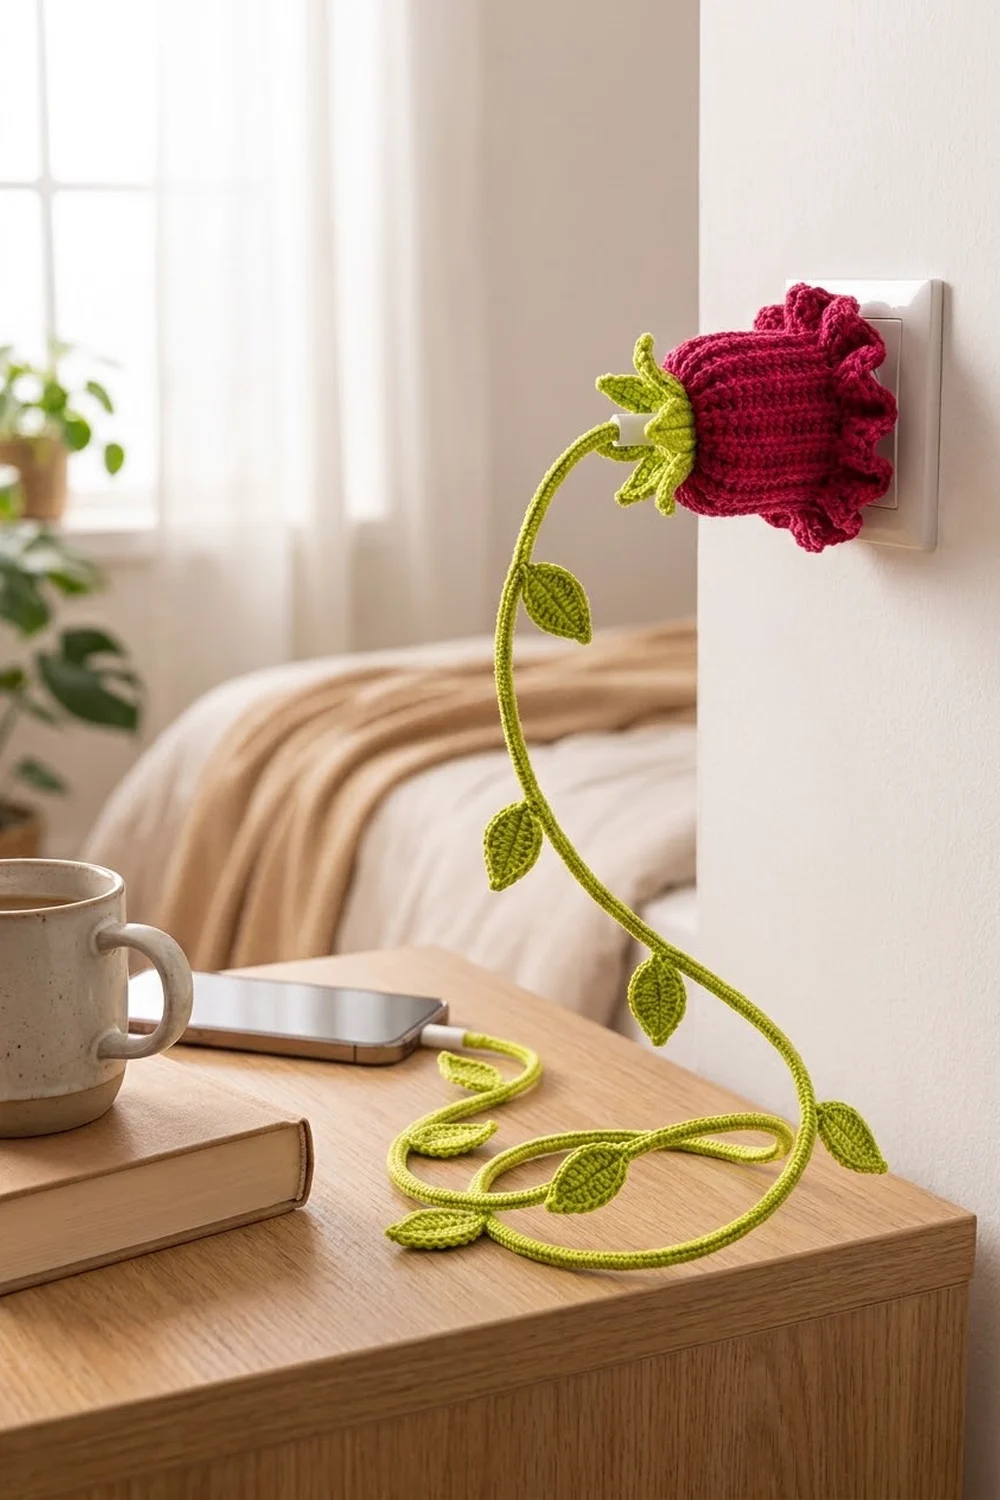
Final Notes
Each part of the set depends on the one before it. Gauge of 5 sts per 1 in (2.5 cm) gives a 32-st body, 6.4 in (16.3 cm) around, which fits the charger. The 32 sts increase to 40 for 10 even scallops, which add a 0.8 in (2.0 cm) ruffle. The 12-st calyx sews to the 24-st base at 1 st for every 2. The cord strip is 5 sts per covered inch and is seamed stitch for stitch, so it ends up exactly the planned length.
Check each of those numbers as you go, and the flower will fit both the charger and the cable.
Happy crocheting!