
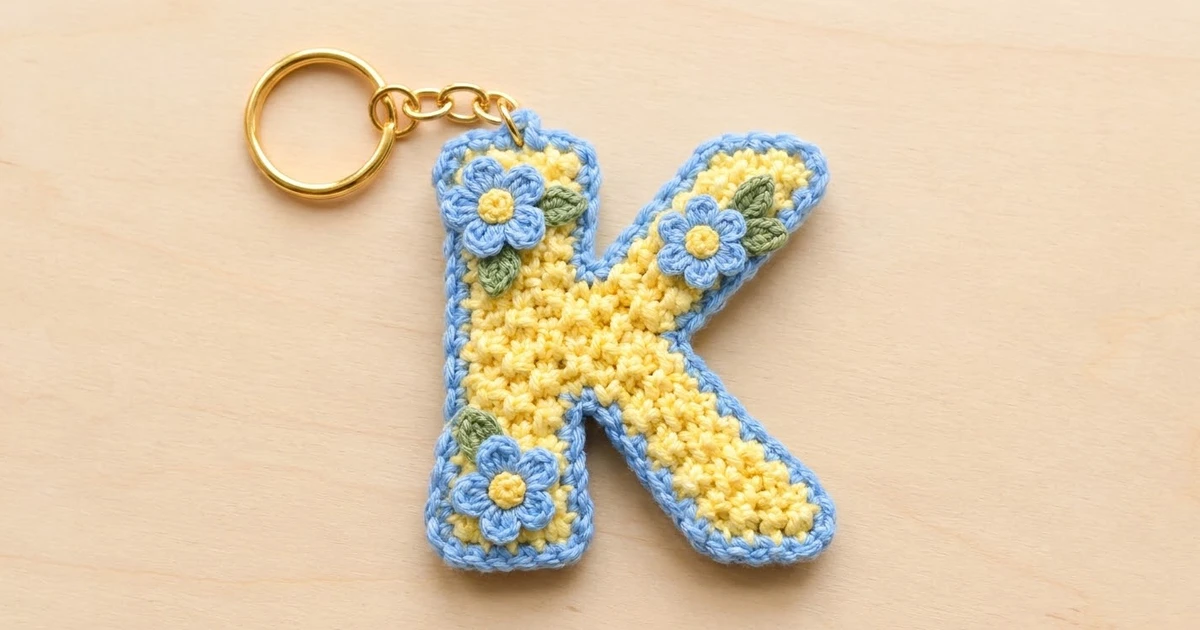
The Buttercup Bloom Letter K Keychain is a small, cheerful initial charm. The pebbly yellow body is framed by a crisp sky-blue rim, and three tiny blue flowers with sunny centers and green leaves are scattered across the letter.
The style is cottage-garden sweet but practical. The fabric is dense enough to hold its shape on a bag, belt loop or set of keys. All instructions use US crochet terms.
The finished letter measures 3.6 in (9.1 cm) wide by 3.4 in (8.6 cm) tall, including the border.
The letter is worked flat in rows of single crochet in three parts that become one piece. You make the lower leg, then the stem, and join them with one shared row. Then you work the upper arm and finish the top of the stem. A two-round border outlines the letter, then you sew on the flowers and leaves and attach the hardware.
Finished Size and Construction
- Finished size: 3.6 in (9.1 cm) wide × 3.4 in (8.6 cm) tall
- Skill level: Easy / advanced beginner
- Terminology: US crochet terms
- Yarn weight: Light / DK (#3) cotton
- Hook: 3.0 mm
- Number of pieces: 1 letter body, plus 3 flowers and 5 leaves sewn on as appliqué
- Layout: Single standalone letter, no joining of multiple pieces
- Body size before border: 3.2 in (8.1 cm) wide × 3.0 in (7.6 cm) tall (16 sts × 15 rows)
- Border depth: 0.2 in (0.5 cm) on every side
Materials
Use a smooth, mercerized or combed cotton in DK weight. Cotton gives clear stitch definition and a firm fabric that will not stretch out with daily handling. Avoid fuzzy or very soft acrylics, because the edges can blur.
- Color A, Buttercup Yellow: 5 g, about 12 m (body and flower centers)
- Color B, Sky Blue: 4 g, about 9 m (border and petals)
- Color C, Sage Green: 1 g, about 2 m (leaves)
These quantities include a generous margin for swatching and weaving in ends.
Tools:
– 3.0 mm crochet hook
– Tapestry needle
– Scissors
– 2 stitch markers
– 1 split ring, 1 in (2.5 cm) diameter
– 1 short gold chain, about 0.6 in (1.5 cm) long
– 1 jump ring, 0.25 in (0.6 cm)
– 2 pairs of flat-nose pliers
– Pins and a small blocking mat
– Spray bottle with water
Abbreviations (US Terms)
- ch – chain
- sc – single crochet
- hdc – half double crochet
- sl st – slip stitch
- st(s) – stitch(es)
- sc2tog – single crochet 2 together: (insert hook in next st, yarn over, pull up a loop) twice, yarn over, pull through all 3 loops on hook
- inc – 2 sc in the same st
- MR – magic ring
Special technique, shift row: On a 5-stitch strip, a shift row keeps the count at 5 but moves the whole strip over by one stitch. The edge with the increase grows outward and the edge with the decrease pulls in. Repeating this every row creates a clean 45-degree diagonal.
Gauge and Checkpoints
Gauge: 5 sc and 5 rows = 1 in (2.5 cm) in rows of sc, worked firmly.
A square gauge is essential here, because the diagonal arms depend on each row being as tall as each stitch is wide.
Test piece: The first section of the stem works as your swatch. After stem Rows 1–7, it should measure 1 in (2.5 cm) wide and 1.4 in (3.6 cm) tall.
Checkpoints:
– Lower leg after Row 7: 5 sts wide in every row, 1.4 in (3.6 cm) tall, with a horizontal slant span of 2.2 in (5.6 cm).
– After Row 8 (junction): 10 sts, 2 in (5.1 cm) wide, 1.6 in (4.1 cm) tall.
– Completed body: 3.2 in (8.1 cm) wide × 3.0 in (7.6 cm) tall.
– After border: 3.6 in (9.1 cm) × 3.4 in (8.6 cm).
If your piece is too big: Go down to a 2.75 mm hook, or tighten your tension.
If your piece is too small: Go up to a 3.25 mm hook.
If stitches match but rows are short: Pull up each loop slightly taller. Short rows flatten the angle of the arms.
Part 1: Lower Leg
With Color A, ch 6.
Row 1: Sc in 2nd ch from hook and in each ch across. Ch 1, turn. (5 sts)
Row 2 (shift): Sc2tog, sc in next 2 sts, inc in last st. Ch 1, turn. (5 sts)
Row 3 (shift): Inc in first st, sc in next 2 sts, sc2tog. Ch 1, turn. (5 sts)
Rows 4, 6: Repeat Row 2. (5 sts each row)
Rows 5, 7: Repeat Row 3. (5 sts each row)
Fasten off, leaving an 8 in (20.3 cm) tail.
You now have a slanted parallelogram. Six shift rows moved the top 6 sts over from the bottom. Mark the top edge on the side where the Row 7 increase sits. That edge will face the stem.
Because single crochet looks nearly the same on both sides, you can flip this piece over if needed to make it lean the right way.
Part 2: Stem and Junction
With Color A, ch 6.
Rows 1–7: Sc in 2nd ch from hook and in each ch across (5 sts). For Rows 2–7, ch 1, turn, sc in each st across. (5 sts each row)
Check: 1 in (2.5 cm) wide × 1.4 in (3.6 cm) tall.
Lay the lower leg beside the stem so that:
– the top of leg Row 7 lines up with the top of stem Row 7,
– the marked increase edge touches the stem,
– the bottom of the leg angles away from the stem.
Row 8 (junction): Ch 1, turn. Sc in each of the 5 stem sts, then continue directly into the top of leg Row 7. Start at the edge touching the stem and sc in each of its 5 sts. (10 sts)
Using the leg tail, whipstitch the side edges of stem Row 7 and leg Row 7 together, just one row end, so there is no gap under the junction. Leave the remaining tail to weave in later.
Check: 2 in (5.1 cm) wide.
Part 3: Upper Arm
Continue with the same yarn, without fastening off.
Row 9: Ch 1, turn. Sc in next 5 sts, which sit over the leg. Leave the 5 stem sts unworked. (5 sts)
Row 10 (shift): Ch 1, turn. Sc2tog, sc in next 2 sts, inc in last st. (5 sts)
The decrease sits on the inner edge next to the stem, and the increase pushes the outer edge away. The arm now leans upward and outward.
Row 11 (shift): Ch 1, turn. Inc in first st, sc in next 2 sts, sc2tog. (5 sts)
Rows 12, 14: Repeat Row 10. (5 sts each row)
Rows 13, 15: Repeat Row 11. (5 sts each row)
Fasten off.
The upper arm mirrors the lower leg: 7 rows tall, with 6 shift rows. The top of the arm sits directly above the bottom of the leg, which keeps the letter balanced.
Part 4: Upper Stem
Row 9: Join Color A with a sc in the first unworked stem st of Row 8, the one next to the arm. Sc in the remaining 4 sts. (5 sts)
Rows 10–15: Ch 1, turn, sc in each st across. (5 sts each row)
Fasten off and weave in all ends.
Body check: The stem is 15 rows tall and 5 sts wide. The letter spans 16 sts from the stem’s outer edge to the tips of the arm and leg. It should measure 3.2 in (8.1 cm) × 3.0 in (7.6 cm).
There are two V-shaped notches. The top one separates stem Rows 10–15 from arm Rows 10–15, and the bottom one separates stem Rows 1–6 from leg Rows 1–6.
Part 5: Flowers and Leaves
Flower (make 3):
With Color A, make an MR.
Round 1: Ch 1, 5 sc in ring. Pull the ring closed and join with sl st to first sc. Fasten off. (5 sts)
Round 2: Join Color B in any st. (Sl st, ch 1, 2 hdc, ch 1, sl st) in the same st, move to next st. Repeat from * 5 times in total. (5 petals)
Fasten off, leaving a 10 in (25.4 cm) tail for sewing.
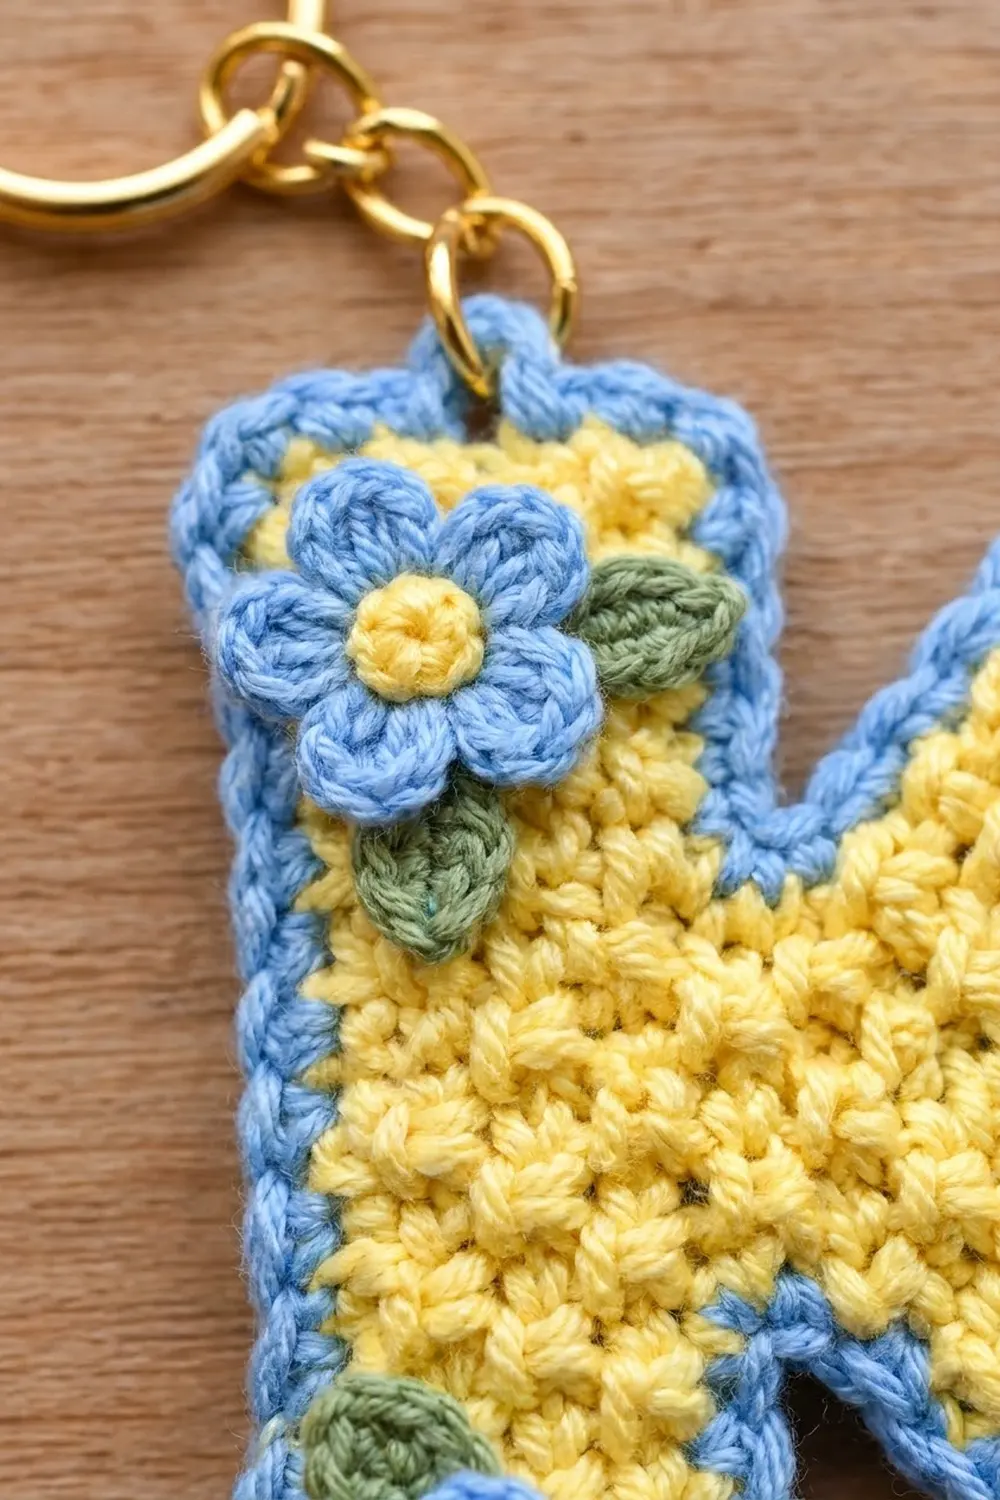
Each flower measures about 0.8 in (2.0 cm) across.
Leaf (make 5):
With Color C, ch 4. Sl st in 2nd ch from hook, hdc in next ch, sl st in last ch. Fasten off, leaving an 8 in (20.3 cm) tail.
Each leaf is about 0.4 in (1.0 cm) long.
You will sew the appliqués on after the border is done and the letter is blocked.
Border
Border gauge: One round of sc adds 0.2 in (0.5 cm) all the way around, matching the 5-rows-per-inch gauge.
Choose your front side. Join Color B in the top-left corner st of the stem top (Row 15). Work clockwise.
Round 1:
| Segment | Instructions | Count |
|---|---|---|
| Stem top | 3 sc in corner st, sc in next 3 sts, 3 sc in corner st | 9 |
| Stem inner edge, top notch | 1 sc in each row end, Rows 14–11 | 4 |
| Top notch point | sc2tog over the stem Row 10 end and the arm Row 10 end | 1 |
| Arm inner diagonal | Rows 11–14, alternating 1 sc, 2 sc per row end | 6 |
| Arm top | 2 sc in first st (obtuse corner), sc in next 3 sts, 3 sc in last st (sharp corner) | 8 |
| Arm outer diagonal | Rows 14–10, alternating 1 sc, 2 sc, starting and ending with 1 sc | 7 |
| Right-side junction | 1 sc in each row end, Rows 9, 8, 7 | 3 |
| Leg outer diagonal | Rows 6–2, alternating 1 sc, 2 sc, starting and ending with 1 sc | 7 |
| Leg bottom | 3 sc in first st (sharp corner), sc in next 3 sts, 2 sc in last st (obtuse corner) | 8 |
| Leg inner diagonal | Rows 2–5, alternating 1 sc, 2 sc | 6 |
| Bottom notch point | sc2tog over the leg Row 6 end and the stem Row 6 end | 1 |
| Stem inner edge, bottom notch | 1 sc in each row end, Rows 5–2 | 4 |
| Stem bottom | 3 sc in corner st, sc in next 3 sts, 3 sc in corner st | 9 |
| Stem outer edge | 1 sc in each row end, Rows 2–14 | 13 |
Join with sl st to first sc. (86 sts)
Round 2: Ch 1. Sl st loosely in each sc around. (86 sl sts)
Fasten off with an invisible join. This round forms the cord-like outer rim.
Why the math works:
– Straight edges: Gauge is 5 sts and 5 rows per inch, so straight side edges take exactly 1 sc per row end.
– Diagonal edges: Each diagonal row end covers about 1.41 times the length of a straight one, so alternating 1 sc and 2 sc (1.5 per row end) keeps the diagonals flat without flaring.
– Corners: Square and sharp corners get 3 sc to turn cleanly. The two obtuse corners (135 degrees) only need 2 sc.
– Notches: Each inside notch takes one sc2tog to keep the V crisp instead of puckered.
– Corner rows: The corner rows (Rows 1 and 15) are covered by the 3-sc and 2-sc corner groups, so their row ends are not counted again on the side edges.
Final Blocking
- Lightly mist the letter with water until it is damp, not soaked.
- Lay it front side up on the blocking mat.
- Pin the stem straight: 1.4 in (3.6 cm) wide with the border, and 3.4 in (8.6 cm) tall.
- Pin the arm and leg tips so the overall width is 3.6 in (9.1 cm).
- Pin each notch point so the V shapes are sharp and even.
- Run a fingertip along the border to settle the slip-stitch rim flat.
- Let it dry completely, then remove the pins.
Attaching Appliqués and Hardware
- Top flower: Center one flower on the upper stem, about Rows 12–15. Sew around the center ring and tack each petal tip. Tuck 2 leaves along its right side, one angled up and one angled down, and sew down along their centers.
- Arm flower: Place the second flower on the upper arm, close to the arm top. Add 2 leaves on its outer side.
- Bottom flower: Place the third flower on the lower stem, about Rows 2–5. Add 1 leaf above it, angled toward the upper left.
- Weave every tail into the back of the body only, so no stitches show on the front.
- Open the jump ring with two pairs of pliers. Pass it through the 5th (center) sc of the stem-top border, add the end link of the chain, and close the ring tightly.
- Thread the split ring onto the other end of the chain.
Final Quality-Control Checklist
- Body measures 3.2 in (8.1 cm) × 3.0 in (7.6 cm) before the border.
- Finished letter measures 3.6 in (9.1 cm) × 3.4 in (8.6 cm).
- Every arm and leg row has exactly 5 sts.
- Row 8 has 10 sts, and Border Round 1 has 86 sts.
- Both notches are sharp, with no gaps at the junction.
- The border lies flat, with no ruffling on the diagonals and no cupping at the corners.
- All 3 flowers have 5 even petals, and all 5 leaves are secured.
- The jump ring is fully closed, with no gap that could catch yarn.
Troubleshooting
- Arms look too steep: Your rows are taller than your stitches are wide. Work the rows slightly tighter, or go down a hook size.
- Arms look too flat: Your rows are short. Pull up taller loops.
- Stitch count drifts on a shift row: Make sure the sc2tog uses exactly 2 sts and the increase goes into the very last st.
- Diagonal border ruffles: Replace one 2-sc group with a single sc on that edge.
- Diagonal border pulls tight: Add one extra sc on that diagonal.
- Hole at the junction: Add another whipstitch with the leg tail before you work the border.
- Letter reads backward: Flip the piece over. The fabric is reversible, and a mirrored K turned over reads correctly.
Care
Hand wash in cool water with mild soap, press out the water in a towel, and dry flat. Keep metal hardware dry to protect the gold finish.
Final Notes
The whole design rests on one measurement chain:
– 5 sts and 5 rows per inch gives a 1 in (2.5 cm) stem and arms that slant at 45 degrees.
– 16 sts × 15 rows gives a 3.2 in × 3.0 in (8.1 cm × 7.6 cm) body.
– An 86-stitch border adds 0.2 in (0.5 cm) all around, for a finished 3.6 in × 3.4 in (9.1 cm × 8.6 cm) letter.
Check your gauge first, count each shift row, and the letter will come out even.
Happy crocheting!