
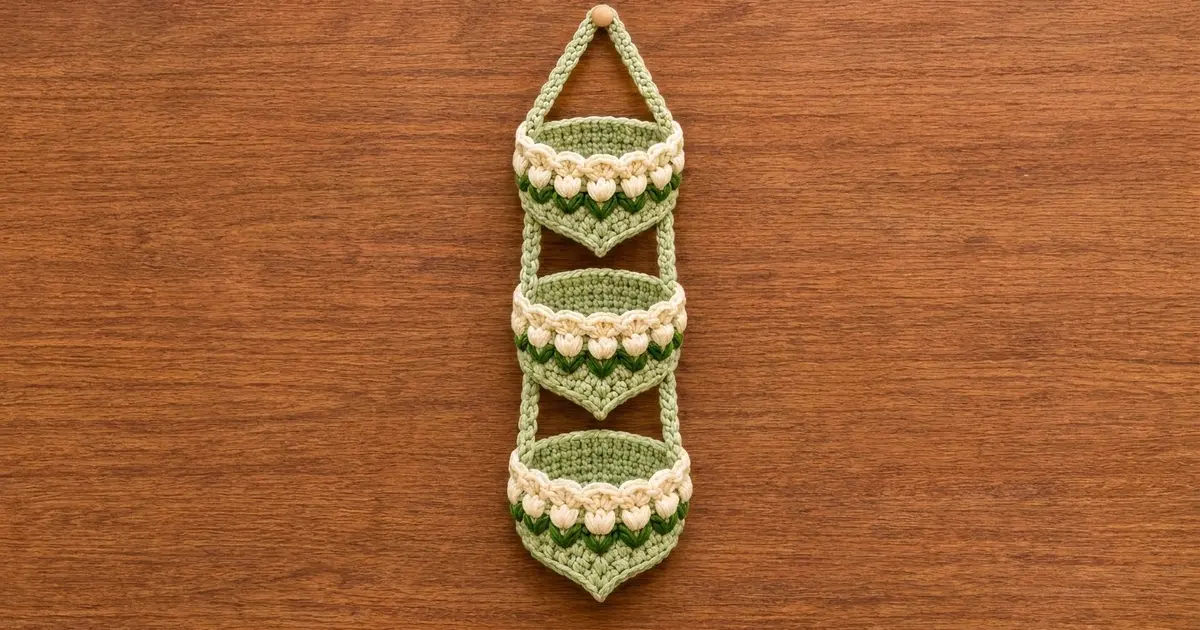
This hanging organizer stacks three small round baskets on two braided cords. Each basket has a sage green wall, a band of chunky cream tulips with dark green V-shaped leaves under them, and a scalloped cream rim. The base of each basket comes to a soft point at the front, so every tier ends in a little teardrop tip.
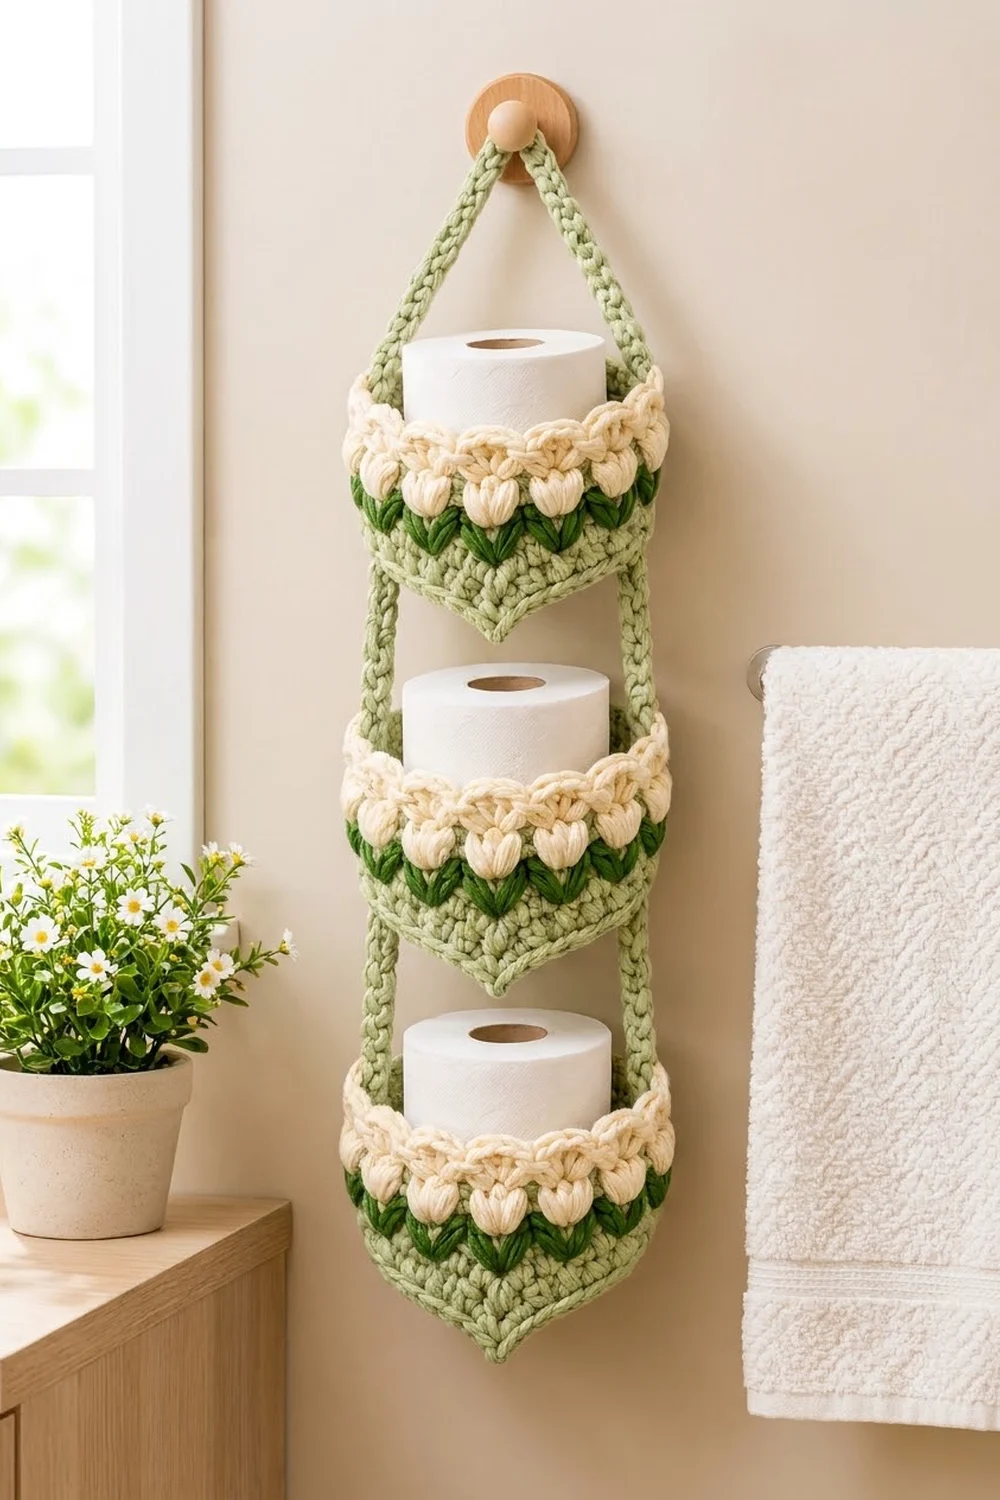
It uses three colors: sage green for the bases, walls, and cords, cream for the tulips and rim, and dark green for the leaves. It suits a cottage bathroom, and each basket holds one standard toilet roll with the top of the roll showing.
This pattern uses US crochet terms. Each basket is about 6.25 in (15.9 cm) across and 3.5 in (8.9 cm) tall at the wall. Hung up, the finished organizer is about 25 in (63.5 cm) long and 7.25 in (18.4 cm) wide, cords included.
You make three baskets from the bottom up: a flat teardrop base in double crochet, straight single crochet walls, a leaf round, a tulip round, and a shell rim. Then you make two braided cords and sew them to the sides of the baskets, and seam the cords together at the top to form the hanging point.
Finished Size and Construction
- Finished size: about 25 in (63.5 cm) long x 7.25 in (18.4 cm) wide when hung
- Skill level: Intermediate
- Terminology: US
- Yarn weight: Bulky (#5) cotton or cotton blend
- Hook: 6.0 mm
- Number of pieces: 5 (3 baskets, 2 cords)
- Layout: 3 baskets stacked vertically, 3 in (7.6 cm) apart, hung from 2 side cords
- Piece size (one basket): 6.25 in (15.9 cm) across x 3.5 in (8.9 cm) wall height
- Basket before rim (border): 3 in (7.6 cm) wall height
- Rim (border) depth: 0.5 in (1.3 cm)
Materials
Pick a firm, smooth cotton or cotton blend in bulky weight, about 110 m per 100 g (120 yd per 3.5 oz). Cotton keeps the walls upright and holds up to bathroom humidity. Don’t use soft acrylic, because it lets the baskets sag.
- Sage green (A): 200 g / 220 m (bases, walls, cords)
- Cream (B): 75 g / 83 m (tulips and rim)
- Dark green (C): 25 g / 28 m (leaves)
These quantities include a margin for a gauge swatch and differences in tension.
Tools: 6.0 mm crochet hook, tapestry needle, 6 locking stitch markers, scissors, measuring tape, and a wall peg or hook for hanging.
Abbreviations (US Terms)
- ch – chain
- sl st – slip stitch
- sc – single crochet
- hdc – half double crochet
- dc – double crochet
- tr – treble crochet
- BLO – back loop only
- st(s) – stitch(es)
- sp – space
- sk – skip
- rep – repeat
Puff (tulip): (Yo, insert hook in st, pull up a loop to about 0.5 in / 1.3 cm) 4 times, yo and pull through all 9 loops on hook, ch 1 to close. The closing ch-1 does not count as a stitch.
V-spike (leaf): Count down 2 rounds below the next stitch. Insert the hook into the stitch 1 to the right of that spot and pull up a long loop to the height of the working round. Insert into the stitch 1 to the left of that spot and pull up a long loop. Insert into the next stitch of the current round and pull up a loop. Yo and pull through all 4 loops. This uses up 1 stitch and leaves two slanted strands that meet in a V.
Shell: 5 dc in the same stitch.
Gauge and Checkpoints
Gauge: 13 sc x 14 rounds = 4 in (10.2 cm) in sc.
Make one full basket before you start the other two. Stop and measure at each checkpoint:
- After Round 5 (base): 6 in (15.2 cm) across
- After Round 6 (tip round): 6.5 in (16.5 cm) wide and 7.25 in (18.4 cm) from the back edge to the tip
- After Round 12 (sage wall): wall height 1.75 in (4.4 cm)
- After Round 15: wall height 3 in (7.6 cm), about 6.25 in (15.9 cm) across
- After Round 16 (rim): wall height 3.5 in (8.9 cm)
If the basket is too big, drop to a 5.5 mm hook. If it’s too small or stiff, go up to a 6.5 mm hook. Change hooks before you change any stitch counts. All of the repeats depend on 60 stitches in the base and 64 in the wall.
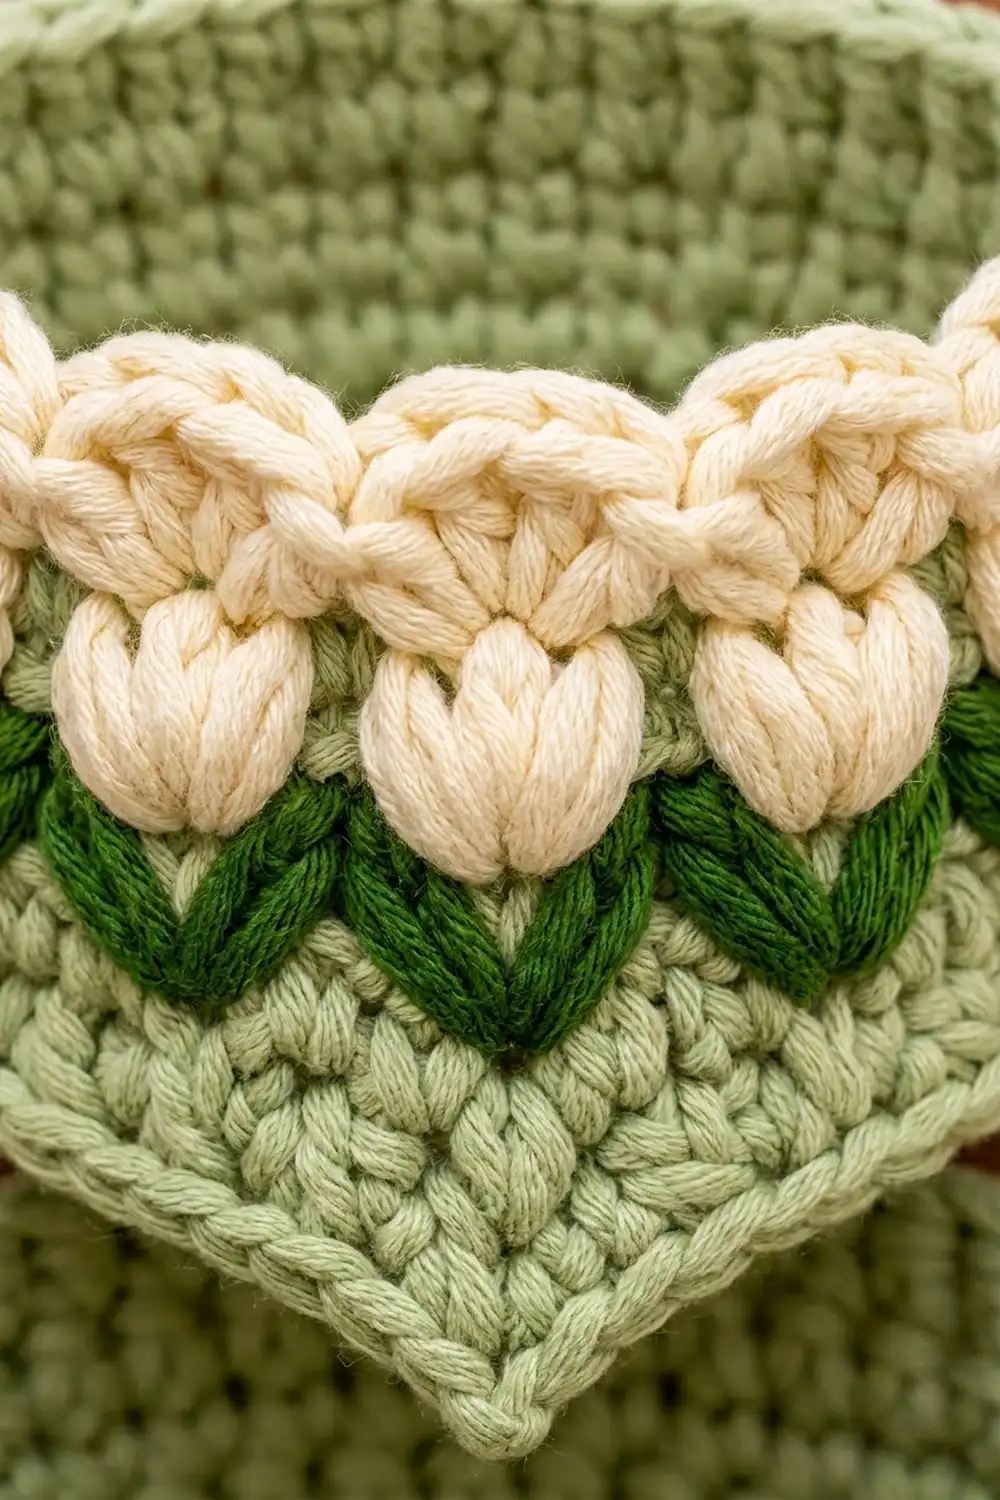
Basket (Make 3)
Join each round with a sl st to the first stitch. The beginning ch-1 or ch-2 never counts as a stitch. To change color, work the final yo of the joining sl st in the new color.
Base
With A:
Round 1: Make a magic ring, ch 2, 12 dc in ring, join. Pull the ring closed. (12 sts)
Round 2: Ch 2, 2 dc in each st around, join. (24 sts)
Round 3: Ch 2, dc in next st, 2 dc in next st; rep from * around, join. (36 sts)
Round 4: Ch 2, dc in next 2 sts, 2 dc in next st; rep from * around, join. (48 sts)
Round 5: Ch 2, dc in next 3 sts, 2 dc in next st; rep from * around, join. (60 sts)
The base should measure 6 in (15.2 cm) across and lie flat.
Round 6 (tip round, conversion): Ch 1, sc in next 26 sts, hdc in next 2 sts, dc in next st, (dc, tr, ch 2, tr, dc) in next st, dc in next st, hdc in next 2 sts, sc in next 27 sts, join.
Count: 59 sts worked 1 per existing st + 4 sts in the tip st = 63 sts, plus the ch-2 tip sp. That is 60 + 3 extra = 63 sts.
Put a marker in the ch-2 tip sp. The increasing stitch heights draw the rounded edge out into a teardrop point.
Walls
Round 7 (turning round, conversion): Ch 1, working in BLO, sc in each st around, and work 1 sc in the ch-2 tip sp when you reach it, join.
Count: 63 sts worked 1 per existing st + 1 sc in the tip sp = 64 sts.
Move the tip marker up to the sc you made in the tip sp. Working in the back loops turns the wall up and leaves a neat ridge around the base.
Rounds 8–12: Ch 1, sc in each st around, join. (64 sts in each round)
Move the tip marker up every round. Count 16 sts to the left of the tip and 16 sts to the right of it, and place a side marker in each of those stitches. Move these up too. The two side markers split the round into a 32-st front half and a 32-st back half, and they show where the cords go. On the last join, change to C.
Leaf Round
Round 13 (C): Ch 1, sc in next st, V-spike in next st, sc in next 2 sts; rep from * 15 more times, join. (64 sts: 16 V-spikes + 48 sc)
The V-spikes reach down into Round 11, so the leaf strands lie over the sage wall. Work them loosely so the wall doesn’t pucker. On the join, change to B.
Tulip Round
Round 14 (B): Ch 1, sc in next st, puff in next st (the V-spike), sc in next 2 sts; rep from * 15 more times, join. (64 sts: 16 puffs + 48 sc)
Each puff sits right above a V, so it looks like a tulip head on its leaves. Push the puffs to the right side with your finger as you work.
Round 15 (B): Ch 1, sc in each sc and in the top of each puff, but don’t work into the ch-1 that closes each puff, join. (64 sts)
Wall height should now be 3 in (7.6 cm). This is your size before the border.
Border (Shell Rim)
Border gauge: Each shell repeat uses 4 wall stitches, which is about 1.25 in (3.2 cm) at gauge. Sixteen repeats come to 19.7 in (50.0 cm), which is the circumference of the wall.
Round 16 (B, conversion): Ch 1, sk first st, shell in next st, sk next st, sc in next st; sk next st, shell in next st, sk next st, sc in next st; rep from * 14 more times, join to the first dc. Fasten off and weave in the ends.
Count per half (side): The 32 sts between the side markers on the front give 8 shells and 8 sc, which is 48 sts. The back is the same, 48 sts.
Total: (16 shells x 5 dc) + (16 sc x 1) = 96 sts, worked over the 64 existing sts (16 sts get shells, 16 get sc, 32 are skipped).
Why the math works: 64 divides evenly by 4, so the rim, the tulips, and the leaves all use the same 4-st repeat. Each shell goes into the second st of a repeat, the same spot as the puff below it. That puts every scallop right over a tulip. The side markers fall between repeats, so you get exactly 8 shells on each half and the cords sit in the dips between scallops.
Cords (Make 2)
The cords use a braided cord technique, sometimes called Romanian cord. With A:
Start: Ch 2, sc in 2nd ch from hook.
Row 1: Turn the work clockwise. Don’t chain. Insert the hook under the single loop on the left edge (the first chain), and sc.
Row 2 and on: Turn clockwise, insert the hook under the 2 loops on the left edge, and sc.
Repeat Row 2 until the cord has 98 rows. Leave a 12 in (30.5 cm) tail.
Cord gauge: 4 rows = 1 in (2.5 cm). The cord is 0.5 in (1.3 cm) wide.
Length checkpoint: 98 rows = 24.5 in (62.2 cm). Every cord measurement below comes from this row count.
Make All Pieces
- Baskets: 3, each needing about 50 g A, 20 g B, and 5 g C
- Cords: 2, each needing about 12 g A
Lay everything out like this before you join it (top to bottom):
        /\         apex: cord tops seamed together
       /  \        8 in (20.3 cm) per cord, 32 rows
      |B1  |       Basket 1: 3.5 in (8.9 cm), 14 rows
      |    |       gap: 3 in (7.6 cm), 12 rows
      |B2  |       Basket 2: 3.5 in (8.9 cm), 14 rows
      |    |       gap: 3 in (7.6 cm), 12 rows
      |B3  |       Basket 3: 3.5 in (8.9 cm), 14 rows
       \/          tip of Basket 3
Cord rows add up as 32 + 14 + 12 + 14 + 12 + 14 = 98 rows per cord.
Joining
Method: Whipstitch the cords onto the outside of each basket wall with A.
Mark the cords first. On each cord, starting at the top, put markers after row 32, row 46, row 58, row 72, and row 84. Rows 33–46, 59–72, and 85–98 are the basket sections. Rows 47–58 and 73–84 are the open gaps.
Stitch-to-stitch logic: The wall has 10 rounds (Rounds 7–16) and each basket section of the cord has 14 rows. Join 14 cord rows to 10 wall rounds by working into each wall round once and adding 1 extra stitch into the cord on every 2nd or 3rd round. That works out to 4 extra stitches, spread evenly.
- Line up row 33 of the first cord with the top of Round 16 on Basket 1, centered over the left side marker.
- Whipstitch down the wall to Round 7. Row 46 should land on the ridge at the base. Work through the back half of the cord only, so the braid stays on the outside.
- Do the same on the right side marker with the second cord.
- Attach Basket 2 at rows 59–72 and Basket 3 at rows 85–98 in the same way.
- Lay the top ends of the two cords end to end at the apex and whipstitch the last rows together. This butt joint makes a smooth bend that sits over the peg.
Tension advice: Pull each stitch just snug. If it’s too tight, the wall dents. If it’s too loose, the baskets tip forward when they’re full.
Size checkpoint: Measure each gap between the rim of one basket and the base ridge of the next. It should be 3 in (7.6 cm), and the hanging length should be about 25 in (63.5 cm).
Final Blocking
- Lightly mist the baskets and cords with water.
- Fill each basket with a toilet roll or a rolled towel that is about 4.5 in (11.4 cm) across.
- Pinch each base tip into a neat point.
- Shape the shells into even scallops with your fingers, and push each puff outward.
- Hang the organizer while it’s still damp so the cords straighten under the weight.
- Let it dry completely, about 24 hours, before taking out the forms.
Final Quality-Control Checklist
- 3 baskets, each with 64 sts in the wall and 16 tulips
- Each tulip sits right above a V-leaf and right below a shell
- Bases 6.5 in (16.5 cm) wide, each with a clear point
- Walls 3.5 in (8.9 cm) high, 6.25 in (15.9 cm) across
- Cords 24.5 in (62.2 cm), 98 rows each
- Gaps between baskets 3 in (7.6 cm)
- Cords centered on the side markers on every basket
- Apex seam smooth, all ends woven in
Troubleshooting
Base cups or ruffles: If it cups, go up a hook size for the base. If it ruffles, go down a size. Check for exactly 60 sts after Round 5.
Tip is rounded, not pointed: Make sure the tr and ch-2 are in one stitch, and work the Round 7 sc into the ch-2 sp, not around it.
Tulips are flat: Pull the puff loops up taller and close each one firmly with the ch-1.
V-leaves pull the wall in: Draw the spike loops all the way up to the height of the working round.
Shells lean to one side: Count the repeats again. You need 16 shells, and each one goes into the second st of a 4-st repeat.
Baskets tilt forward: Re-sew the cords so they sit exactly on the side markers. Uneven placement shifts the balance.
Care
Hand wash in cool water with mild soap, then reshape the baskets over a roll and hang to dry. Don’t wring or tumble dry them.
Final Notes
Everything in this pattern follows from a short chain of measurements. Thirteen sc to 4 in (10.2 cm) gives a 60-st base 6 in (15.2 cm) across. That turns into a 64-st wall 6.25 in (15.9 cm) across and 3.5 in (8.9 cm) high, with 16 matching tulips, leaves, and shells. Two 98-row cords, 24.5 in (62.2 cm) each, hold the three baskets 3 in (7.6 cm) apart, for a finished organizer about 25 in (63.5 cm) long. If the measurements match at each checkpoint, the finished piece will too.
Happy crocheting!