
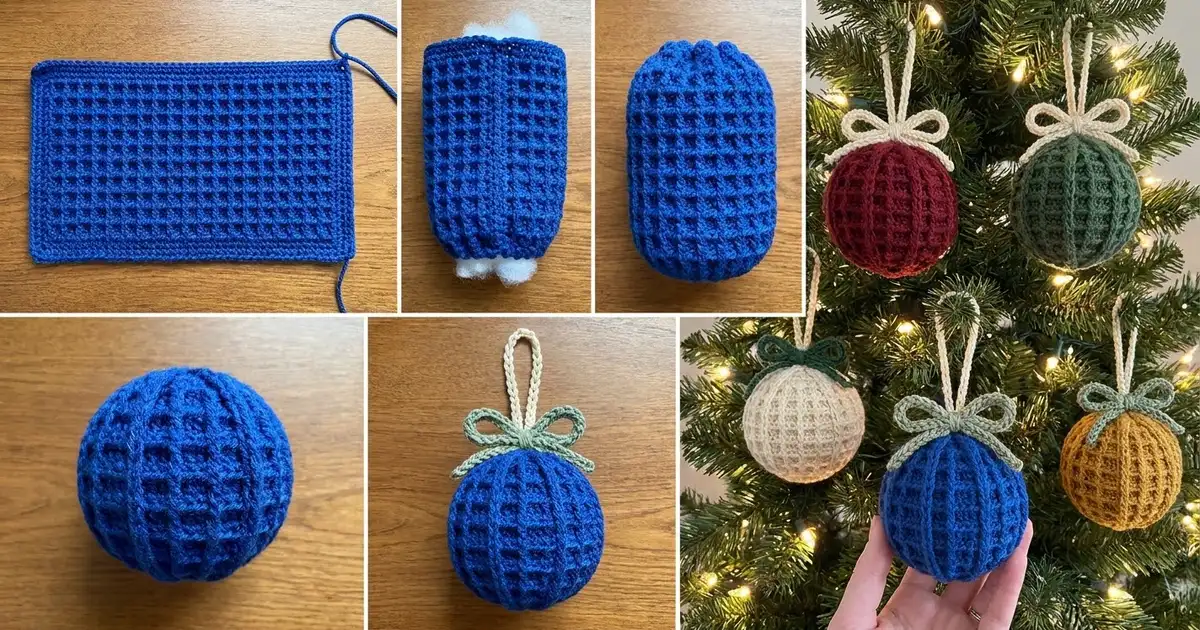
The Winter Waffle Ornament is a round, stuffed Christmas ball covered in a raised grid of ridges and small recessed squares. Rows of post stitches give it the look of a knitted waffle or a quilted bauble, with deep texture that catches the tree lights.
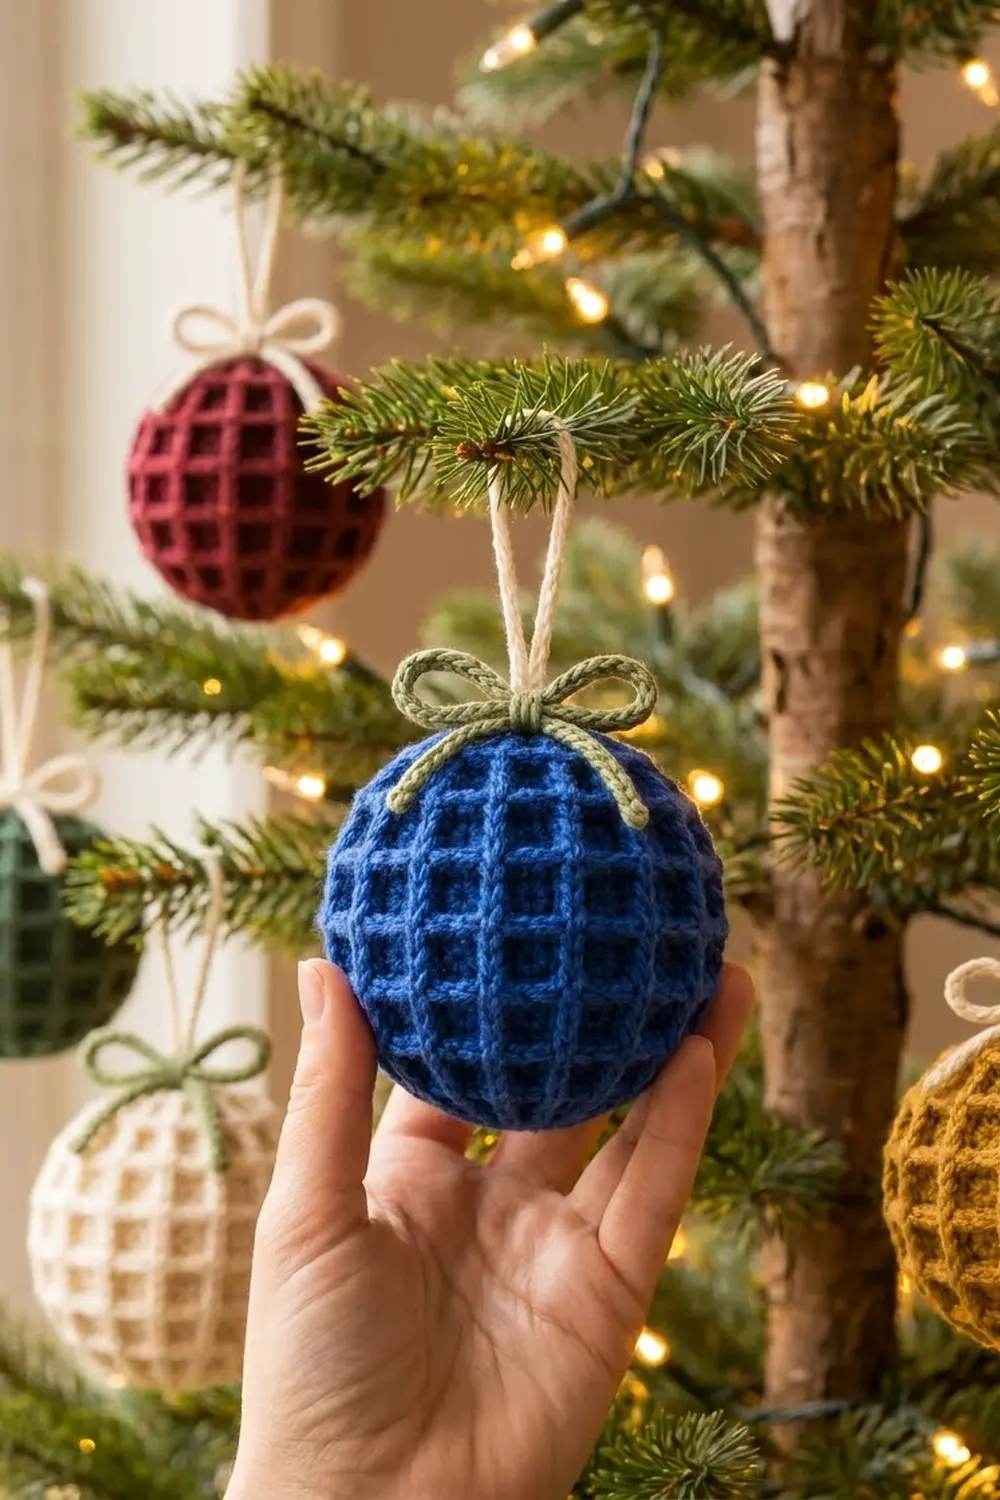
The sample is royal blue with a cream hanging loop and a sage-green bow. It also works well in deep red, forest green, cream or mustard gold. Hang a few colors together for a classic but slightly rustic look. This pattern uses US crochet terms.
The finished ball measures about 3½ in (8.9 cm) across and about 11½ in (29.2 cm) around the middle. With the loop added, the ornament is about 7.1 in (18.0 cm) tall.
The construction is simple. You crochet one flat waffle-stitch rectangle, edge it with one round of single crochet, seam the short sides into a tube, then gather, stuff and close it into a sphere. A chain loop and a chain bow finish the top.
Finished Size and Construction
- Finished size: about 3½ in (8.9 cm) across; about 11½ in (29.2 cm) around
- Skill level: Easy-intermediate (you need to know front and back post stitches)
- Terminology: US crochet terms
- Yarn weight: Worsted (#4)
- Hook: 5.0 mm (US H-8)
- Number of pieces: 1 body panel, plus a chain loop and a chain bow as trims
- Layout: One rectangle, seamed into a tube and gathered at both ends
- Panel size before border: 11 in × 5.2 in (27.9 cm × 13.2 cm)
- Panel size after border: 11½ in × 5.7 in (29.2 cm × 14.5 cm)
- Border depth: ¼ in (0.6 cm) on each edge
Materials
Choose a smooth, firmly twisted worsted-weight yarn, either cotton or acrylic. Post stitches show up best in a plied yarn with good stitch definition. Avoid fuzzy or very loosely spun yarn, because it blurs the grid.
Yarn (per ornament):
– Main color (MC), royal blue: 18 g / about 36 m (39 yd)
– Loop color (A), cream: 4 g / about 8 m (9 yd)
– Bow color (B), sage green: 3 g / about 6 m (7 yd)
These quantities include a margin of about 15% for swatching and seaming.
Tools:
– 5.0 mm (US H-8) crochet hook
– Tapestry needle
– About 10 g of polyester fiberfill
– Scissors
– Stitch markers
– Ruler or tape measure
– Steam iron or garment steamer (optional)
Abbreviations (US Terms)
- ch: chain
- sl st: slip stitch
- sc: single crochet
- dc: double crochet
- FPdc: front post double crochet
- BPdc: back post double crochet
- st(s): stitch(es)
- RS / WS: right side / wrong side
- [ ]: repeat the stitches in brackets the number of times stated
Special stitch – FPdc: Yarn over and insert the hook from front to back to front around the post of the stitch below. Yarn over and pull up a loop, then [yarn over, pull through 2 loops] twice.
Pattern note: The ch-2 at the start of each row does not count as a stitch.
Gauge and Checkpoints
Gauge in waffle pattern: 12 sts and 10 rows = 4 in (10.2 cm), measured after Row 5 and a light steam.
The body is a single piece, so the panel works as your gauge swatch. Check it early.
- After Row 1: 33 dc should measure 11 in (27.9 cm) wide.
- After Row 5: the panel should be 2 in (5.1 cm) tall.
- After Row 13: 11 in × 5.2 in (27.9 cm × 13.2 cm).
- After the border: 11½ in × 5.7 in (29.2 cm × 14.5 cm).
If the panel is too big, go down to a 4.5 mm hook. A larger panel makes a softer, larger ball that needs more stuffing and tends to sag at the poles.
If the panel is too small, go up to a 5.5 mm hook. A smaller panel is fine, but the squares will look tighter and the ball will be smaller.
Post stitches pull the fabric in, so measure in the middle of the panel, not at the edges.
The Waffle Panel
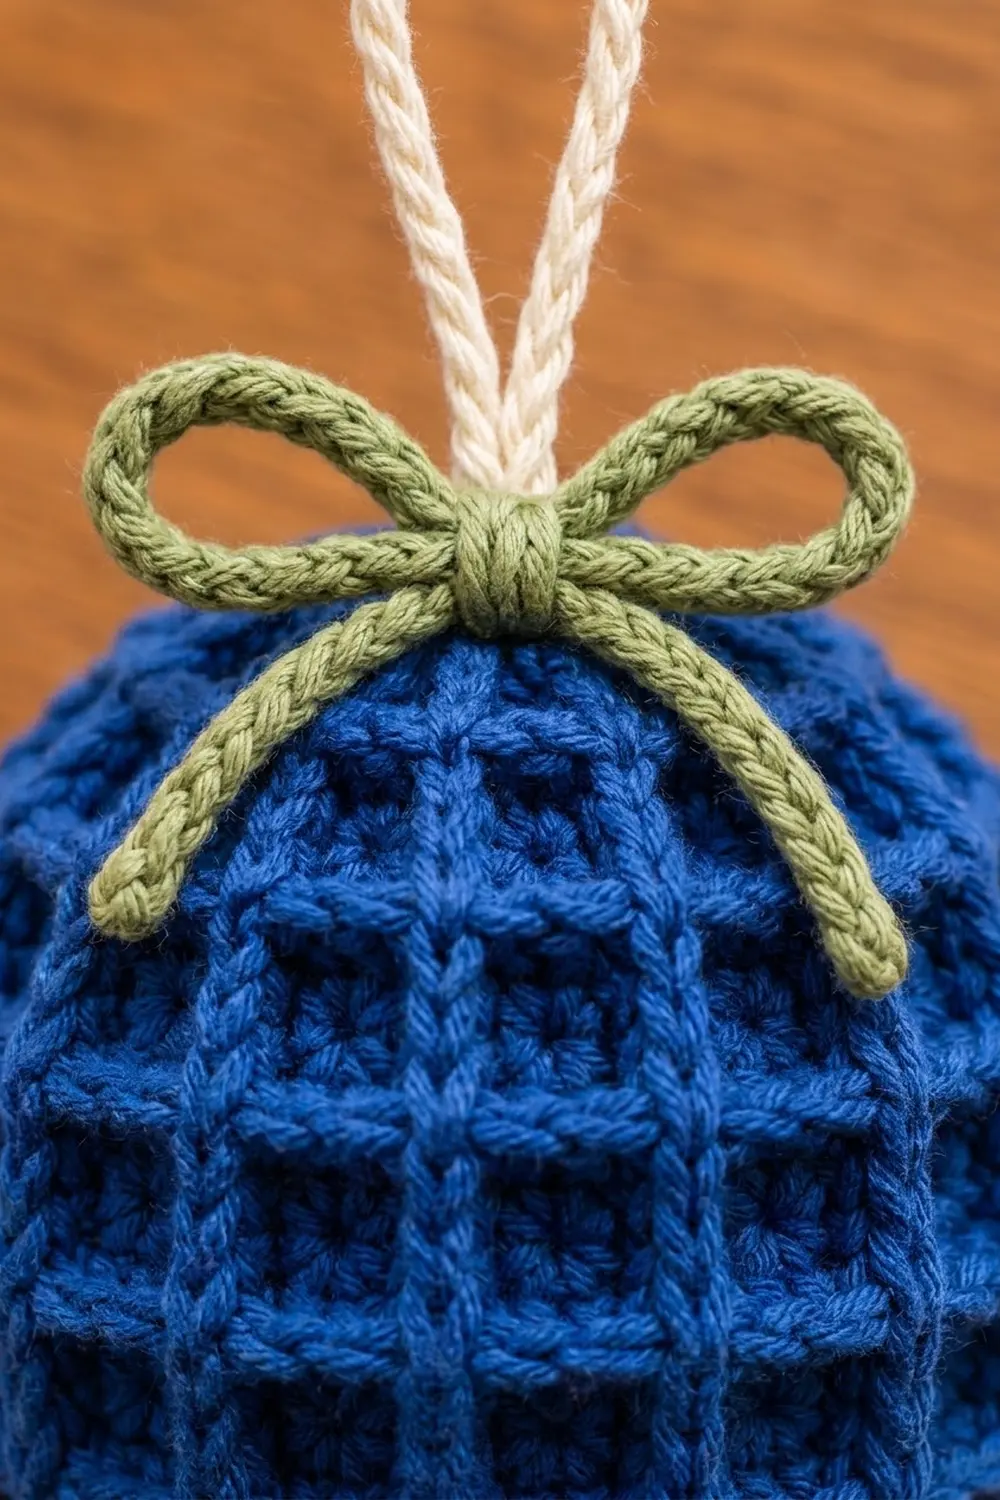
The rows run around the ball’s circumference. The vertical post ridges become the ribs that meet at the poles. Grid rows and ridge rows alternate, so every recessed square is 2 dc wide and 1 row tall.
Foundation: With MC, ch 35.
Row 1 (RS): Dc in 3rd ch from hook and in each ch across. Turn. (33 dc)
Row 2 (WS, ridge row): Ch 2, dc in first st, FPdc around each of next 31 sts, dc in last st. Turn. (33 sts: 2 dc + 31 FPdc)
Working front post from the WS pushes the tops of Row 1 to the RS, where they form a raised horizontal ridge.
Row 3 (RS, grid row): Ch 2, dc in first st, [FPdc around next st, dc in next 2 sts] 10 times, FPdc around next st, dc in last st. Turn. (33 sts: 11 FPdc + 22 dc)
The 11 FPdc sit in stitch positions 2, 5, 8 and so on up to 32. They form the vertical ridges. Each pair of plain dc between them forms a recessed square.
Rows 4–13: Repeat Rows 2 and 3 five more times. Each row has 33 sts. Do not fasten off.
Check: You now have 6 grid rows (3, 5, 7, 9, 11, 13) and 6 ridge rows (2, 4, 6, 8, 10, 12). The vertical ridges should line up in straight columns, because each FPdc is worked around the stitch directly below the previous ridge. The panel should measure 11 in × 5.2 in (27.9 cm × 13.2 cm).
Across one row there are 10 full squares, plus a single dc square-half at each edge. After seaming, those two halves meet to form the 11th square. That gives 11 squares around and 11 ribs around the ball.
Border
The border is one round of single crochet. It gives a firm, rope-like edge for seaming and a sturdy line for gathering. It also forms the final horizontal ridge at the top of the panel.
Border gauge: 1 sc in each stitch along the top and bottom edges, and 2 sc in each dc row-end along the short sides.
Round 1 (RS): Continue from Row 13 without turning, and work down the short side.
- Short side: Work 2 sc in each of the 13 row-ends. (26 sc)
- Corner: Work 3 sc in the first foundation ch.
- Bottom: Work 1 sc in each of the next 31 foundation chs.
- Corner: Work 3 sc in the last foundation ch.
- Second short side: Work 2 sc in each of the 13 row-ends. (26 sc)
- Corner: Work 3 sc in the first st of Row 13.
- Top: Work 1 sc in each of the next 31 sts.
- Corner: Work 3 sc in the last st of Row 13.
- Join with sl st to first sc. Fasten off, leaving a 16 in (40.6 cm) tail for seaming.
Total: 126 sc
Per-side counts: Count each side from corner center to corner center, including both corner centers.
- Top and bottom: 35 sc each (1 center + 1 side sc of the corner, 31 sc, 1 side sc + 1 center of the corner)
- Short sides: 30 sc each (1 + 1 + 26 + 1 + 1)
Why the math works: 35 + 35 + 30 + 30 = 130. The 4 corner centers are each counted on two sides, so subtract 4 to get 126. That matches the stitch-by-stitch total of 31 + 31 + 26 + 26 + (4 × 3) = 126. One sc per stitch keeps the long edges flat. Two sc per dc row-end matches the height of a dc row, so the short sides neither ruffle nor pull in.
Checkpoint: 11½ in × 5.7 in (29.2 cm × 14.5 cm).
Assemble the Ornament
1. Seam the tube. Fold the panel RS out so the two short sides meet. With the long tail, whipstitch the 30 sc of one side to the 30 sc of the other, stitch for stitch, through the back loops only. The seam disappears into a vertical ridge, and the two square-halves form one full square. The tube should measure 11½ in (29.2 cm) around.
2. Gather the bottom. Thread a 12 in (30.5 cm) length of MC. Weave it in and out through the front loops of all 35 sc of the bottom edge. Pull tight until the opening closes, knot securely, and push the knot inside. The ribs will now pull together at the base.
3. Stuff. Fill the tube firmly with fiberfill until it forms a rounded cup. It should feel springy, not hard.
4. Gather the top. Weave a second length of MC through the 35 sc of the top edge in the same way. Add a little more stuffing so the shoulders stay round, then pull closed, knot, and bring the tails up through the center.
5. Hanging loop. Hold two strands of A together and ch 36, about 7.2 in (18.3 cm). Fasten off. Fold the chain in half and sew both ends to the top center of the ball to make a loop about 3.6 in (9.1 cm) tall.
6. Bow. With one strand of B, ch 50, about 10 in (25.4 cm). Fasten off. Wrap the chain once around the base of the loop and tie a bow with two loops about 1.2 in (3.0 cm) wide. Tack the knot to the ball with B so the bow cannot twist.
Weave in all ends inside the ball.
Final Blocking
- Roll the ball between your palms to spread the stuffing evenly.
- Hold a steamer or steam iron about 1 in (2.5 cm) above the surface. Do not press.
- While the yarn is warm, use your fingers to straighten each vertical rib so it runs directly from pole to pole.
- Nudge the horizontal ridges so they sit as level rings.
- Pinch the bow loops into shape and let them cool flat.
- Let the ornament dry and cool completely, about 30 minutes, before hanging.
- Check: about 3½ in (8.9 cm) across.
Final Quality-Control Checklist
- Every row had 33 sts.
- 11 vertical ribs run straight from the bottom pole to the top pole.
- 6 rows of recessed squares, separated by raised horizontal rings.
- The border has 126 sc: 35 on top and bottom, 30 on each short side.
- The seam is hidden inside a rib, and the square there matches the others.
- Both poles are fully closed, with no stuffing showing.
- The ball is about 3½ in (8.9 cm) across and 11½ in (29.2 cm) around.
- The loop is about 3.6 in (9.1 cm) tall and firmly anchored.
- The bow is centered, symmetrical and tacked down.
- All ends are hidden inside.
Troubleshooting
The ribs zigzag. A FPdc was worked around the wrong stitch. Each grid-row FPdc must go around the stitch directly below the previous FPdc, at positions 2, 5, 8 and so on up to 32.
The horizontal ridges show on the WS. The ridge rows must be worked as FPdc from the WS. If you worked them as BPdc, the ridges land on the wrong face.
The panel narrows as you go. Post stitches tighten quickly. Loosen your yarn-overs, and check that the first and last stitches are plain dc and not skipped.
The short sides ruffle. You worked more than 2 sc per row-end. Rework them to exactly 26 sc per side.
There is a gap at the poles. Weave through every stitch, pull firmly, and add a second pass of the gathering yarn if needed.
The ball looks lumpy. Add stuffing in small tufts, not one large wad, and roll the ball before closing.
The loop tilts. Sew both ends of the chain to the exact center of the gathered top, then tack the bow knot over them.
Care
Spot clean with a damp cloth and mild soap, then reshape and air dry. Store with other ornaments in a padded box so the ribs don’t get crushed.
Final Notes
The measurement chain is short and easy to check:
- 33 sts at 12 sts per 4 in (10.2 cm) give an 11 in (27.9 cm) panel width.
- 13 rows at 10 rows per 4 in (10.2 cm) give 5.2 in (13.2 cm) of height.
- The 126-sc border brings the panel to 11½ in × 5.7 in (29.2 cm × 14.5 cm).
- Seaming the 30-sc short sides makes an 11½ in (29.2 cm) tube.
- Gathering 35 sc at each pole and stuffing gives a ball about 3½ in (8.9 cm) across.
If the first two checkpoints are correct, the rest follows. Once you have made one, try a full set in red, green, cream and gold.
Happy crocheting!