
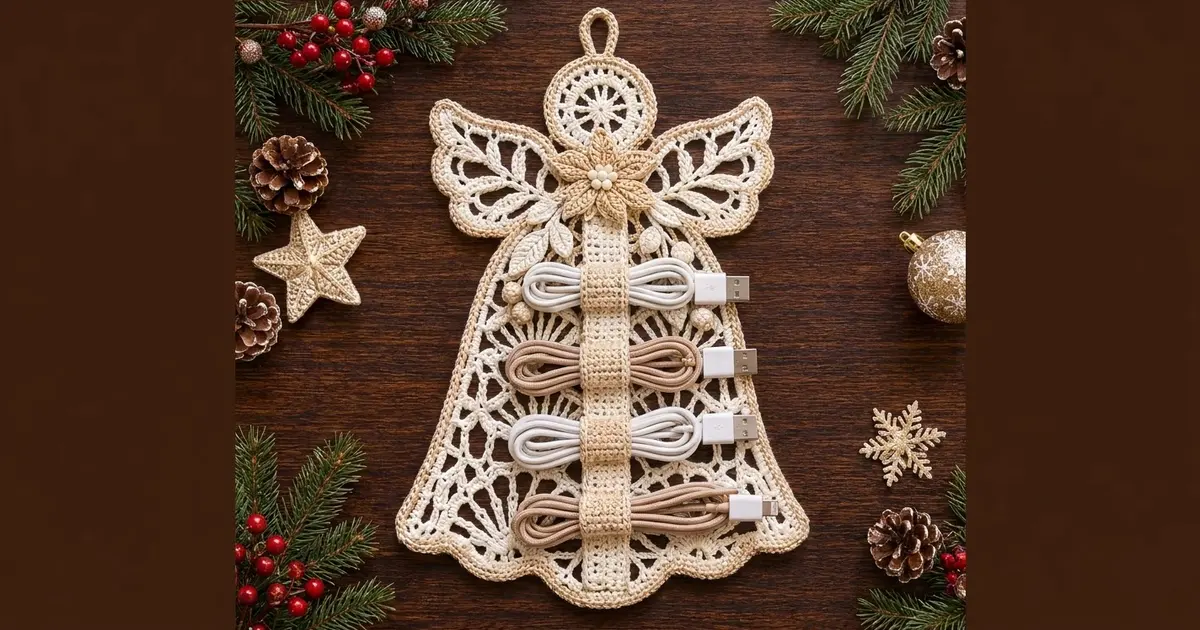
This lace angel is a Christmas wall hanging that also does a job. It has a round wheel-spoke head, two feathered wings, and a bell-shaped skirt of fans and pointed openings. A firm strap with four arched loops runs down the center and holds coiled charging cables.
The colors are soft and wintry. Ivory is used for the lace, strap, loops, leaves, and berries. Warm beige is used for the outline border, the hanging loop, and the large petals of the layered flower at the neckline.
All instructions use US crochet terms. The finished angel measures about 11.3 in (28.7 cm) wide by 12.5 in (31.8 cm) tall, plus a 1.3 in (3.3 cm) hanging loop.
Here’s the construction in order:
1. Crochet the head in rounds.
2. Work the skirt in rows straight off the head.
3. Make the two wings and sew them on.
4. Add a beige border around the whole outline.
5. Sew on the strap, loops, flower, leaves, and berries.
Finished Size and Construction
- Finished size: 11.3 in (28.7 cm) x 12.5 in (31.8 cm), not counting the hanging loop
- Skill level: Intermediate
- Terminology: US
- Yarn weight: Sport (#2) mercerized cotton
- Hook: 2.75 mm (C-2)
- Number of pieces: 16 (head/skirt panel, 2 wings, 2 flower layers, 4 leaves, 2 berry sprigs, 1 strap, 4 cable loops)
- Layout: one angel panel with appliqués and a center strap
- Head size: 3 in (7.6 cm) across
- Size before border: 10.8 in (27.4 cm) x 12 in (30.5 cm)
- Border depth: 0.25 in (0.6 cm)
Materials
Use a smooth mercerized cotton. It shows the lace clearly and keeps the strap firm enough to hold cables. Avoid fuzzy or stretchy yarns.
- Ivory: 80 g / 248 m (panel, wings, strap, loops, leaves, berries, small flower layer)
- Beige: 30 g / 93 m (border, hanging loop, large flower layer, loop edging)
- 2.75 mm (C-2) hook
- Tapestry needle
- Stitch markers
- Rustproof pins and a blocking mat
- Spray bottle
- Optional: 3 small ivory pearl beads
These amounts include about 15% extra for swatching and sewing tails.
Abbreviations (US Terms)
- ch: chain
- sl st: slip stitch
- sc: single crochet
- hdc: half double crochet
- dc: double crochet
- rev sc: reverse single crochet (crab stitch)
- sk: skip
- sp: space
- st(s): stitch(es)
- RS / WS: right side / wrong side
Bobble: *Yarn over (yo), insert hook in st, pull up a loop, yo, draw through 2 loops; repeat from * 4 more times in the same st (6 loops on hook). Yo and draw through all 6 loops.
Gauge and Checkpoints
Gauge:
– 24 dc and 10 rows = 4 in (10.2 cm)
– 24 sc and 28 rows = 4 in (10.2 cm)
Use the head as your test piece. It should measure 3 in (7.6 cm) across before you start the skirt.
Checkpoints:
– Head after Round 4: 3 in (7.6 cm)
– Skirt Row 1: 4.2 in (10.7 cm) wide
– Skirt Row 9: 6.8 in (17.3 cm) wide
– Skirt Row 21: 10.8 in (27.4 cm) wide and 8.4 in (21.3 cm) long, measured from the head
– Wing: 2.6 in (6.6 cm) from the ring to the feather tips
If your piece is too big, go down half a hook size. If it’s too small, go up half a hook size. Lace stretches when blocked, so pin your swatch before you measure it.
Head (Wheel Medallion)
Use ivory.
Round 1: Ch 6 and sl st to form a ring. Ch 3 (counts as dc), 15 dc in the ring. Join to the top of the ch-3. (16 dc)
Round 2: Ch 5 (counts as dc + ch 2). Dc in next dc, ch 2; repeat from * 14 times. Join to the 3rd ch of the ch-5. (16 dc, 16 ch-2 sps)* These are the spokes of the wheel.
Round 3: Sl st into the first ch-2 sp. Ch 3 (counts as dc), dc in the same sp, dc in next dc. 2 dc in next sp, dc in next dc; repeat from * 14 times. The last dc goes in the 3rd ch of the beginning ch-5. Join. (16 dc worked 1 per dc + 32 dc in spaces = 48 dc)*
Round 4: Ch 1. Sc in next 5 sts, 2 sc in next st; repeat from * 7 more times. Join. (48 sts worked + 8 extra = 56 sc)* Fasten off.
Fold the head in half with the join at the top. Mark 13 stitches in a row, centered at the bottom.
Skirt
Use ivory. Work in turned rows.
Row 1 (RS): Join yarn in the first marked st. Ch 3 (counts as dc), dc in the same st, 2 dc in each of the next 11 sts, dc in the last marked st. Turn. (13 sts worked + 12 extra = 25 dc)
Shaping rule for Rows 2–21:
– Start every row with ch 3 (counts as dc), then dc in the first st.
– Dc in each edge dc until you reach the lace.
– Work the lace across.
– Dc in each edge dc up to the last st, then work 2 dc in the last st.
This adds 1 edge dc at each end of every row. After 4 rows, each side has 4 new edge stitches, which makes exactly one new 8-stitch repeat. Count every chain as a stitch.
Lace rows (multiple of 8 + 1):
– Row A (fans): Dc in first st. Sk 3 sts, 7 dc in next st, sk 3 sts, dc in next st; repeat from .
– Row B: Dc in first dc. Ch 1, sk 1 dc, dc in next 5 dc, ch 1, sk 1 dc, dc in next dc; repeat from .
– Row C: Dc in first dc. Ch 3, sk the ch-1 sp and 2 dc, sc in next dc, ch 3, sk 2 dc and the ch-1 sp, dc in next dc; repeat from .
– Row D: Dc in first dc. Ch 3, dc in next sc, ch 3, dc in next dc; repeat from .
The ch-3 arches in Rows C and D form pointed oval openings between the fans. Each repeat stays at 8 stitches.
Work Rows A–D in each of these groups. Every row is one dc wider at each end than the row before.
| Rows | Stitch totals |
|---|---|
| 2–5 | 27, 29, 31, 33 |
| 6–9 (now across the full width) | 35, 37, 39, 41 |
| 10–13 | 43, 45, 47, 49 |
| 14–17 | 51, 53, 55, 57 |
| 18–21 | 59, 61, 63, 65 |
The new edge stitches join the lace at the start of each group. Because of this, each band of fans sits half a repeat over from the band below, which gives the honeycomb look.
Row 22 (scallop hem): Ch 1, sc in first st. Sk 3 sts, 9 dc in next st, sk 3 sts, sc in next st; repeat from * 7 more times. Fasten off. (8 scallops, 81 sts)*
Wings (Make 2)
Use ivory.
Row 1: Ch 4 and sl st to form a ring. Ch 3 (counts as dc), 6 dc in the ring. Turn. Pull the tail to tighten the ring. (7 dc)
Row 2: Ch 4 (counts as dc + ch 1). Dc in next dc, ch 1; repeat from * 4 more times. Dc in last dc. Turn. (7 dc + 6 ch-1 sps = 13 sts)*
Row 3: Ch 3 (counts as dc). 2 dc in next ch-1 sp, dc in next dc; repeat from * 5 more times. Turn. (7 dc worked 1 per dc + 12 dc in spaces = 19 dc)*
Row 4: Ch 3 (counts as dc), dc in next 2 sts. 2 dc in next st, dc in next 2 sts; repeat from * 4 more times. 2 dc in last st. Turn. (19 sts worked + 6 extra = 25 dc)*
Row 5: Ch 1, sc in first st. Ch 5, sk 3 sts, sc in next st; repeat from * 5 more times. Turn. (6 ch-5 loops)*
Row 6: Work (sc, hdc, 5 dc, hdc, sc) in next ch-5 loop, sl st in next sc; repeat from * 5 more times. Fasten off. (6 feathers of 9 sts = 54 sts)*
The row ends of Rows 1–4 form the wing’s two straight edges. To make the second wing face the other way, just flip it over.
Make All Pieces
Ivory: 1 head/skirt panel, 2 wings, 4 leaves, 2 berry sprigs, 1 small flower layer, 1 strap, 4 cable loops.
Beige: 1 large flower layer, plus the border, hanging loop, and loop edging.
Large flower layer (beige):
1. Ch 4 and sl st to form a ring. Ch 1, 8 sc in the ring. Join.
2. Ch 6, sl st in 2nd ch from hook. Work sc, hdc, dc, dc in the next 4 ch (one stitch in each). Sl st in next sc. Repeat from * 7 more times. (8 pointed petals)*
It measures 2.2 in (5.6 cm) across.
Small flower layer (ivory):
1. Ch 4 and sl st to form a ring. Ch 1, 6 sc in the ring. Join.
2. Ch 4, sl st in 2nd ch from hook. Work sc, hdc in the next 2 ch (one stitch in each). Sl st in next sc. Repeat from * 5 more times. (6 petals)*
It measures 1.3 in (3.3 cm) across.
Leaf (make 4):
1. Ch 11.
2. Starting in the 2nd ch from hook: sc, hdc, dc in next 5 ch, hdc, sc.
3. Work 3 sc in the last ch.
4. Turn the work to the other side of the chain: sc, hdc, dc in next 5 ch, hdc, sc. Join. (21 sts)
Each leaf is 1.8 in (4.6 cm) long.
Berry sprig (make 2):
1. Ch 8. Bobble in the 4th ch from hook. Sl st in the next 4 ch. This is the main stem.
2. Ch 5, bobble in 4th ch from hook, sl st in next ch, sl st in next st of the main stem; repeat from * once. (3 berries)*
Strap:
1. Ch 10.
2. Row 1: Sc in 2nd ch from hook and in each ch across. (9 sc)
3. Rows 2–60: Ch 1, sc in each st. Fasten off.
4. With beige, sl st loosely along both long edges.
The strap measures 1.5 in (3.8 cm) x 8.6 in (21.8 cm).
Cable loop (make 4):
1. Ch 6.
2. Row 1: Sc in 2nd ch from hook and in each ch across. (5 sc)
3. Rows 2–24: Ch 1, sc in each st. Fasten off.
4. With beige, sl st along both long edges.
Each loop measures 0.8 in (2.0 cm) x 3.4 in (8.6 cm).
Layout:
              [ hanging loop ]
                 ( HEAD )
   [WING]   leaf [FLOWER] leaf   [WING]
           leaf  | strap |  leaf
        berries  |=loop1=|  berries   1.6 in
                 |=loop2=|            3.6 in
                 |=loop3=|            5.6 in
                 |=loop4=|            7.6 in
           ~~~~ scalloped hem ~~~~
Joining
Block the panel and wings first (see Steps 1–3 of Final Blocking). Then put the angel together in this order:
- Wings: Lay each wing’s inner straight edge along the side of the skirt at Rows 1–4. Match each wing row to a skirt row, since both are 0.4 in (1.0 cm) tall. Whipstitch through the outer loops, 2 stitches per row end. The feathers should rest against the side of the head.
- Border: Work the border (see the next section).
- Loops onto the strap: Center the loops 1.6 in (4.1 cm), 3.6 in (9.1 cm), 5.6 in (14.2 cm), and 7.6 in (19.3 cm) from the top of the strap. Sew each end row of a loop to a long edge of the strap. Each loop arches over the front with 1.9 in (4.8 cm) of slack.
- Strap onto the panel: Center the strap on the skirt. Its top sits at Row 1, and its bottom ends in the dip between the 4th and 5th scallops. Whipstitch both long edges between the loops.
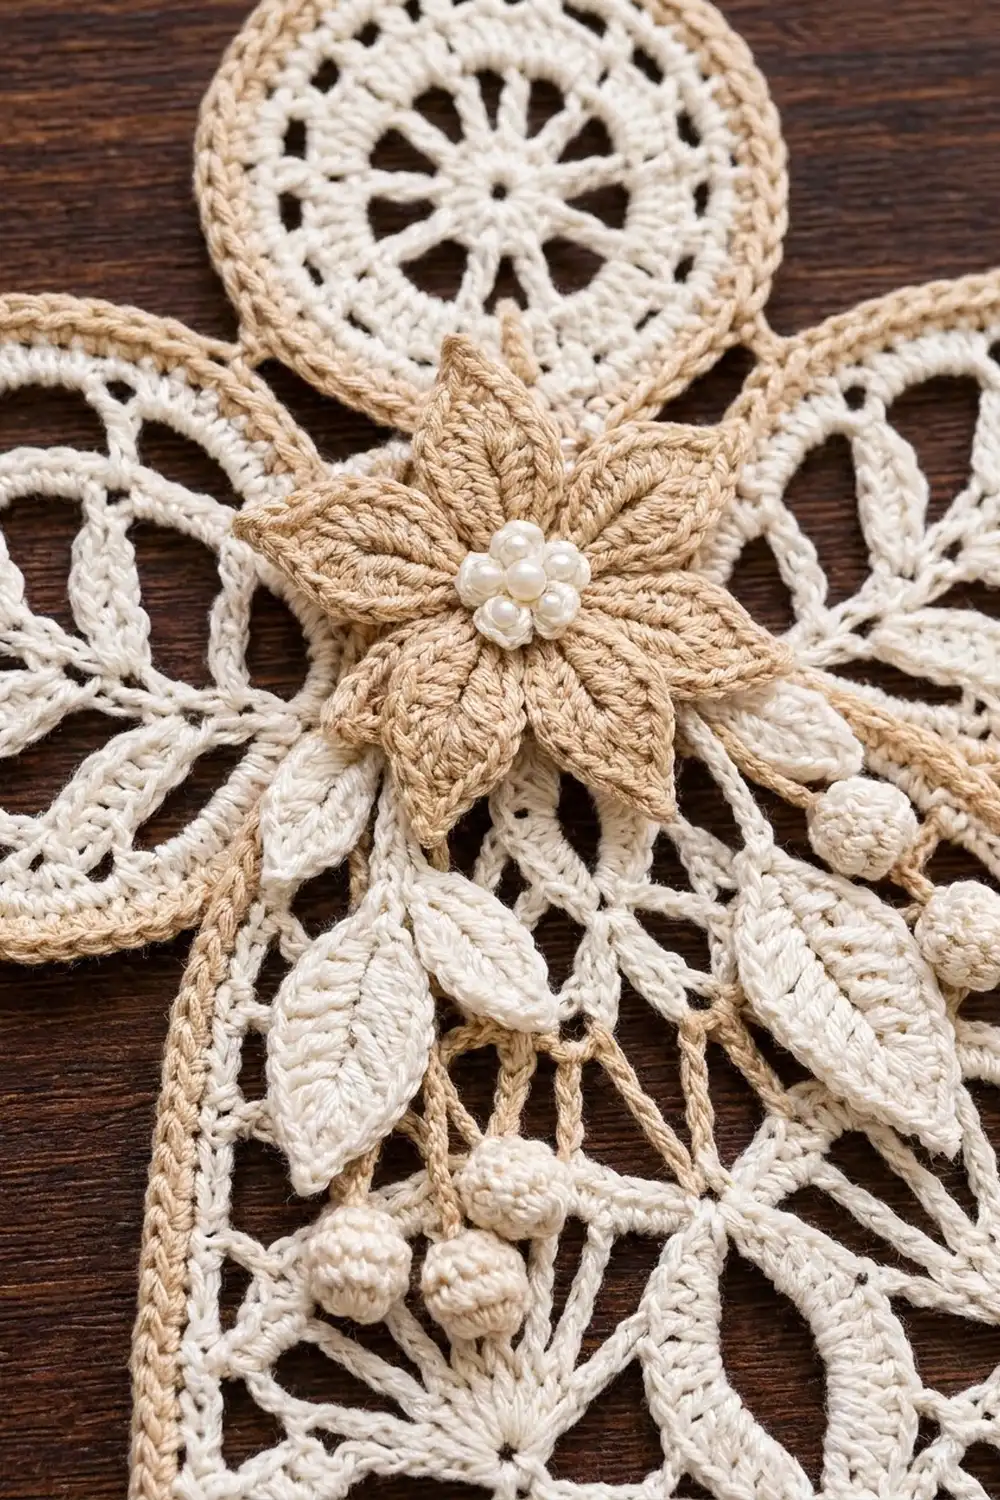
- Flower: Stack the small flower on the large one so the petals are offset, and sew through the center. Add the beads, or make 3 ivory French knots. Sew the flower over the top of the strap.
- Leaves and berries: Tuck 2 leaves under each side of the flower, pointing down at an angle. Sew the berry sprigs below the leaves.
Keep your sewing snug but relaxed. If the lace puckers, your stitches are too tight. After joining, the panel should still measure 10.8 in (27.4 cm) wide.
Border
Border gauge: Work 2 sc per dc row end and 1 sc per stitch, plus a few extra sc on curves.
Round 1 (beige, RS): Join at the bottom right corner. Work around in this order:
- Right skirt side (row ends of Rows 21–5): 2 sc per row end = 34 sc
- Right wing, lower edge (row ends of Rows 1–4): 8 sc
- Right wing feathers: 54 sts worked 1 per st + 6 extra (one in each center dc) = 60 sc
- Head arc (the part not covered by wings): 31 sts worked 1 per st + 5 extra, spaced evenly = 36 sc
- Left wing feathers: 60 sc
- Left wing, lower edge: 8 sc
- Left skirt side: 34 sc
- Hem: 81 sts worked 1 per st + 8 extra (one in each scallop’s center dc) = 89 sc
Join. (329 sc)
Round 2: Ch 1, rev sc in each st around. Join. (329 rev sc)
Hanging loop:
1. Join beige at the top center of the head.
2. Ch 15, sl st in the same st.
3. Ch 1, work 22 sc into the loop. Sl st to finish and fasten off.
The loop is 1.3 in (3.3 cm) tall.
Why the math works:
– A dc row is about as tall as 2 sc are wide, so 2 sc per row end keeps the sides flat.
– The extra stitches on the curves add the length a larger outer edge needs.
– The border adds 0.25 in (0.6 cm) on every side. That brings the panel from 10.8 x 12 in (27.4 x 30.5 cm) to 11.3 x 12.5 in (28.7 x 31.8 cm).
Final Blocking
- Wet the panel and wings before you add the border, then roll them in a towel to remove extra water.
- Pin the panel to 10.8 in (27.4 cm) x 12 in (30.5 cm). Pin out every scallop tip, and pin the head into a round circle.
- Fan out the wing feathers evenly and pin them. Let everything dry completely.
- After the border and assembly, mist the whole piece. Pin it to 11.3 in (28.7 cm) x 12.5 in (31.8 cm).
- Smooth the strap and loops by hand, and shape the petals into points. Let it dry.
Final Quality-Control Checklist
- The head is 3 in (7.6 cm) across and lies flat.
- The skirt row totals went from 25 up to 65.
- There are 8 even scallops at the hem.
- The wings match in size and sit at the same height.
- The border has 329 sts and lies flat.
- The loops are evenly spaced and hold coiled cables.
- The hanging loop is centered and secure.
- All ends are woven in.
Troubleshooting
- Fans cup: Your tension is too tight. Loosen up, or use a larger hook.
- Skirt is lopsided: You missed an edge increase. Check your rows against the totals in the table.
- Ovals don’t line up: In Row A, make sure you count the chains as stitches.
- Border ripples: Take out some of the extra curve stitches.
- Border cups: Add 1–2 sc on each curve.
- Loops are too tight for cables: Add 4 rows to each loop.
Care
Take the cables out first. Hand wash in cool water with mild soap, then lay flat to dry, pinning to shape if needed.
Final Notes
The size of the finished angel comes from one chain of measurements:
- A gauge of 6 dc per inch gives a 3 in (7.6 cm) head.
- Over 21 rows of 0.4 in (1.0 cm) each, the skirt grows from 4.2 in (10.7 cm) to 10.8 in (27.4 cm) wide.
- Before the border, the panel measures 10.8 x 12 in (27.4 x 30.5 cm).
- The 0.25 in (0.6 cm) border brings it to 11.3 x 12.5 in (28.7 x 31.8 cm).
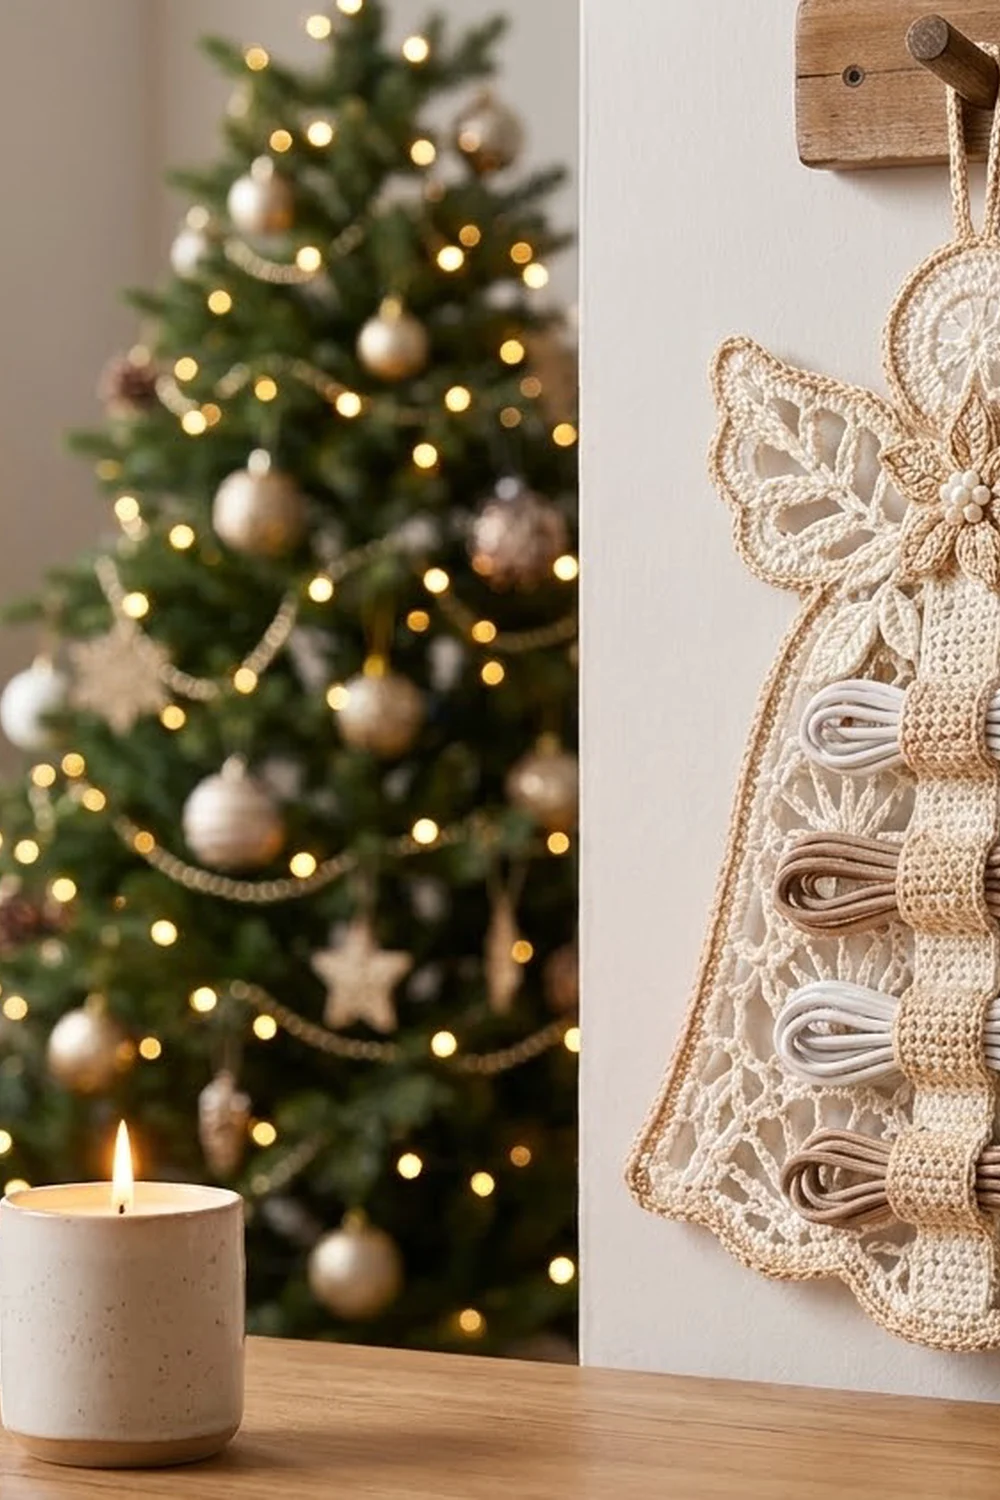
Check each stage as you go, and your angel will hang straight and keep your cables tidy all season.
Happy crocheting!